
Pixotope Keyer
Introduction
Separating actors and props from a green screen scene is a critical function for any virtual-set or mixed-reality project. The aim is to:
identify and isolate the foreground elements from the background screen color
preserve:
fine edge details such as hair
transparency of translucent objects such as glass bottles
remove any spill color from the actors
recover the shadows from the actors and props
The foreground objects need to be completely solid where there is no transparency.
The quality of the produced key is highly dependent on a good keying setup.
Here are some basic rules.
The green screen
The screen should be evenly colored if painted. Ensure a proper chroma green paint is used, and that the surfaces are free from brush marks or other recognisable “texture”
The screen must be stretched tightly to avoid creases if it is made of fabric
Ensure the floor color is the same color as the walls, and that it is clean and without marks
The walls should be at least 3 m high to allow keying of standard-height actors - taller props or actors would require higher walls
The walls should meet the floor seamlessly without creases or shadows. Often, coving is used at the junctions to smooth the transition
The walls should be lit evenly with a wash of light and with no visible highlights or hot spots
The floor should be lit evenly
The subjects should be picked out from behind by a rim light to give them some separation from the screen and to minimise edge spill
The front of the subjects should be illuminated with beauty (key and fill) lights
The camera
Ensure that the camera has a properly calibrated lens and that it is positioned in the desired position on the set
It is normal to have the camera at the same height as the actors' heads so that it is easy to key the actors if they move some distance from the green screen towards the camera
Make sure the lens has been back-focussed.
Make sure proper white balance is set
Make sure the scene is correctly exposed
Ensure the camera is not set to a high gain, which might introduce noise
Check the camera's "clean" video signal on a monitor to ensure there is minimal noise in the image
Do not use image sharpening on the camera if this can be avoided. It may well produce edge artefacts on the key. The image can always be sharpened after the keying process.
NOTE: Noise is an inherent part of any camera video image, and minimizing this is critical for good images as well as creating a good key.
The main issue is to not pick up too much spill color from the environment onto the actors, which would make keying more difficult.
The Talent and Lighting
Do not position them too close to the walls, ideally no closer than 2m and never closer than 1 m
Light them from behind to create good edge definition- rim lights
Light them from the front to create attractive lighting, and to remove any under-illuminated hollows in skin and clothing that could show the screen color - key and fill lights
Position them far enough from the camera to be fully framed with the choice of lens and zoom setting
Talent should not wear any clothing that includes the same color as the screen color
Also be careful of colours that are close to the background color e.g. yellow or cyan for a green screen; cyan or magenta for a blue screen. These may be problematic for de-spill.
Try to avoid transparent clothing that might pick up and reflect the background color
Talent should avoid clothing textures that might cause moiré patterns e.g. herringbone, plaid or dog-tooth patterns
Video keyer
The video keyer is an easy-to-set-up, real-time chroma keyer that you can use to key your video input. It is a component implemented inside the Pixotope Video Pipeline. The keyer algorithm extracts an alpha mask from the received frame, allowing the removal of the specifically picked color from the background of the scene and from its reflections in the foreground image. The user interface for the keyer is included in the Pixotope Director under Production → Adjust → Video Keyer.
Initialize
The first step is to set the reference color(s) for the keyer. The labelling tool is used to select the background colors to be extracted to leave just the foreground. The labelling tool is located in Video Keyer → Initialize.
Background and foreground colors can be picked and modified to define the values used to create the alpha channel to extract the foreground image.
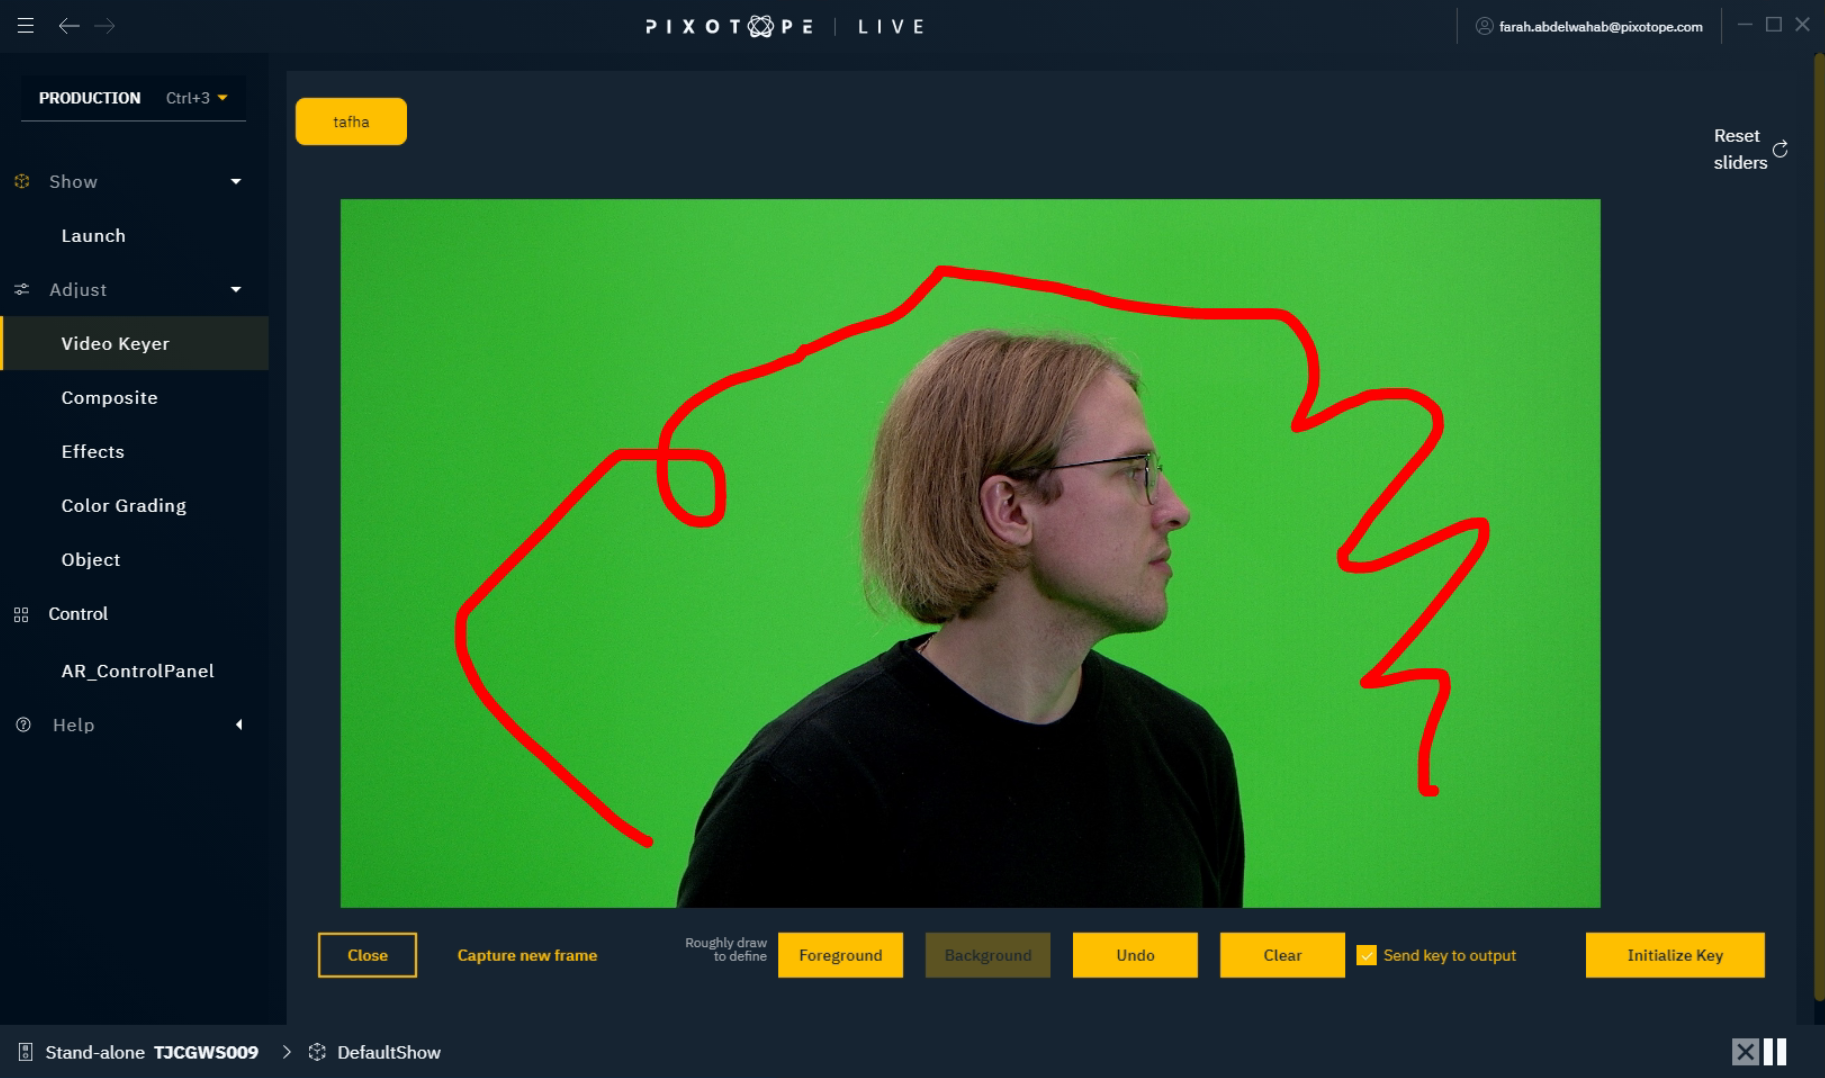
Here you can set background and foreground key color references
Keyer model
There are 3 keyer models available:
Chroma - PX1 (legacy): legacy keyer present in Pixotope 1.5
Chroma - PX1 - Linear (legacy): a derivative of the legacy keyer using linear converted video instead of gamma corrected video - for use with linear colourspace
Chroma - PX2: new keyer using a more advanced color model with more precise color extraction and sharper alpha mask
Adjustments
Refine
The Refine category remaps the alpha values so the user will be able to suppress values with low transparency and increase values with high opaqueness. The functionality is driven by two threshold values and interpolated in between. The different keyer models use a different interpolation method.
The 3 parameters help to define the area between fully transparent and fully opaque for the keying process.
The exclusion is based on the color deviation and the color saturation. Both parameters are computed independently and are added to the computed mapped alpha (in the diagrams below, Lt and Ut represent Remove Background and Adjust Foreground respectively).

Displayed functionality of Refine adjustments.
Add Luma Key
This is an additional tool to exclude the foreground pixels from the background screen based on luminance difference.
Note that the luminance reference for the backing color is controllable:
If "Automatic Clean Plate Generation" is
enabled: the reference is automatically generated from the locally closest backing color
disabled: the reference is issued from the labelling tool
Key color intensities
By default, all colors are considered equal, but as for example yellow is quite close to green mathematically, it can be useful to key certain colors harder than others (and even make colors repel keying). With these sliders you can change how aggressive the key will be towards the three color channels individually for Chroma - PX1 keyer. Negative values mean that this color repels keying.
As Chroma - PX2 keyer uses a different color model, the control is concentrated on a unique slider related to global adjustment strength. This control is automatically balanced for green or blue screen usage.
Mask Adjustments
Erode
Removes pixels on the mask boundaries, making the mask smaller. Generally this should be avoided.
Gain
Adjusts the transparency of the mask. Increasing the Gain will harden up the soft edge of the mask. Use with care.
Gamma
Scales the alpha by an exponential function. This will noticeably vary the effect of low alpha values.
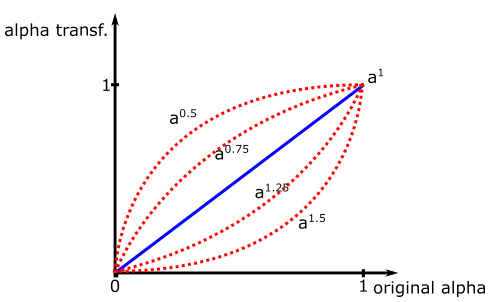
Example of gamma transformation with different exponents.
Detail Enhancements (only for Chroma - PX2)
This parameter brings more details to the mask through a local analysis of the luminance variations resulting in sharper edges, but it may also bring back image noise.
Shadows
The Shadow controls allow the user to add shadows that exist on the evenly lit backdrop. Shadows are added based on the luma of the pixels; any pixel darker than the original pick will be included in the shadow, the alpha strength depending on just how dark the pixel is. This is why it is important to pick a mid green rather than the darkest green when initializing the keyer.
The "Add shadows" slider controls the alpha of the shadows, while "Adjust contrast" controls the color, trying to darken the fill in the area where shadows are identified.
Despill
The Despill controls allow the user to suppress the background color removal with separate Luma and Chroma controls and to adjust the color range and hue for the areas containing a significant amount of spill.
Respill
The Respill controls allow for the replacement of of the background color with a specific custom color, or to automatically use a color from the 3D scene. Respill can really help to blend the foreground elements into the 3D scene. It is usually best to automatically select the respill color from the background.