This features is available when using an XR license
You can switch the active camera system (video and tracking source) between the camera systems defined in Group A and Group B.
Enable camera input switching
-
Enable “Camera input switching" in SETUP > Show > Show settings
Define camera system groups
-
Per machine: Route the 2 camera systems which should be switched between
-
Select the first camera systems to be in Group A
-
Select the second camera systems to be in Group B
Switch between groups
Using Director
-
Switch using the Group A/Group B radio button in the Routing panel
Using a URL ( HTTP request)
Use a URL only HTTP request (via Gateway) where ParamNumber refers to the group.
-
Group A:
ParamNumber=1 -
Group B:
ParamNumber=2
http://localhost:16208/gateway/23.1.0/publish?Type=Call&Target=Store&Method=SetCameraSet&ParamNumber=1
Learn more about How to use Pixotope Gateway
Using the control panel (HTTP request)
-
Drag an InvokeURL system action onto a trigger widget
-
Paste the above HTTP request into the argument field
Learn more about System actions
OR download this ready made control panel to Switch between camera groups
Switch between camera groups.pxpanel
Using the control panel (API Log)
Using the control panel (API Log)
Create widget
-
Press
Tin your control panel to bring up the Widgets toolbox -
Select a tab widget
-
Click and drag on the canvas to place it
-
Change the Display Name on the tabs via Widget tab > Options
-
Set the values to
1for Group A and2for Group B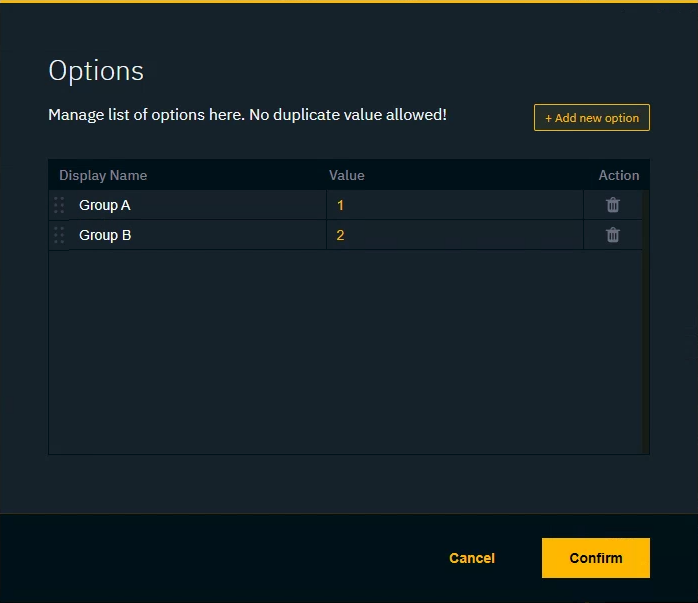
-
Listen to the Director action
Make sure that you have routed your cameras and defined the camera system groups before you listen to the action. For every change to on of the groups, the actions need to be updated!
-
Select the API Log tab
-
Listen to the Set type by enabling the
Setfilter-
Click the
xicon to clear the logs -
Click
Playicon to start listening to messages
-
-
In Director: Switch from Group A to Group B and back again
-
Click on the
Pauseicon to stop listening to messages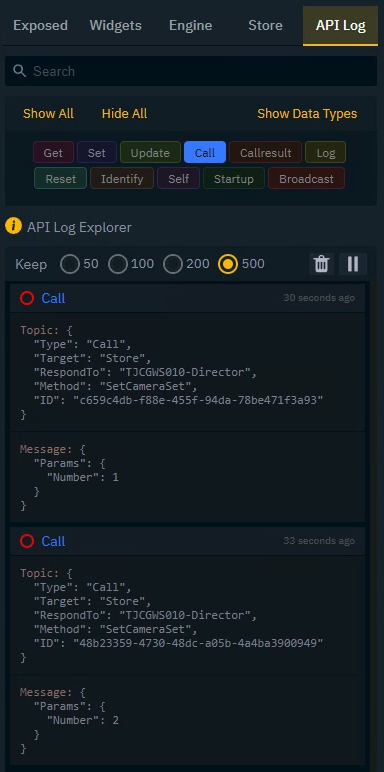
Link the action
-
Double click the tab widget
-
Drag either one of the Set messages onto the Source/Target of this action
-
Click the action to open the Code Editor
-
Add a dynamic argument called for example
valueand replace the number in the message so it looks like this:{ "Params": { "Number": "{{value}}" } }
-
Right click the Tab widget and drag its Select value into the value argument of the action
-
Press
Ror the "Play" button in the header to try it out
If multiple camera systems are routed to one machine and none of them are part of any group, the first camera system is used.