Create, open and manage shows
The START > Storage > Shows panel displays a list of your local shows (show files) and allows you to open and manage shows.
Learn more about Show files - where your SETUP is stored
You can
Create new shows
Import shows
Open shows
Rename shows
Duplicate shows
Open show location
Open linked project location
Delete shows
For Client role: If you are on a client machine, the displayed shows are from the server machine (read-only).
Create new show
Create a show from an existing project
Click "Create new show" on START > Storage > Shows
Select "from existing project"
Choose the Location of existing project
Use Asset Hub, if your project already exists in the
Synced Storage/ProjectsUse Other, if the project is currently not synced
Use Move or Copy whether to move or copy the project into
Synced Storage/ProjectsUse Keep it local only to not use Asset Hub for syncing
Click "Select" and browse to the
.uprojectfile of the project which should be linkedOptionally edit the name for the show (file)
Confirm by clicking on "Create new show"
This creates a .pxshow file with a link to the existing project
Create a show from a template
Click "Create new show" on START > Storage > Shows
Select "from template"
Select the project type from the dropdown
AR, VS or XR project
Choose the Location of existing project
Use Asset Hub, if your project should be synced
Use Other, if the project should not use Asset Hub for syncing
Click "Select" and select the location where the new project should be created
Enter a name for the show (file)
A project name will be generated complying to the Unreal engine naming restriction
Confirm by clicking on "Create new show"
This creates
a new project (folder)
a synced projects will be created in
Synced Storage/Projects
a
.pxshowfile with a link to the new project
Import show file
To import a show file to your local storage, manually copy the show file into [Installation folder]\Local storage\Show files
Open a show
Hover over the show you want to open and click "Open show"
For Server role: When a new show is opened, the show setup is loaded on all clients.
Rename, duplicate or delete a show
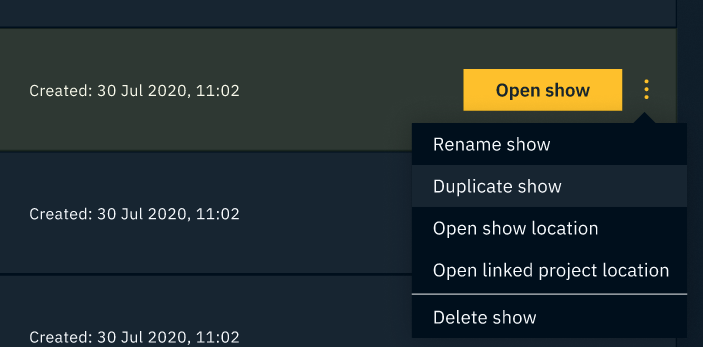
Hover over the overflow menu (3 dots) to the right
Select one of the options

Rename show
Renames the show file.
NB: Cannot be performed on an open show.
Windows file name restrictions apply → https://docs.microsoft.com/en-us/windows/win32/fileio/naming-a-file
Duplicate show
Duplicates the show file.
Delete show
Deletes the show file.
NB: Cannot be performed on an open show.
Open show location
Opens a file explorer with the show file selected.
Open linked project location
Opens a file explorer with the .uproject file of the linked project selected.
Next steps
Continue to


