The color grading panel allows control to make live adjustments to the video, the 3D graphics and the final output. It is used to tweak the output for realism, but also permits artistic freedom.
A very important aspect of the Pixotope color grading tools, is that it is a non-destructive color correction, which is computed in 32 bits floating point linear color space. This means that separate changes done to the 3D graphics and video will not remove or clip any values, and will always be possible to recover downstream. This is crucial for a functional HDR workflow.
-
3D Graphics
-
the color grading of all 3D objects including mapped input media
-
-
Video
-
the color grading of the camera system projection
-
-
Final output
-
color grading on everything combined
-
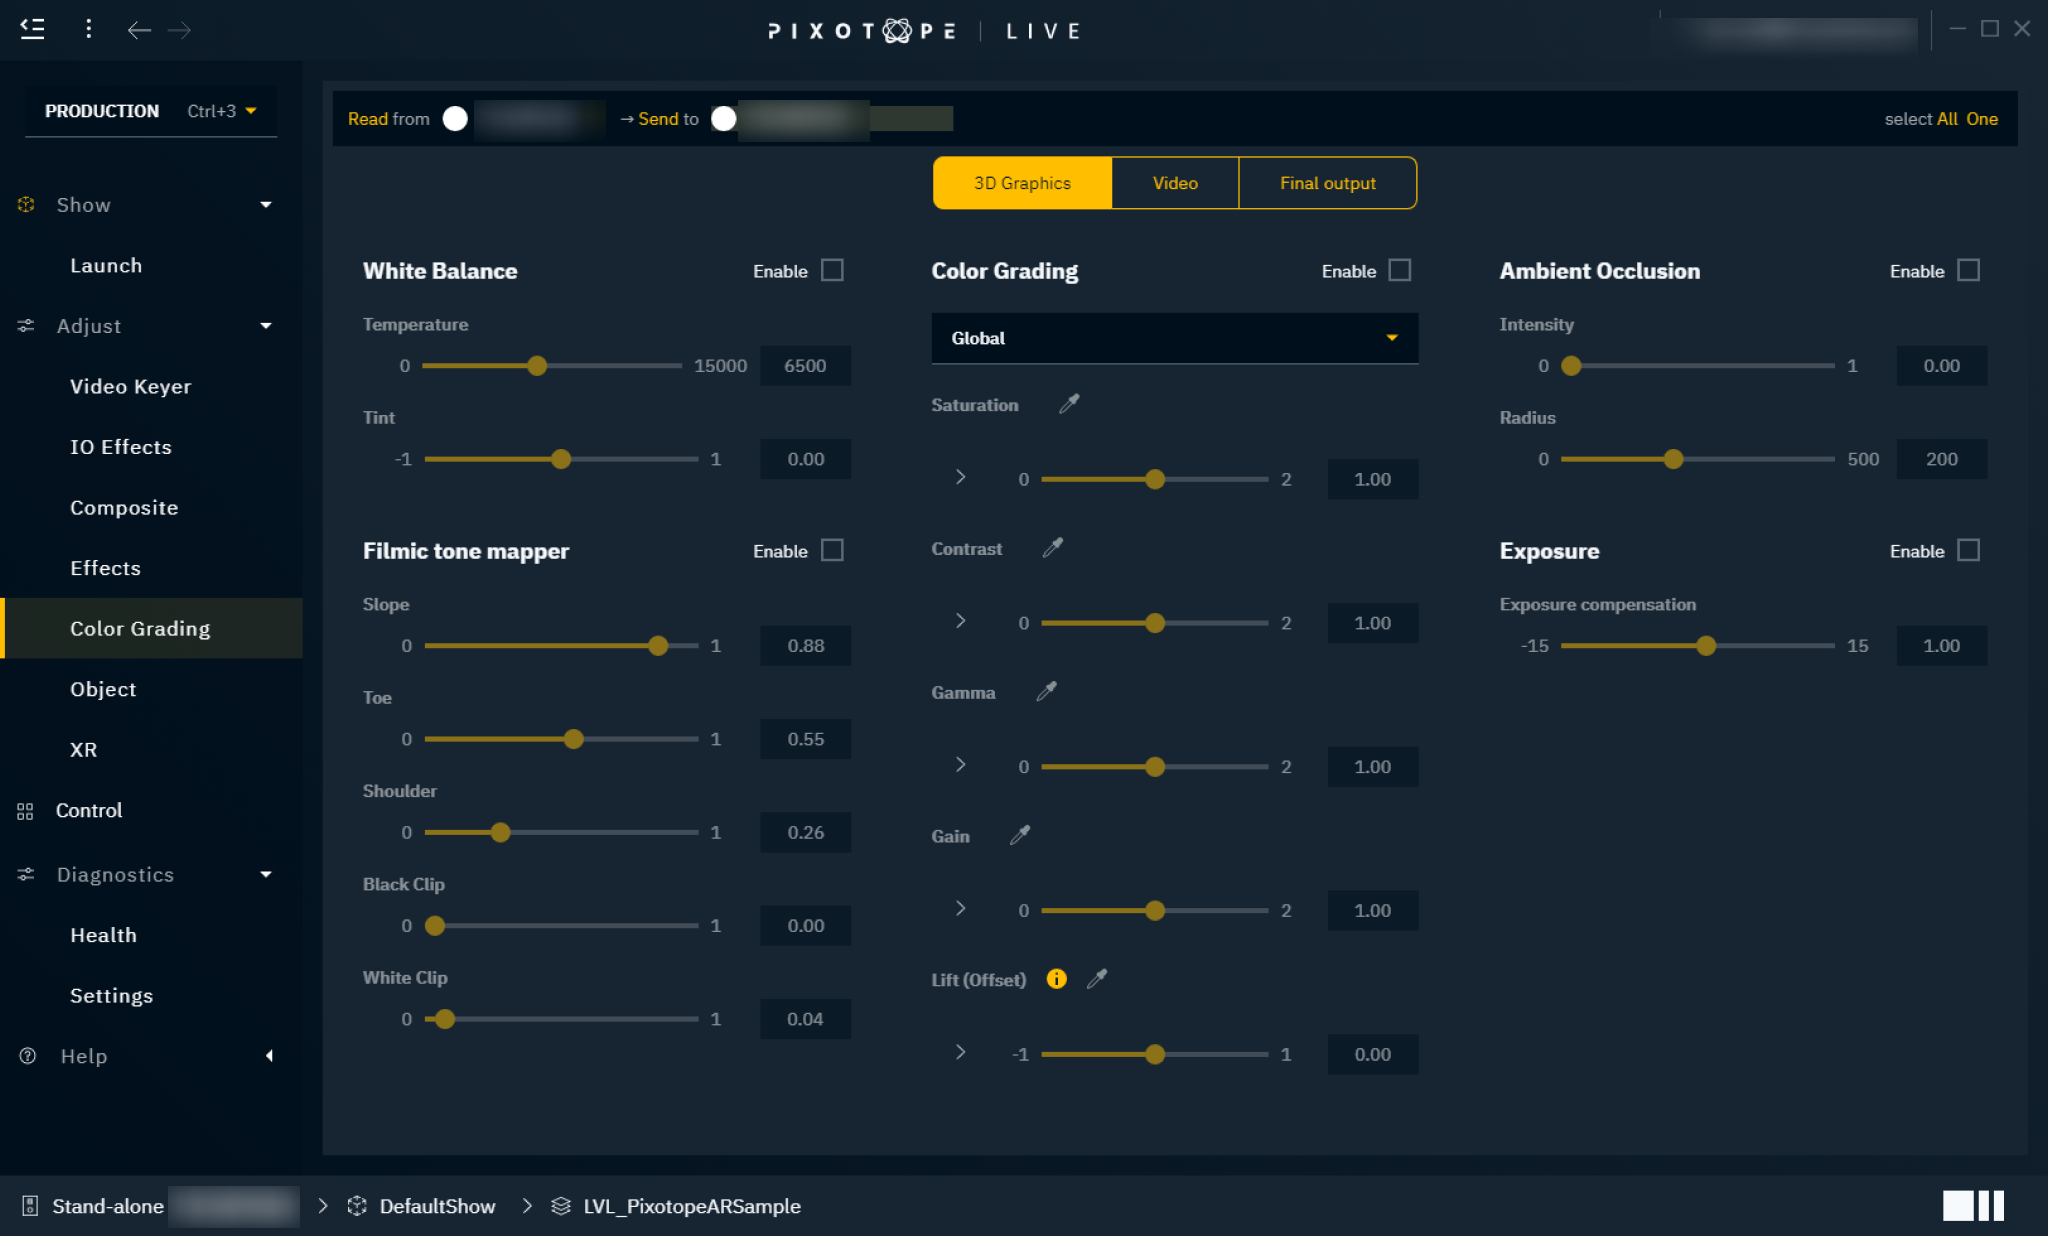
White Balance
White balance is used to correct the lighting so that white is displayed as "true white". If the white balance is on the cold side, white appears more blueish.
Temperature
Controls the white balance temperature. A higher value results in a warmer white.
Tint
Controls the color tint of the white balance. A higher value adds more cyan and magenta to the color range.
Color Grading
Color grading is used to adjust the overall color representation in the scene.
Mode
-
Global - adjust the color globally
-
Shadows - adjust the color values for shadows in the scene
-
Midtones - adjust the color values for midtones in the scene
-
Highlights - adjust the color values for highlights in the scene
Saturation
Controls the intensity of the colors. A higher value results in more pure colors. Use the arrow to reveal individual RGB sliders.
Contrast
Controls the tonal range of light and dark color in the level/scene. A higher value will tighten the highlights and darken the level/scene. Use the arrow to reveal individual RGB sliders.
Gamma
Controls the luminance intensity of the mid-tones color. Use the arrow to reveal individual RGB sliders.
Gain
Controls the luminance intensity of the whites (highlights). Higher values result in more washed-out highlights. Use the arrow to reveal individual RGB sliders.
Lift (Offset)
Controls the luminance intensity of the blacks (shadows). Higher values result in more washed-out shadows. Use the arrow to reveal individual RGB sliders.
Do not use with AR
Using Lift (Offset) is currently not supported with AR.
Filmic tone mapper (3D graphics only)
When using a virtual set extension (AR) with XR, the usage of filmic tone mapping has to be the same on both AR and XR machines.
Learn more about how to Calibrate color matching
Tone mapping is used to map the colors in a high dynamic range and convert them to a limited dynamic range that a regular display can output. The process of tone mapping can be thought of as a way to simulate the response that the film has to light.
The purpose of the Tone Mapping function is to map the wide range of high dynamic range (HDR) colors into low dynamic range (LDR) that a display can output.
This is the last stage of post-processing that is done after the normal rendering during post-processing, but before the graphics are composited with the video. The tone mapping never affects the video plates.
Unlike in Unreal, the Pixotope version of the tonemapper does NOT also convert the image to sRGB / rec709. This means that the Film tonemapper can be used together with user selected color space conversions, but be aware that most ODTs already include tonemapping. As an example, if you prefer the look of the Filmic tonemapper to the ACES Rec 709 ODT, please choose a simple REC709 output conversion that does not already include a tonemapper, otherwise the image will be tonemapped twice (and typically look very flat), and also make sure the video input is using this same inverse confusion.
Also note that the Filmic tone mapper in Pixotope can produce values that are higher than 1, which makes it possible to use it for HDR content, but it might be difficult to get consistent results, and we recommend turning it off for HDR output, and relay on the tonemapping that are in the HDR conversions.
Slope
This will adjust the steepness of the S-curve used for the tonemapper, where larger values will make the slope steeper (darker) and lower values will make the slope less steep (lighter).
Toe
This will adjust the dark color in the tonemapper.
Shoulder
Controls the bright color. A higher value results in brighter colors.
Black clip
This will set where the crossover happens where black's start to cut off their value. In general, this value should not be adjusted.
White clip
This will set where the crossover happens where white's start to cut off their values. This will appear as a subtle change in most cases.
Ambient Occlusion (3D graphics only)
Ambient occlusion is an effect that creates a more natural ambient lighting in the scene. It calculates how objects (occlusions) are exposed to ambient lighting and creates a diffuse non-directional shading effect in sheltered and enclosed areas.
Intensity
Controls the amount of the effect applied. A higher value results in more shading effects.
Radius
Controls the radius from the occlusions where the effect is applied.
Exposure (3D graphics only)
Exposure gives you control over the exposure in the scene.
Exposure compensation
Logarithmic adjustment for the exposure.
-
+2- 4 x brighter -
+1- 2 x brighter -
0- no adjustment -
-1- 2 x darker -
-2- 4 x darker
Some camera tracking systems (such as Pixotope Vision and Marker) can track the aperture/iris of a compatible lens, which again can drive the exposure of the scene (as in real life).
Learn more about Pixotope Tracking