Calibrate delays
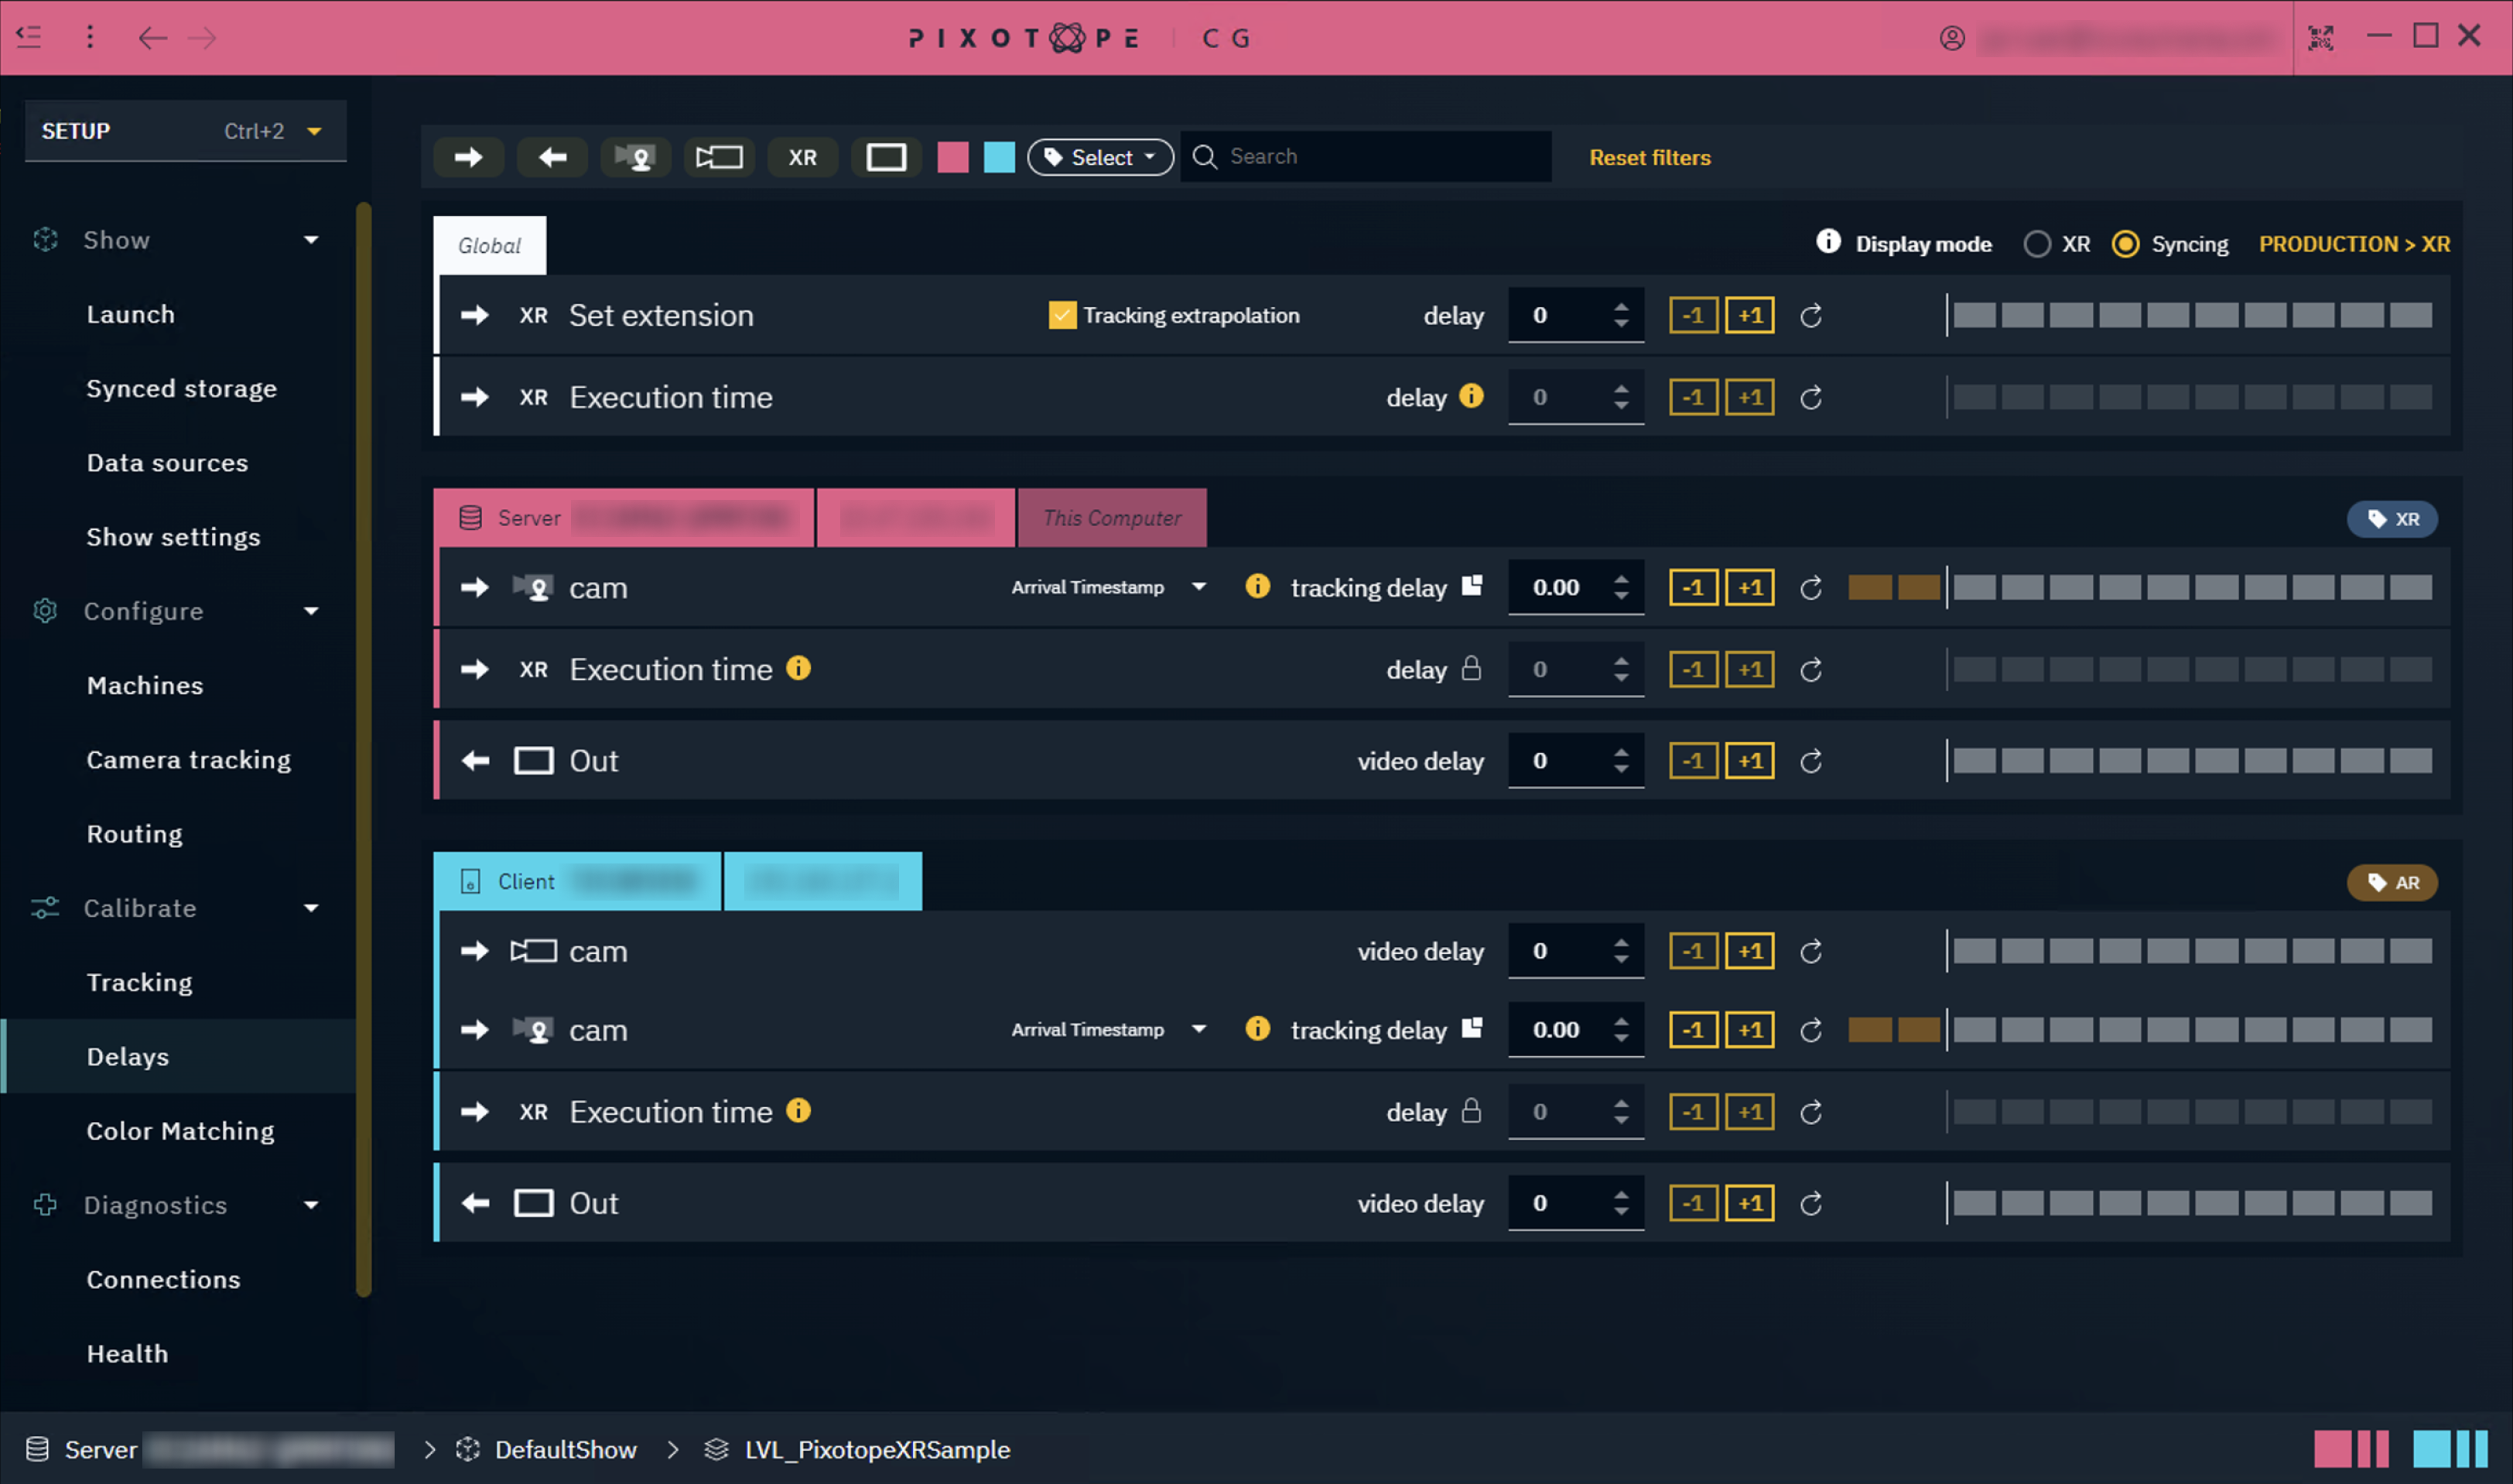
Depending on your tracking and video pipeline, you can end up with delayed video or tracking data. To avoid Graphics elements sliding when the camera is panned, tilted or zoomed, we need to synchronize video and tracking data.
Configure frame matching method
Select the frame matching method supported by your system - see available frame matching methods below
For Timecode method
Choose your primary timecode source
Check for incoming timecode
Learn more about how to Configure timecode (LTC)
Frame matching methods
Automatically calibrate video and tracking delays
Learn more about how to Use automatic delay detection
Manually calibrate video and tracking delays
To manually calibrate the delay between video and tracking
Pan the physical camera quickly and stop abruptly
Check to see whether the previously placed calibration cone slips temporarily from the marked point
Use the -/+ buttons or the input field to change the delay
If the graphic moves first | If the camera feed moves first |
|---|---|
Subtract video delay for the camera If that is not possible, then add tracking delay | Add video delay for the camera If that is not possible, then subtract tracking delay |
Use the filters on the top of the page to focus on the areas you are working on.

Available delays
Delay | Type | |
|---|---|---|
Global > Set extension (for AR) | Input | Delays the graphics independently while keeping graphics and tracking locked* |
Global > Execution time | Input | Delays any API call to the engine* |
Video delay | Input | Delays the video feed/Increases the video buffer size |
Tracking delay | Input | Delays the tracking feed/Increases the tracking buffer size
|
Video delay | Output | Delays the video feed/Increases the video buffer size
|
Audio delay | Output | Delays the audio feed/Increases the audio buffer size |
* See Configure and calibrate multi-machine syncing for more details
Separate transform and lens delay
In case the transform and lens data provided by your tracking system is not in sync, you can edit the delays for them separately.
Click on the Break icon to separate tracking and lens delay

Control the tracking and lens delay separately

To unify them, click on one of the icons again.
Calibrate delays between AR and XR
The Set extension delay controls the delay between AR and XR.
You need at least one machine in the AR and one in the XR render group. Learn more about Render groups - AR, VS, AR+VS, XR
Automatic AR/XR delay detection
Launch a level (LIVE or Preview Live) on all AR/XR machines
Point the AR camera towards the output of the LED wall (at least 50% coverage)
Click "Start AR/XR delay detection” in the Global section of the Delays panel
Optionally, check the result by switching to Syncing mode
Note that this step needs timecode!

Manual AR/XR delay detection
Launch a level (LIVE or Preview Live) on all AR/XR machines
In the Global section of the Delays panel change Display mode to "Syncing"
This can also be done on the PRODUCTION > XR panel
Rotating shapes are shown on both the AR and the XR machines
On XR machines/LED wall these are red, on AR machines they are green

Manually adjust the Set extension delay until the shape movements match/overlap and appear yellow
Timecode and a Digital Twin actor are needed for this to work. Learn more about how to Configure timecode (LTC) and Calibrate XR alignment - Digital Twin XR
Calibrate delays for a multi-machine setup
Learn more about how to Configure and calibrate multi-machine syncing
