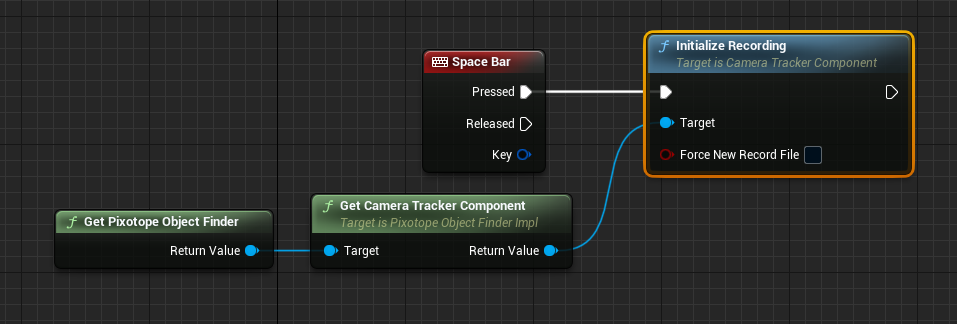
Recording and playback of tracking data
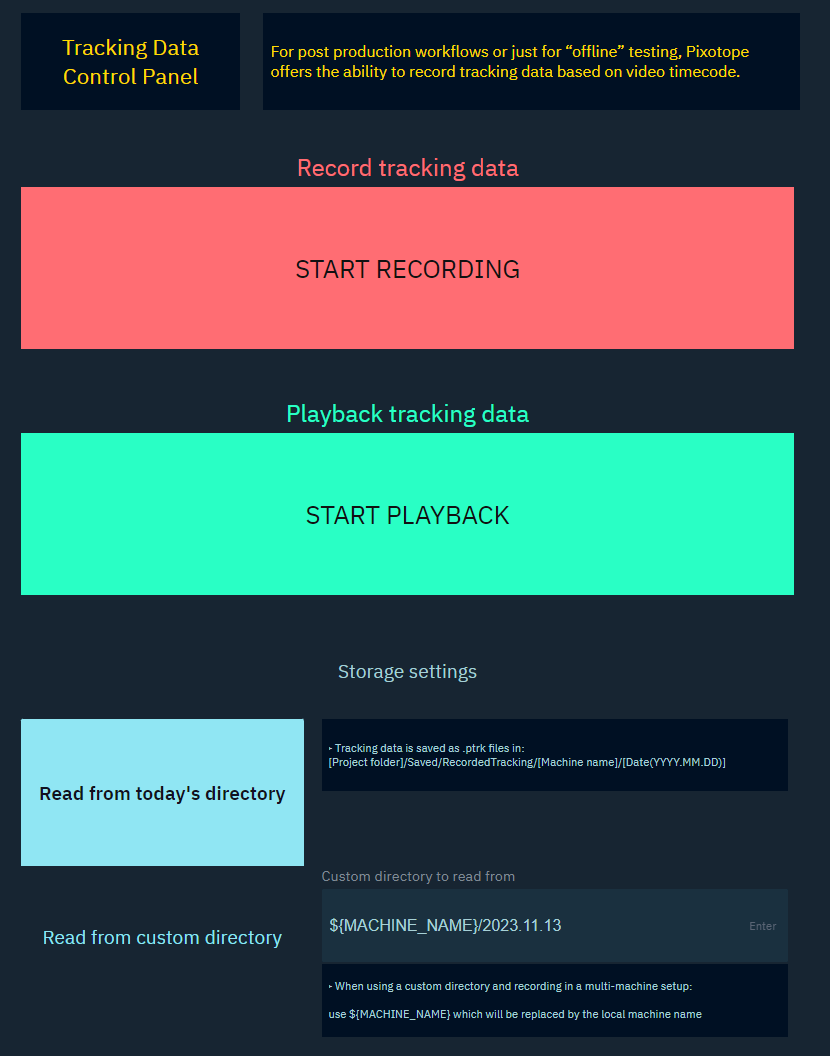
For post production workflows or just for “offline” testing, Pixotope offers the ability to record tracking data based on video timecode.
How it works
When recording camera tracking, the camera tracking data is saved together with the video timecode. In playback mode, the same tracking data is reapplied if it finds the same video timecode coming in from a video playback source.
Requirements
A device which allows recording and playing back video with embedded timecode.
The timecode used for the recording should be a continuous, synchronous “time-of-day” timecode, rather than a specific asynchronous timecode such as is used for triggering an event. The aim is for recorded timecode for tracking to be unique within any 24 hour period. This allows the system to automatically match incoming timecode to any recorded tracking data for any specific day.
How to record tracking data
Via the control panel
Download the control panel below and copy it to
[Project folder]/Content/
OR Create a new control panel and import the control panel below from the top toolbarLaunch panel in Director
Click START RECORDING to start saving the tracking data from any of the Calibration project’s levels - See "Location of recorded tracking data" below
Record and playback tracking - 2024.06.13.pxpanel
OR create one yourself
Launch a level
Create a new control panel from the top right of any Launch panel in Director
Go to the Engine tab on top of the control panel side menu, and select the WorldSettings actor
Drag and drop "Record Camera Tracking Data" and "Camera Tracking Source" from the Properties list
Pick widget type (we suggest toggles or tabs)
Edit the widget properties in the Widgets tab
To read from a custom directory:
Drag and drop “Use Today’s Directory” as a toggle or tab widget from Engine > Properties
Drag and drop “Tracking Recording Source” as a text widget from Engine > Properties
Set custom directory file path
Learn more about Creating a control panel - PRODUCTION
Via the Editor
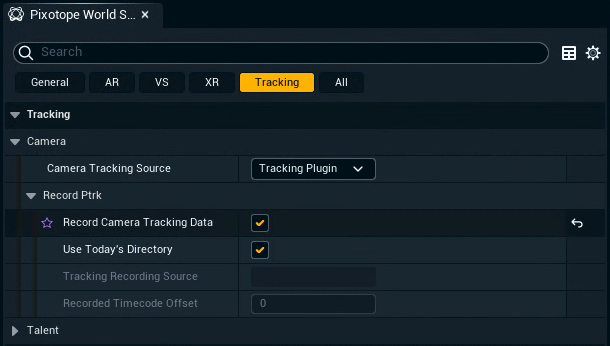
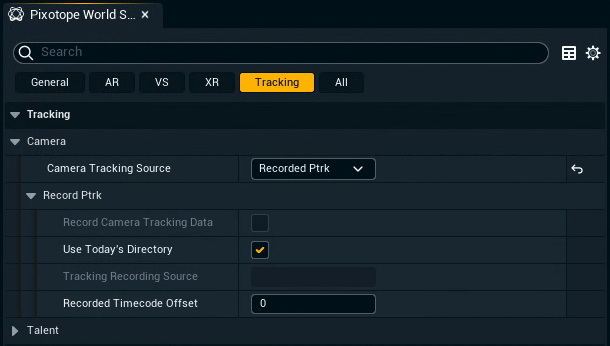
Go to Pixotope World Settings > Tracking > Camera
Enable "Record Camera Tracking Data" to save the tracking data - See "Location of recorded tracking data" below
Location of recorded tracking data
The tracking data is saved to .ptrk files in today’s directory within the current project on the local machine.
[Project folder]/Saved/RecordedTracking/[Computer name]/[Date(YYYY.MM.DD)]
There is currently no way to change this location.
How to play back recorded tracking data
Make sure the video and its timecode is played back the same way it is recorded.
For example: SDI Level A signals have progressive and SDI Level B signals have interlaced Timecode data. Using Level A during recording and Level B during playback (or the opposite) will produce bad results.
Via the control panel
See above
Via the Editor
Specify which directory the recorded tracking data should be read from:
Use Today’s Directory (default selection)
overrides the Tracking Recording Source setting to read from whichever directory the current computer would have recorded to today
Use Custom Directory (Tracking Recording Source)
point to a directory or specific file
enter an absolute path or relative to
[Project folder]/Saved/RecordedTrackingfor recording in a multi-machine setup use
${MACHINE_NAME}which will be replaced by the local machine name
Set “Camera Tracking Source” to “Recorded Ptrk” in Pixotope World Settings > Tracking > Camera
Optionally use Recorded Timecode Offset to shift the recorded tracking relative to video by this number of frames
When playing back, tracking data is not recorded regardless of the Record Camera Tracking Data setting.
Limitations
When a video format uses the same timecode for multiple video frames/fields the first reads after starting to play after a pause or jump in video might be incorrect
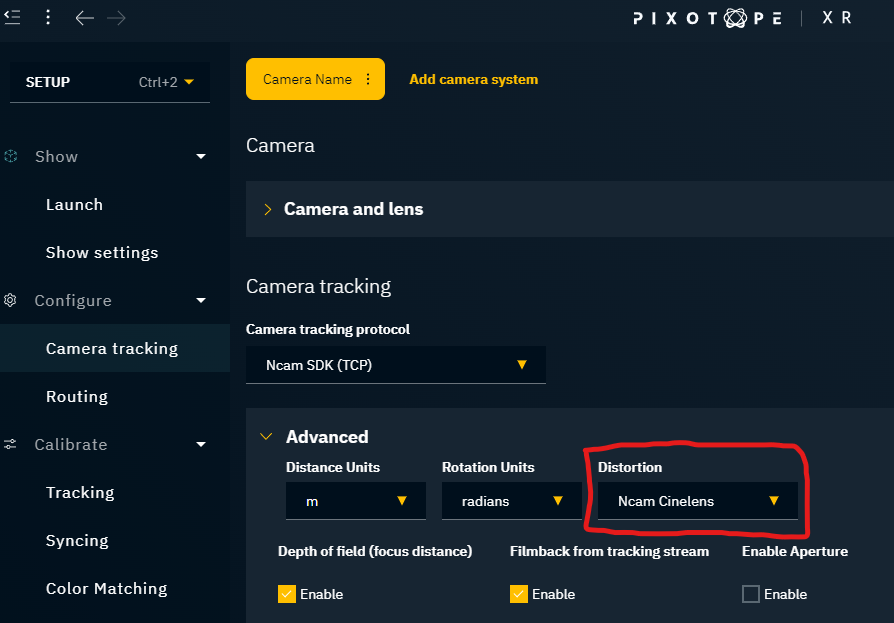
Recording and playback will not work with with distortion model Ncam Map, use Ncam Cinelens instead. This is the default distortion model for Ncam tracking input.
