A Cloud Tools addon/license is needed
-
for result generation
For using the results no license is needed.
If in a multi-machine setup, add the Cloud Tools license on the Server machine.
The Cloud tools panel represents a collection of tools to make your virtual production life easier. We make recent algorithms available to you and integrate them into our workflow. The general workflow would look something like this:
-
You provide a video, an image or a prompt depending on the chosen tool
-
Our cloud does the calculations and notifies you when the results are ready to be used
As a first version we are starting with a tool that generates a 3D mesh from video.
Want to try it out?
How to get a trial license
-
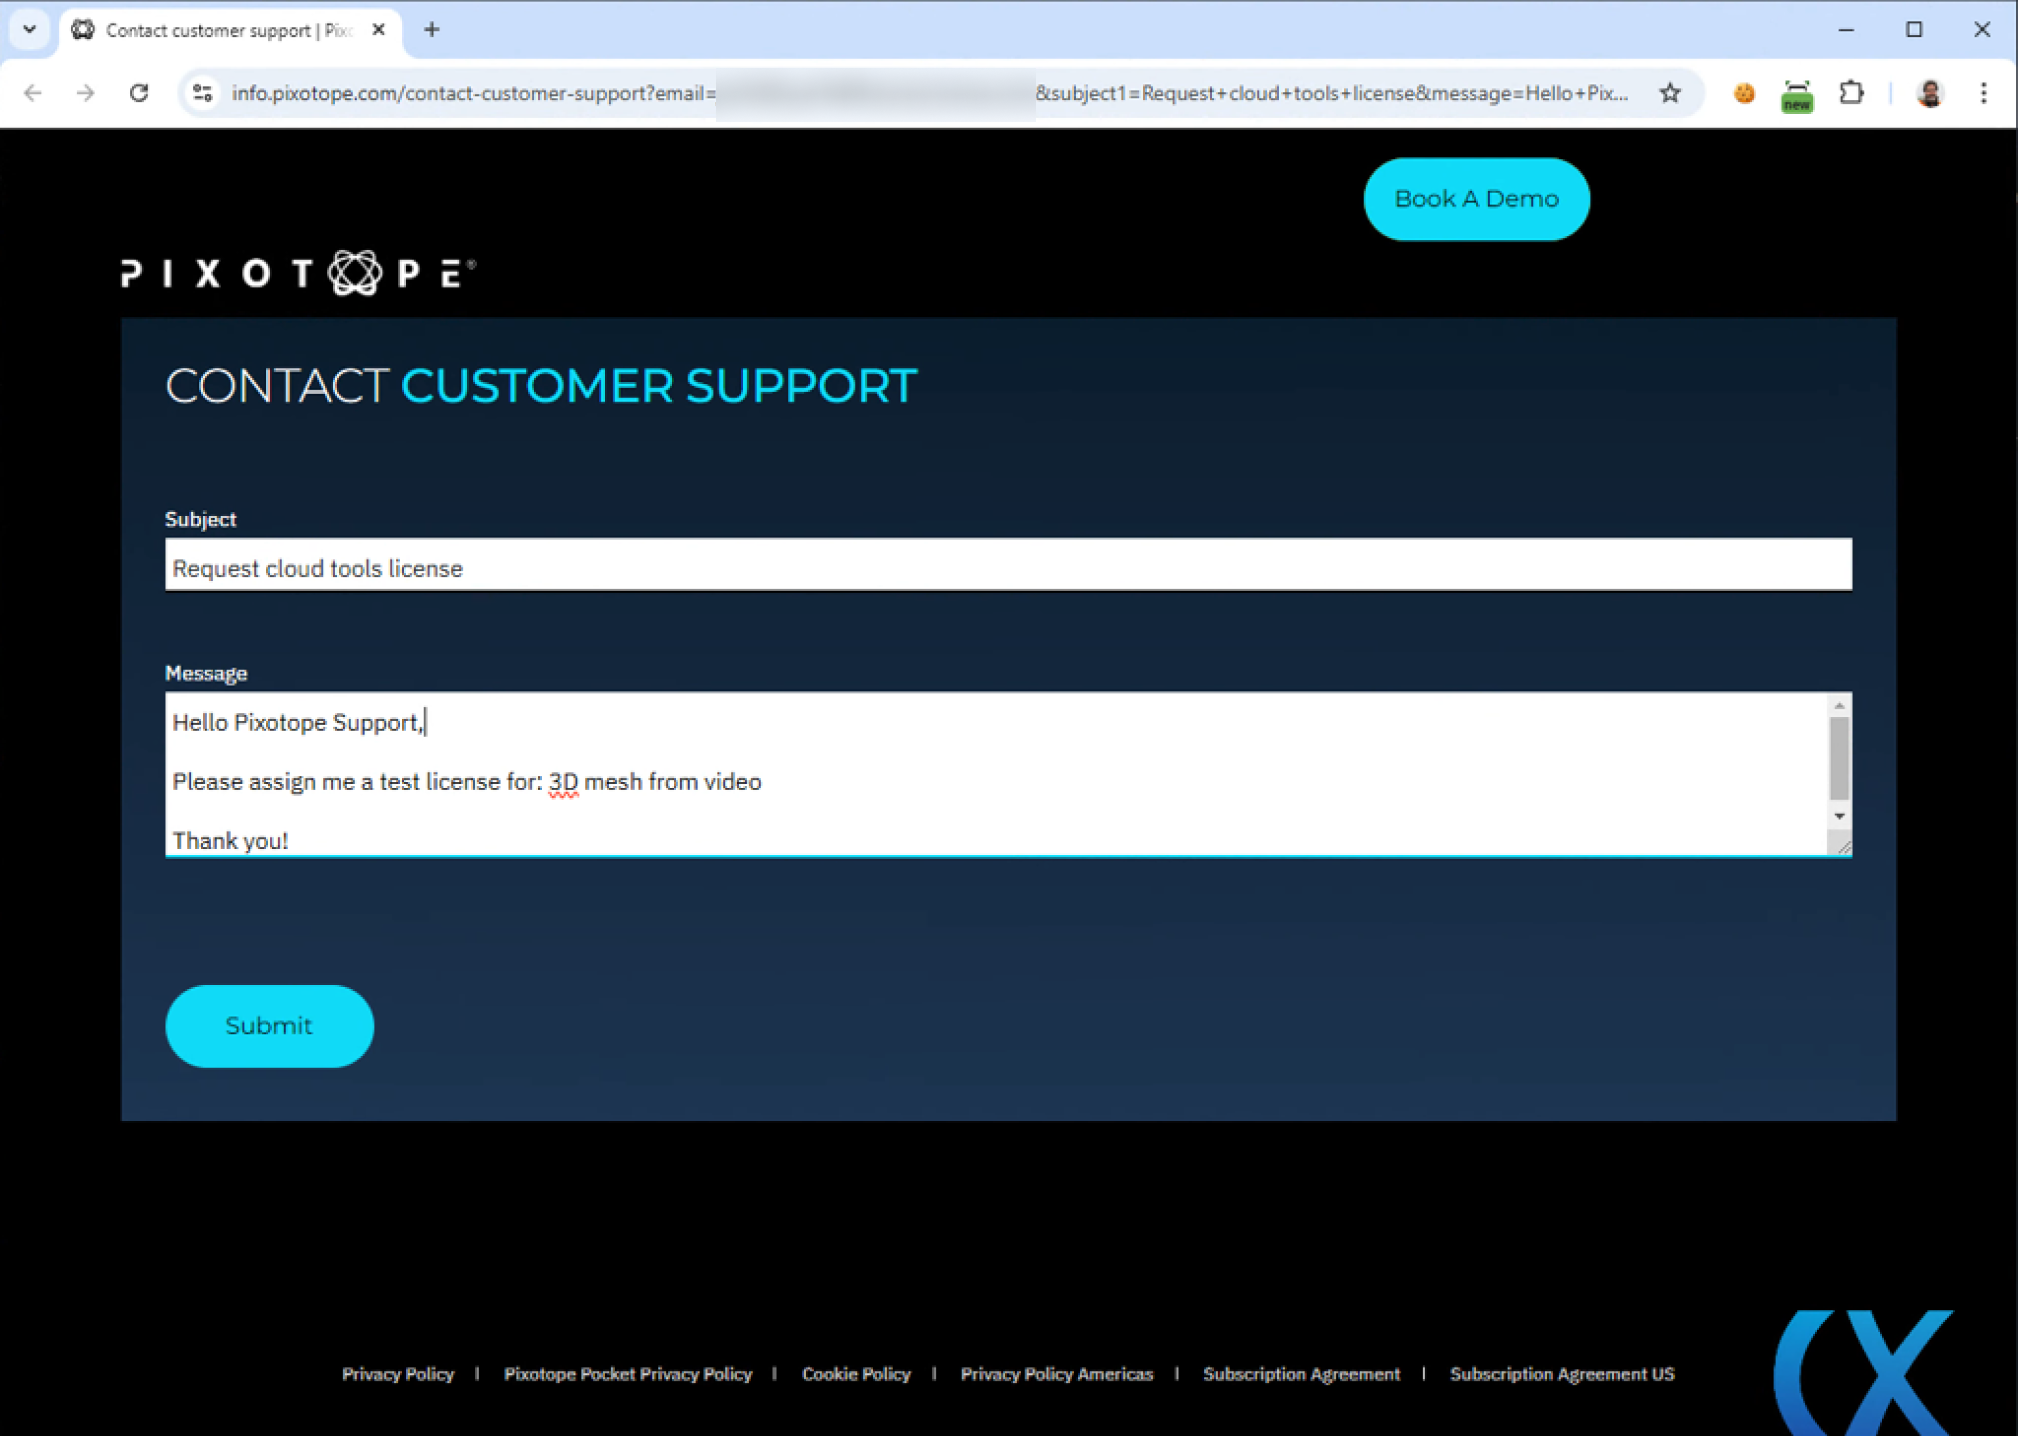
Click the "Contact us" button on the SETUP > Tools > Cloud tools panel

-
Submit the form
-
Our customer support team will be in touch
Handle the license
How to handle the Cloud tools license
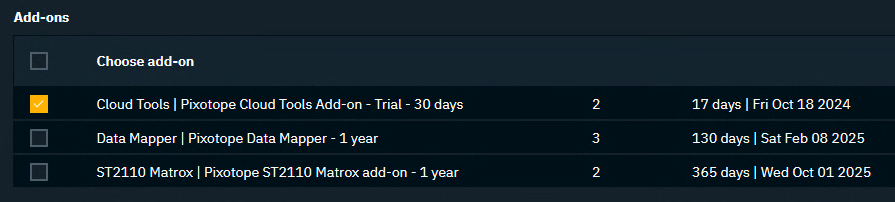
After a license has been assigned to your admin, go to Pixotope Cloud and assign it to the one who will use it.
Learn more about how to Manage users and licenses
In Director
-
Click on "Change license type" in the User menu on the top right
-
Choose the Cloud Tools add-on
-
The tool is now activate
If in a multi-machine setup, add the Cloud Tools license on the Server machine.
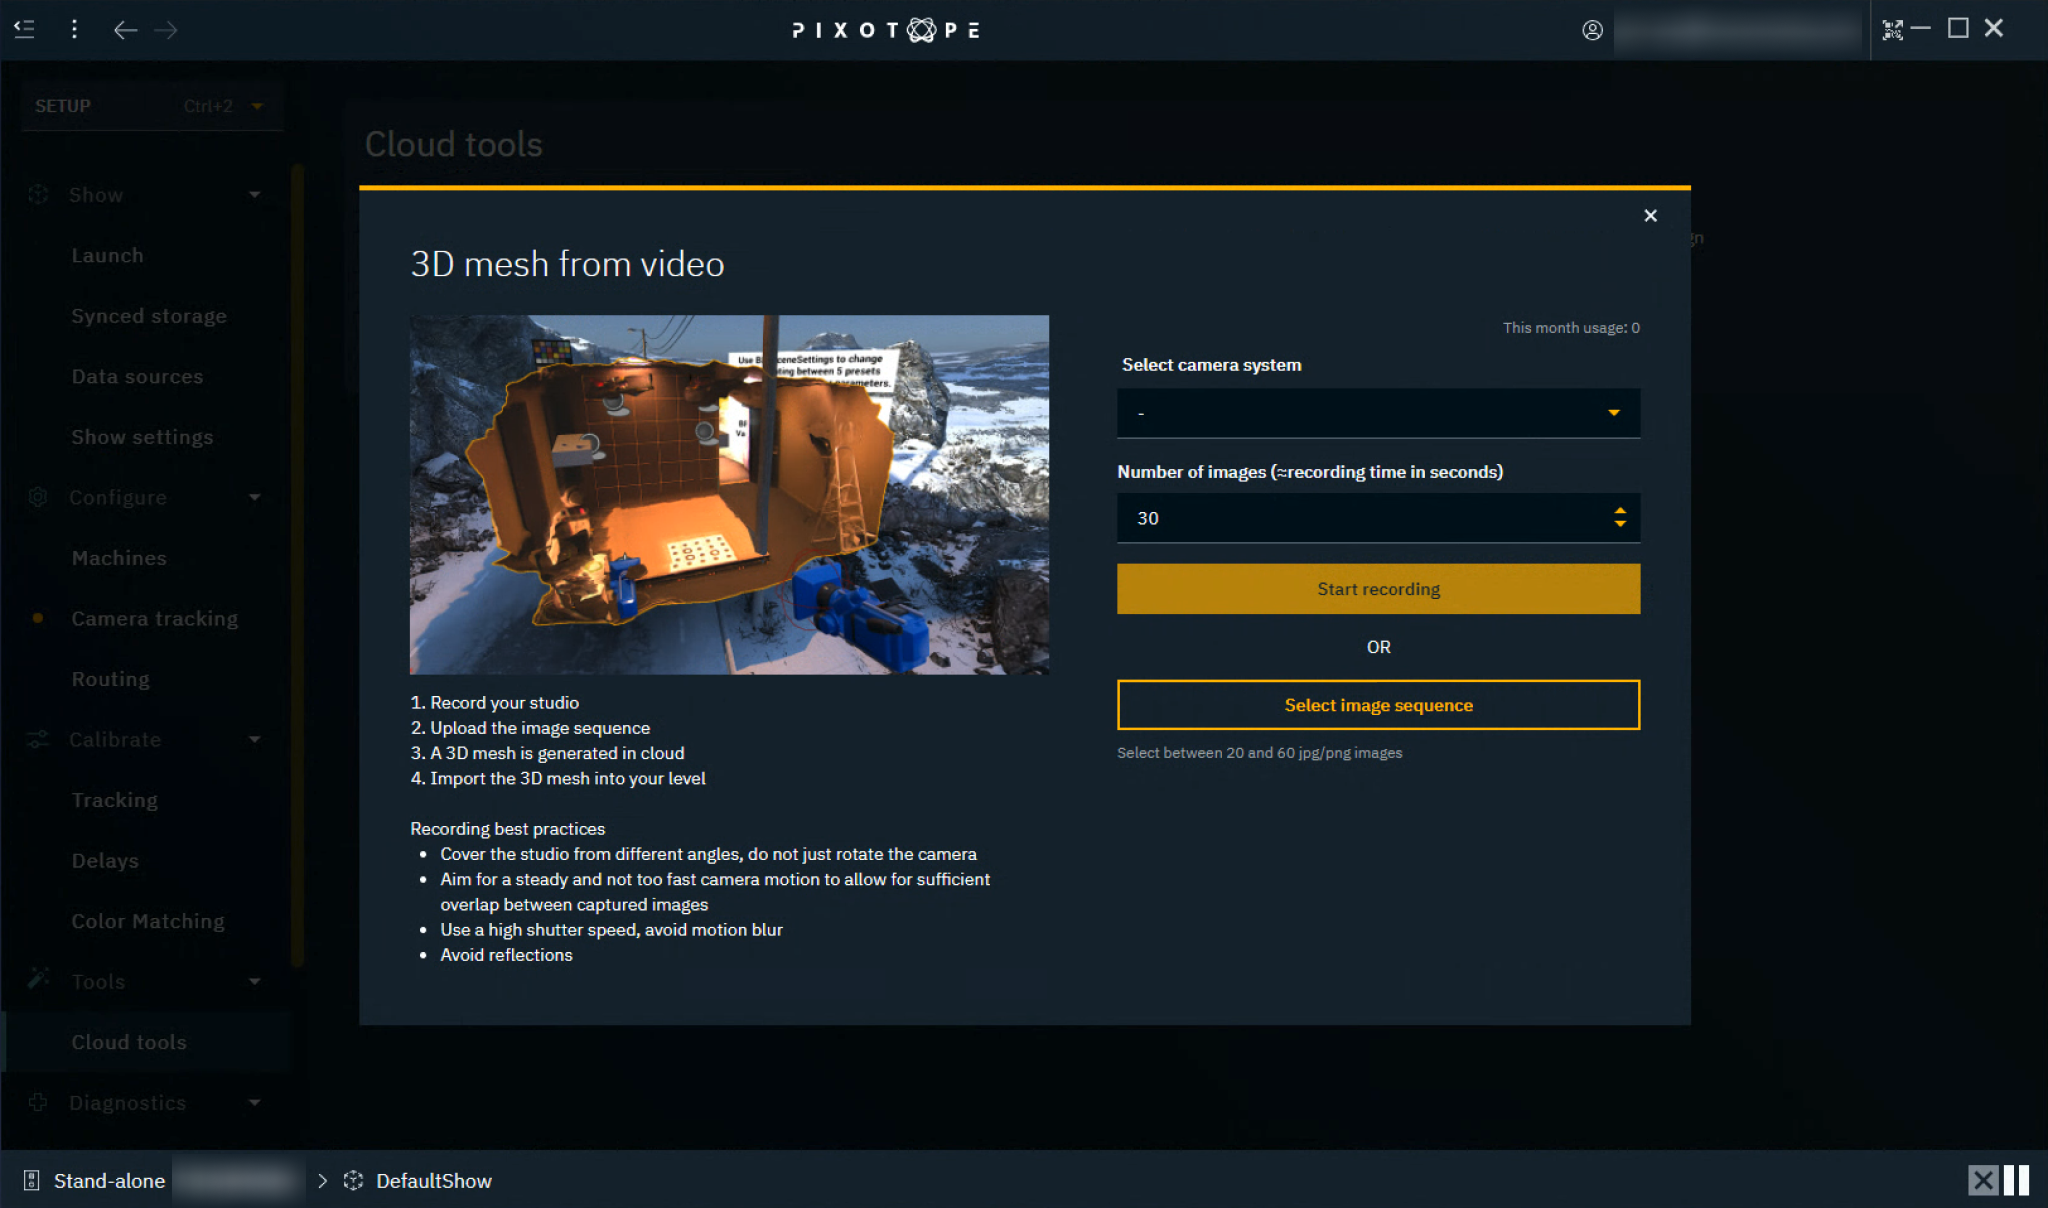
3D mesh from video
We start off with an experimental version of a tool allowing you to create a "3D mesh from video". While you record a video of your studio, we grab frames and send them up to the cloud, calculating a rough 3D mesh. This you can then import and use to align your scene.
This is a 4 step process:
-
Record your studio
-
Upload and generate
-
Import the result
Record your studio
-
Click the tool in the SETUP > Tools > Cloud tools panel
-
Select the camera system with which you record
-
Optionally: Change the number of images to capture
-
A higher number increases
-
the area you can cover
-
but also increases the recording and processing time
-
-
-
Start the recording
-
We are capturing frames and choose the ones with the least amount of motion blur
-
Recording best practices
-
Cover the studio from different angles
-
Do not just rotate the camera, but move it!
-
-
Aim for a steady and not too fast camera motion to allow for sufficient overlap between captured images
-
Use a high shutter speed, avoid motion blur
-
Avoid reflections
Upload and generate
-
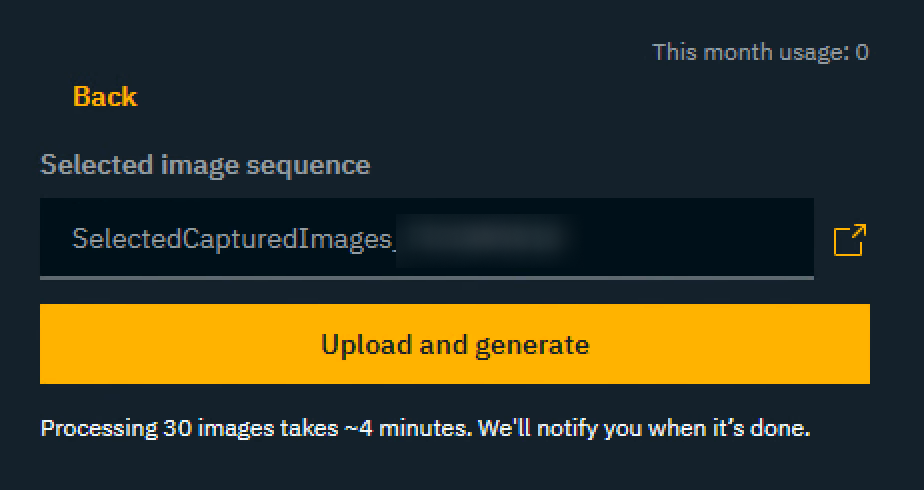
Optionally: Check the captured images via the file explorer by clicking the icon next to the path
-
Click the "Upload and generate" button
-
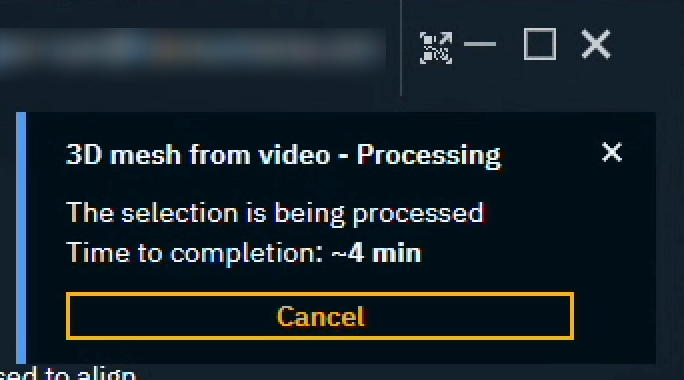
The images are uploaded and the request for 3D mesh generation is queued
-
Time to completion is a very rough estimate based on
-
your place in the queue
-
an average processing time of ~4 minutes (for 30 images)
-
-
-
We notify you when it is done
Import that result
-
Select a level to import it to
-
Click the "Open Editor and import" button

-
This opens the selected level in the Editor and imports the mesh
View generated results
To view all generated results
-
click "View results" in the Cloud tools panel

Manually import the mesh
How to manually import the mesh
-
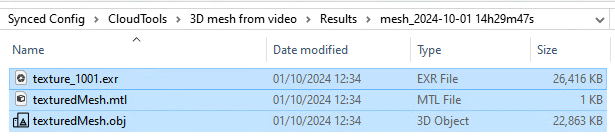
Click "View results" in the Cloud tools panel
-
...\Pixotope\[Version number]\Synced Config\CloudTools\3D mesh from video\Results
-
-
Unzip the files content
-
Open the Pixotope Editor
-
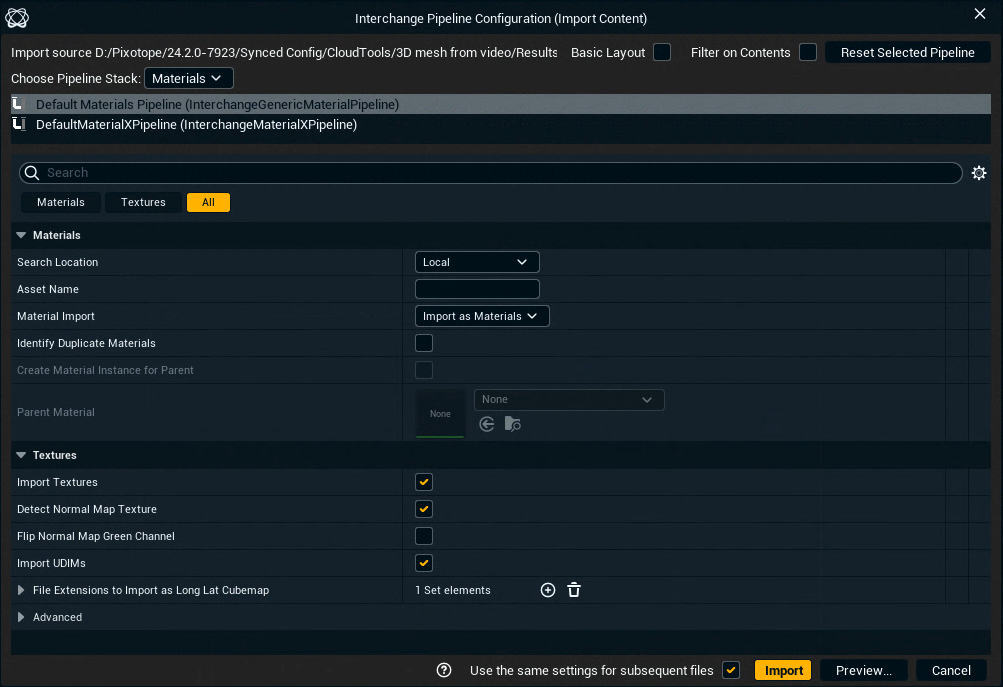
In the Content Browser navigate to a folder you want to import the content to
-
Select all files and drag them into the Content Browser
-
For the Material just click "Import"
-
For the Asset change
-
Offset Rotation X to
90 -
Offset Uniform Scale to
100.0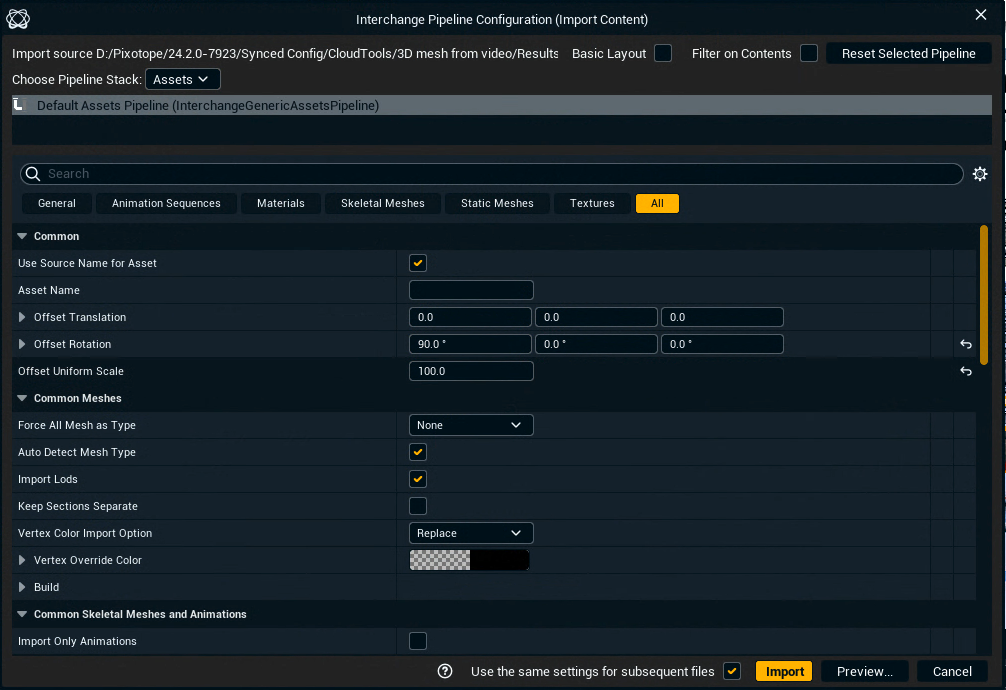
-
-
A Mesh with a Material and its Texture are created
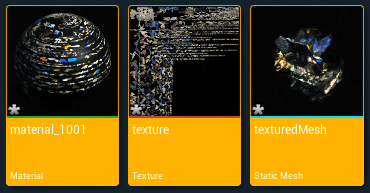
-
Open the Material
-
change its Shading Model to "Unlit"
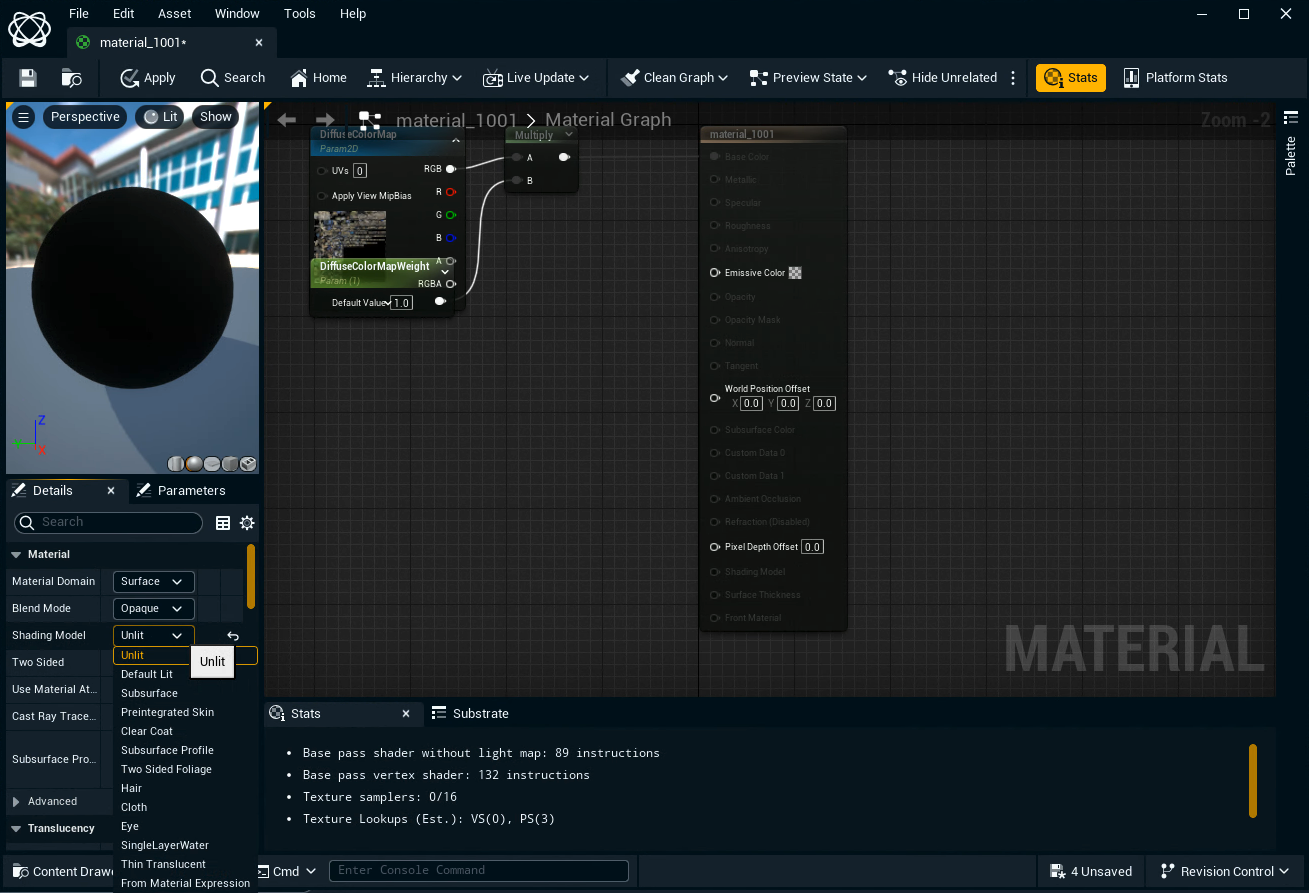
-
Plug the Multiply node into the Emissive Color
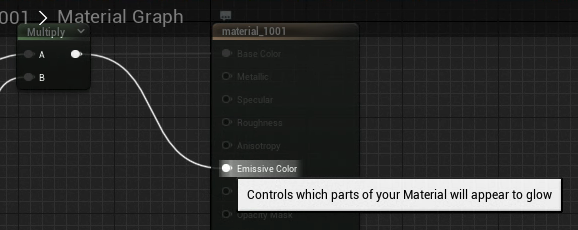
-
Apply the changes and Save the material
-
-
Drag the Mesh into the level and rotate as needed