The object panel lets you make adjustments to one or multiple objects. You can make the following adjustments:
-
Transform objects
-
Change any of their properties
-
If multiple objects are selected, only the common properties are selectable
-
These operations can be performed in both Live mode and Editor mode. The only difference is how adjustments are saved and applied.
Learn more about where adjustments are saved
-
Make sure the machine, running the level with the objects you want to adjust, is selected in the "Read from" part of the header
-
Check that all the machines you want to send the changes to are selected in the "Send to" part of the header
-
Click on "Objects" at the right side of the screen to open the object drawer
-
Select one or multiple objects
-
Make adjustments to
-
transform
-
If multiple objects are selected, changing the value
-
in the input field will set this value on all selected objects (absolute)
-
using the stepper buttons below will transform all selected objects by this value (relative)
-
-
-
a selected property
-
If multiple objects are selected, only the common properties are selectable
-
-
Object browser
The Objects browser lists all objects, together with some additional information.
Here you can:
-
select one or more objects and then adjust them in the "Object" panel
-
click "Adjust" to make adjustments to only one object
-
select multiple objects and click "Adjust objects"
-
-
remove adjustments that were made earlier
-
select multiple objects and click "Reset Adjustments"
-
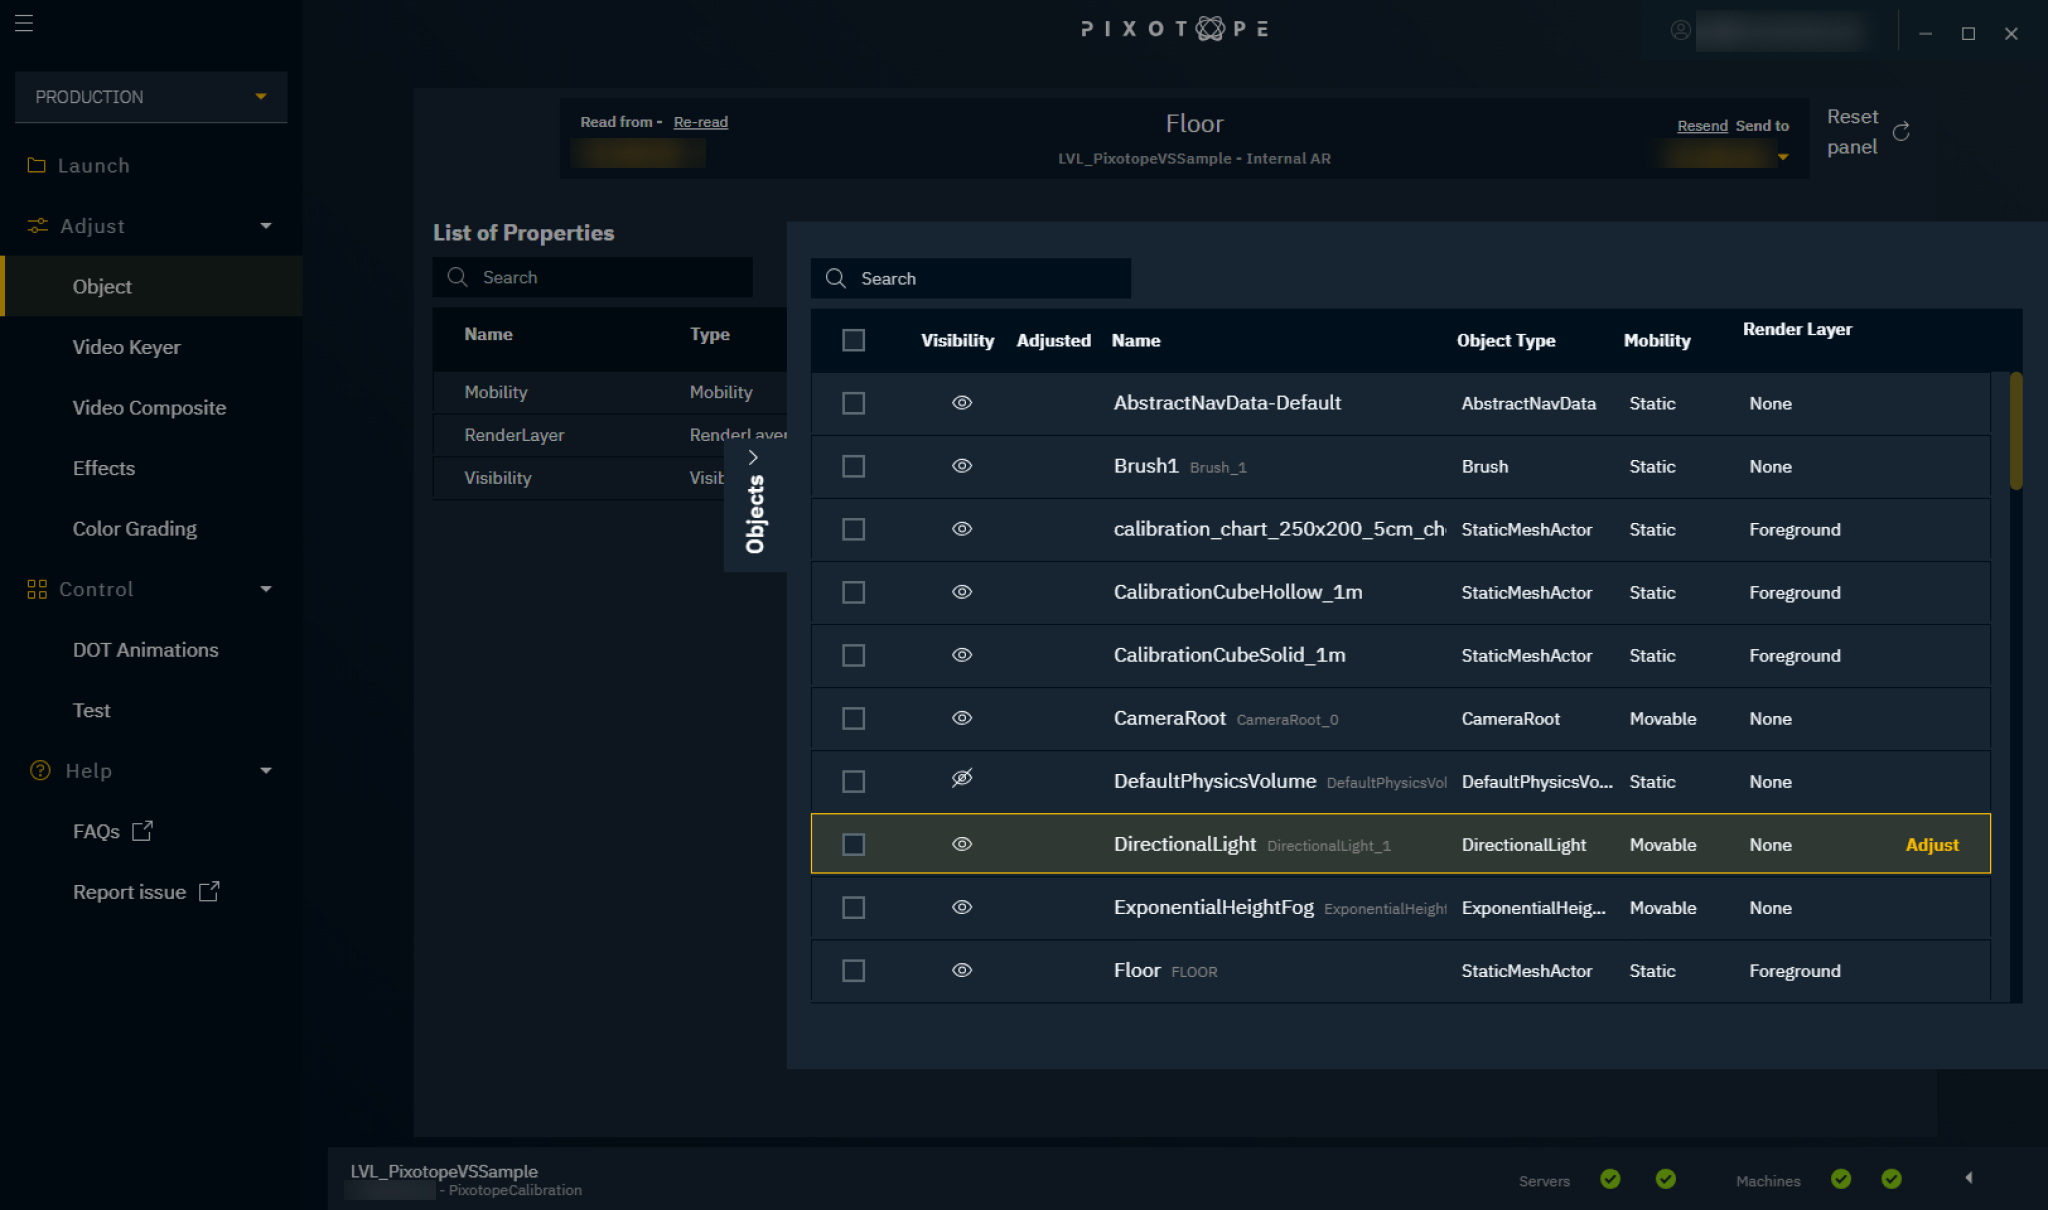
Visibility
Shows whether the object is visible in the Editor/Live mode.
Adjusted
Shows whether one or more values of an object were adjusted through the Adjustment panels.
Name
Shows the display name of each object and, if different, the unique Name (ID Name) in gray.
Object Type
Shows the type of the object.
Mobility
Shows whether the object is static or movable.
Render Layer
Shows the Pixotope-compositing-specific qualities of certain meshes, like AR Shadow Catching or Translucency.
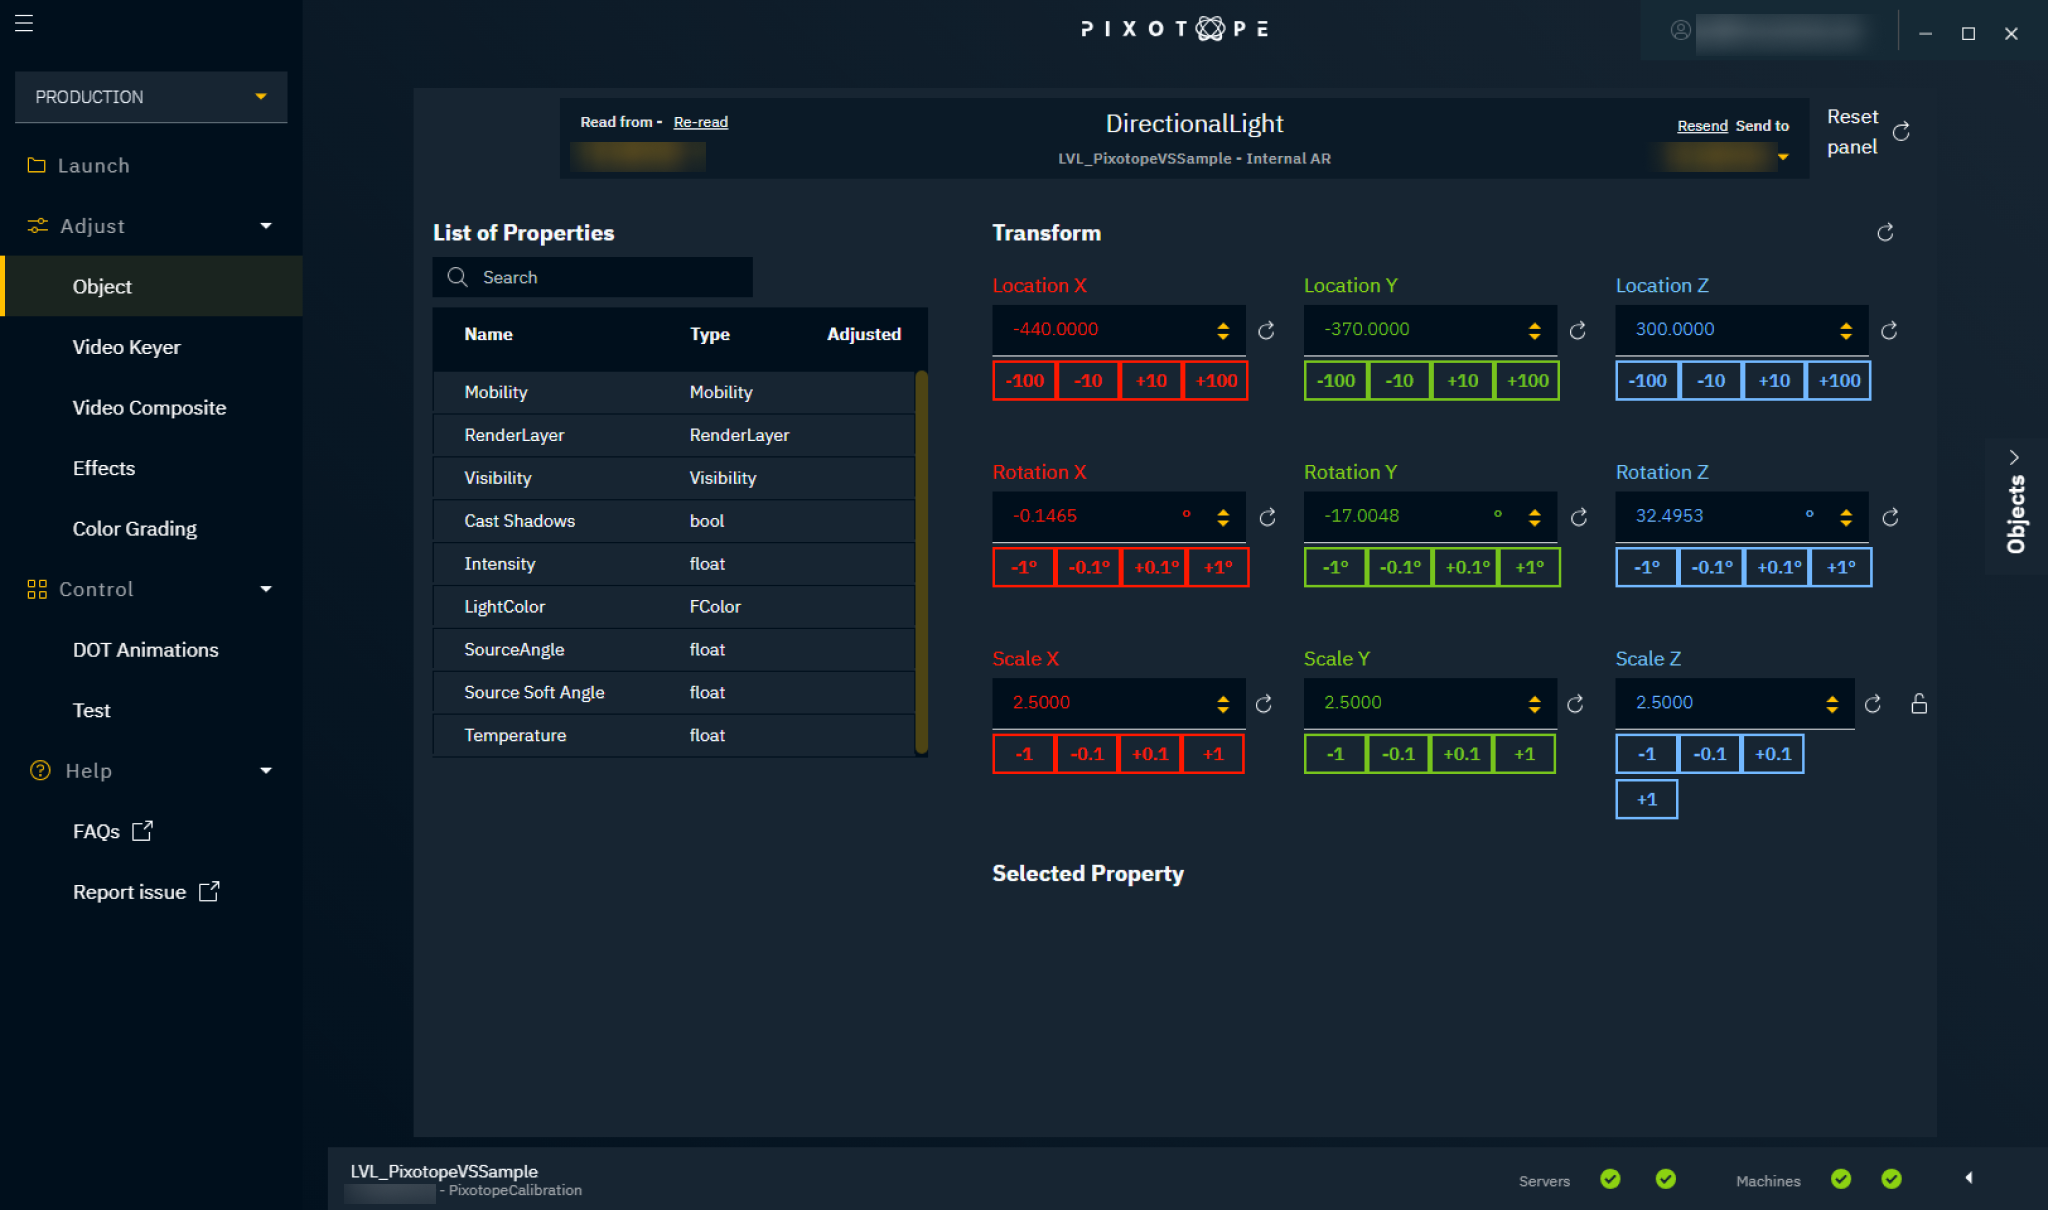
Transform
Transform your objects by typing values into the input fields of the X-, Y- and Z-axes or by clicking the stepper buttons underneath. To reset the transformation to the original values, click the reset icon.
Create presets
Use quick presets to try different settings, use named presets to recall them later.
When saving
-
Live changes of the selected object(s)
-
AND the object selection itself are stored
When applying
-
it loads the stored values onto the saved object selection
-
it switches to the saved object selection
Learn more about how to Use presets