-
For creating light field files using the generator, a USB license dongle is needed
-
For using the light field files in the engine, a 3D living photo license is needed
3D Living Photo is based on lightfield technology, which allows you to create high-quality 3D images that look lifelike and blend seamlessly with any AR, XR, and virtual studio workflows.
Setting up 3D Living Photo is a 3 step process:
Test with example files
If you just want do do a quick test run, you can download
-
a raw camera feed, to be used in the 3D Living Photo Generator
-
a light field file, to be used in the Pixotope Editor
Record talent
To streamline the recording of multiple talents we recommend to do a test production going through all the steps! This way you can get familiar with which recording setup and talent movements work best for your intended use.
To record your talent you need
-
a turntable
-
a green screen and lighting setup
-
a way to rotate the camera to record in portrait mode (for optimized resolution)
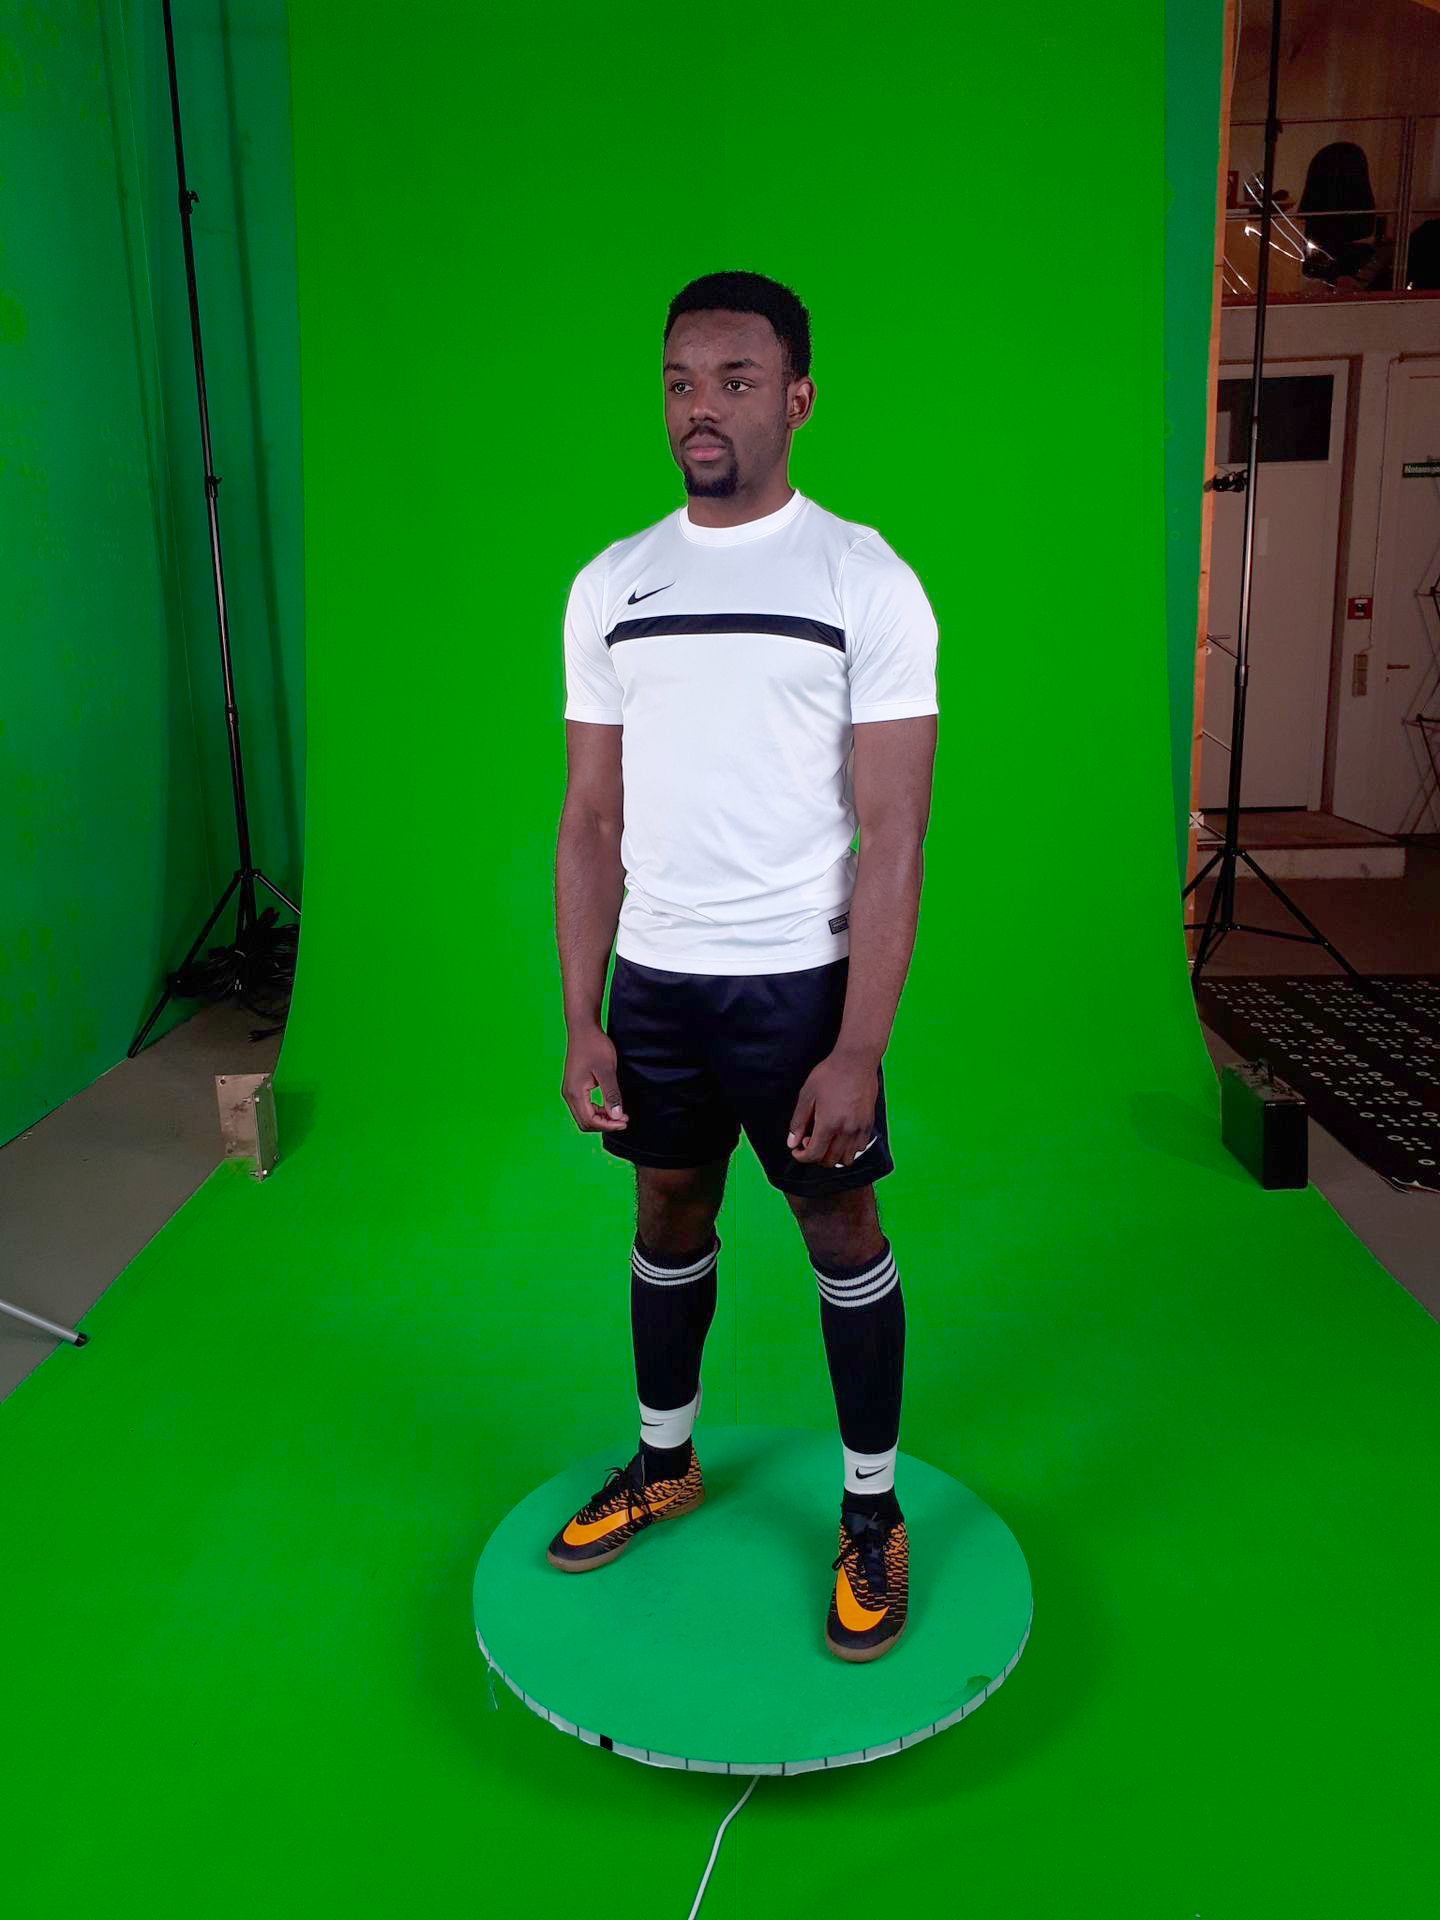
Prepare your green screen
-
Use any kind of green or blue screen
-
Choose a colour which does not appear in the clothes of the talent
-
-
The green screen should cover the floor, but it does not have to be very wide
-
The distance between the talent and the green screen should be at least 2m to avoid green spill
Set up your lights and camera
Lights
-
Choosing an even lighting helps to avoid shadows which might not always fit the shooting/viewing angle
-
We recommend to use the same camera which you later use for the live production, but really any camera can be used
Camera
-
Rotating the camera by 90 degrees to portrait mode optimizes the available resolution
-
The position of the camera should have the same height as in the live production
-
If this is not decided yet, using the height of the talent’s upper chest is a good starting point
-
-
Use a horizontal position and do not tilt the camera too much towards the floor
-
Camera settings like gain, gamma, black etc. can be chosen freely
-
We recommend to use a neutral setting and add effects/colour grading/gamma in post production
-
Directing your talent
-
The feet of the talent should be centered on the turntable
-
To achieve the effect that the talent’s head follows the camera during the live production, the talent needs to turn their head during the recording as well. Face the camera as long as possible.
-
The talent should not blink
-
Avoid significant movements with other body parts
Make the recording
-
Set a mark on the turntable indicating the zero point
-
Make the mark face the camera
-
Choose to record a single or a double turn
Double turn (recommended)
-
Position the talent so they are seen from the front
-
Start the recording and rotate the turntable 2x
A double turn allows for more creative flexibility
Single turn
-
Position the talent so they are seen from the back
-
Start the recording and rotate the turntable 1x
Create light field
This requires a USB license dongle
Install 3D Living Photo Generator
-
Open the zip file and extract it to the desired location
-
Launch the application by clicking
3DLivingPhoto.exe
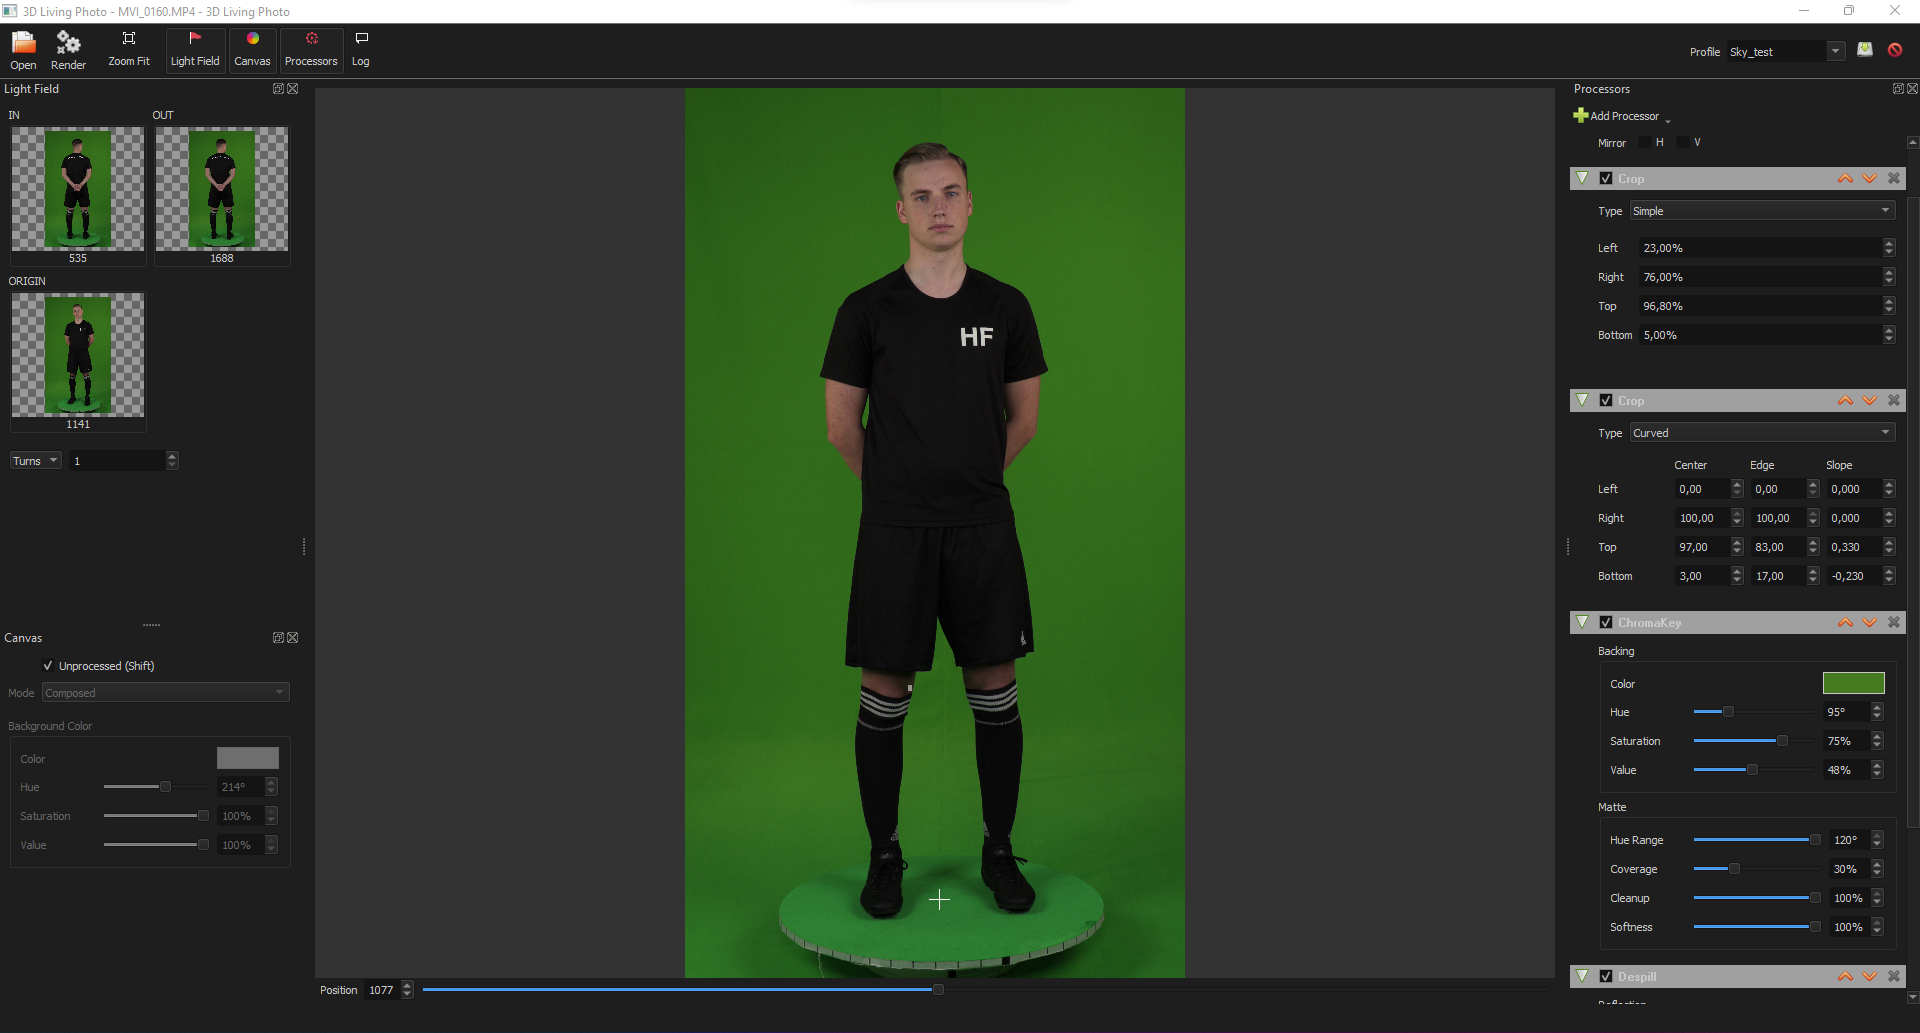
Prepare the video
-
Click "Open" on the top left to import the recorded video file
-
Any format supported by ffmpeg can be used
-
-
Rotate the video by adding a Transform processor on the top right
-
Remove unwanted areas by adding one or more Crops processors
-
Choose between different shapes and adjust its corners
-
-
Key the image by adding a ChromaKey processor
-
To pick a color area
-
Hold down
Shift + Right clickto drag a selection rectangle around the color you want to remove -
Hold down
Shiftand drag the rectangle onto the color swatch in the processor tab on the right
-
-
-
Remove the unwanted color spill from the talent by adding a Despill processor
-
To pick a color area, see above
-
Use the Position slider underneath the image to scrub through the video.
It is possible to use multiple processes at the same time and also change their order.
Canvas menu
Save this profile
In case you need to do further editing or apply the same values to new footage, save them as a profile for later use
-
Type a new profile name into the Profile dropdown on the top right
-
Click the Save icon next to it
The profile is now selectable using the Profile dropdown.
To remove a profile, select it and click the Remove icon.
Set light field range
-
Select a frame where the Zero point* is in front by using the Position slider
-
Move the white Origin Crosshair with your mouse (drag and drop) to exactly the center mark at the front of the turntable. This helps to find exactly the same point again for the Origin and Out marks.
-
Define the starting position of the light field by clicking and dragging the image into the IN slot on the top left
-
Use the Position slider to go to the OUT and the ORIGIN position and repeat step 2
-
Specify the amount of turns
|
|
IN |
ORIGIN |
OUT |
|---|---|---|---|
|
Double turn |
Zero point* in front
turntable position before the first turn |
Zero point* in front
turntable position after first and before second turn |
Zero point* in front
turntable position after the second turn |
|
Single turn |
Zero point* in front
turntable position before the first turn |
Zero point* in the back
turntable position after 180 degrees turn |
Zero point* in front
turntable position after the first turn |
* Zero point: indicated by the mark at the front of the turntable
Set the Origin point
-
Drag and drop the Origin Crosshair exactly at the center of the turntable (between the talent’s feet) to set the Origin crosshair.
Export the light field
-
Click the Export icon to generate the light field file
-
Save it to a location inside the project folder
-
A
.lffile is created
-
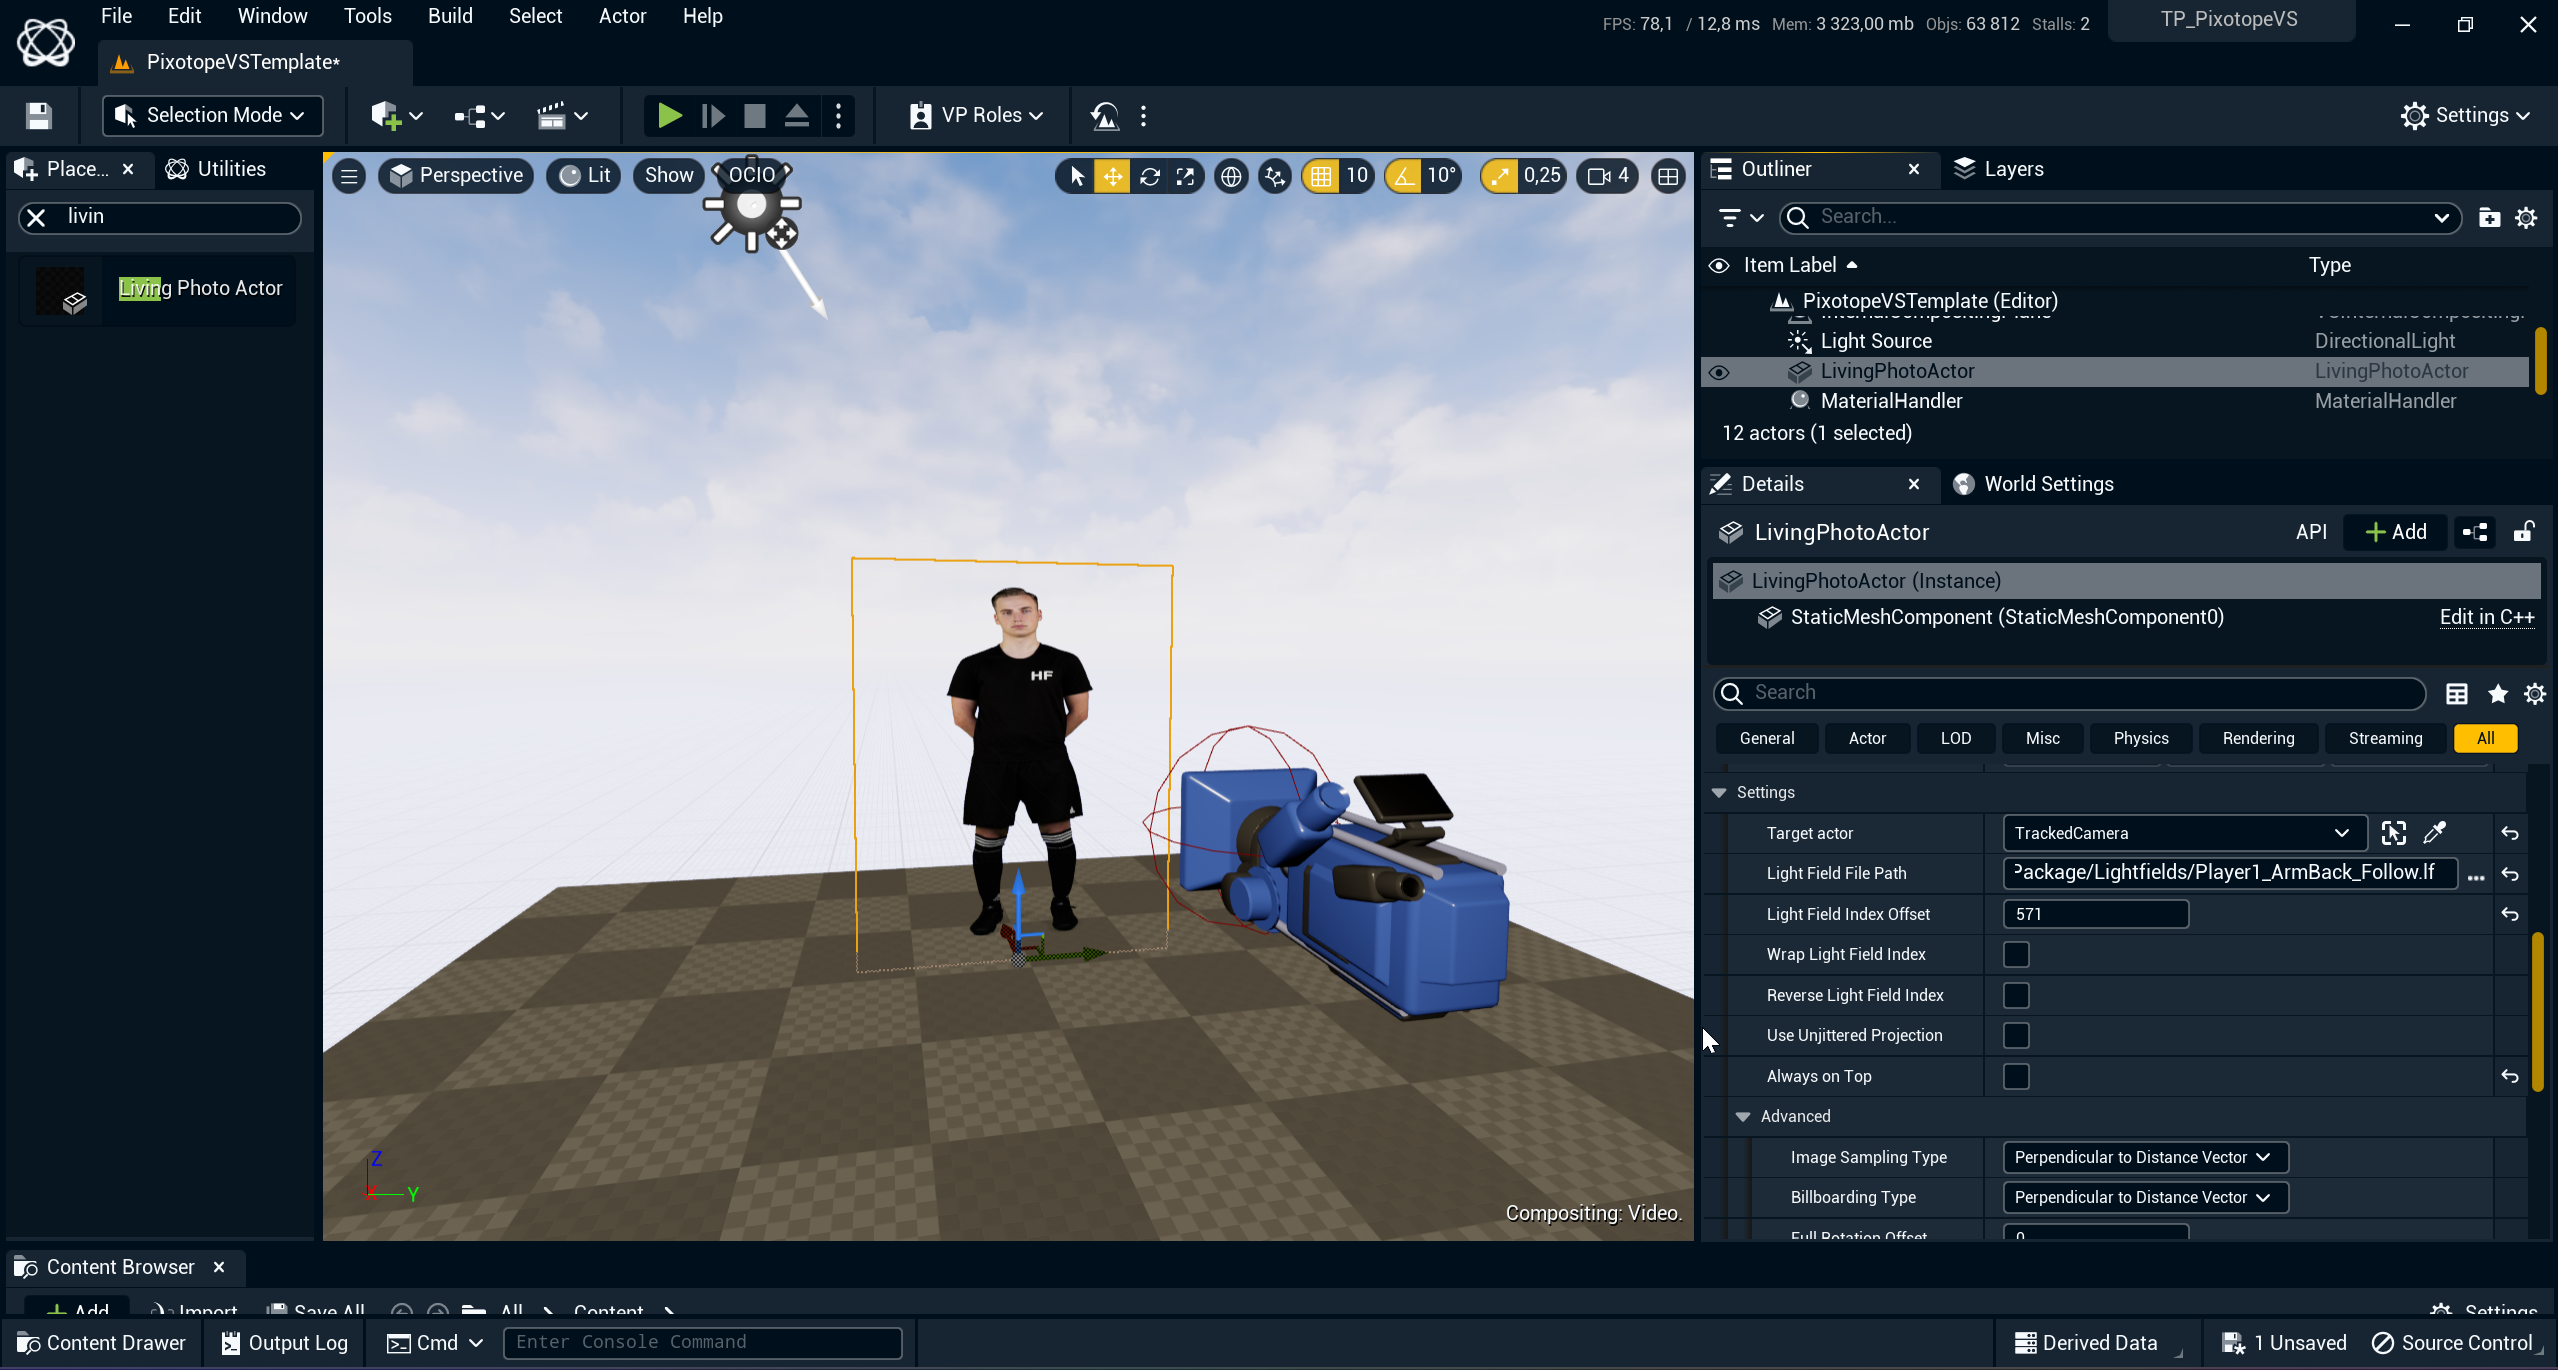
Add to level
-
Place the Living Photo Actor in the level by finding it in the Place Actor tab and dragging it into the level
-
Go to the Details of the actor and scroll down to the Living Photo section
-
Link to the exported light field file, by specifying the Light Filed File Path
-
Select the TrackedCamera actor as the Target actor the talent will look towards
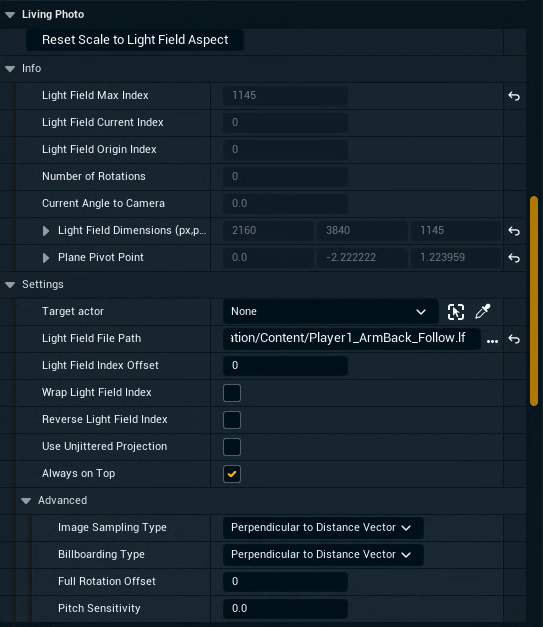
Additional settings
|
Light Field Index Offset |
Specify which frame/position the light field should start with |
|---|---|
|
Wrap Light Field Index |
Automatically continue to the start/end frame when a larger/smaller index is chosen |
|
Reverse Light Field Index |
Reverse the order of frames |
|
Use unjittered projection |
Move the texture past Unreal Engine TAA, giving a much sharper result |
|
Always on top |
Ensure that the Light Field Actor is always rendered on top regardless of being placed behind other actors |
|
Pitch Sensitivity |
Determine how much the Living photo adjusts its pitch angle when the Target Actor moves vertically |
|
Reset Scale to Light Field Aspect |
Reset custom move, rotation and scale position to default |
Tips and tricks
Good practice
It’s considered good practice to make sure the feet are touching the floor. Be mindful that the feet will not look entirely grounded and may look better if hid behind something.
Set up viewing range
You can usually handle the light field like a regular texture; but you can adjust the starting point of the video and if the texture should also be following the camera in vertical direction; not recommended, but sometimes a valid option for small camera movements.
What to avoid?
As we are shooting the talent just from one height, we do not record information from higher angles. Therefore also during the broadcast you should avoid higher shooting angles, e.g. high crane shoots.
As a solution, you can use multiple cameras during the shoot!!! Besides the regular camera, which is positioned at the height of the breast of the talent, you can use an addtional one from below for hero shots. Also you can use one camera at a higher position (especialy while using a flying/drone camera during the broadcast). During the live broadcast you have to decide which lightfield to use. You can not blend from one file to the other one!