Our automatic delay detection compares the input video's optical flow with the expected optical flow calculated from the tracking input. The basic workflow is
-
Start detection
-
Move the camera
-
Apply the delay
Preparation
-
Make sure
-
the camera systems are configured correctly
-
the tracked and virtual camera move correctly, though the tracking does not necessarily have to be calibrated yet
-
the frame matching method is set correctly
-
Learn more about how to Configure the frame matching method
-
-
-
Go to the Delays panel
-
On the machine you would like to calibrate the active camera of
-
Launch a level (LIVE or Preview Live)
-
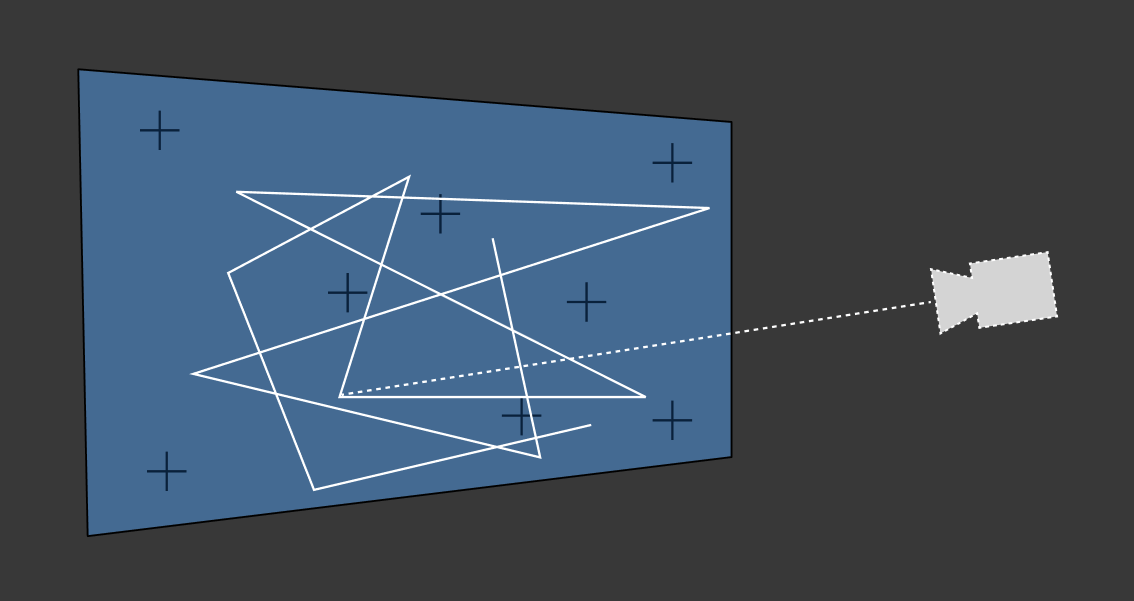
Point the camera towards areas with trackable features
-
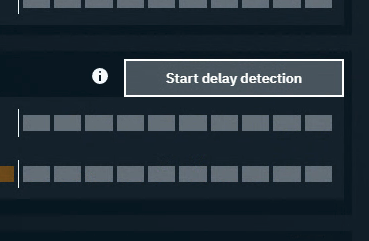
Run delay detection
-
Click on "Start delay detection" shown when hovering over the machine
-
Rapidly move the camera in changing directions until notified
The detection duration varies based on confidence, but usually takes around 10 seconds. To improve accuracy/confidence
-
move the camera in changing speeds and directions
-
do not zoom in and out
-
-
make sure
-
there are enough trackable features seen by the camera at all times
-
to use an aperture which shows no/low motion blur
-
-
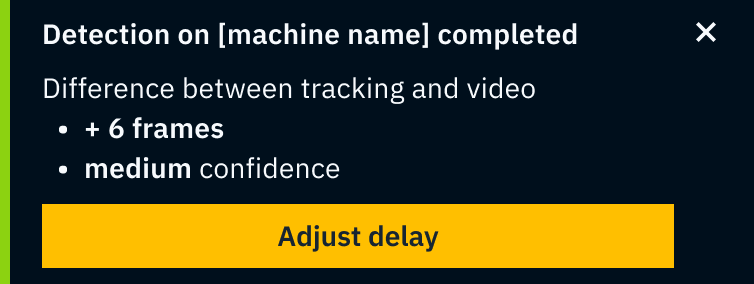
The detected difference between tracking and video is shown
-
Click "Adjust delay"
-
The difference between tracking and video is applied as tracking delay
-
We do not change the video delay unless the tracking delay would become negative
-
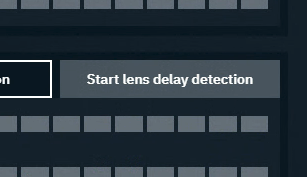
Run transform and lens delay detection separately
-
Click on the Break icon next to tracking delay
-
Learn more about how to Separate transform and lens delay
-
-
Detect the transform delay the same way as described above
-
Then click "Start lens delay detection"
-
Randomly zoom in and out until notified
To improve accuracy/confidence
-
zoom the camera in and out in changing speeds
-
do not move the camera, but only change the zoom
-
-
make sure
-
there are enough trackable features seen by the camera at all times
-
to use an aperture which shows no/low motion blur
-
-
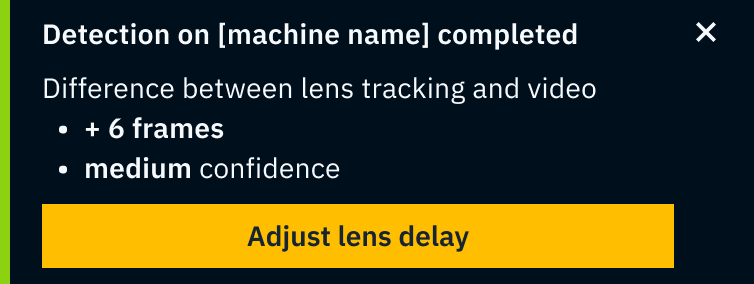
The detected difference between tracking and video is shown
-
Click "Adjust lens delay"
-
The difference of the delay is applied as tracking delay
-