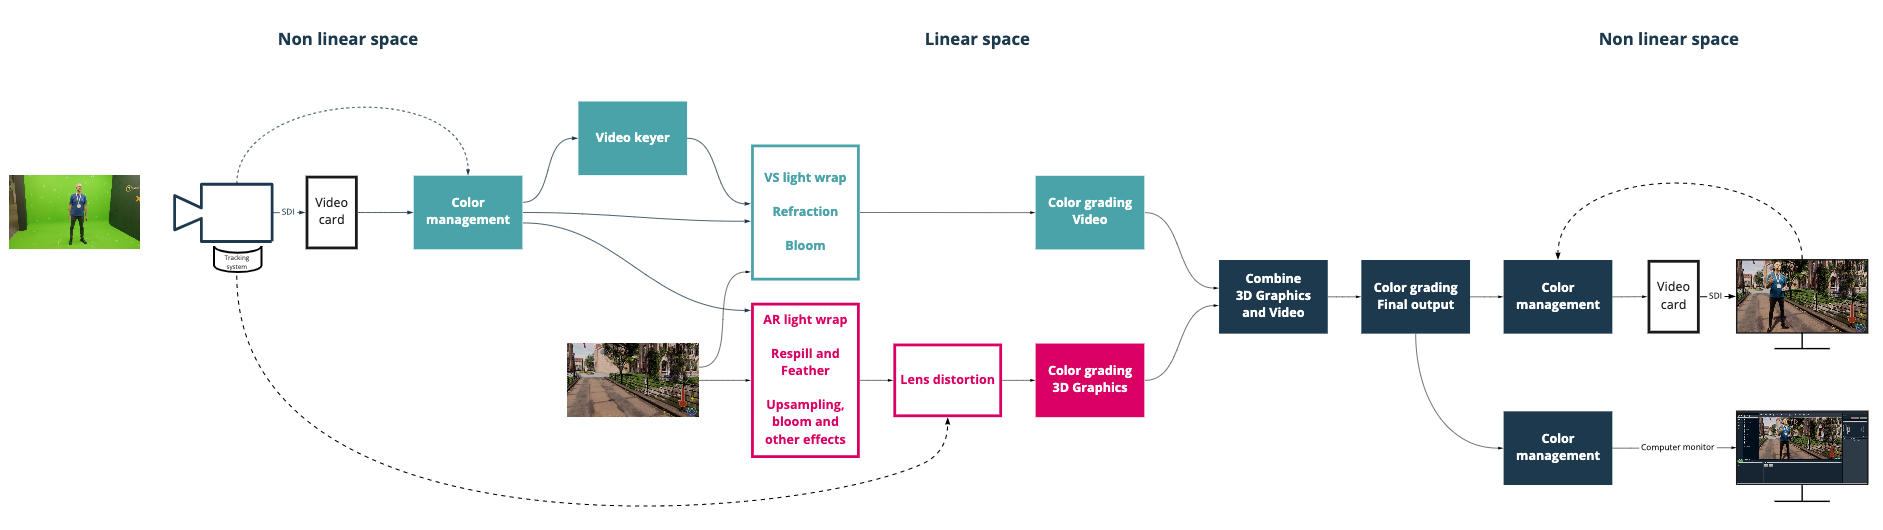
All rendering and internal compositing is done inside Pixotope's customized render pipeline of the Unreal Engine. We have optimized the render pipeline to allow for very efficient single-pass rendering that does not compromise the quality of the video.
Specifically, the Pixotope Engine ensures:
-
that no anti-aliasing is added to the video
-
the ability to affect video with lights, shadows, reflections and other effects
-
seamless integration with translucent objects, such as virtual glass materials, smoke, etc.
-
seamless transition between tracked and virtual cameras, using all of Unreal's animation tools
-
full control over what type of image effects are applied to the video
-
no multiple-pass rendering overhead, because everything is rendered in a single pass
-
full and separate control of color grading for video, graphics and composite
Custom Depth Stencil
Our compositing pipeline has a Custom Depth Stencil which is separate from the Unreal Engine one.
The stencil values we use are:
|
1 |
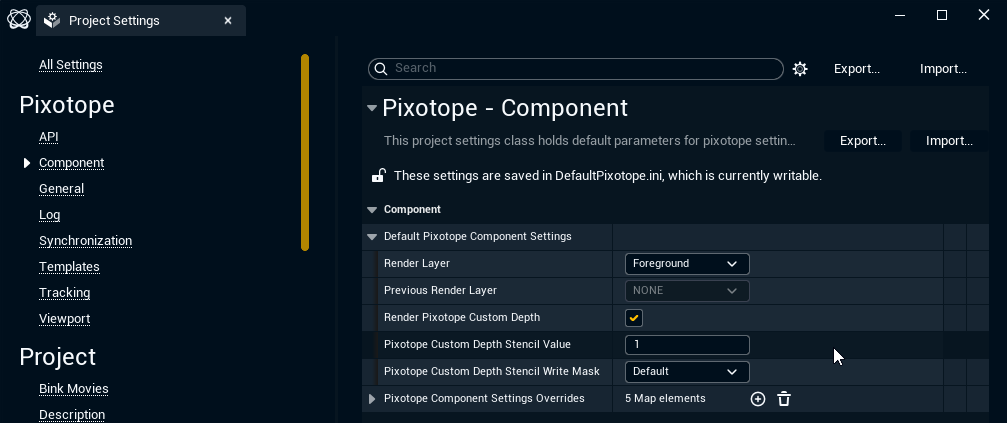
Default for any object in Pixotope. Used for opaque objects; blocks the video feed. The global default can be adjusted in Project Settings > Default Pixotope Component Settings. |
|
2 |
Shadowcatcher. Used to mark the area of interest for AR shadows and ambient occlusion. |
|
4 |
Used in MediaInputComponent. Previously garbage matte. |
|
8 |
Free. Previously in old AR to mask reflection planes. |
|
16 |
AR Holdout1 |
|
32 |
Translucent object (also requires "custom depth stencil write mask" to be set to "Sixth bit (32), ignore depth"). |
|
64 |
MaskAO. Can be used to mask out ambient occlusion from an area (for example on the Shadowcatcher). |
|
128 |
VS Compositing plane1 |
1 If Unified Compositing in Project Settings > Pixotope - General is disabled, 16 and 128 are swapped.
Change Custom Depth Stencil
-
Select the actor
-
Change the number of the Pixotope Custom Depth Stencil in Details > Pixotope Component Settings
-
Make sure that Render in Pixotope Custom Depth is enabled
-

In Blueprints
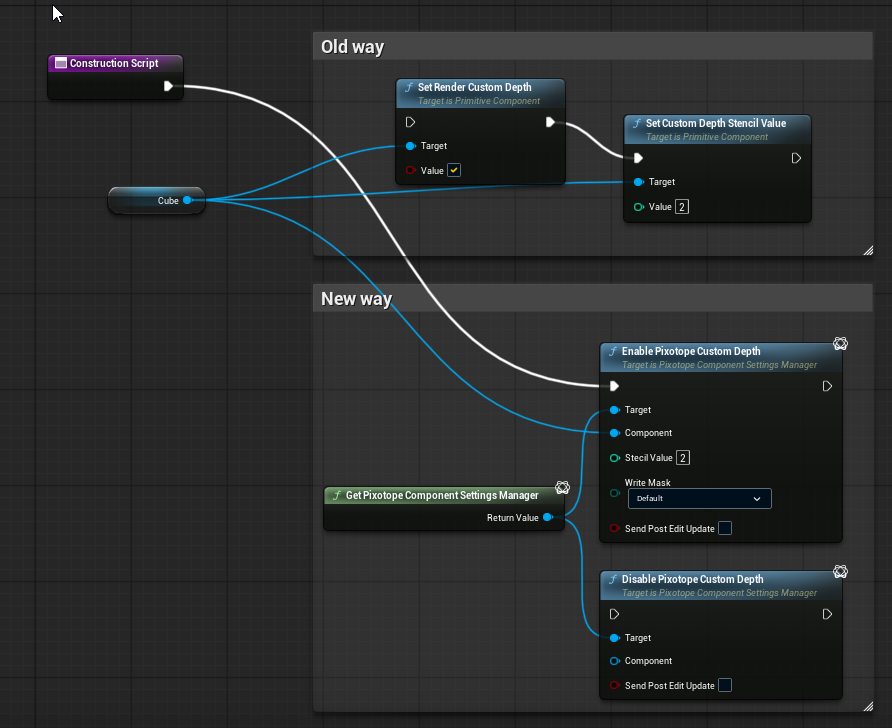
Pixotope Custom Depth can be adjusted in plugin using the Pixotope Component Settings Manager. It should be done on construction or begin play.
Avoid using it every tick.
Avoid adjusting Pixotope Custom Depth settings in Details for Components in Blueprints. Use blueprint nodes as shown below.
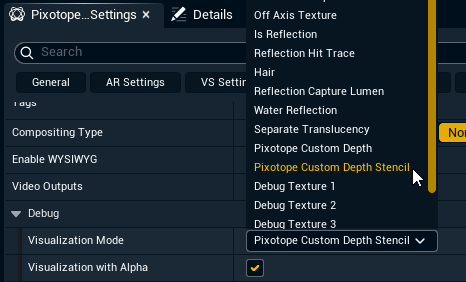
Visualize Custom Depth Stencil
-
Go to the Pixotope World Settings
-
Select Pixotope Custom Depth Stencil under Debug > Visualization Mode
Migrate Pixotope projects prior to 26.2
All actors that were converted before will need to be reconverted or will need stencil adjustments.
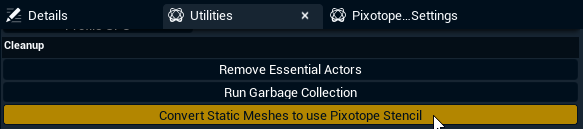
To ease conversion of projects that used multiple actors with Pixotope specific stencils we provide a one click conversion:
-
Open the Utilities tab
-
Click "Convert Static Meshes to use Pixotope stencil" which
-
The conversion
-
reads Unreal’s CustomDepth Stencil Value and copies it to Pixotope Custom Depth Stencil
-
Only Static Meshes are converted. Other mesh actors like the Skeletal Mesh Actor have to be converted manually.
Disable custom depth for XR without inputs
Pixotope Custom Depth is needed for most of our compositing pipeline. However, it can be disabled if needed (e.g. XR without any inputs) by
-
disabling
Render Pixotope Custom Depthin Project Settings > Default Pixotope Component Settings and then restart the project -
or via the following console command:
Pixotope.PixotopeCustomDepthEnabled false
Learn more about Useful console commands
Compositing planes
Internal compositing planes are used to place video inside the virtual environment. They consist of a specialized geometry that enables the TrackedCamera to project the video onto a specific depth in the scene. This allows for correct reflections, refractions, shadows, occlusions, etc. They can be placed anywhere in a level.
For AR levels: they can be used for AR reflections from the video into the scene.
They can:
-
rotate with the camera
-
cast virtual shadows
Learn more about how to Adjust compositing
Translucency
Some special rules for translucency apply: for best results in VS, use a material with "Render after DOF" enabled, and set the custom stencil value to 32 with the "custom depth stencil write mask" set to "Sixth bit (32), ignore depth". If you need to use material without "Render after DOF", enable legacy translucency, but the quality will be reduced. Translucency in AR does not technically require custom depth values or "Render after DOF", but it is easier to just use the same settings as for VS.
AR vs VS
AR refers to graphics behind all Unreal Engine rendered graphics. It can also have shadows and/or reflections on top of it.
VS refers to a video "plane" placed in the scene that can have UE graphics both in front of and behind it.