Introduction
This document is aiming to provide a comprehensive overview of how to approach designing a timecode-driven production within Pixotope Engine.
To follow this guidelines a solid understanding of level-design within Unreal Engine 5 will be necessary, together with a good grasp of what multi-machine synchronization is about in Pixotope.
To understand how to configure Pixotope to use timecodes study the following document: Configure and calibrate multi-machine syncing
Useful Indicators
Within Editor you can check if timecode is successfully reaching the Engine, by looking at Data Hub status in the Network Status tab.
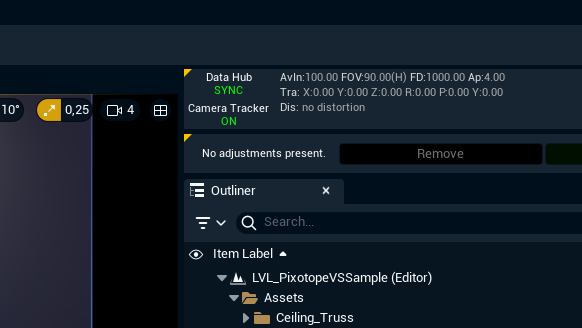
|
SYNC |
indicates that you are receiving a consistent timecode stream with values coming in with a correct chronology |
|
NO TIMECODE |
indicates that Engine is expecting to receive timecode, but nothing is coming in |
|
ON/OFF |
indicates that Multi-machine Sync is not enabled |
Watch out for frame drops! For a production to be correctly synchronized between machines a stable frame rate is a MUST.
That being said we will try to go through ways a good design can safeguard against an occasional dropped frame.
Another useful indicator could be the Timecode Provider tab that can be found under Window>Virtual Production. It shows you the last timecode that reached the engine.

Tick and Time
With Multi-machine Sync correctly setup, timecode flowing in, and a stable FPS your production is already synchronized!
Game Time, Application Time, and Tick’s Delta Time should reflect the timecode you provide. This means that any design that works in a usual setup should perform reasonably well within this new paradigm.
By default Execution Time Offset is applied over timecode. This can be configured under Project Settings>Pixotope>Synchronization>Game Time.

There are ways however to make sure your production behaves flawlessly!
Events
Triggering Events Remotely
By default all Pixotope API messages of types Call, Set, and Update reaching the Engine will execute synchronously between all machines, if Multi-machine Sync is correctly setup.
Here you can read more about using our API: Using the Pixotope API
This means you can build your production on a set of Blueprint Functions and Events, trigger them from a Control Panel, and be sure to have these calls executed simultaneously between all engines!
Here you can read more about building Control Panels: Creating a control panel - PRODUCTION
Because all the engines need to reach a consensus on when to execute an API message we add 5 frames of execution to makes sure there is enough time for this communication.
This can be configured in Store under a value State.Sync.CommonSyncDelay
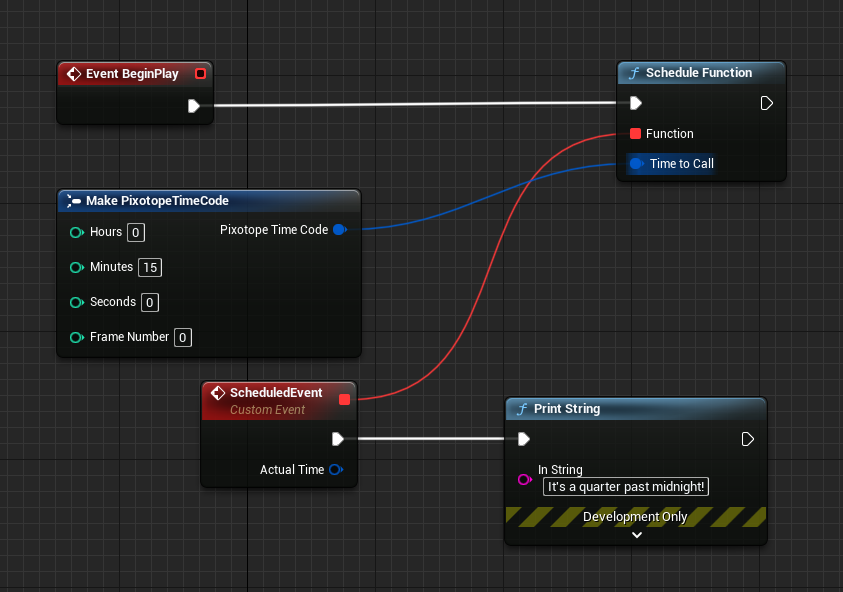
Scheduling Events
Using Schedule Function Blueprint you can define a logic that is to be executed at a given timecode (or right when Engine receives an equal or higher timecode, to be precise).
This should allow you to build complex timecode-driven productions.
By default this feature uses the first timecode (indexed as 0) and applies the Execution Time Offset configured in Director.
Under Project Settings>Pixotope>Synchronization>Schedule Function you can change this behavior.

Calling Events Synchronously from One Engine to Other Engines
In a rare instance you want one of you Engines to drive the production and send synchronized commands to other Engines, you can use a content pack Pixotope Synchronized Event.
Read more about it here:
Pixotope Synchronized Events content will not be plug-and-play, only a template on which you can construct your own logic.
This is not a recommended way of setting up a production, and will require an extensive understanding of both Blueprints and Pixotope to pull of.
Sequences
Traditional Sequence Workflow
The simplest way to get sequences to work is to just follow the usual way of triggering them.
As mentioned before both Tick and Pixotope API are going to be synced, so your sequence should execute simultaneously on all machines, if created in a Function/Event that is triggered from a Control Panel.
A slightest frame drop can cause sequence execution to desynchronize in this setup!
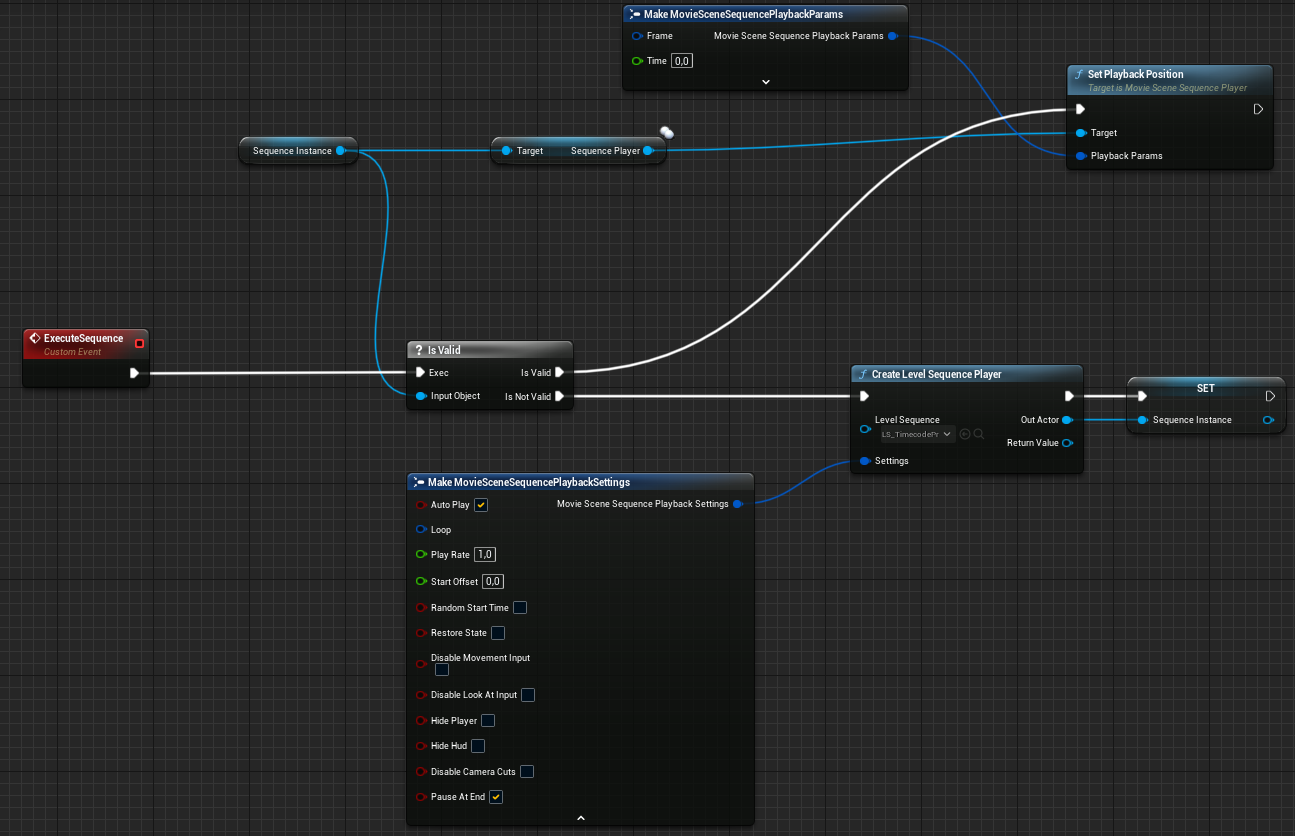
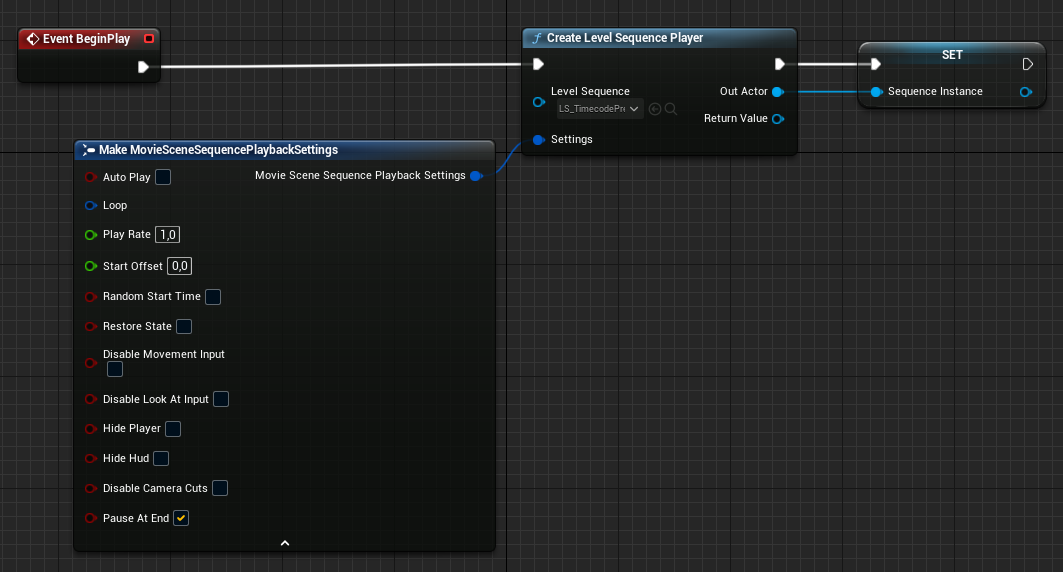
Scheduling Sequences with Blueprints
A more robust way of setting sequences can be built using Blueprints, this will be especially useful if you want to schedule your sequences to execute at a particular timecode or if you are experiencing frame-drops and desynchronization when testing your production.
This approach requires strong UE5 knowledge to understand and build custom logic upon.
Try following these steps:
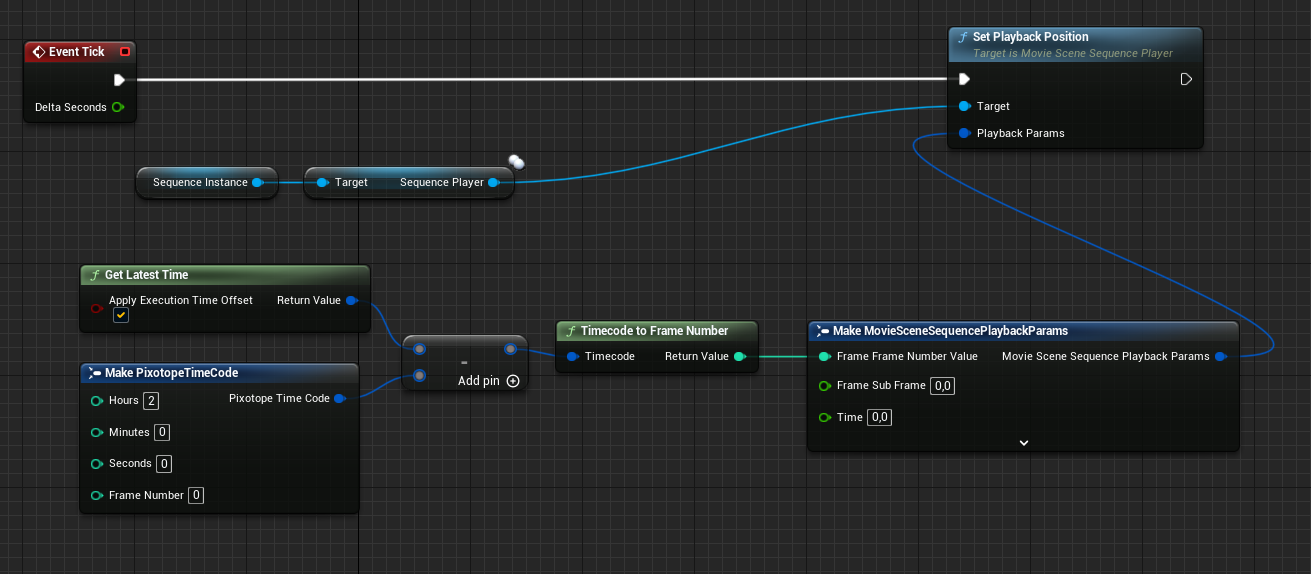
Notice that this way assures that the sequence stays true to timecode, event if you drop frames!
Materials
As discussed before Game Time is replaced with timecode in Live Preview (PIE) and Live in Pixotope, when Multi-machine Sync is correctly set up.
This means you can use Time material node to drive your shaders and be sure that they will stay in sync.

Particle Effects and Randomness
For any pseudo-random number generation and particle effects you build make sure to have seeds set up, so the results are the same on various machines.
Other Features
There are a couple of use cases that can might be useful for everyone, but are still an option within Pixotope.
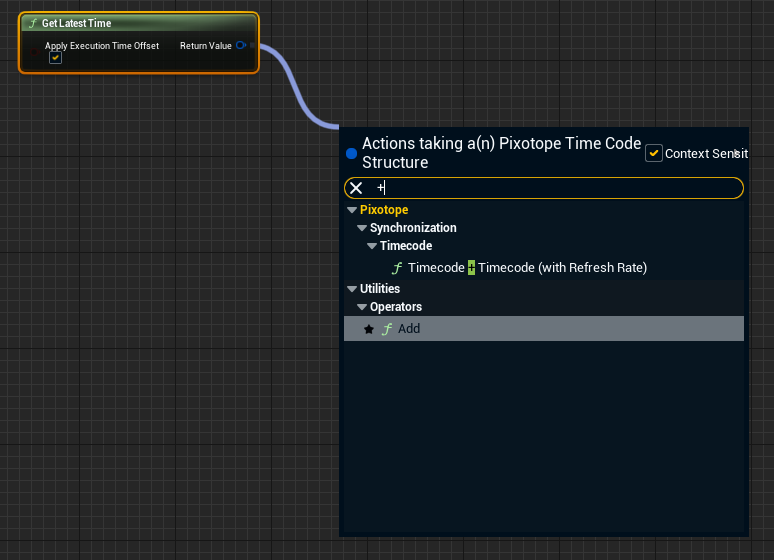
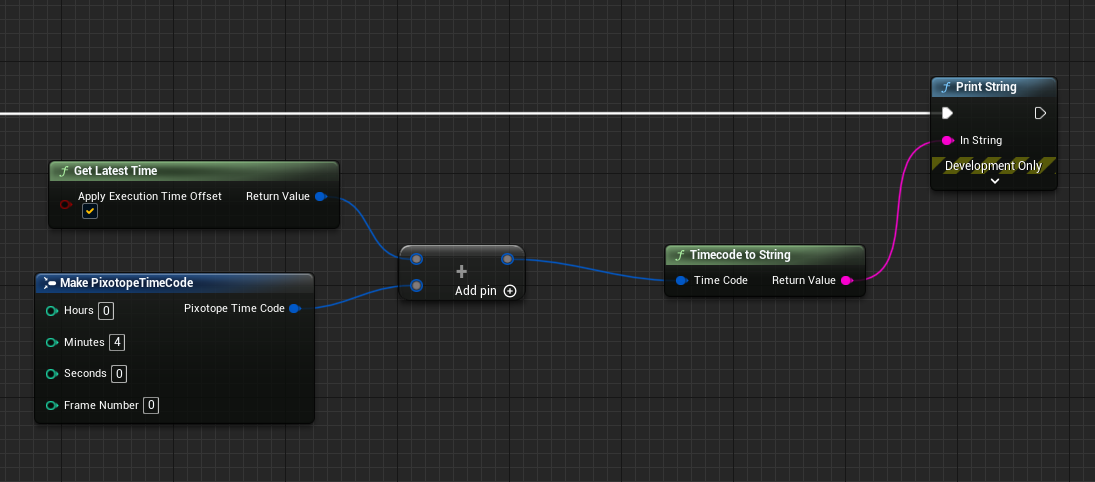
Timecode Math
Use + or - operators in Blueprints to build complex scheduling logic for your production!
Sync Delta Time in Editor
By default Game Time, Application Time, and Tick’s Delta Time are not derived from timecode when in Editor (they however are in Live Preview/PIE).
Setting Project Settings>Pixotope>Synchronization>Editor>Sync Delta Time in Editor to true will make Editor viewport synchronized.
This will result in viewport camera “jumping” when you try to move, when you have an event slightest FPS drop.
We don’t expect the FPS to be perfect when editing the level, hance this option is disabled by default.
Delayed Tick
Some productions might be set up with particular events timed to a number of ticks that passed. This is an approach we wouldn’t recommend, however for such a rare case there is a way to synchronize the beginning of your Live ticking between multiple machines.
On every machine go to Project Settings>Pixotope>Synchronization>Delayed Tick and set Wait for Synced Tick to a number of seconds higher than 0. This should be higher than the time it takes the slowest machine in the studio to start the level.

Each machine will now communicate with the rest and they will all try to start ticking simultaneously.
For this to work the Execution Time Offset between machines needs to be setup correctly in Director, there is also an option to override it locally with a different delay (Local Synced Tick Delay).
This feature doesn’t delay Begin Play nor a first Tick. However every tick after will be synced.