Director - Presets
With presets you can save and apply fixed sets of values.
Try out and save different settings and quickly switch between them while still editing

Save settings using custom names and recall them later through the control panel or the API

You can find the presets drawer in the Video keyer panel.
Learn more about how to Use the video keyer
General
Presets are
stored in the show file
shared between machines
Scope
Presets store values based on the shown scope in the header of the drawer.
Scope | |
|---|---|
This panel | All settings which can be set on this panel. This includes settings on all sub pages. |
Apply to
Presets are applied to the object shown in the header of the drawer.
Use quick presets
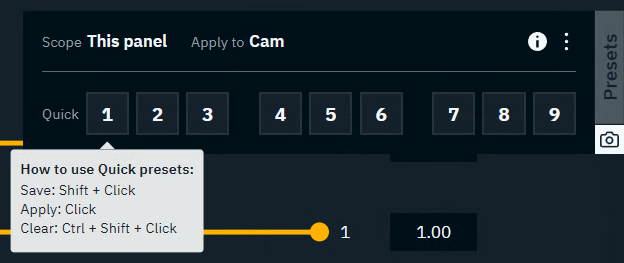
Quick presets allow you to easily store settings in predefined slots and recall them with a single click.

Open quick presets
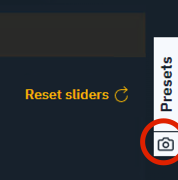
Click on the camera snapshot icon on the bottom right of the presets drawer to open/close it

Save a quick preset
Shift + Clickone of the numbered slots to store the current settingsNOTE: Saving in a slot which already has a preset stored, will overwrite the stored preset
The slot in which the settings are stored, is shown with a white outline
In a multi-machine setup, the outline color is the machine color from which this preset was saved

Single-machine setup

Multi-machine setup
Apply a quick preset
Clickon a numbered slot to apply the preset stored in itNOTE: Clicking on an empty slot will not do anything
Clear a quick preset
Ctrl + Shift + Clickon a numbered slot to clear the preset stored in itNOTE: Numbered slots do not have to be cleared, they can just be overwritten (See "Save a quick preset")
Clear all quick presets
Open the overflow menu on the top right of the drawer and choose "Clear all quick presets"

Use named presets
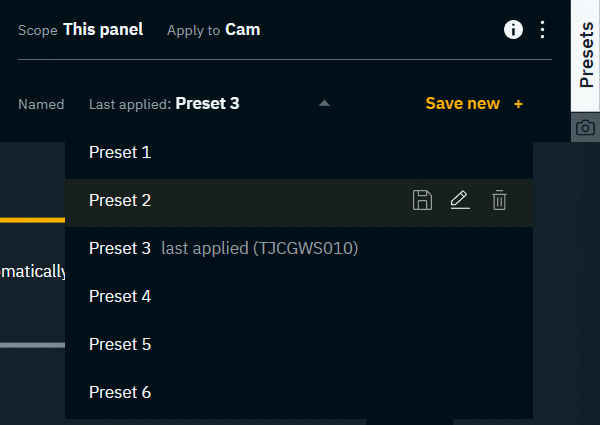
Named presets allow you to save settings using custom names so they are recognizable and can be recalled later through the presets drawer, the control panel or the API.

Open named presets
Click on the "Presets" button on the right to open/close the drawer
Save a named preset
Click "Save new +"
Choose a name for your preset
When using the default name it will automatically count up. Preset 1, Preset 2, …
Apply a named preset
Open the Preset dropdown
Select a named preset
Last applied indicates which preset was last applied. However, we are not keeping track of the changes you make afterwards. This means that last applied and the values you see might be different.
Overwrite a named preset
Open the Preset dropdown
Hover over the preset you want to overwrite with the current data
Click on the Disc icon

Click on "Overwrite" to confirm

Rename a named preset
Open the Preset dropdown
Hover over the preset you want to rename
Click on the Edit icon

Edit the name and press
Enterto confirm
Delete a named preset
Open the Preset dropdown
Hover over the preset you want to delete
Click on the Trash can icon

Click on "Delete" to confirm

Delete all named presets
Open the overflow menu on the top right of the drawer and choose "Delete all named presets"
Trigger named presets from the control panel
In Control panel
Select the API Log tab and filter on
Call
In Director
Apply the preset you would like to trigger with a widget
You should see a call listed in the API Log tab mentioning the name of your preset
In Control panel
Drag the Call onto the canvas and select for example a trigger button to link it to
Learn more about how to Replicate any Pixotope functionality - API Log tab
Listening to calls
Add a widget using this action
