Linear Timecode (LTC) is a clock stream that can be supplied in a number of ways. It is typically used for synchronization in video production, filmmaking, and live events.
We can use it to facilitate automated execution of Cue Actions, through the Pixotope Event System. If we feed multiple engines the same Timecode signal, they will all trigger at the same time - imperative when frame-perfect accuracy is required, for instance for hitting lip sync or matching audio cues!
LTC can also be used to synchronise video and tracking together, or when recording incoming tracking data.
Synthetic timecode
Instead of using a physical signal, Synthetic timecode uses the Pixotope network (Data Hub) to create a shared time reference.
Synthetic timecode requires
-
Lock/Genlock (preferably from SDI) on the machine that generates it
-
a robust network and low latency
Your network health should at least have a rating of 5/6, otherwise triggered events might not be frame accurate across machines.
Learn more about how to Check the network health
Set up synthetic timecode in Director
-
Enable "Multi-machine syncing" in SETUP > Show settings
-
Set Timecode type to "Synthetic"
-
Choose the machine which should act as a the Timecode provider
A global synthetic timecode is provided as primary timecode.
Synthetic timecode can not be used
-
in combination with Real timecode
-
for the Timecode frame matching method
-
with a Control or Artist license
Verify timecode coming in
-
Open the Status panel by clicking on the Status bar on the bottom
-
Click on "Show all timecodes" on the top right

Real timecode
We receive an LTC signal through the video card, either:
-
via an LTC port (as analog audio on a breakout cable) OR
-
via an SDI input (embedded into the video signal)
In a production environment, this signal would usually come from audio, especially if events had to be triggered on audio playback cues. However, we can easily set up a test environment where we generate and handle our own timecode.
Supported methods
Setup Analog audio timecode
Setup for AJA video cards
AJA Kona 4 and 5
For the Kona 4 and Kona 5 cards, analog audio timecode can be received on the “LTC In” cable on the multifunction breakout cable.
The state of the Timecode can be seen on the AJA ControlPanel, by viewing the Timecode tab and selecting the source as “LTC Port”. if timecode is received, it is displayed in the control panel.*
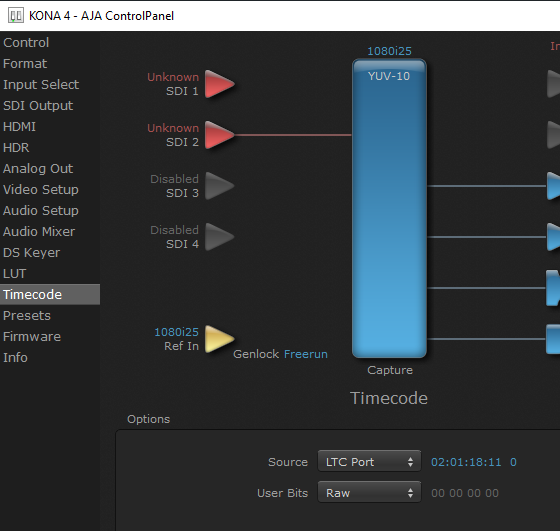
*Note the timecode display does not update in real-time, but refreshes every second.
AJA CORVID
For the CORVID video cards there is a joint Genlock/LTC In analog connector.
Pixotope does not genlock to Timecode and always requires a genlock reference as analog black/burst or tri-level, or to genlock from an SDI input reference signal.
We suggest for the Corvid cards it is easier to genlock to an SDI input and to reserve the “genlock/LTC In” input for LTC.
N.B. It is possible to construct an auxiliary LTC input cable that connects to header pins on the Corvid series of cards if you need to use both analog genlock and analog LTC concurrently.
Testing LTC Input
It is very simple to set up an LTC source. You need:
-
Windows computer with a headphone audio output
-
Source audio file
-
Program to playback the file
-
An audio cable from a 3.5mm plug to a BNC connector
We suggest you plug in your headphones to the audio output to verify the signal. Test first that you can hear Windows alert sounds. You may need to adjust the Windows audio mixer controls.
-
Create or download an audio LTC file
-
This should be in .wav format and at 44.1kHz. For ease of testing, we have supplied some working test files here: https://we.tl/t-0r4hmyGTVV
-
Alternatively, you can create your own file at this site: http://elteesee.pehrhovey.net/ltc/create
-
An LTC file has to be created in the same time base that your video is using - so for 25 or 50Hz video rates, choose a timecode base of 25; for 29.97 or 59.94Hz video rates, choose a timecode base of 29.97
-
-
Select a program to playback the file
-
Windows Media Player is sufficient. You could also use Audacity: https://www.audacityteam.org/download/
-
Play one of these LTC files back through the headphones - the sound should “warble” quite loudly - timecode has a very distinctive sound
-
-
Connect the audio cable
-
Connect the audio cable from the headphone output jack to the “LTC In” connector of your AJA card
-
-
Open the AJA ControlPanel
-
Select the Timecode tab and set the source to “LTC Port”
-
Ensure that the Capture block is showing the correct timebase, and change it if necessary
-
-
-
Play the file
-
Play the LTC file again and check that the timecode display is showing the correct value in the AJA ControlPanel
-
If the correct timecode can be shown in the AJA ControlPanel, Pixotope will be able to access the LTC values.
Windows Media Player can run the LTC .wav file by just right-clicking on the .wav file. If you want more control or to adjust or trim the signal, then we suggest using Audacity.
Troubleshooting LTC Audio
Run the LTC input:
-
If the timecode isn’t shown in Pixotope, check that the timecode is shown in the AJA ControlPanel
-
If it is not shown in the AJA ControlPanel, check that “LTC Port” is selected and that the sync rate of the Capture block matches the LTC file rate
-
If it still doesn’t work, check the audio output of the source computer on headphones. Is it warbling like timecode? Is it loud?
-
If it sounds incorrect, or you have no sound, check the Windows Audio Mixer options or try a different LTC file
-
If it doesn’t appear to playback in Audacity, check with Windows Media Player
Connecting Audio LTC to Multiple Pixotope Engines
The AJA Kona 4 and Kona 5 cards have an “LTC In” and an “LTC Out” cable, so that Audio LTC could be looped through one machine to the next in a “daisy-chained” configuration.
This is not the best way, however, because any break in that chain could stop the downstream machines from receiving the LTC signal.
A better approach is to distribute the LTC signal through an audio distribution amplifier (d/a), and provide a separate cable from the d/a to each of the “LTC In” ports of the AJA cards.
Set up real timecode in Director
-
Enable "Multi-machine syncing" in SETUP > Show settings
-
Set Timecode type to "Real"
-
Go to SETUP > Configure > Routing
-
Click on the + in the top-right corner of a machine and then select "Timecode"
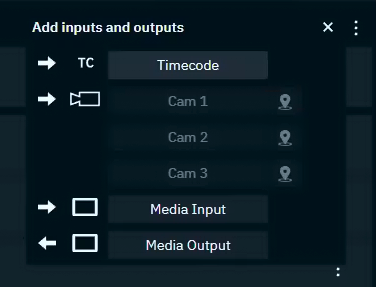
-
A Timecode item will be added underneath Lock
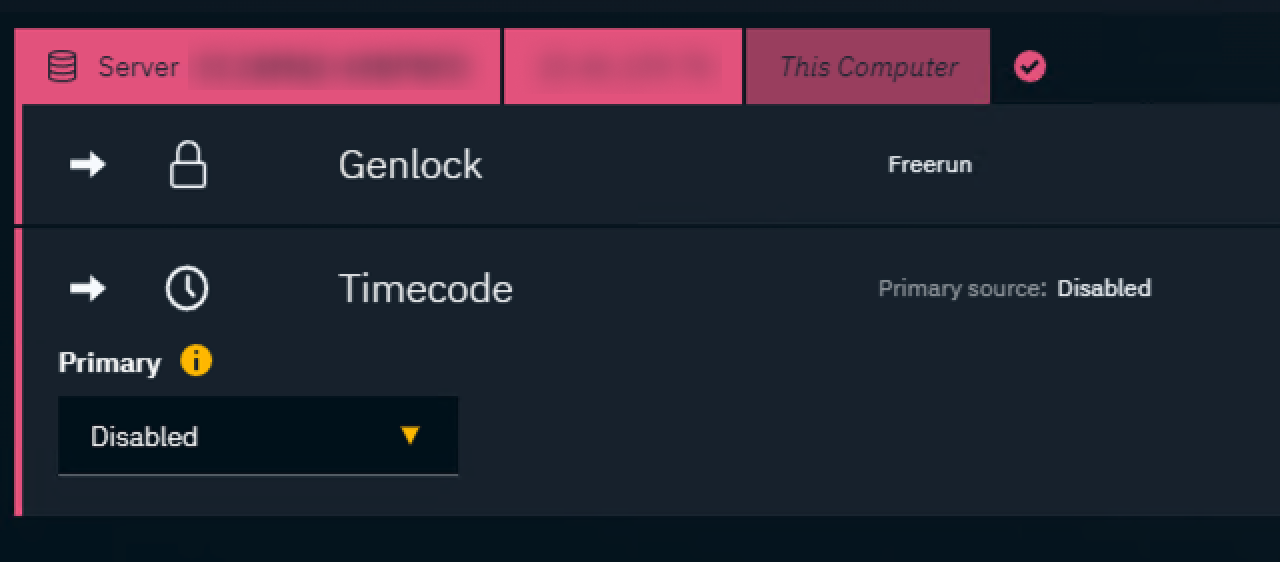
-
Launch a level as Timecode is reported from the running engine
-
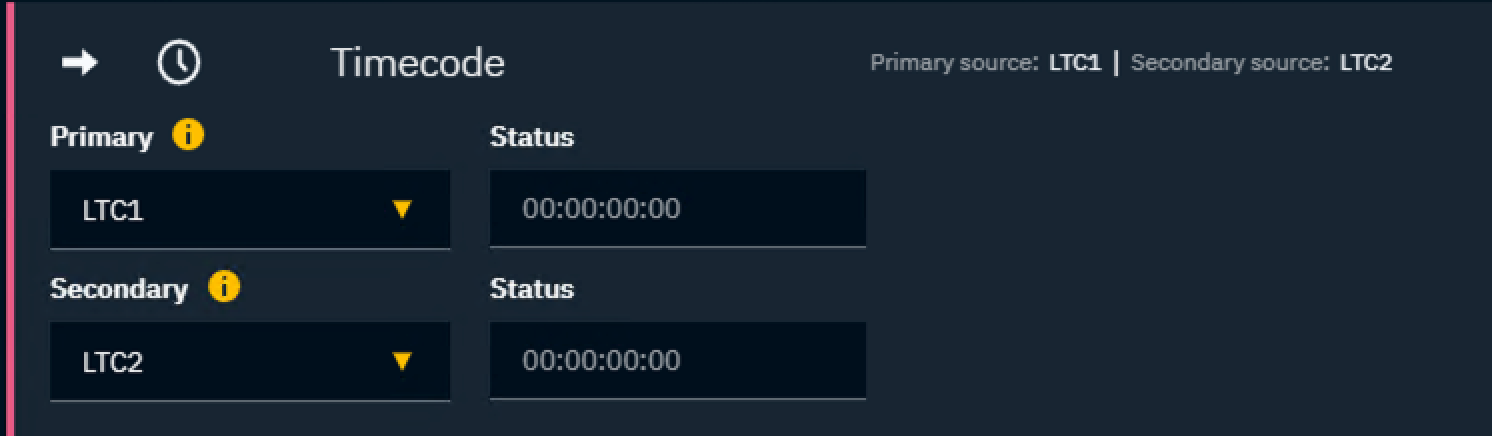
Set your Primary source and its Status field appears
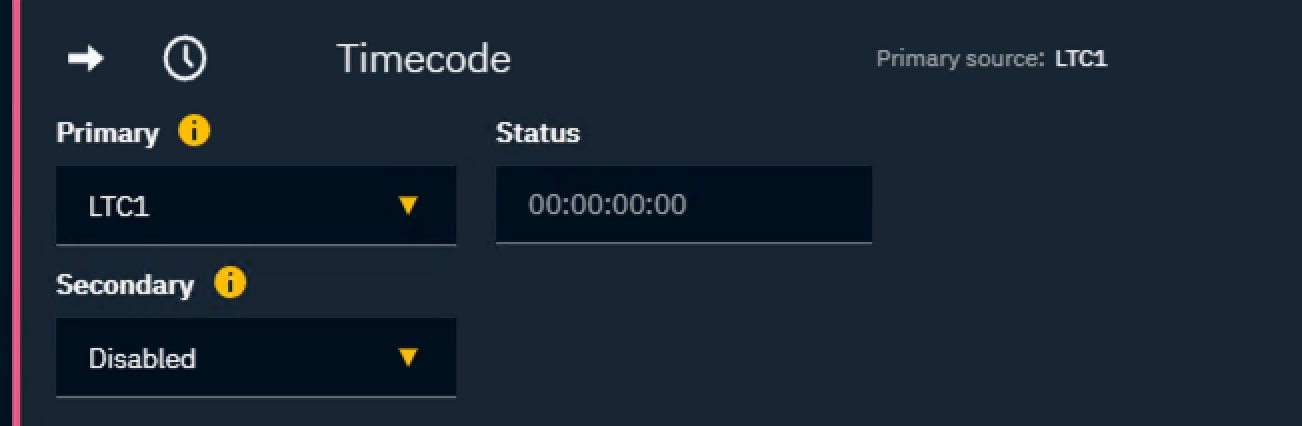
The Status field shows the timecode received by the engine
-
For AJA, you can also verify that timecode is received, by viewing the Timecode tab of the AJA ControlPanel
-
Embedded LTC: set source to "RP188 LTC" or "RP188 VITC"
-
LTC Port: set source to "LTC Port"
-
-
-
Optionally set your Secondary source and its Status field will appear
-
Repeat these steps for all machines which need a timecode source
Only one Embedded source is possible at any time.
A level needs to be running for Status to update as the timecode is reported by the engine.
Using timecode in Editor
-
Access the timecode using the "Get Video IO Timecode" blueprint node
-
the index refers to primary or secondary within Director
-
Outputting timecode via SDI
Timecode is embedded in all SDI outputs.