If you have created the project using the CG template, below steps are not needed.
Prerequisites
-
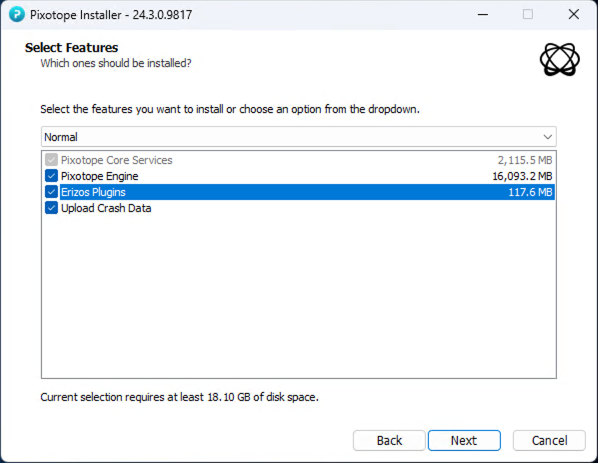
Make sure to select "Erizos Plugins" in the Pixotope installation
-
This installs the Erizos UE Plugins and auto-starts the Erizos Agent service
-
Learn more about how to Install Pixotope
Enable Plugins
-
Click on Edit > Plugins in the Pixotope Editor
-
Enable
-
Erizos Tools for Motion Design
-
PxTemplateBuilder
-
-
Restart the Editor
Update project settings
-
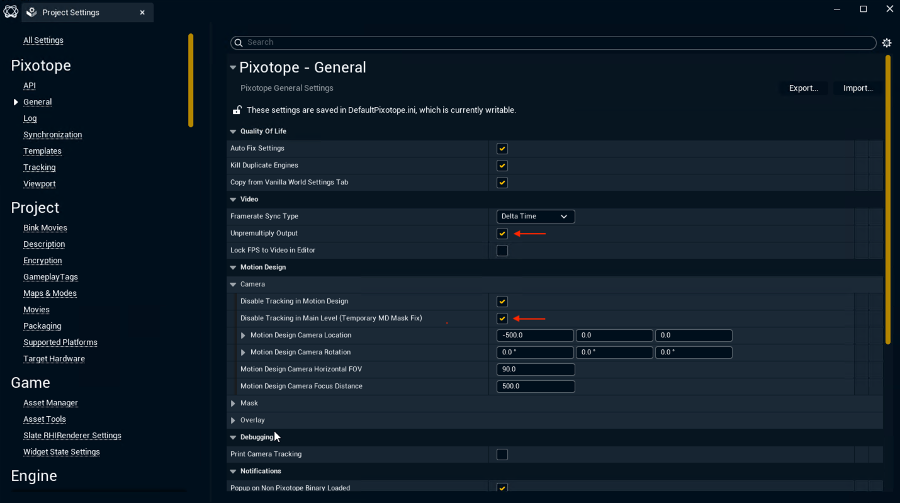
Click on Edit > Project Settings
-
Go to Pixotope > General > Motion Design
-
Enable the Disable Tracking in Main Level (Temporary MD Mask Fix) checkbox
-
-
Go to Pixotope > General > Video
-
Enable the Unpremultiply Output checkbox
-
Create CG level structure
Pixotope CG - Level Structure
-
Learn how to structure your Pixotope CG projects. This video level structure, naming conventions and configurations.
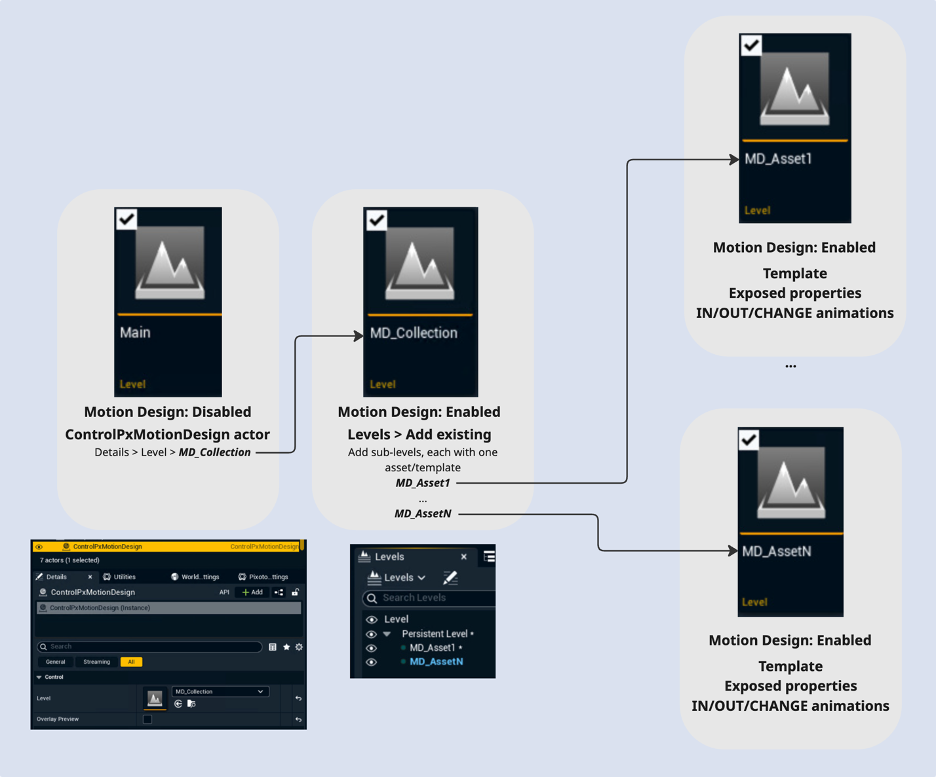
The CG workflow requires the following level structure
|
Name |
Motion Design enabled |
Notes |
|---|---|---|
|
|
No |
Includes Control PX Motion Design actor where the Used when importing templates into Erizos Studio. |
|
|
Yes |
Persistent level all Motion Design templates/levels will be streamed into. |
|
|
Yes |
Streamed into |
Create Main level
This is the level that
-
will be used to import all Motion Design templates/levels containing templates through the Erizos plugin from using Erizos Studio
-
will be played from/which Erizos Studio will launch Live
-
Create and open a new empty level
-
We call it Main, but it can be named anything
-
-
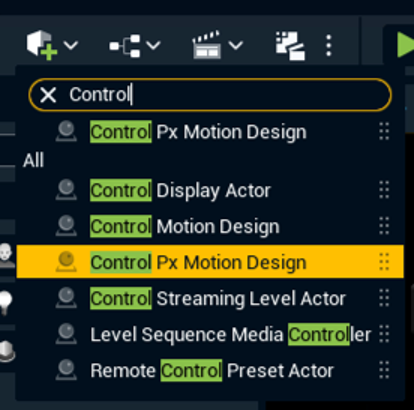
Add a Control Px Motion Design actor to the scene
-
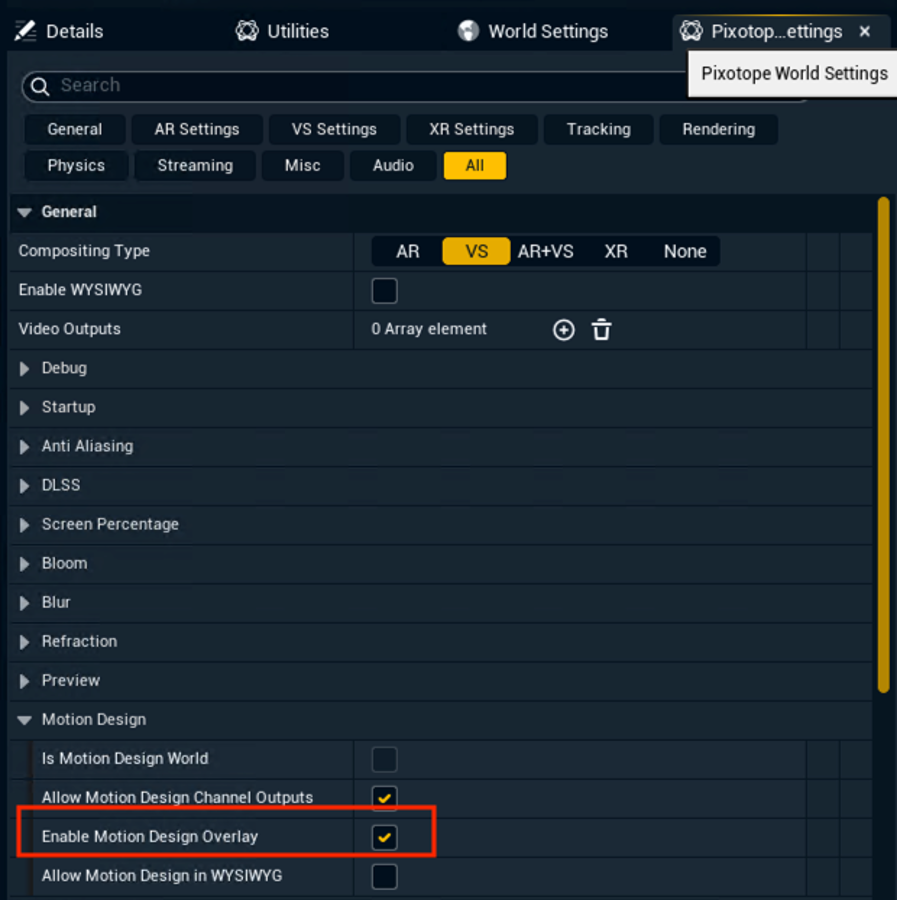
Go to Pixotope World Settings > Motion Design and make sure the Enable Motion Design Overlay checkbox is checked
-
Select the Post Process Handler and open the Details panel
-
Enable Exposure Compensation on the Post Process Handler and set it to
0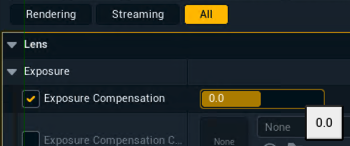
-
Save this level
Do NOT enable Motion Design on this level!
Make sure that the main level is never turned into a Motion Design level. A level for which Motion Design was enabled once and saved will unfortunately not work as a Main level even when disabling Motion Design again.
Create MD_Collection level
This is the level, all Motion Design templates/levels will be streamed into
-
Create and open a new empty level called MD_Collection
-
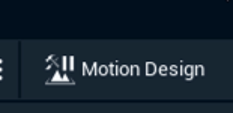
Click on the Motion Design button on the top right to turn that level into a Motion Design level
-
The icon will now show up with a Pause symbol
-
-
Select the Post Process Handler and open the Details panel
-
Enable Exposure Compensation on the Post Process Handler and set it to
0
When outputting both Fill and Key signals, set the Compositing mode to EXTERNAL in the Pixotope World Settings.
Create MD_YourTemplate level
This is the level that contains a template. Create one of these Motion Design levels per asset that you will turn into templates, expose properties from, etc.
-
Create and open a new empty level called MD_[templateName]
-
Click on the Motion Design button on the top right to turn that level into a Motion Design level
-
The icon will now show up with a Pause symbol
-
-
Select the Post Process Handler if available and open the Details panel
-
Enable Exposure Compensation on the Post Process Handler and set it to
0
Connect your Main level and your MD_Collection level
-
Open your Main level
-
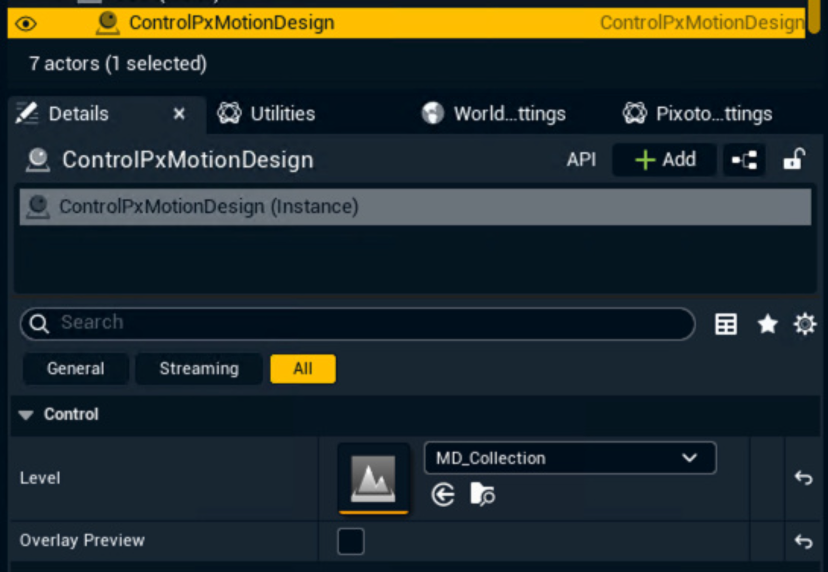
In the normal Outliner, select the ControlPxMotionDesign actor
-
Go to the Details panel
-
In Control > Level, select the MD_Collection level
Stream MD_YourTemplate levels into MD_Collection
-
Open the MD_Collection level
-
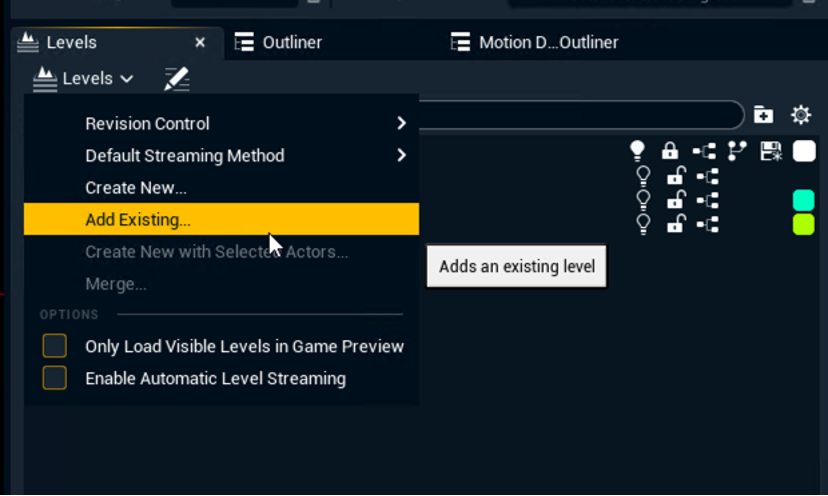
In the Levels tab, open the Levels menu
-
Click on "Add Existing..."
-
Select your created template level (e.g., MD_YourAsset)
-
Save changes
Next step
Continue to Create a template