Creating a template consists of the following steps:
-
Add your motion design assets (background, text elements, etc.)
-
Group and mark them as Template
-
Expose the parameters which should be editable inside the template form
-
Set up In/Out/Change sequences
-
Add a layer tag
-
Stream into MD_Collection level
-
Sync changes to all machines
Set up workspace
Pixotope CG - Tools and Features
-
A brief introduction to the Material Designer, Operator Stack, Viewport and the Motion Design Outliner.
-
Make sure you have the following windows enabled (from Window title bar menu):
-
Template Builder – dock it at the bottom next to the Content Browser tab
-
Remote Control – dock it at the bottom next to the Content Browser tab
-
Note: You will not need to interact with it
-
-
Motion Design Outliner – dock it on the top right next to the Outliner tab
-
Levels – dock it on the top right next to the Outliner tab
-
When using Cloners, make sure that Generate Mesh Distance Fields in Project Settings > Engine - Rendering is enabled. Note that this has a performance cost.
Add motion design assets
Pixotope CG - Building Motion Graphics
-
Follow along as we build a simple lower third graphic using the tools and features available with Pixotope CG.
Add your motion design assets and structure them
-
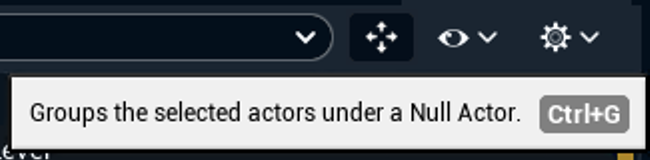
Go to the Motion Design Outliner and select all actors
-
Group them by clicking the cross icon next to the search bar
-
The actors are grouped under a Null Actor
-
-
Give it a meaningful name
-
this will be the template name (e.g., L3_Double)
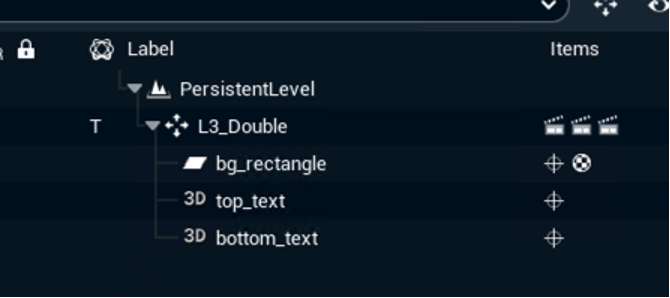
A simple double-line lower third
-
Mark as template
Pixotope CG - Template Builder
-
This video shows how to add controls and create templates ready for playout in Erizos Studio.
-
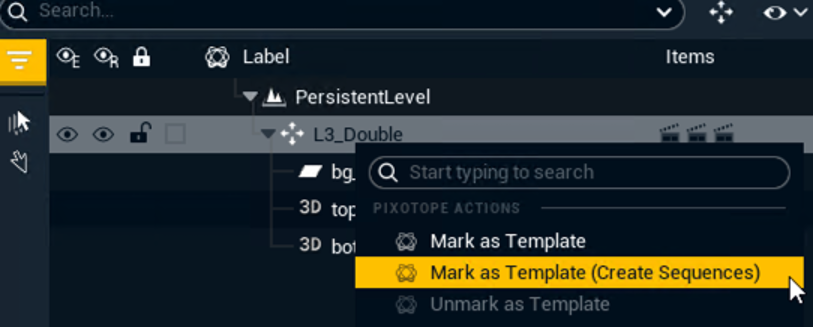
Go to the Motion Design Outliner and right-click the newly created Null Actor
-
Select "Mark as template (create Sequences)"
-
This option creates empty In/Out/Change sequences and links them to this template
-
-
Go to the Template Builder tab and check that there is now a template with the name of the Null Actor and linked In/Out/Change Lifecycle animations
You can also edit the template name directly from the Template Builder by
-
double clicking it
-
OR clicking the edit icon next to the name
Expose parameters
-
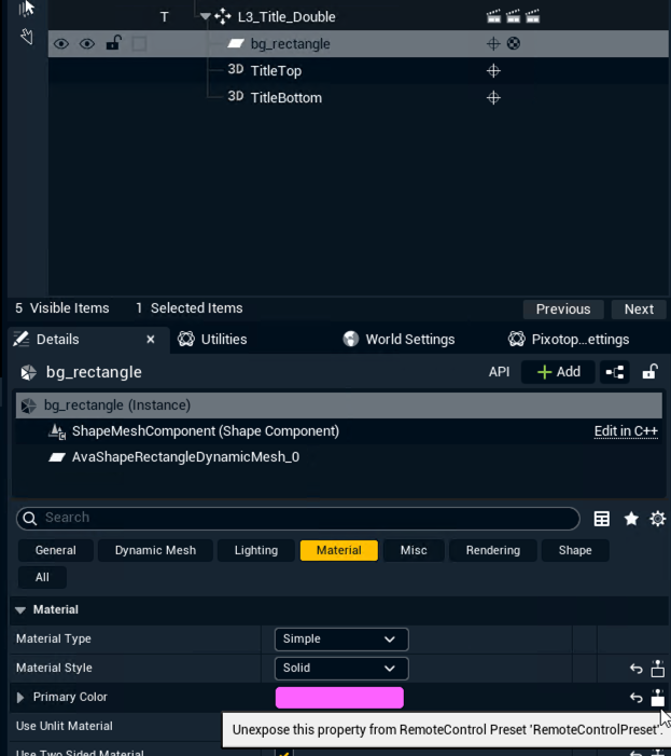
Select the parameter you would like to control from the template form
-
For example: bg_rectangle actor > Details > Material > Primary color
-
-
Click on the Expose button
-
Repeat this process for other properties you want exposed
-
Open the Template Builder tab and check that, under the L3_Double template, all exposed parameters are now listed
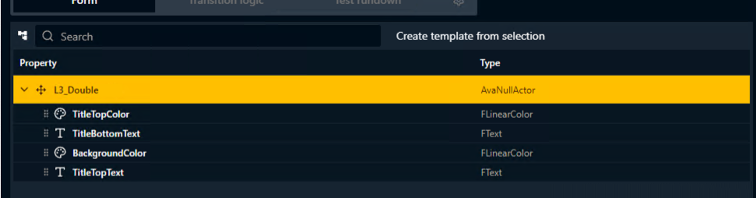
-
Rename the parameter if needed
-
This name will be used as the label name inside the Erizos Studio form
-
Combine parameters
If you want to combine multiple exposed parameters to be controlled by a single form element inside Erizos Studio, give them the exact same parameter name.
The parameters have to be the same type!
Set up In/Out/Change sequences
If you used the Mark as template (Create sequences) option above, the In/Out/Change sequences were already created, properly named and linked to the life cycle animations (basic transition logic) for IN, OUT and CHANGE.
Set up sequences manually
Set up sequences manually
-
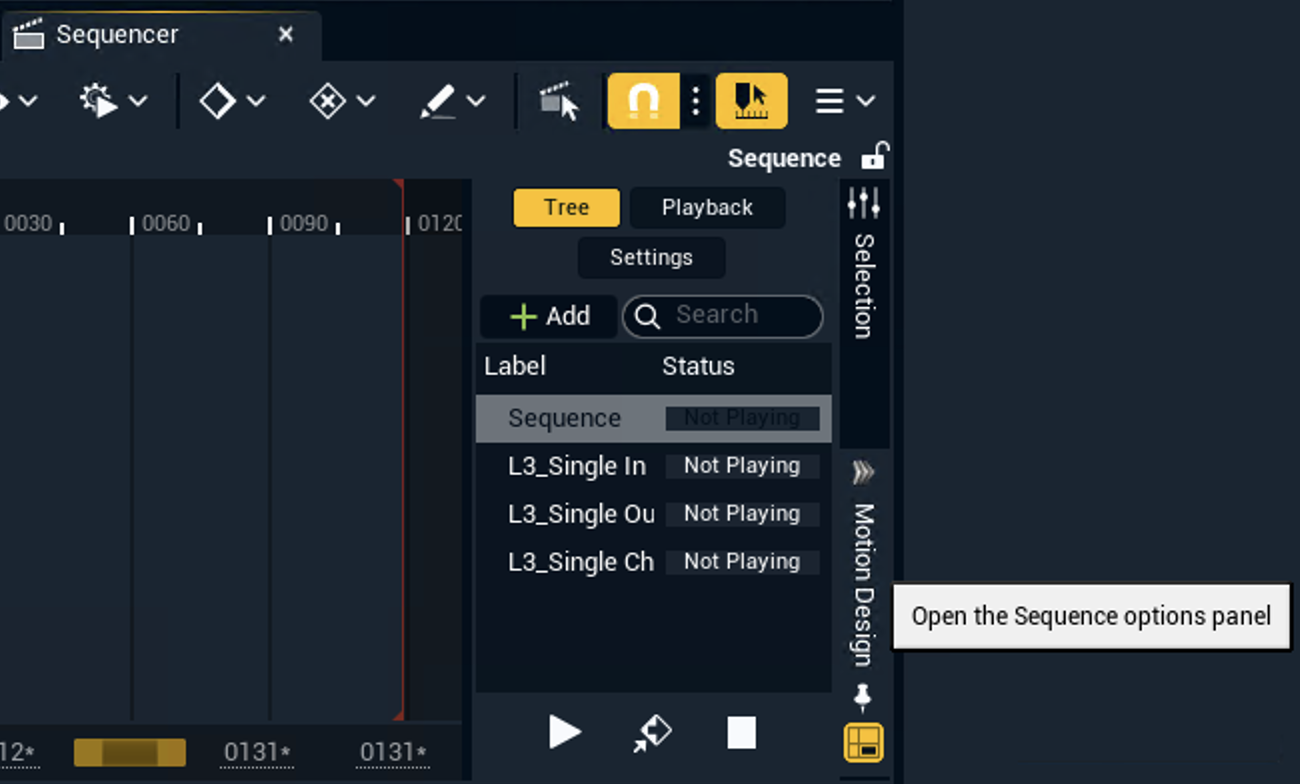
Open the Sequence Options panel on the right side of the Sequencer tab
-
Click the Add button to create a new sequence
-
Rename the new sequence to
[TemplateName]_[In|Out|Change]-
for example L3_Double_In
-
-
We keep the original Sequence untouched
-
This is the sequence without transition animations where all design work is done
-
-
Go to the Template Builder tab
-
Select the template this sequence should be linked to
-
Click on the plus on the right of the lifecycle animation to which you want a sequence to link to
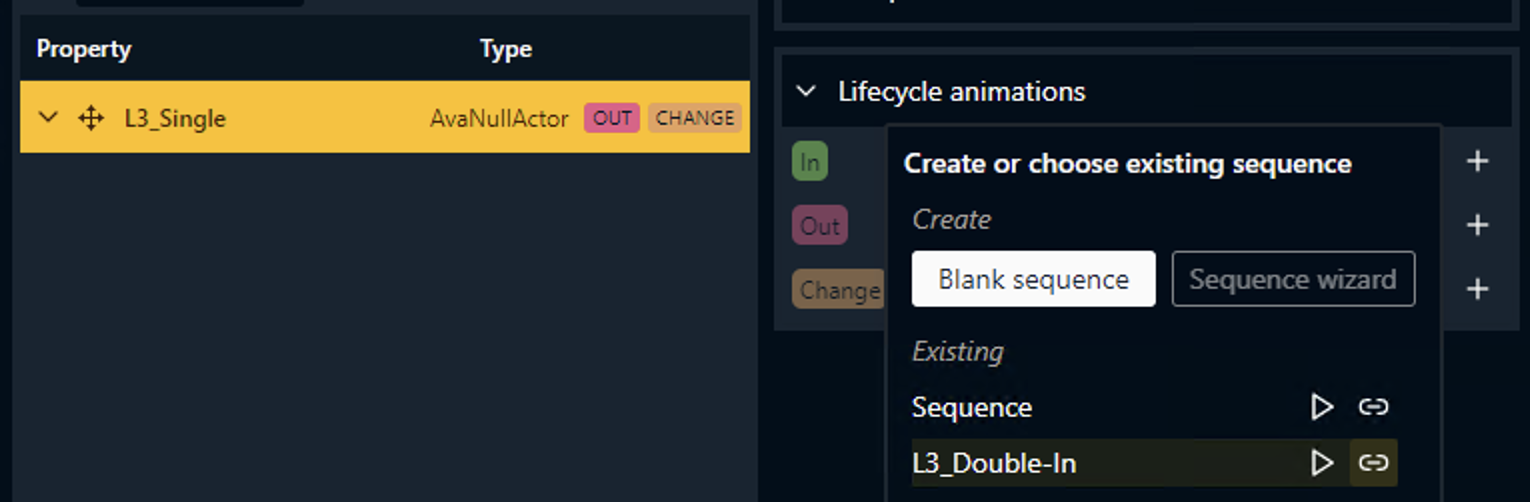
-
Click on the link icon of the sequence you want to link to
-
Repeat this for all other life cycle animations
General sequence requirements
Off-camera positioning
Frame 0 of the IN animation and the last frame of the OUT animation must place the asset off-camera. This is to prevent visibility issues when launching the level.
Preview marks
Preview marks define what frame you get a snapshot from if you are getting your Local Preview inside Erizos Studio Remote Preview.
Learn more about preview and playout inside Erizos Studio
If no Preview mark is added, the last frame of the IN/CHANGE animations will be used.
Add preview mark
-
In the Sequencer: Position the playhead on the desired frame
-
Right-click the playhead
-
Add mark (creates mark labeled "A" by default)
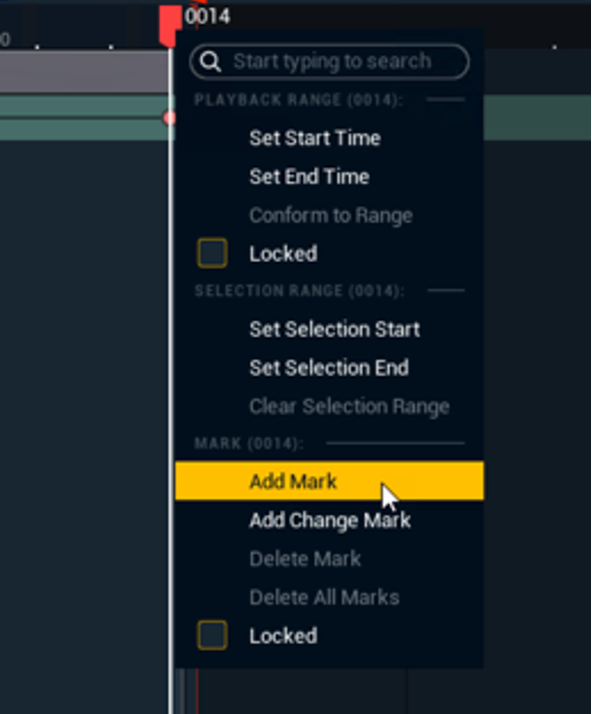
-
-
Right-click the new mark
-
Change the Label name to "Preview"
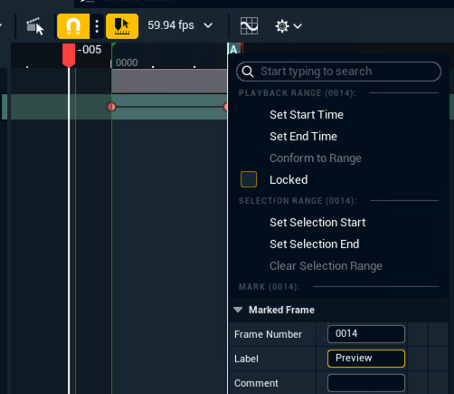
-
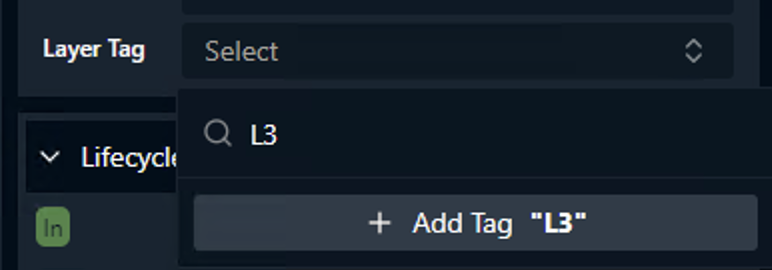
Add layer tag
Templates can be grouped into layers. When a new template is taken IN while another template in the same layer is already IN, the first template's OUT animation triggers before the new template's IN animation begins.
-
Open the Template Builder tab
-
Select a template
-
Expand the Template Details
-
Under Layer Tag click "Select"
-
Start typing to add a new tag
-
OR select an existing tag
-

Stream into MD_Collection level
-
Open MD_Collection
-
Stream your newly created template level into it
Learn more about the how to Create the CG level structure
Sync the changes to all machines
Make sure both engines are in sync.
From Editor
-
All newly created files or previously existing files that have been modified are marked with a yellow arrow on the top-left corner
-
Right-click on one of them and go to the Pixotope Asset Hub menu
-
Click "Push all changes"
Learn more about how to Use source control in Engine - Pixotope Asset Hub plugin
From Director
-
Go to Director > SETUP > Show > Synced Storage
-
Click the "Push Changes" button
-
On the other machine, on the same panel, double-check that the machines are in sync and the latest changes have been pulled
Learn more about how to Sync projects and other files in Synced storage
Next step
Continue to Import templates into Erizos Studio