Install different versions of Pixotope in parallel
It is possible to install different versions of Pixotope in parallel.
Note: Remember to create copies of your projects if the new Pixotope version ships with an upgrade of the Unreal Engine version.
Hardware and software setup
Check out the hardware and software requirements before starting the installation.
Recommendations
-
Have the latest Windows updates installed
-
Pause updates while you are in production (you can pause updates for a specified period of time in the Windows Update settings)
-
-
Disable Smart App Control of Windows 11
-
Do a clean-install of the Nvidia display drivers without Geforce Experience - Nvidia driver installation
-
Disable any third-party program that adds an overlay
-
In the Nvidia App, Find Settings →
Nvidia Overlayand disable it, as well asGame filters and Photo mode.
-
-
Do not install any tweaking or overclocking programs
-
For performance-critical setups: Make sure your hardware has sufficient cooling, since CPUs/GPUs start thermal throttling around 85-90 degrees, which will cause stuttering and hitching
-
If the computer has an NPU (Neural Processing Unit) and the engine crashes, find the NPU in the Windows Device Manager and disable it.
Network setup
We recommend using static IP addresses in a production environment. You can, however, also use DHCP.
An internet connection is required for the initial activation of the license and for the Online license mode.
Learn more about license modes
Ports required
|
Port |
Protocol |
Usage |
|---|---|---|
|
80 |
TCP |
HTTP - for CRL (Certificate Revocation List) validation |
|
443 |
TCP |
SSL - for license activation on https://prod.pixotope.cloud/ |
|
8567 |
UDP |
Tracking Server to Editor |
|
16201-16225 |
TCP |
|
|
16226 |
TCP |
WebRTC output (WHEP server) |
|
38860 |
TCP |
When using the Ncam SDK tracking |
Port conflicts
In the event of a port conflict, we recommend stopping any processes that are blocking the ports used by Pixotope.
To check which processes are using the port:
-
Open Resource Monitor > Network tab > Listening Ports
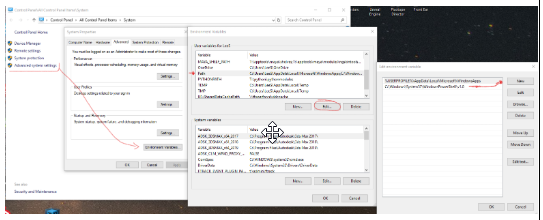
For Active Directory setups
Add the following system path to the environment variable PATH:
C:\Windows\System32\WindowsPowerShell\v1.0
Firewall configuration
In addition to the required ports, the following domains must be accessible through your firewall:
|
Domain |
|---|
|
*.cloud.trackmen.net |
|
*.pixotope.cloud |
|
*.pixotope.com |
|
*.production-pixotope-cloud.s3-accelerate.amazonaws.com |
|
*.zendesk.com |
If you have any problems running the Data hub or accessing other Pixotope workstations in the network, make sure you have:
-
disabled the Windows firewall or have made the above domains accessible
-
Set the network profile to private
-
Shut down any system optimizers or any software that manipulates the data flow
-
Check the installation path for non-ascii characters (see the Language support section below)
User permissions
Pixotope requires administrator rights for installation only. After installation, standard (non-admin) users can run Pixotope.
Exceptions requiring administrator rights at runtime
|
Feature |
Why |
|---|---|
|
NMOS controller (Matrox) |
Required by the Matrox service |
If your users do not need these features, no admin rights are required after installation.
Folder permissions
Standard users need read and write access to the following locations:
|
Path |
Purpose |
|---|---|
|
|
Application files, local storage, show files, etc. |
|
|
Shared application data |
|
|
User-specific settings and cache |
|
|
The Engine shader cache will be written to a subfolder. |
Antivirus exclusions
Some antivirus software may flag or block Pixotope executables. Add the following exclusions to your antivirus or endpoint protection configuration:
|
Exclusion |
Reason |
|---|---|
|
|
Core Pixotope service — may be blocked as an unrecognized process |
|
|
Exclude the entire installation folder to prevent interference with Pixotope services |
Language support
Pixotope supports the usage and display of characters for most languages out of the box.
For full support of Chinese, Japanese, or Korean characters (for display or in file/installation paths), the following Windows setting needs to be enabled:
-
Go to Windows Settings > Time & Language > Language > Related settings: Administrative language settings > Change system locale...
-
Enable “Beta: Use Unicode UTF-8 for worldwide language support.”
Download software
-
Log in to Pixotope Cloud → Pixotope Cloud
-
Go to Downloads and choose a product section
-
Choose a version
|
Name |
Full installer |
No-Engine installer |
|---|---|---|
|
Product section |
Pixotope |
Apps |
|
Size |
~5GB |
~800MB |
|
Purpose |
For Render or Artist machines |
For Control or Server machines or machines running Pixotope Reveal |
Run the installer
Unzip the Pixotope installer zip file and run the Pixotope installer located in the root folder.
Windows User Account Control may ask you for permission to make changes to your device.

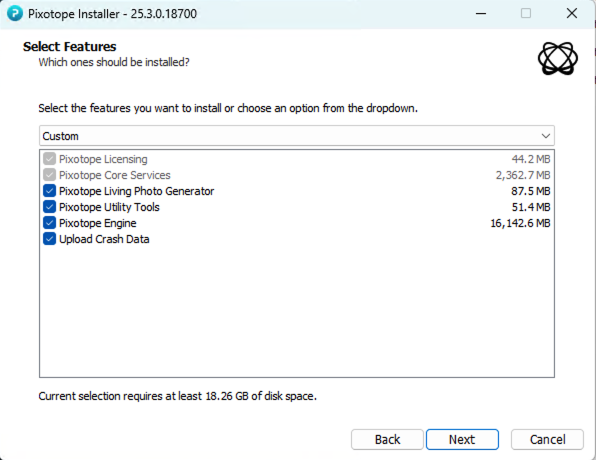
Select features
Automatically upload crash data
By agreeing to automatically Upload crash data, you help us improve Pixotope. If a Pixotope service crashes and the machine is online, it would send crash data to us. Be aware that this might contain information such as the computer name and IP address.
To get in touch with Customer support, please report issues the usual way.
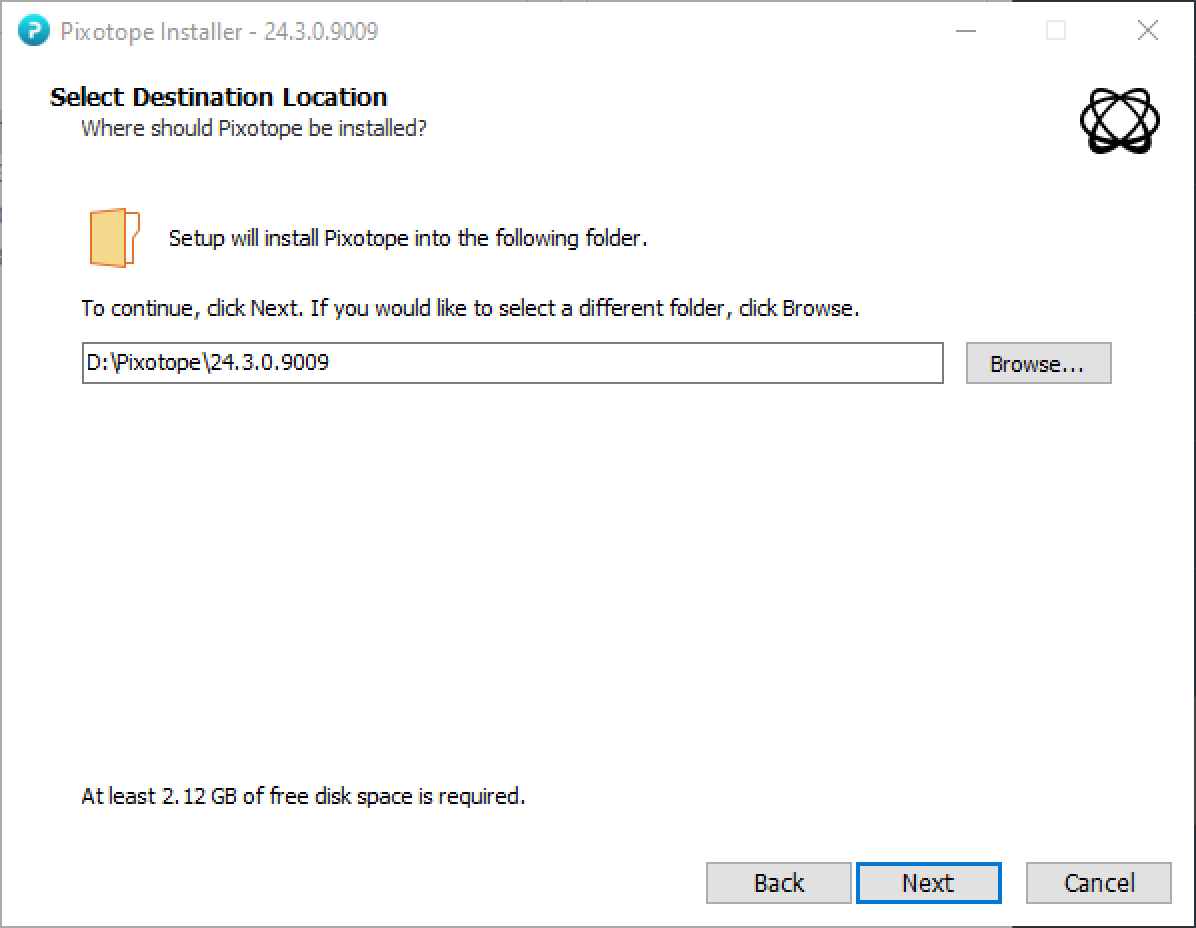
Select an installation folder
By default, Pixotope Suite will be installed in the folder:
C:\Pixotope\[Version number].[Build number]\
To install Pixotope on a different hard drive, keeping the same file path structure shown above, just change C:\ to, for example, D:\. This will install it on:
D:\Pixotope\[Version number].[Build number]\
Do not install into the “Program Files” or “Program Files (x86)” folder.
For file paths with non-ascii characters, see the Language support section above
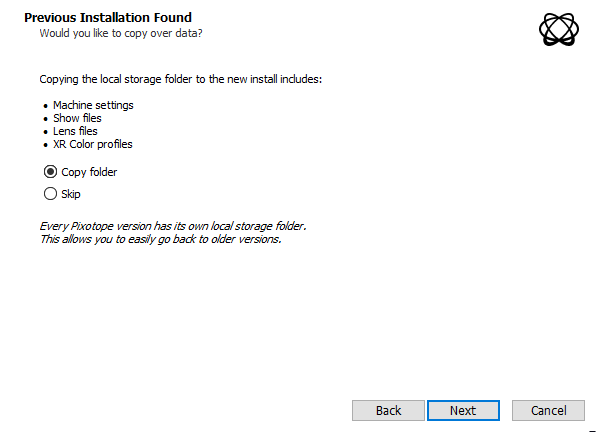
Migrate data
In case a previous version was found in the same installation folder, the installer offers to copy data across, including
-
Machine settings
-
Show files
-
Lens files
-
XR Color profiles
-
Synced storage history (for Server and Stand-alone)
The installer uses a non-destructive merge where your modified files are never overwritten.
This step can also be done manually by copying the following from the previous install into the new installation
-
Local storage
-
Services\AssetHub\runtime
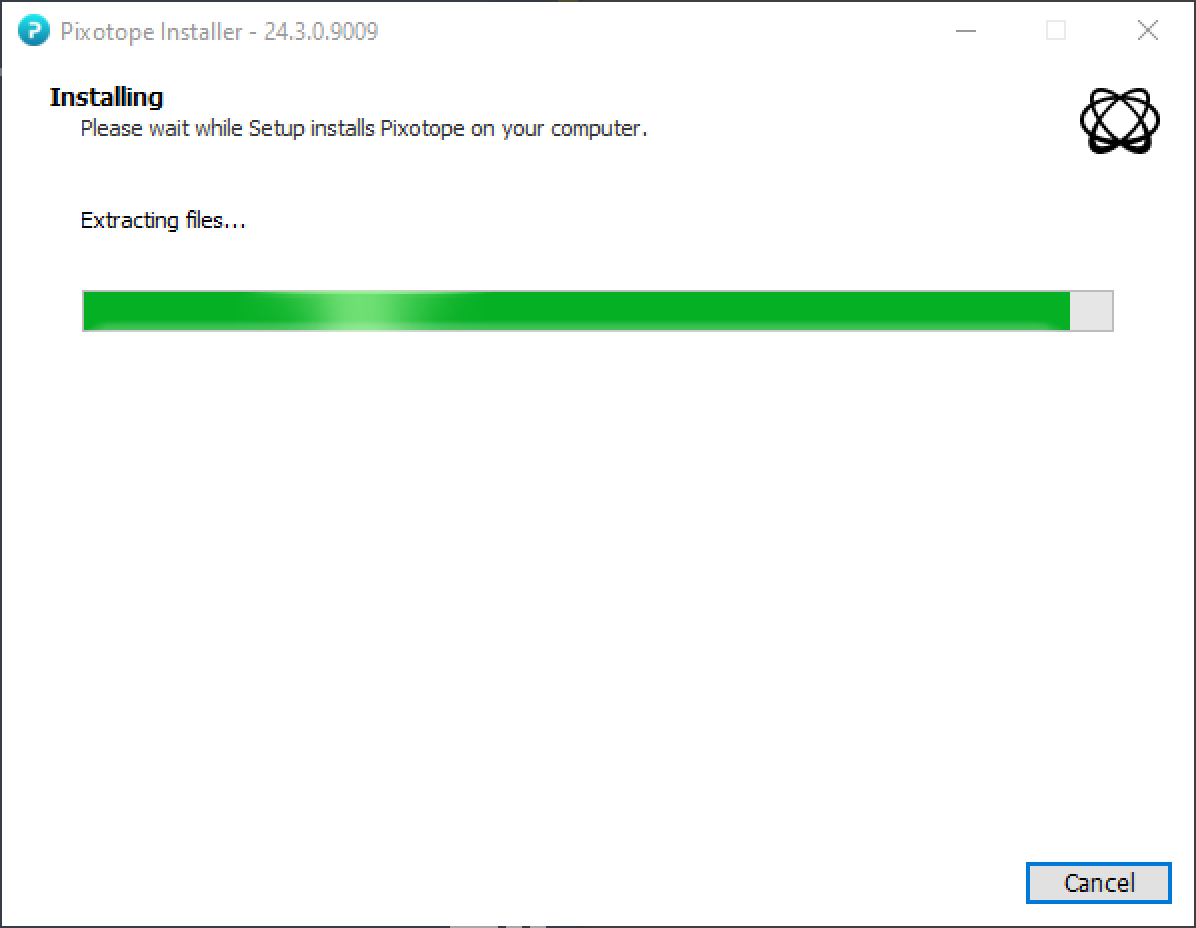
Start the installation
This will take several minutes. Please ensure that you do not interrupt the process.
Network install
Needs an existing Pixotope network with Pixotope Graphics 25.3 or later!
Network install allows you to install and launch a new Pixotope Graphics version on all connected machines.
-
Download the new installer
-
Open the PX - Network install control panel from the control panel library
Learn more about the Control panel library
-
Right-click the downloaded installer
zipfile and copy its file path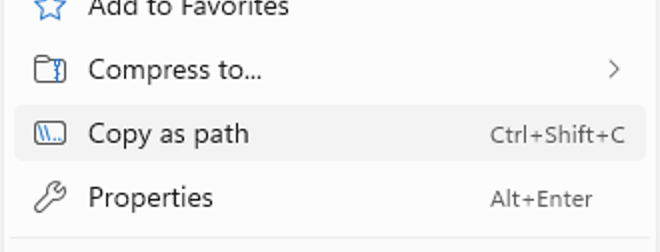
-
Paste the file path into the Installer path field in the control panel
-
Make sure that Pixotope Graphics is running on all connected machines
-
Click "Start network install”
-
The process is started
-
In case of an error it would show
success:falsein the Response field
-
The network install process executes the following steps:
-
The file is unzipped to Synced config
-
The folder is distributed via the Asset Hub
-
On all machines
-
The new version is installed
-
The current version is closed
-
The new version is launched
-
Silent and automated install
The Pixotope installer supports command-line parameters for silent and automated installations.
Basic silent installation
To install Pixotope without user interaction, run the installer with the /SILENT or /VERYSILENT parameter:
Pixotope_Installer.exe /VERYSILENT
|
Parameter |
Behavior |
|---|---|
|
|
The installer wizard’s progress bar is shown |
|
|
The installer runs completely hidden; no windows are displayed |
Both modes install Pixotope with the default settings
-
all components
-
default installation path
Save and reuse an installation configuration
To customize which components are installed, installation path, and other options, without editing the configuration file manually, you can save your choices from one installation and reuse them on other machines.
Step 1 - Save the configuration
-
Run the installer on one machine with the
/SAVEINFparameter:
Pixotope_Installer.exe /SAVEINF="C:\pixotope_config.inf"
-
This opens the installer wizard as usual. Walk through the steps and select your preferred options (components, installation folder, etc.). When the installation finishes, your choices are saved to the specified
.inffile
Step 2 - Review the configuration file
The generated .inf file looks something like this:
[Setup]
Lang=english
Dir=C:\Pixotope\26.1.0.21900
Group=Pixotope 26.1.0.21900
NoIcons=0
SetupType=custom
Components=licensing,core,livingphoto,utilities,engine,crashdata
Tasks=
|
Field |
Description |
|---|---|
|
|
Installer language |
|
|
Installation directory |
|
|
Start menu group name |
|
|
Whether to skip creating Start menu icons ( |
|
|
|
|
|
Comma-separated list of components to install |
|
|
Optional tasks (e.g., desktop shortcuts) |
You can edit this file to change the configuration. For example, to skip the Engine component, remove engine from the Components line. To skip automatic crash data upload, remove crashdata.
Step 3 - Reuse the configuration
-
Copy the
.inffile to the target machines and run the installer with/LOADINFand/VERYSILENT:
Pixotope_Installer.exe /VERYSILENT /LOADINF="C:\pixotope_config.inf"
-
This installs Pixotope silently using the saved settings — same components, same paths, same options.
Use quotes around the file path if it contains spaces, e.g.
/LOADINF="C:\My Configs\pixotope_config.inf"
Additional command-line parameters
The Pixotope installer is built with InnoSetup and supports its standard command-line parameters:
|
Parameter |
Description |
|---|---|
|
|
Override the installation directory |
|
|
Prevent the system from restarting after installation |
|
|
Suppress all message boxes (use together with |
|
|
Create a log file in the user's TEMP directory with details of the installation process |
|
|
Prevent cancellation during the installation process |
For a full list, check out → InnoSetup documentation on command-line parameters
For environments where Pixotope is already running, consider combining this with the Network install above.
Next step
Continue to Starting Director