For XR productions where the set should be extended beyond the XR walls (LED screens) the following setup is needed:
-
One or more render machines for the XR wall
-
One render machine for the virtual set extension
-
Translucent/XR holdouts are used to make the transition to the XR wall seamless
-
The virtual set extension can be thought of as an AR scene with a hole punched through to the raw camera video in the area occupied by the physical LED screens.
Set up a combined level
The settings and the content displayed on the XR machines compared to the one on the set extension machine are only slightly different.
|
|
XR machines |
Set extension machine |
|---|---|---|
|
Compositing type |
XR |
AR |
|
Renders XR walls |
Yes |
No |
|
Renders holdouts |
No |
Yes |
|
Other 3D content |
Same for all machines |
|
This can be achieved by adding the AR/XR machines to their respective render groups.
Learn more about Render groups - AR, VS, AR+VS, XR and how to Configure machines
Set up level streaming for more separation
To easily update or switch out the 3D Graphics independent of your XR setup, it is recommended to set the 3D Graphics up in a separate level and stream it into the combined level for XR and Set extension.
-
Combined level for XR and Set extension
-
Streamed in 3D Graphics level
-
Set up the combined level for XR and Set extension
-
In Director
-
add all XR machines to the XR render group
-
and the Set extension machine to the AR render group
-
Learn more about Render groups - AR, VS, AR+VS, XR and how to Configure machines
-
-
Create an empty level
-
with only the Pixotope essential actors (TrackedCamera, CameraRoot, MaterialHandler, PostProcessHandler). If you do not see these actors in your level, enable "Auto-spawn essential actors" in Pixotope World settings > Startup and click Play in Editor to spawn them
-
-
Create a Digital Twin to match your LED volume
-
If you are using Pixotope Tracking and want to use the Digital Twin functionality to automatically generate and map your XR actors, go to Automatic XR alignment
-
If you are using a different tracking system, you will need to create and align the twin manually, go to Create a Manual Twin
-
-
Create holdouts from the XR walls
-
Select the Digital Twin actor and click "Create XR holdout" button in the details panel
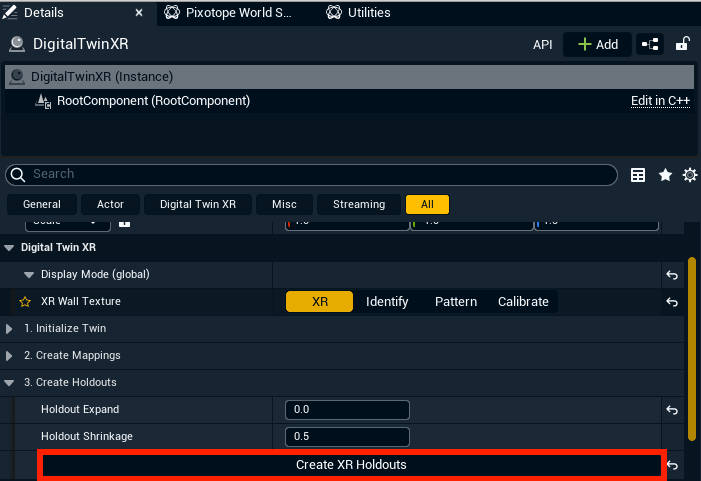
-
Set up 3D Graphics level
-
Set up your graphics level(s) to be level streamed into your XR level
-
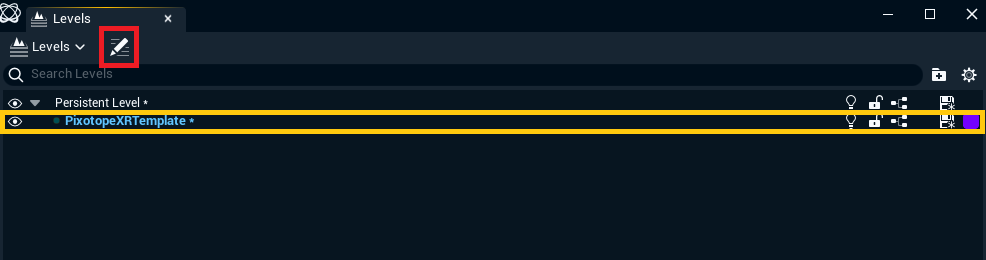
In Pixotope Editor with the XR level open, go to Windows > Levels, and add your graphics level(s)
-
Right click the added level(s) and change the streaming method to "always loaded" if you want them to always be visible and not manually loaded from blueprints. Otherwise set the streaming method to “blueprint”.
-
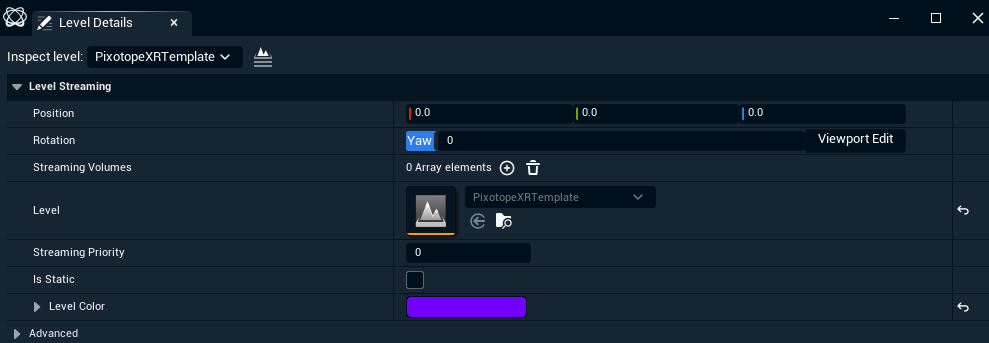
You can adjust the scale, position and rotation of the streamed level by clicking the “Summon level details” button in the “levels” window. We recommend adjusting the position and rotation of the streamed level rather than adjusting the camera root, since this will make it easier to add new graphics levels later.
-
-
With your graphics level open, disable "Auto-spawn essential actors" in your Pixotope World settings > Startup
-
Delete the PostProcessHandler, MaterialHandler, TrackedCamera, XROutsideFrustumPoint and CameraRoot from your graphics level if they are present
Syncing
-
In Pixotope Director, go to SETUP > Show > Show settings and set Multi-machine syncing to "Timecode"
-
Go to SETUP >Routing and set the timecode source on all machines to match where you should be receiving timecode on your machines
-
Verify that you have timecode coming in on all machines. If the status of the timecode is 00:00:00 then the most common causes are:
-
The wrong source is selected
-
The timecode generator is misconfigured (e.g. a 30 fps timecode will not work with 50 fps video)
-
There is hardware between the timecode generator and the machine that is invalidating the signal (e.g. broken or wrong type of DA (needs to be analog since TC is an analog signal), if you are using t-pieces the signal might become too weak, or there could be something else introducing too much noise into the signal)
-
-
Set delays. Learn more about this in Configure and calibrate multi-machine syncing
-
Make sure all materials and particle effects are using deterministic seeds and no per-machine randomness. For particle effects:
-
Go to your emitter properties and enable "Determinism"
-
Make sure you are using the same random seed number across all your machines
Learn more about how to Set up timecode synchronized levels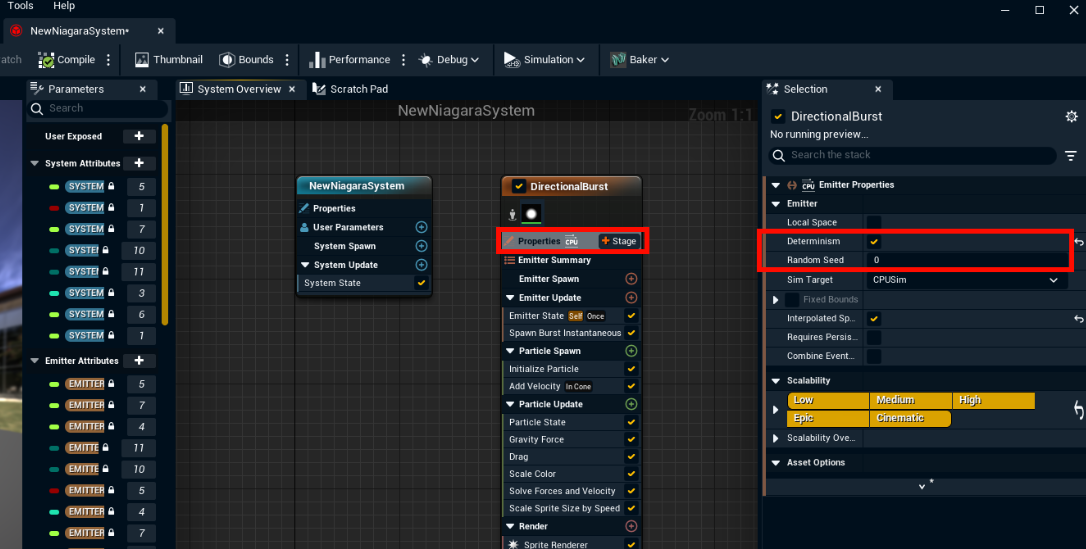
-
To use randomly generated numbers in blueprints, you can create a random stream variable and manually set the seed of all randomness derived from that variable, so that the "randomness" is in sync between all of your engines.
Read more about how random streams work → https://docs.unrealengine.com/en-US/random-streams-in-unreal-engine/
Learn more about how to Configure and calibrate multi-machine syncing
Color Matching
-
Now you should perform color matching, to match the colors between your LED volume and your set extension
Learn more about how to Calibrate color matching