Getting started with Pixotope
Academy Tutorial - Getting Started
Learn how to launch a project in Pixotope and configure a basic camera & routing for your Virtual Production.
Learn how to do a simple virtual studio production using:
1 tracked camera
1 computer
1 Pixotope Live license
Learn more about Plan your virtual production.
Check out the following links to get an overview of Pixotope, its concepts and components.
Schematic
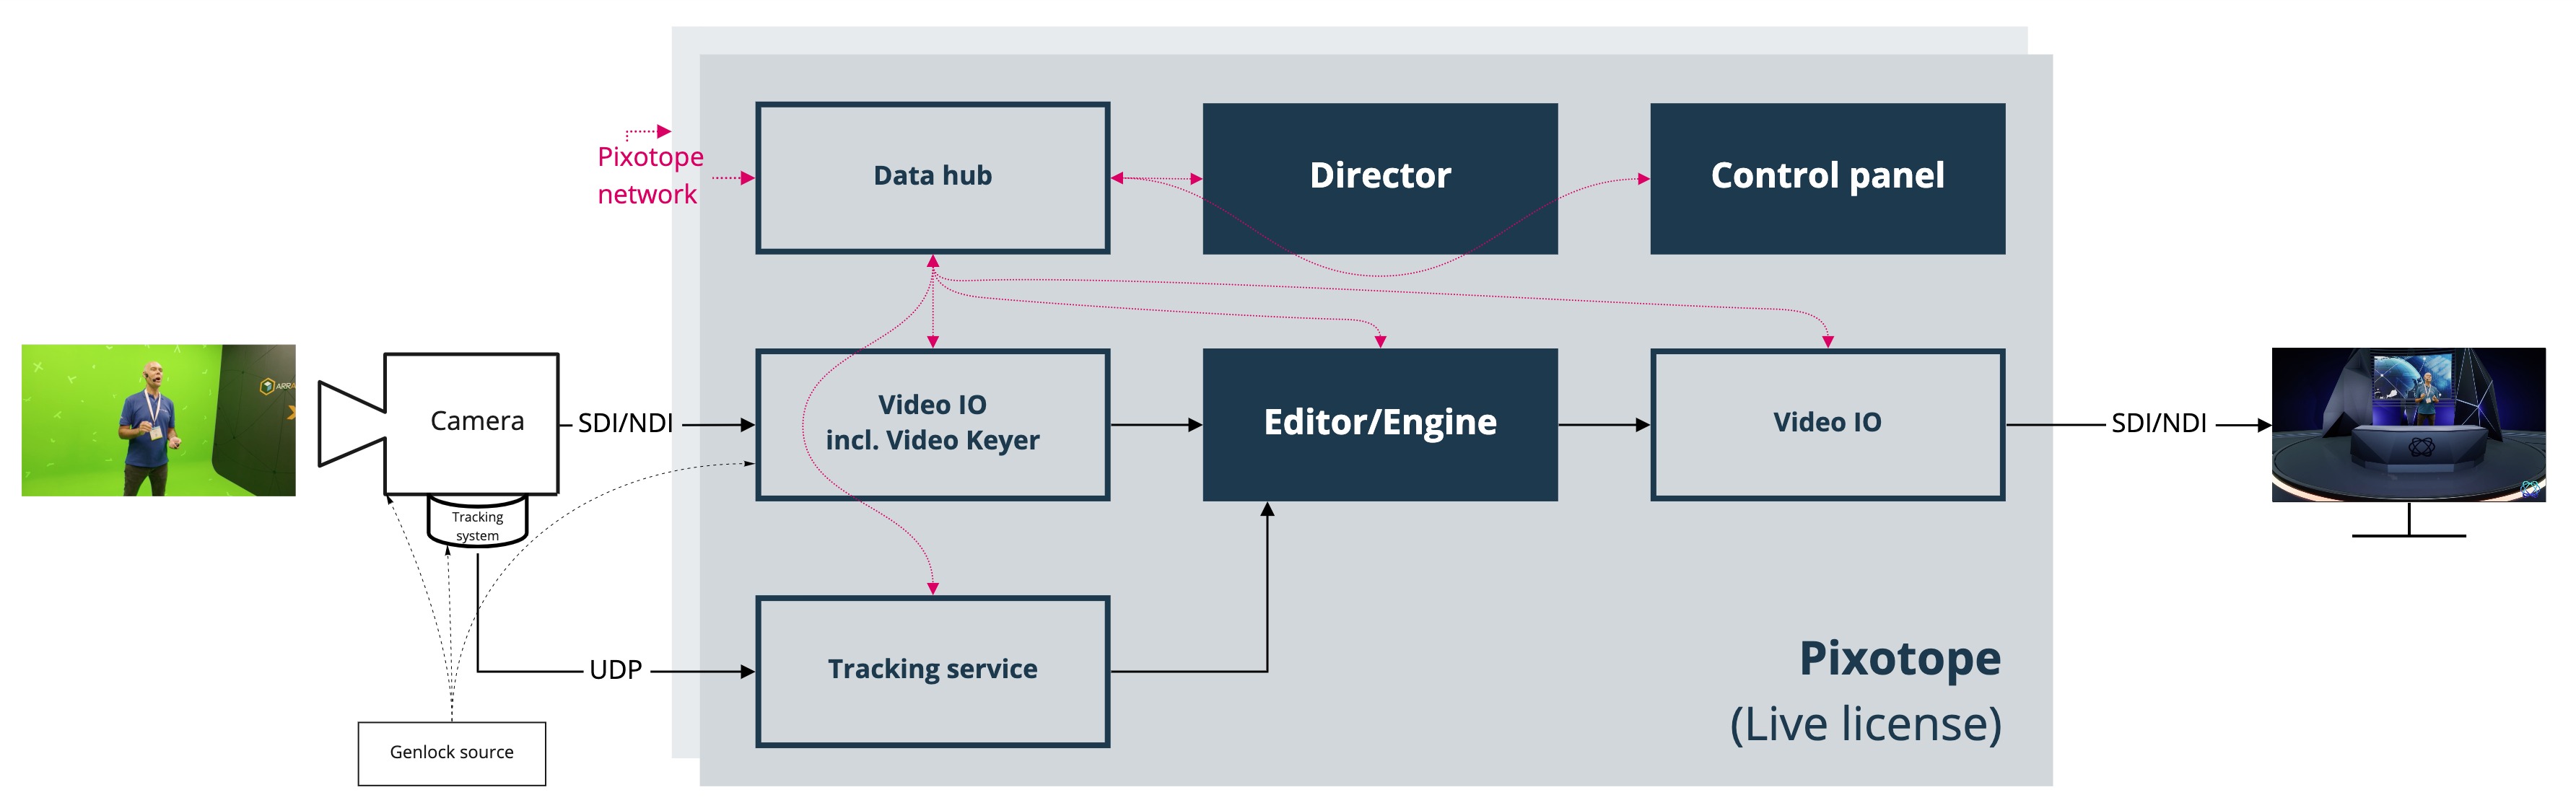
Camera system
Camera
The captured video comes in via
SDI into the video card
or NDI through the network card - What is NDI?
Signal gets keyed or just passed through into the Pixotope Engine
Camera tracking system
Tracking data comes in through the network card
Tracking service translates the data and sends it to the Pixotope Engine
Pixotope Engine applies the physical camera conditions to the virtual camera
The rendered virtual scene gets merged with the real scene
The scene gets output through SDI or NDI
Pixotope Director is the main software you interact with for configuring, adjusting and controlling your show
It can be used locally or remotely
It controls all aspects of Pixotope
Pixotope Data hub
It handles the communication between all Pixotope services and all Pixotope machines. See multi-camera setup.
Example projects using Pixotope
Pixotope lets you merge the real and the virtual world, in real time and in perfect quality.
To see what Pixotope has made possible, visit pixotope.com
Or try it out yourself and download our example projects.
Checklist
The machine is set up
Network card(s) is/are installed and configured
Graphics and video I/O cards are installed and they use the required drivers - See system requirements
The physical camera is set up
The tracking system is set up
A user account with a valid Live license is available - Manage users and licenses
Pixotope is installed - Install Pixotope
Start Director
The Pixotope Director is the main interface for setting up, adjusting and controlling a Pixotope production.
Start Director
Log in
Choose a Live license
Choose a Stand-alone or Server role
Create a new show from an existing project or a template
Learn more about Starting Director, Create, open and manage shows and the Pixotope Director - Interface
Learn more about Roles - Stand-alone, Client or Server
Learn more about Show files - where your SETUP is stored
Set up your first show
Edit your show settings and configure and calibrate your camera systems, media in- and outputs and object tracker groups
Add a camera system
Configure camera tracking
Configure video inputs and outputs
Configure routing
Calibrate tracking
Calibrate syncing
Learn more about Setting up a show
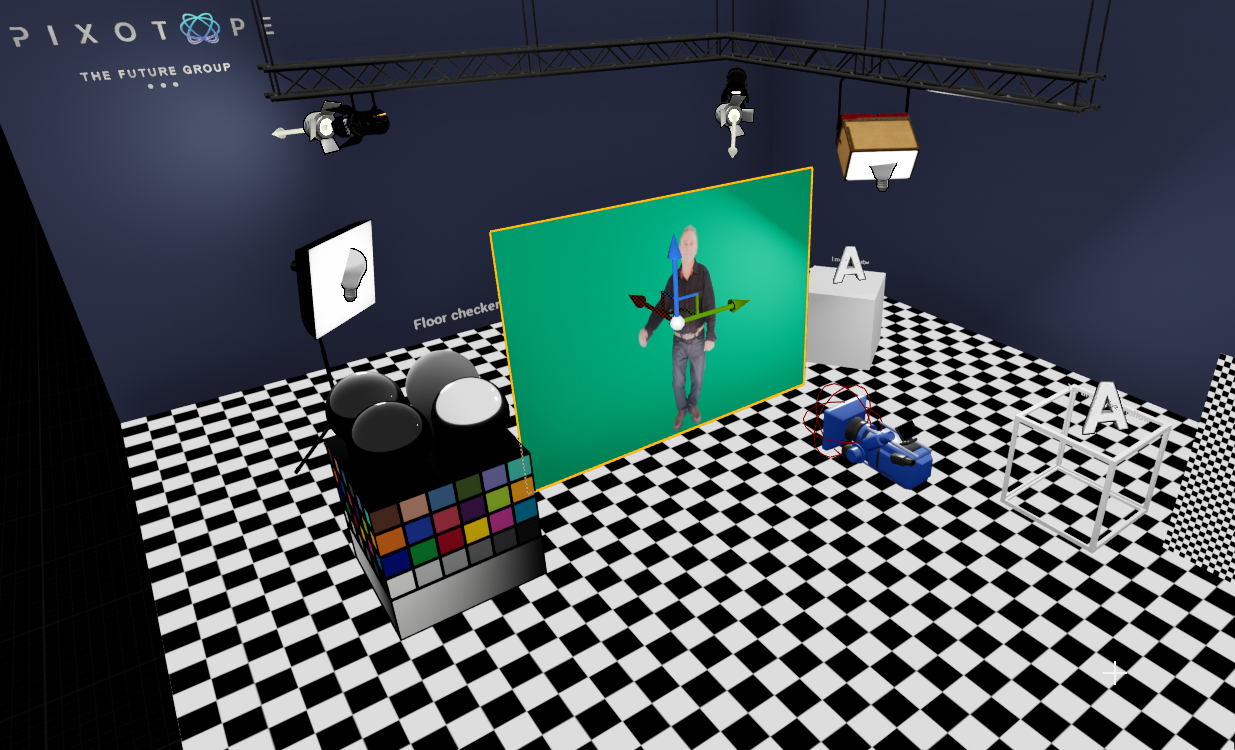
Prepare a simple VS level
For a virtual studio, we need to place the talent in our 3D environment.
Film the talent with a tracked camera in front of a green screen
Position a compositing plane in the virtual studio
The video is projected onto the compositing plane
Learn more about how to Set up a VS level and more general Preparing levels in Pixotope Editor
Make adjustments
To perfectly composite video and 3D graphics, use Pixotope's adjustment panels.
Learn more about Making adjustments
Key video
Pixotope’s video keyer is an easy to use real-time chroma keyer which is used to key video inputs.
Select the camera system you would like to key
Initialize the key
Refine the key
Learn more about how to Use the video keyer
Adjust compositing
Adjust how video and 3D graphics are composited together.
Learn more about how to Adjust compositing
Adjust effects
Optionally you can add camera effects.
Learn more about how to Adjust effects
Adjust color grading
Adjust the color grading of your 3D graphics and video so the sources match. Optionally you can color grade the final output.
Learn more about how to Adjust color grading
Create a simple control panel
In the Editor: Expose the properties you would like to control
Create a new control panel
Create a trigger widget
Add a target action
Save your control panel
Learn more about Creating a custom control panel
Run live
Launch your level in LIVE mode
Use the control panel to control your level
Learn more about Running live production
Data integration and API
Use external data in your Pixotope levels or drive the production with external controls.
Learn more about Using the Pixotope Engine API
More
Find additional information here: