
Making adjustments - PRODUCTION
Have you created and set up a show yet?
Learn more about Setting up a show
Academy Tutorial - Pixotope Director Walkthrough - PRODUCTION View
Step by Step Walkthrough of the PRODUCTION View in Director
Switch view
After finishing setup switch the view in Director from SETUP to PRODUCTION
Learn more about the different Views - START, SETUP and PRODUCTION
Launch level
Launch a level, whether you launch in Live or Edit mode will affect how the adjustments are saved
Learn more about how to Launch levels
Key video
Go to PRODUCTION > Adjust > Video Keyer
Select the video input you want to key and enable the video keyer
Enter the "Initialize key" area and draw on the image to select the colors which should be keyed out
Click "Initialize key" and refine the key using the different parameters
Learn more about how to Use the video keyer
Make adjustments to levels
Adjustment panels provide a convenient way to make live adjustments on running levels on single or multi-machine setups without having to open the Pixotope Editor.
Change indicator
In the PRODUCTION > Composite, Effects, and Color Grading panels (more to come), there is a way to identify which parameters have had value changes. It is a blue dot, and a light blue background fill behind the parameter’s label.

Strength has been adjusted
When hovering over the change indicator, the dot will turn into a reset icon. Which values the change indicator resets to depends on whether you are making adjustments in EDIT mode or LIVE/Preview Live mode.
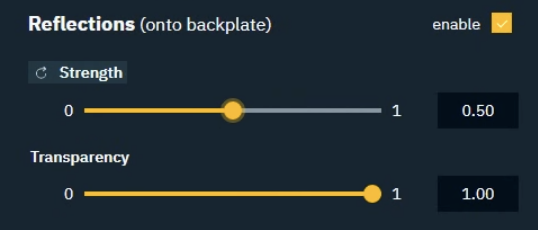
Strength’s change indicator on hover
When making adjustments in EDIT mode:
Adjustments are saved to the level directly upon saving
Resetting an adjustment will reset to the Engine’s default value, regardless of what values are saved to the level
Our Pixotope Calibration project contains levels which have been adjusted from the Engine’s default value, so these values will appear adjusted from the first launch
When making adjustments in LIVE or Preview Live mode:
Adjustments are "added on top" of a level
Resetting an adjustment will reset to the level’s last saved value
Adjustments are stored locally on the machine within the project folder (
[Project folder]/Saved/Adjustments/[Levelname].adj)
Learn more about Adjusting levels - where it reads from and sends to
Change indicator for the Color Grading panel:
In this panel the change indicator has a slight variation
Each tab under Color Grading offers a unique set of parameters to manipulate. In the below example you can see how changing parameters under Global does not affect parameters under Midtones
The blue dot next to the tabs on top cannot be reset, but help notify you of adjustments that may not be immediately apparent
Adjust composite
The composite panel allows you to
adjust how 3D graphics and video or composited together
transform and adjust compositing planes
Choose which layer to adjust (3D Graphics, Video) or which compositing plane to transform
Make adjustments
Learn more about how to Adjust composite
Adjust effects
The effects panel allows you to add various post-processing effects to the 3D graphics as well as the video.
Choose which layer to apply an effect to (Graphics, Video)
Enable effect
Learn more about how to Adjust effects
Adjust color grading
The color grading panel allows you to adjust
white balance
color grading for global/shadows/midtones/highlights
for
3D graphics
video
final output
Additionally you can adjust the filmic tone mapper and ambient occlusion for 3D graphics.
Choose which layer to adjust the colors on
Make adjustments
Learn more about how to Adjust color grading
Adjust objects
The object panel allows you to change properties of and make transformations to one or multiple objects.
Learn more about how to Adjust objects