An XR license is needed for
-
Showing this panel
-
Rendering XR Walls
In the XR panel, you can change all XR related settings available in the Editor.
Learn more about how to Set up an XR level (virtual window)
Learn more about Pixotope World Settings > XR
General
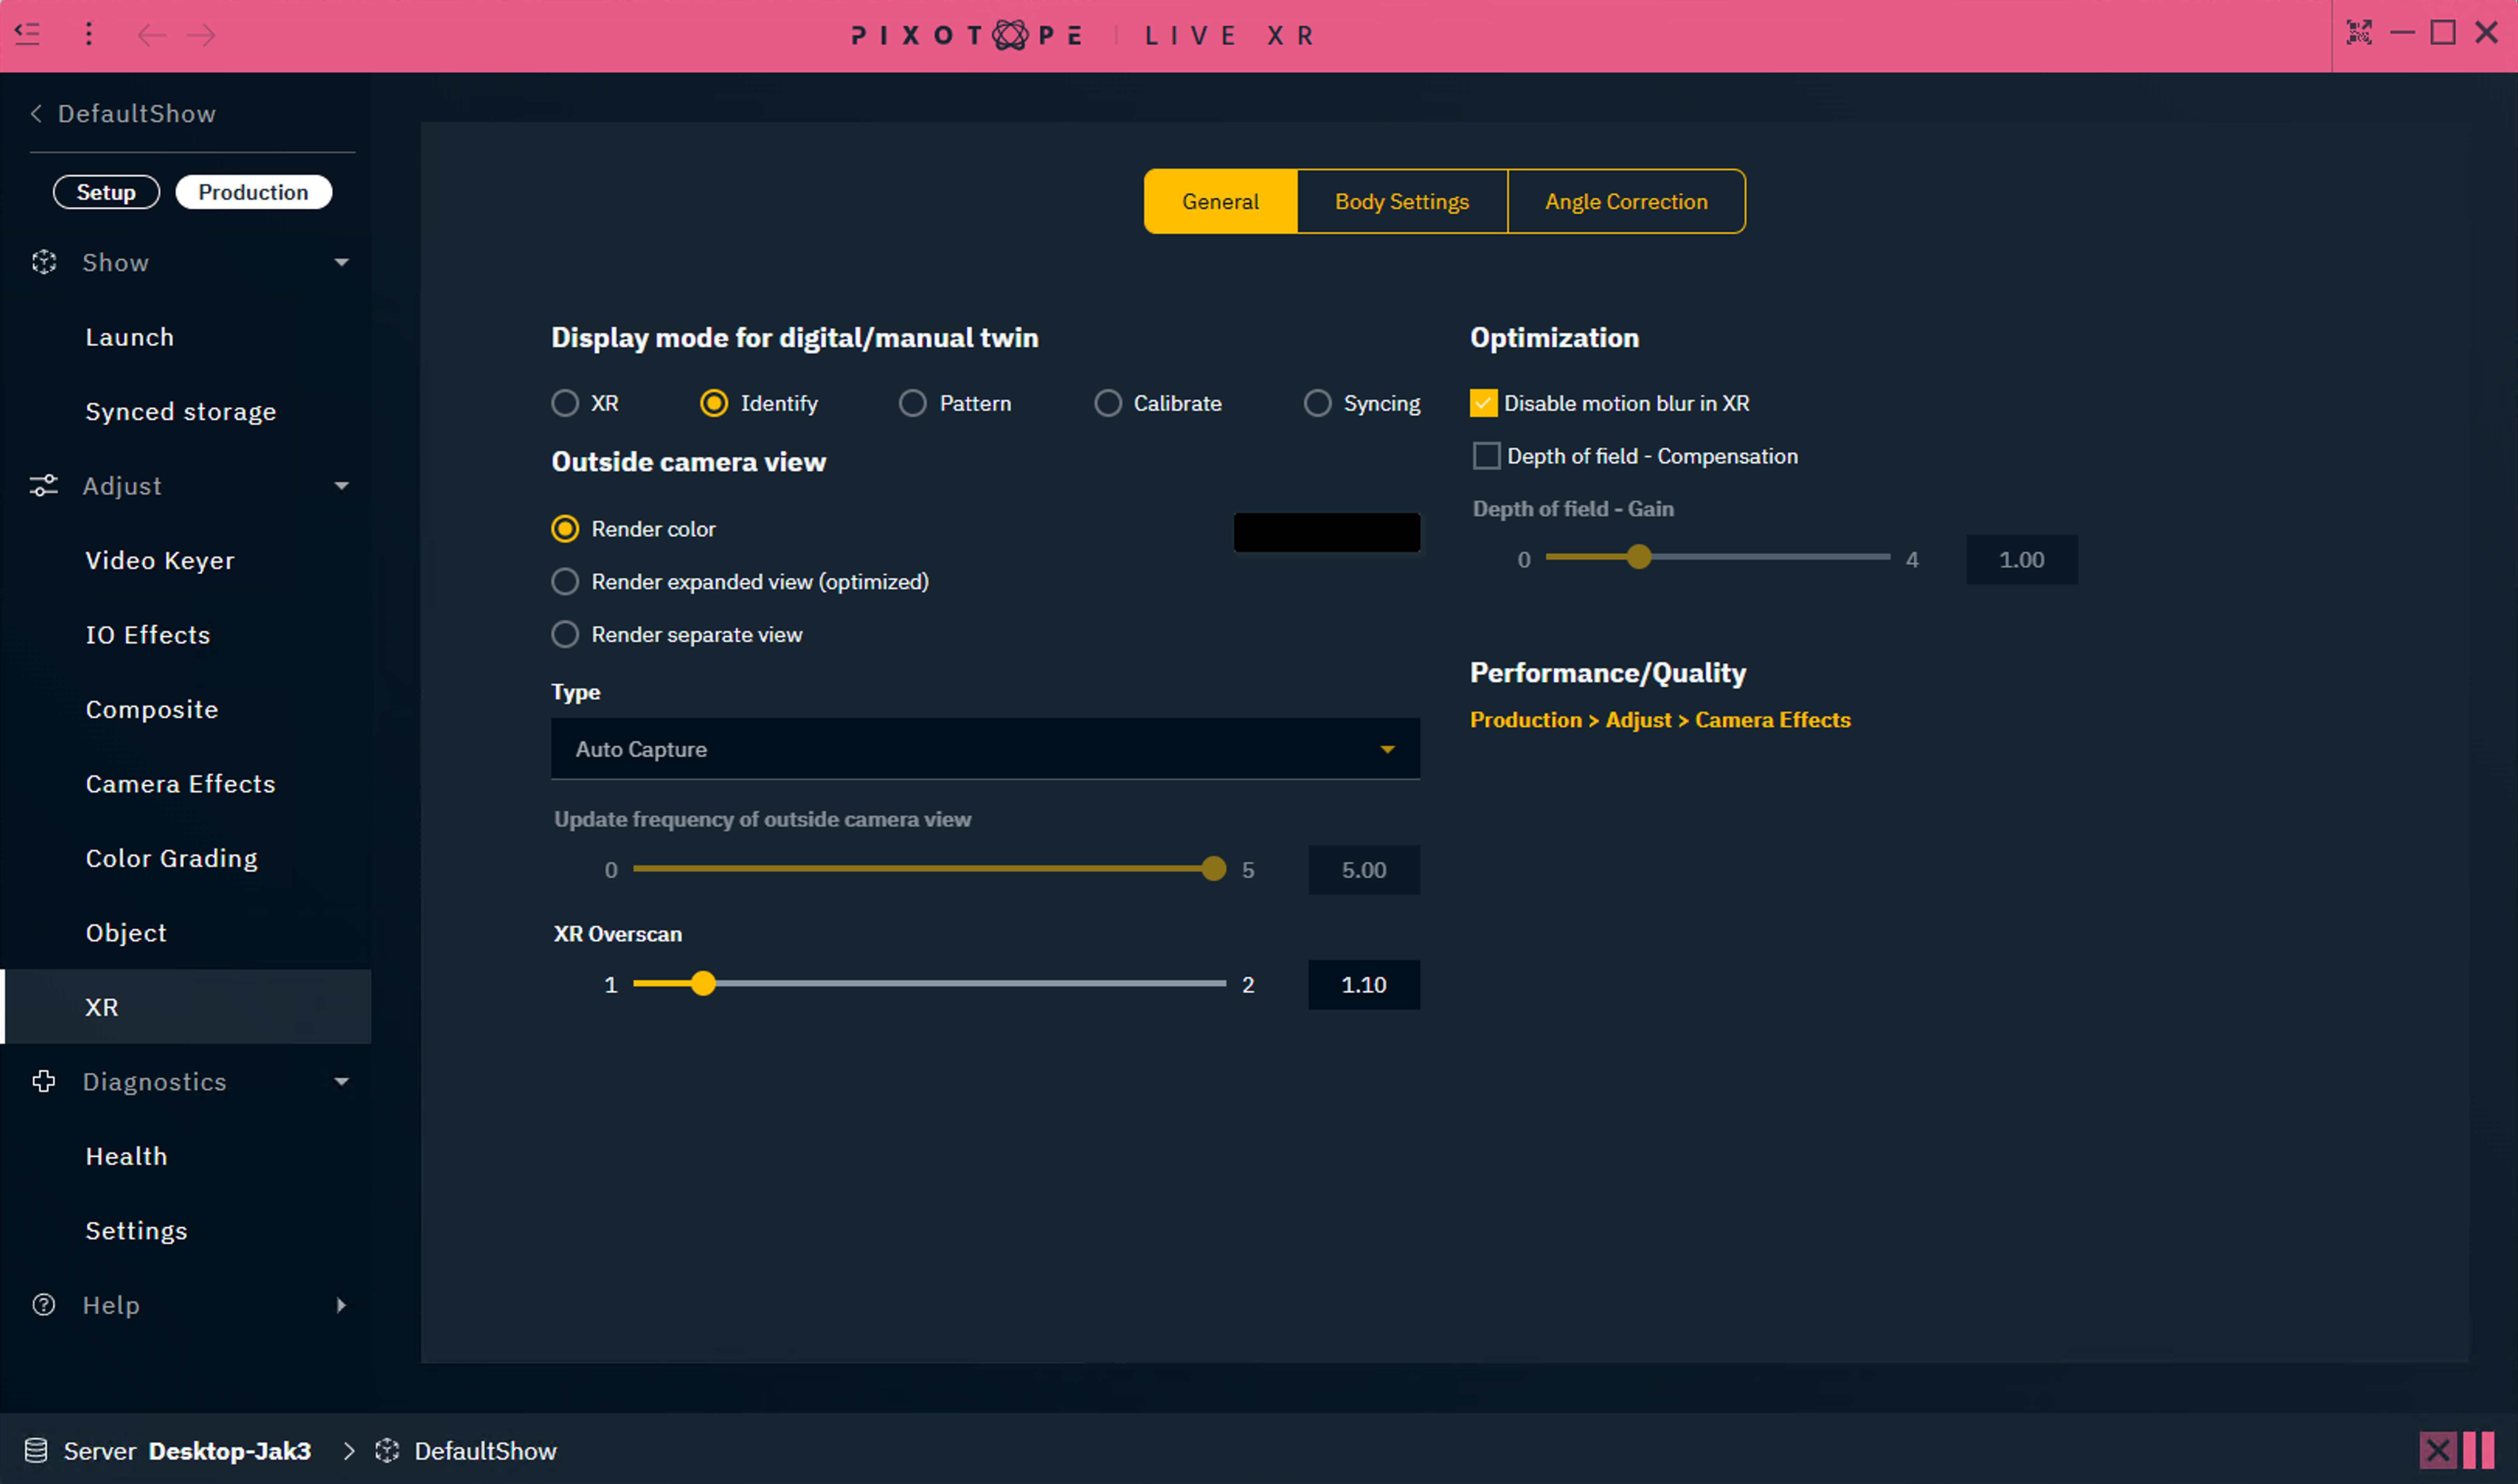
Display mode for digital/manual twin
Change what is displayed on the XR walls.
|
XR |
Shows the actual XR output |
|---|---|
|
Identify |
Shows all mappings Learn more about how to Create mappings |
|
Pattern |
Shows the tracking pattern when using Pixotope Tracking Learn more about how to Calibrate XR alignment with Pixotope tracking |
|
Calibrate |
Shows outlines for every XR wall. On XR machines/LED wall these are red, on AR machines they are green. When the wall is perfectly calibrated, they should overlap and appear yellow. Learn more about how to Calibrate XR alignment with Pixotope tracking |
|
Syncing |
Shows rotating shapes on both AR and XR machines. On XR machines/LED wall these are red, on AR machines they are green. When the wall is perfectly calibrated, they should overlap and appear yellow. Learn more about how to Calibrate delays between AR and XR |
Outside camera view (outside frustum)
Change how the area outside the camera's view (outer frustum) is rendered
|
Render color |
Renders a custom color |
|
Render expanded view (optimized) |
Renders an expanded view of the camera view (inner frustum) |
|
Render separate view |
Renders a separate view from the XROutsideFrustumPoint’s viewpoint |
Type
Choose a render type. Used when Outside Camera View is set to Render Separate View.
Update Frequency Of Outside Camera View
Choose the update frequency. Used when Render Outside Type is set to Cube.
XR overscan
Blend between inside and outside camera view.
Optimization
Disable motion blur in XR
Disables motion blur in the render output. Checked by default.
Depth of field compensation
Depth of field - Gain controls how much to compensate
|
|
no DOF blur on wall |
|
|
recommended by Epic |
|
|
upper limit (much stronger DOF blur) |
The machine needs to be set to XR, for these settings to be active.
Learn more about Render groups - AR, VS, AR+VS, XR
Learn more about Depth of field compensation → https://dev.epicgames.com/community/learning/knowledge-base/earV/unreal-engine-icvfx-depth-of-field-compensation
Render quality
Same as PRODUCTION > Composite > 3D Graphics > Render quality
Body settings
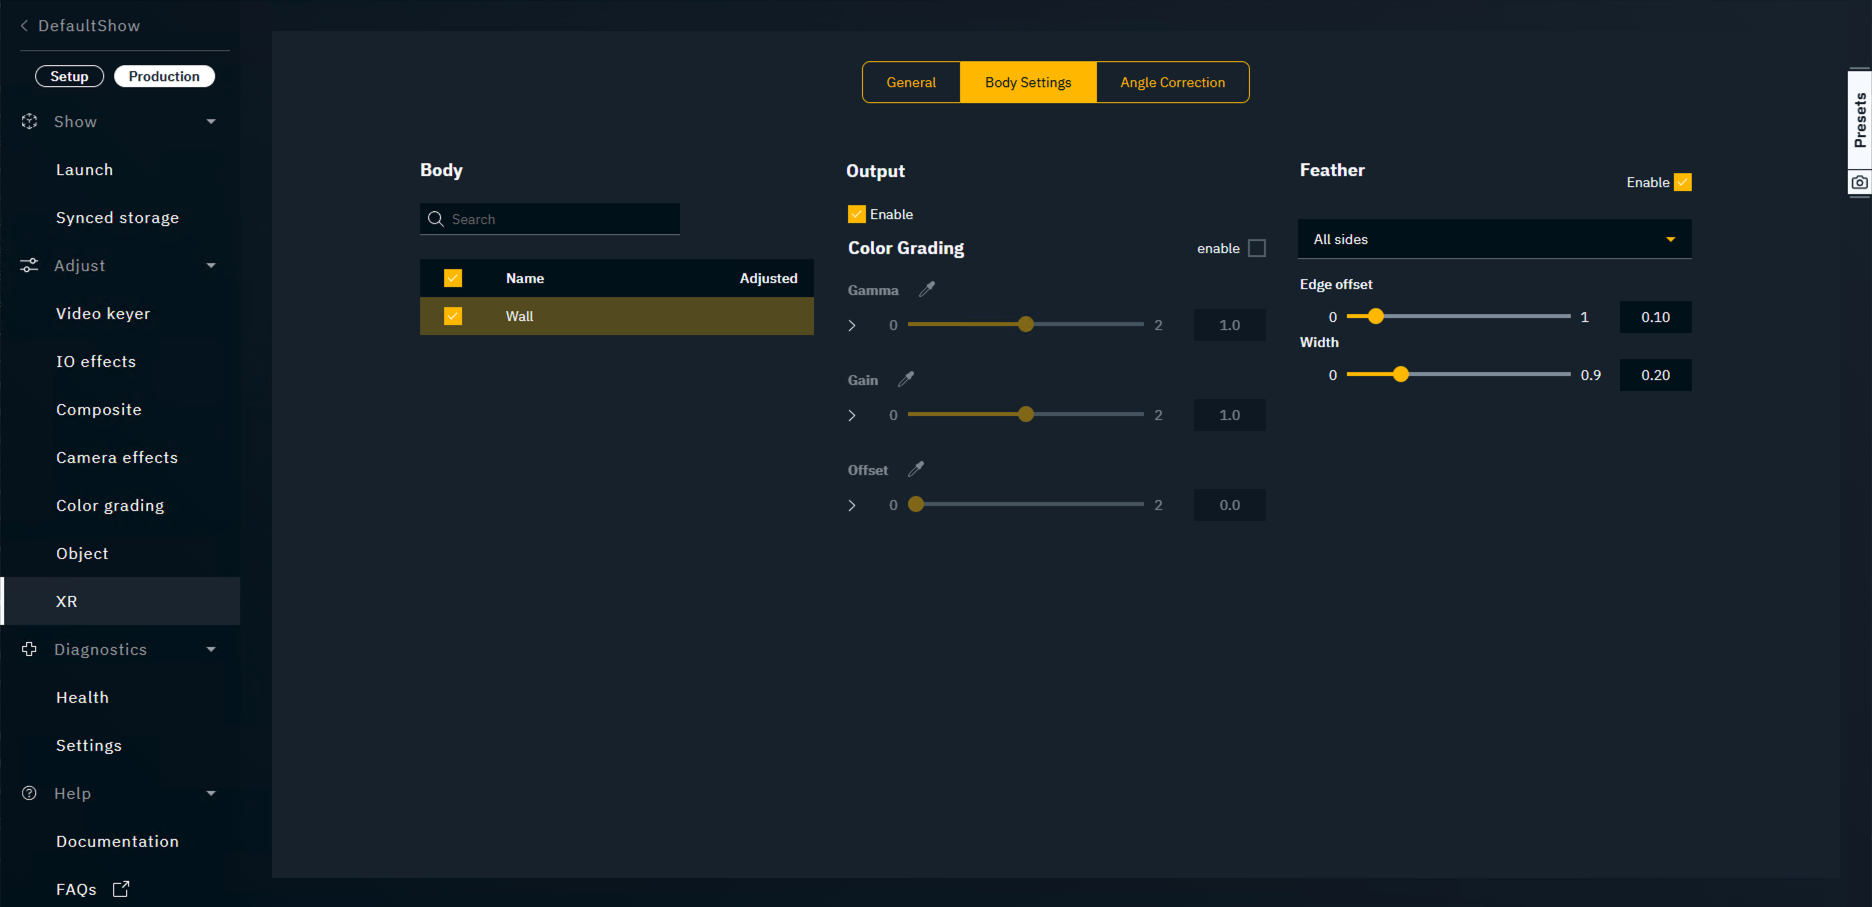
Body
Shows a list of all bodies to which the settings on the right will be applied to.
Output
Enable
Enables the rendering of the XR walls of the selected Body.
Color grading
Compensates for color discrepancies of the physical planes.
Feather
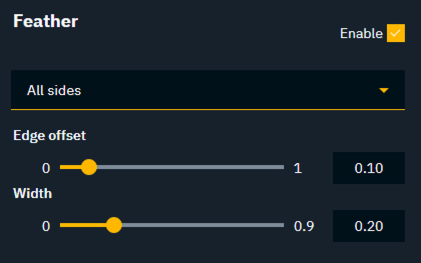
Allows to adjust feathering.
|
All sides |
Individual |
|---|---|
|
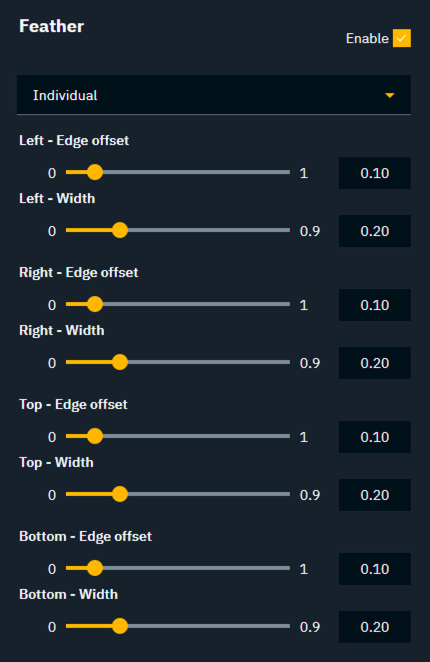
|
Parameters
-
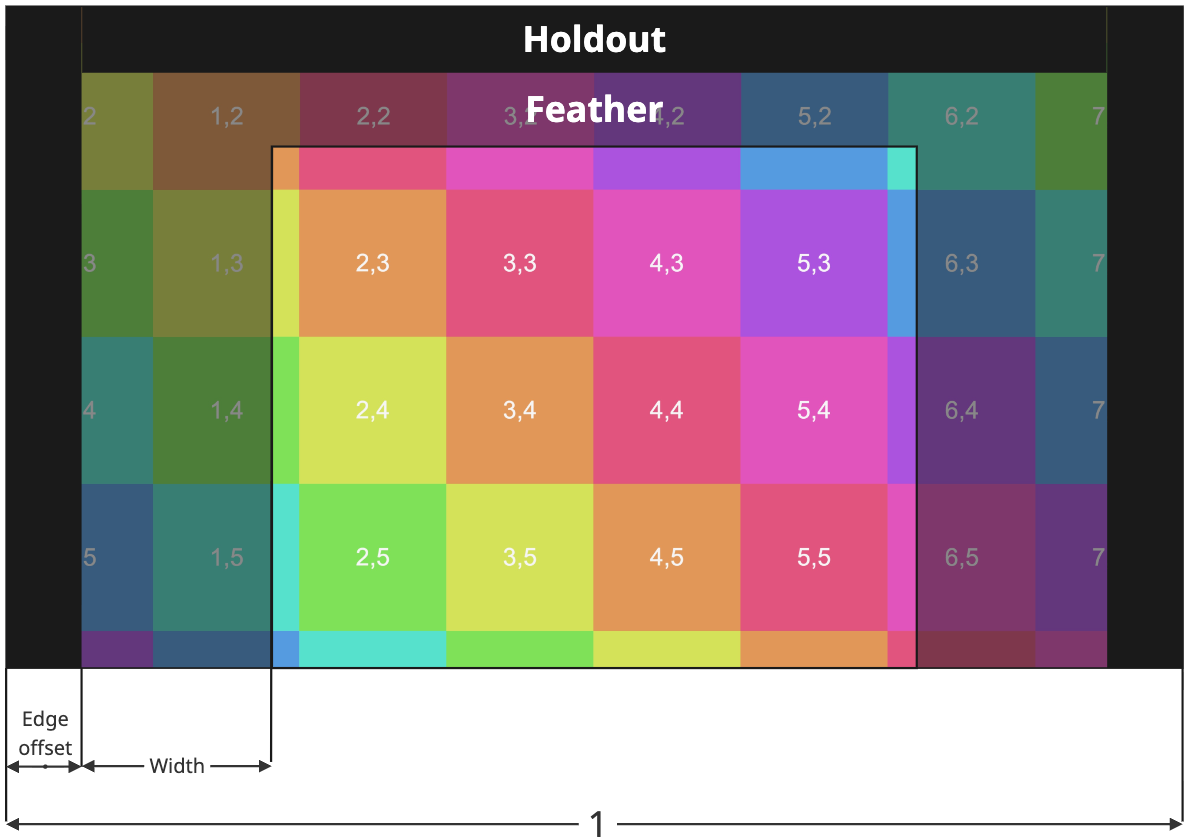
Edge offset: distance from the edge where feather starts
-
Width: width of the feather
The full width/height is equal to 1.
Angle correction
LED panels do not emit each color equally in all directions. A pixel builds color from separate emitters, one per primary, and each emitter has its own angular output. The differences come from the physical package: die size, wire bonding and the mechanics of the LED housing. Seen straight on, the primaries sum to the intended color. Seen from the side, each falls off at a different rate, so the same signal reads as a different color. The wall shifts in hue and saturation, not only in brightness. This is normal LED behaviour, not a fault, and processor calibration does not remove it because normal LED calibration is measured straight on.
In XR the viewer is a tracked camera that moves during the shot, so its angle to each wall changes continuously. The shift becomes visible where the LED wall meets the AR set extension: the wall drifts while the graphics hold still.
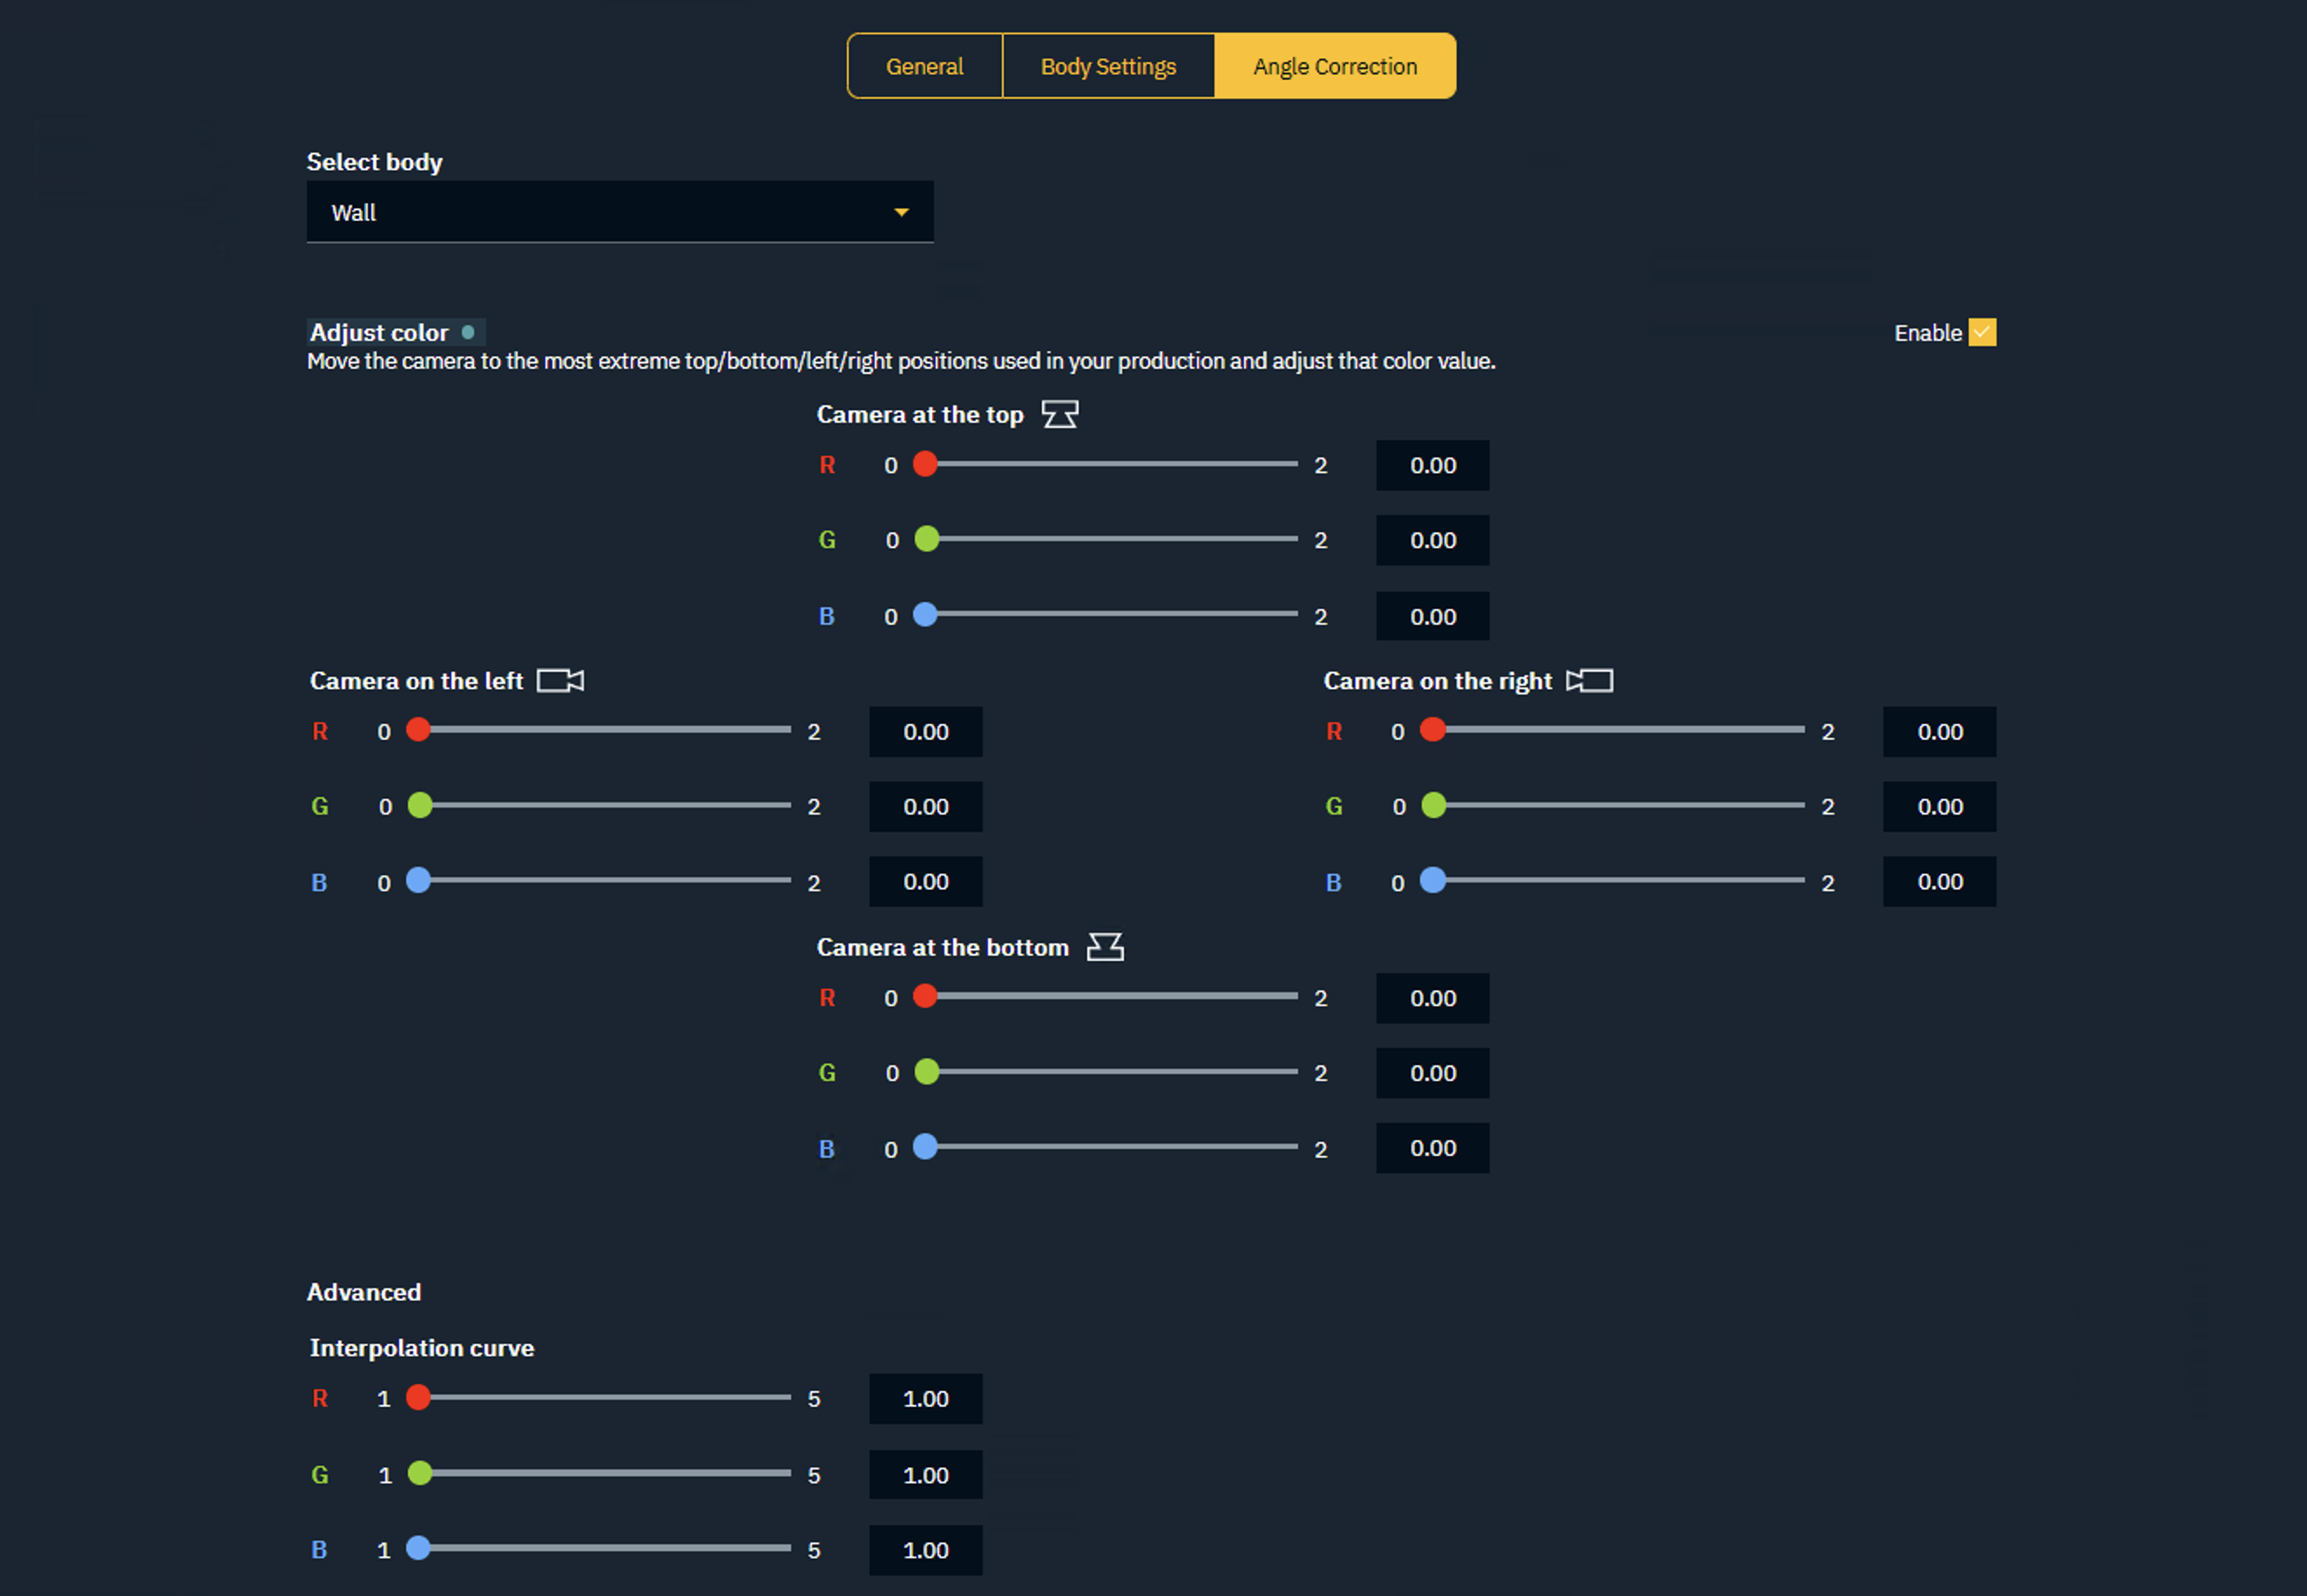
Angle correction uses the tracked camera position to compensate. You set a color correction at the extreme camera positions your production uses, per body, and Pixotope interpolates between them as the camera moves. The result holds wall color through the move, with no change to the LED processor and no operator action on air.
-
Select the body to adjust
-
Enable Adjust color
-
Move the camera to the most extreme up/down/left/right positions used in your production and adjust the corresponding color value
-
Optionally
-
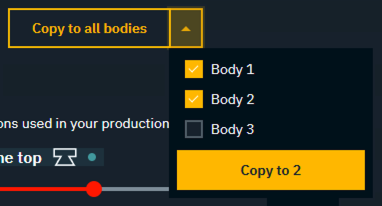
click "Copy to all bodies"
-
Copies the Adjust color settings from the selected body and overwrites these on all other bodies
-
-
click the arrow next to it and select the bodies to copy the settings to
-
Advanced
Interpolation curve
Controls how the corrections you set for the extreme camera positions are blended in between. The default of 1 is linear, while higher values concentrate the correction closer to the extreme positions.