
Bitfocus Buttons can drive Pixotope from hardware control surfaces such as an Elgato Stream Deck. The Pixotope (Gateway API) module sends each key press to Pixotope Gateway, which passes it on to a control panel, the Engine or any other Pixotope service. The same module also works in Bitfocus Companion 4.x.
This page covers the setup both workflows share. Then continue with the workflow that fits your show.
Learn more about How to use Pixotope Gateway
Prerequisites
-
Pixotope 26.3 or later, with Director running and a project open
-
Pixotope Gateway reachable from the Buttons machine on port
16208-
Gateway is started and stopped with Director. Closing Director shuts down Gateway and the other Pixotope services, and every key stops working
-
-
Bitfocus Buttons 1.8.10 or later, installed on the machine the Stream Deck is connected to. The Pixotope module (v1.1.0 or later) ships with it, see Install Buttons below
-
A Stream Deck (or another supported surface) connected to the Buttons machine
Choose an approach
|
Approach |
How it works |
Use it when |
Requires |
|---|---|---|---|
|
Each key fires a Remote Call on a control panel, which clicks one of the panel's buttons |
The show logic already lives in a control panel, or operators use the panel and the Stream Deck side by side |
The control panel open in LIVE mode |
|
|
Each key calls a Blueprint event, sets a property or changes a Store value directly |
You need a few quick actions without a panel, or want live values shown on the keys |
The level open. Events that depend on BeginPlay or runtime state need LIVE mode. Object names are hard-coded in Buttons, so renaming or re-placing an actor breaks its keys |
Both approaches can be mixed on the same Stream Deck.
Set up Buttons
Install Buttons
-
Download Bitfocus Buttons from bitfocus.io and run the installer with the default settings
-
Close the Elgato Stream Deck app if it is installed. It holds the device, and Buttons cannot use it while that app runs
-
Start Buttons. The user interface opens in a browser at
http://localhost:4440 -
Create the local user account it asks for, then sign in
-
The account is local to this Buttons install, not a Bitfocus cloud account. Operators need these credentials on show day
-
-
The dashboard lists No positions, No surfaces and No connections on a fresh install
Check the Pixotope module
The Pixotope module ships with Buttons 1.8.10 and is installed on first launch. Older installs may not have it, or have a version older than 1.1.0.
-
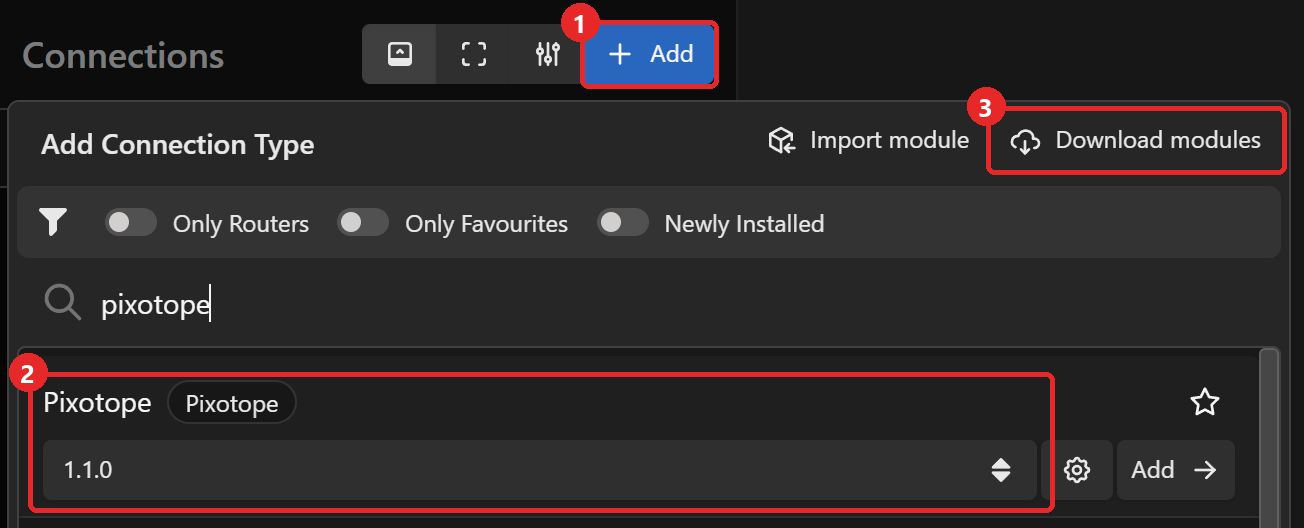
Go to Connect > Connection and click + Add (1)
-
Type
pixotopein the search field of the Add Connection Type dialog-
The search also lists modules with similar names. The Pixotope row shows the installed module version in its dropdown (2)
-
-
If Pixotope is missing or older than 1.1.0, click Download modules (3)
-
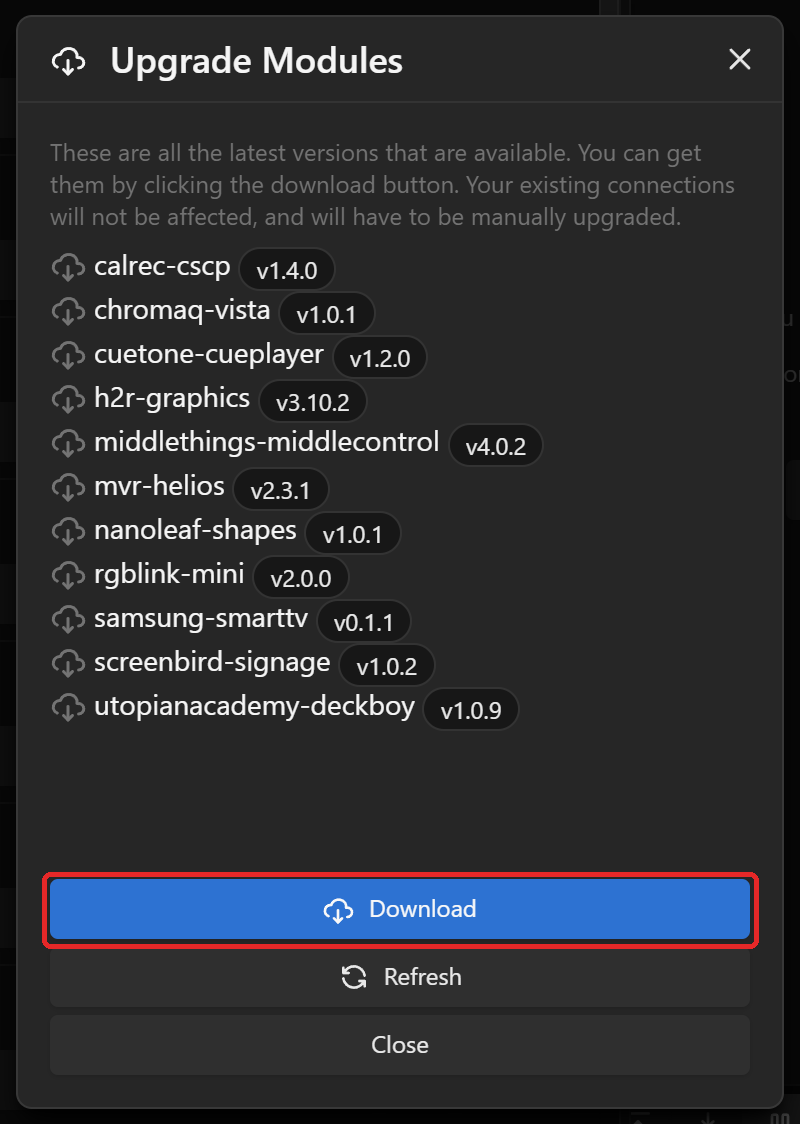
The Upgrade Modules dialog lists every module with a newer version available
-
-
Click Download
-
All listed modules are downloaded, Pixotope included. They are small, so there is no need to pick them individually
-
-
Click Close and check the Pixotope version again
Downloading a new module version does not upgrade existing connections. Select the connection under Connect > Connection, pick the new version in the Module dropdown and click Save.
Add the Pixotope connection
-
In Buttons go to Connect > Connection
-
Click + Add, then Add → on the Pixotope row
-
In Create Connection, keep the Label
Pixotopeand click Create. Close the Add Connection Type dialog-
The label becomes the connection's Variable Key, which the
$(Pixotope.…)variables on the following pages assume isPixotope
-
-
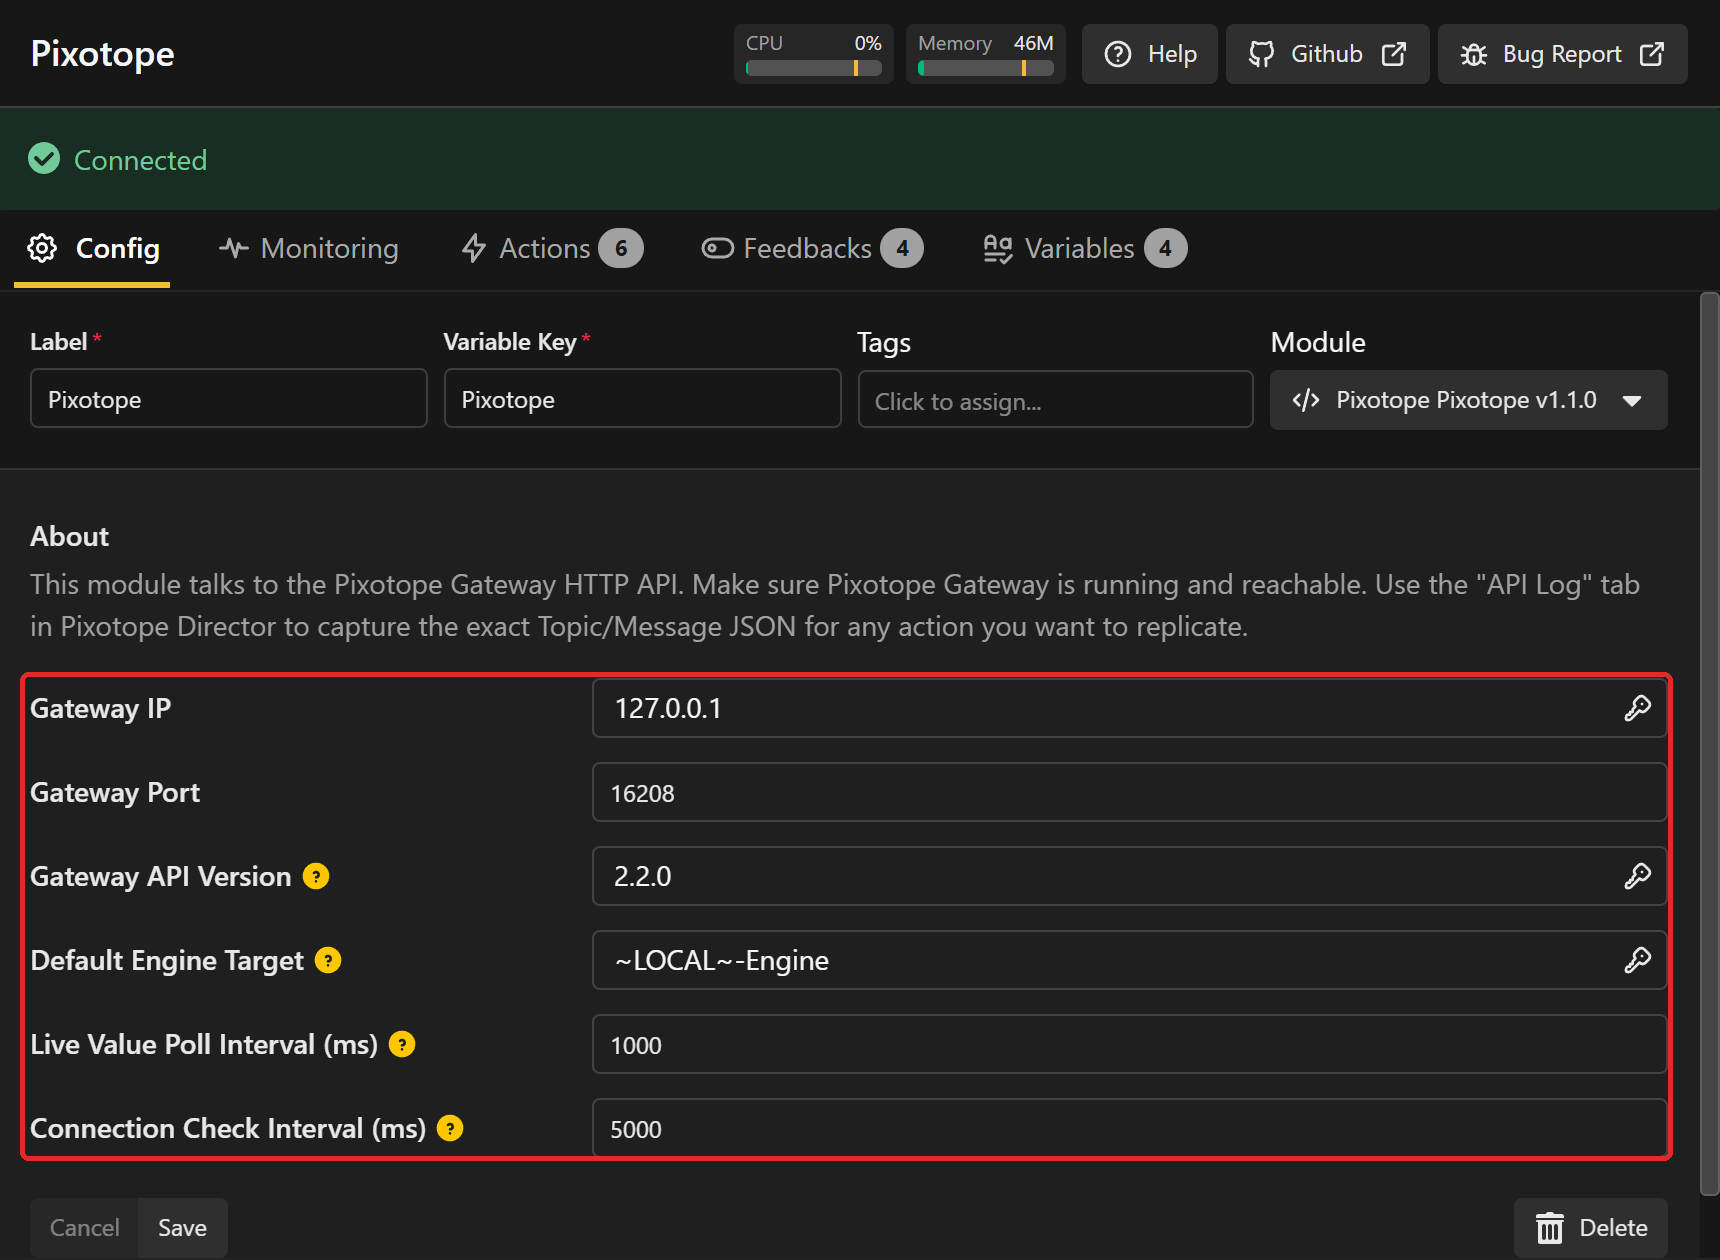
The connection opens on its Variables tab and connects with the default settings right away when Buttons runs on the Pixotope machine. To change a setting, open the Config tab, edit it and click Save
-
The connection header turns green and shows Connected once Gateway responds
-
If it stays red, check that Director is running on the Gateway machine and that the IP and port are right
-
|
Setting |
Default |
Description |
|---|---|---|
|
Gateway IP |
|
IP address of the Pixotope machine running Gateway |
|
Gateway Port |
|
Port Gateway listens on |
|
Gateway API Version |
|
Version segment of the publish URL. Leave as default |
|
Default Engine Target |
|
Engine used when an action does not name a target |
|
Live Value Poll Interval |
|
How often live values shown on keys are refreshed |
|
Connection Check Interval |
|
Heartbeat used while no live values are shown. |
The module has no passkey setting. Keep the Gateway passkey empty when using Buttons, otherwise its requests are rejected.
Learn more about Passkey protection
Assign the Stream Deck to a position
A Position is the page of keys a surface shows.
-
Go to Connect > Surface
-
Click Discovered surfaces and select the Stream Deck
-
Click Adopt → Create Position, enter a Label for the new position, for example
Studio A, and click Adopt → Create -
Check that Assigned to Position shows the new position and that Brightness is above 0
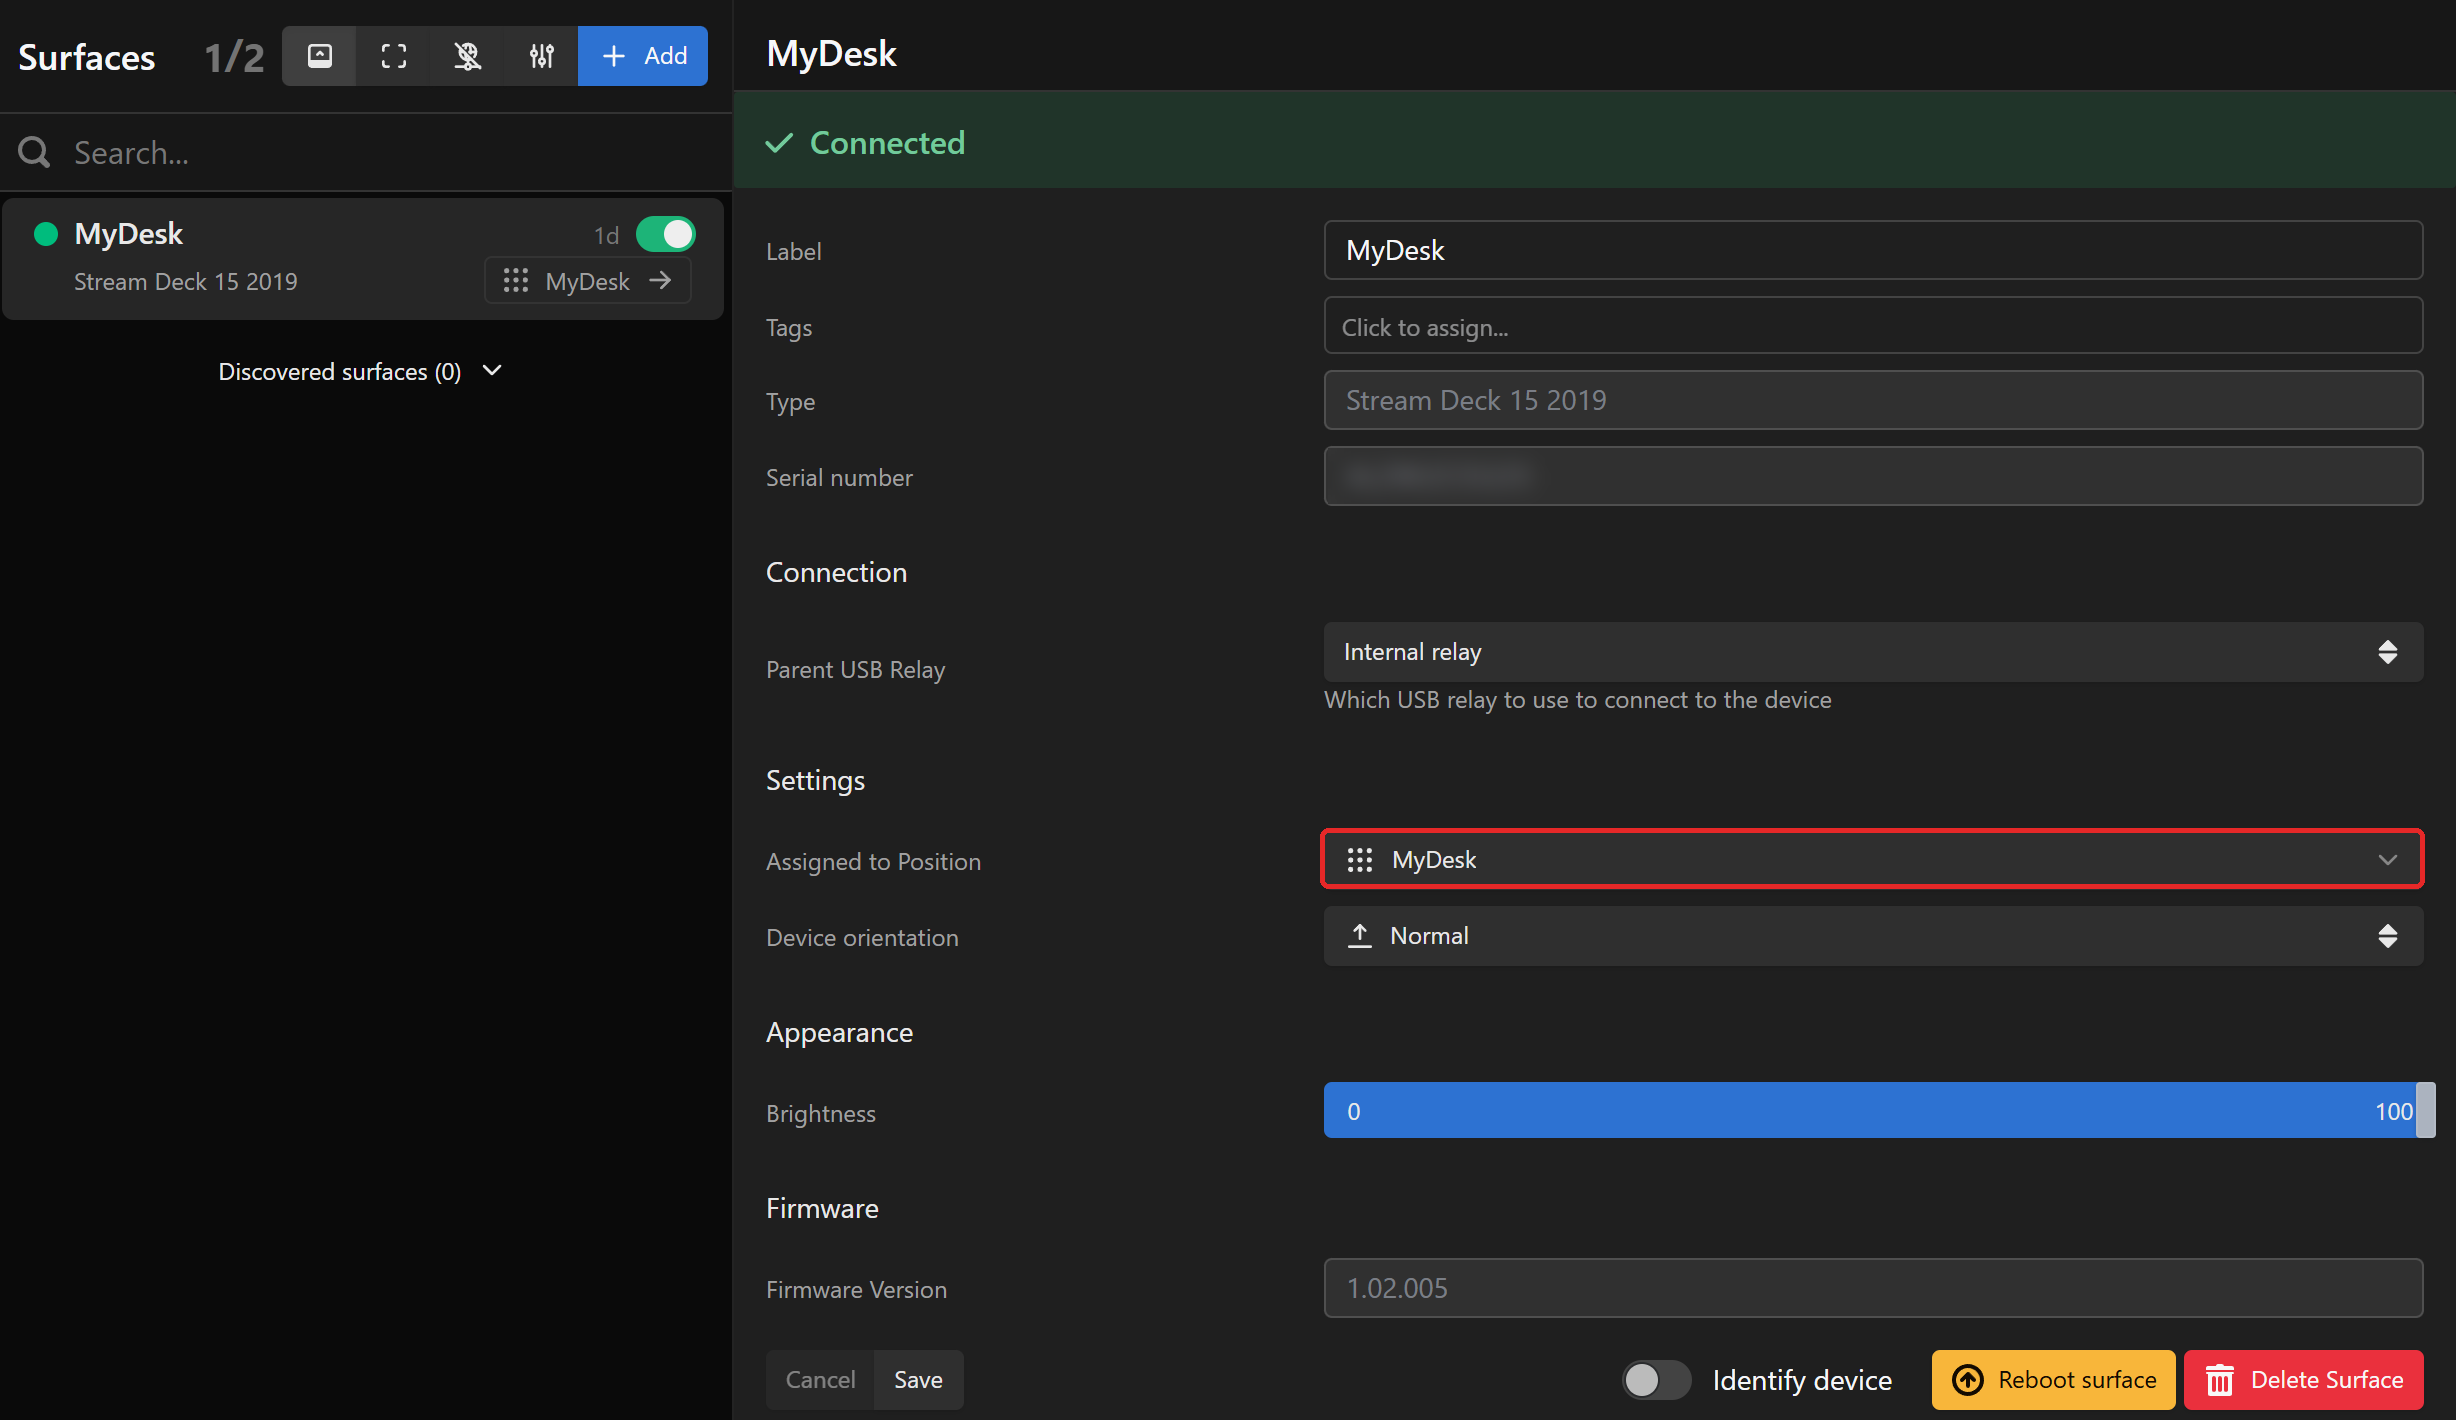
If the Stream Deck stays dark, check Brightness in the same panel.
Create a key
-
Go to Position and click Edit on your position
-
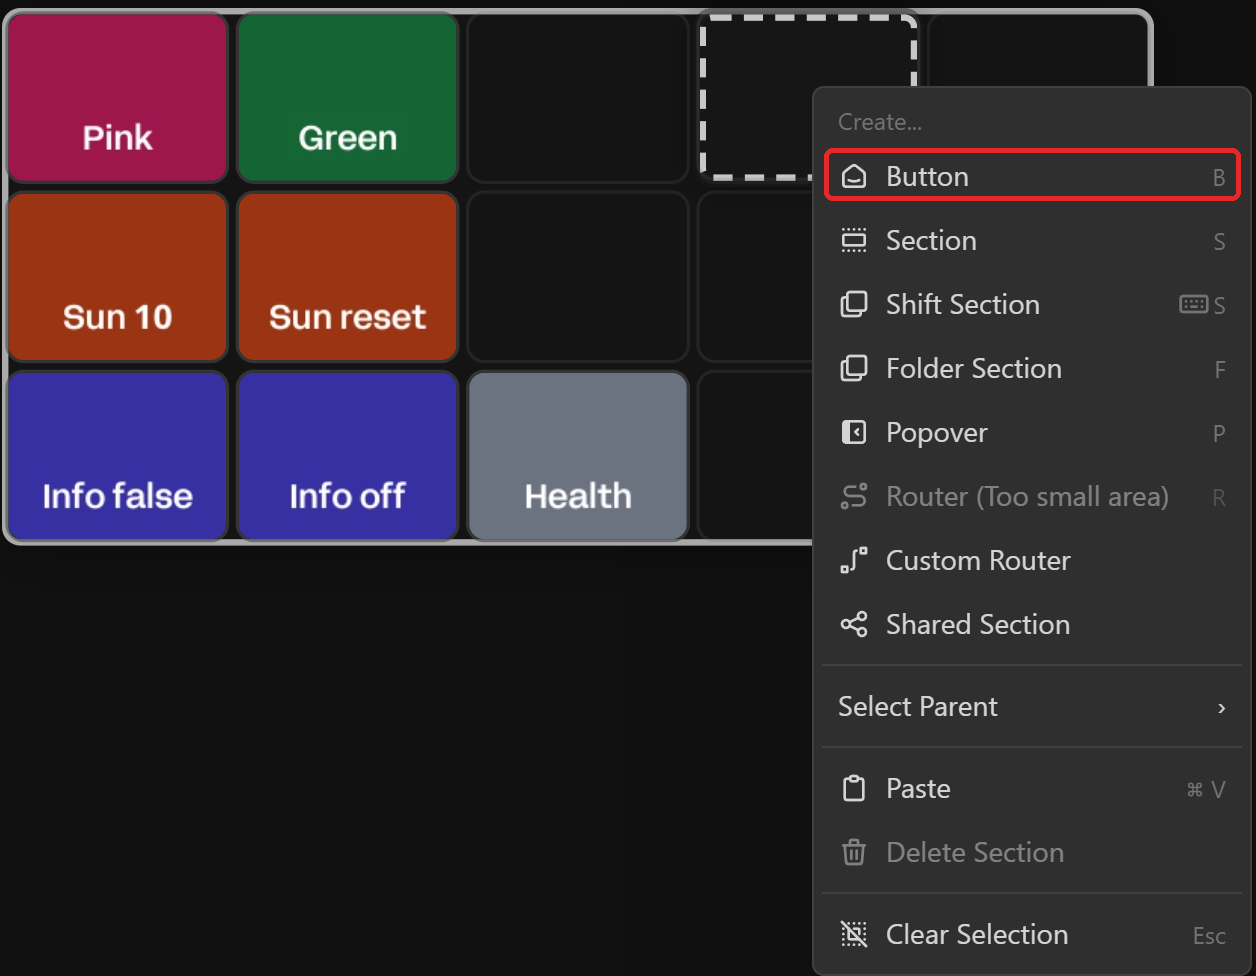
Select an empty key and press
B-
Or right click the key and click Create > Button
-
-
In the Inspector on the right, open the Actions tab (lightning icon)
-
Under Press, click Add Action… and type
Pixotopeto list the module's actions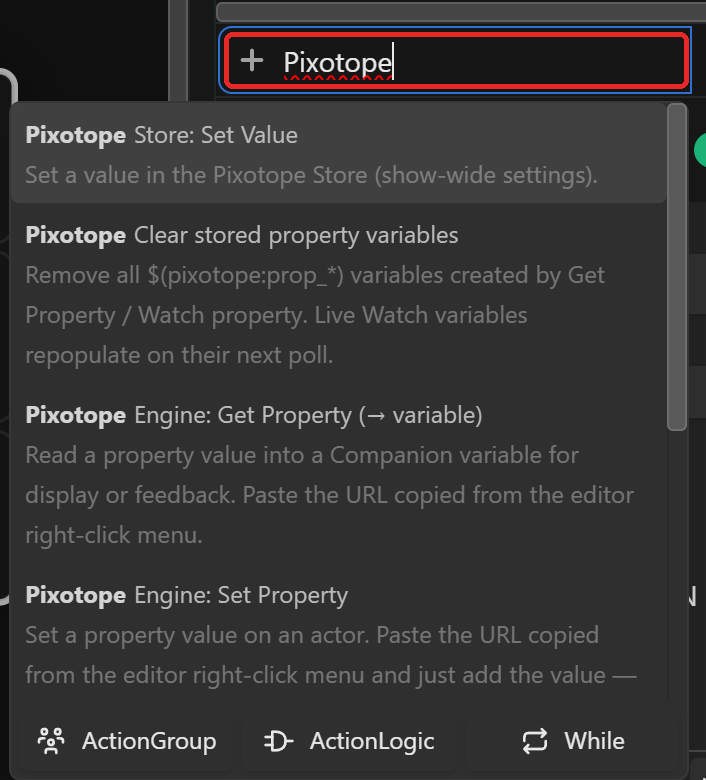
-
Fill in the action. The options depend on the approach, see the pages below
-
With more than one Pixotope connection, pick the right one in Connection
-
-
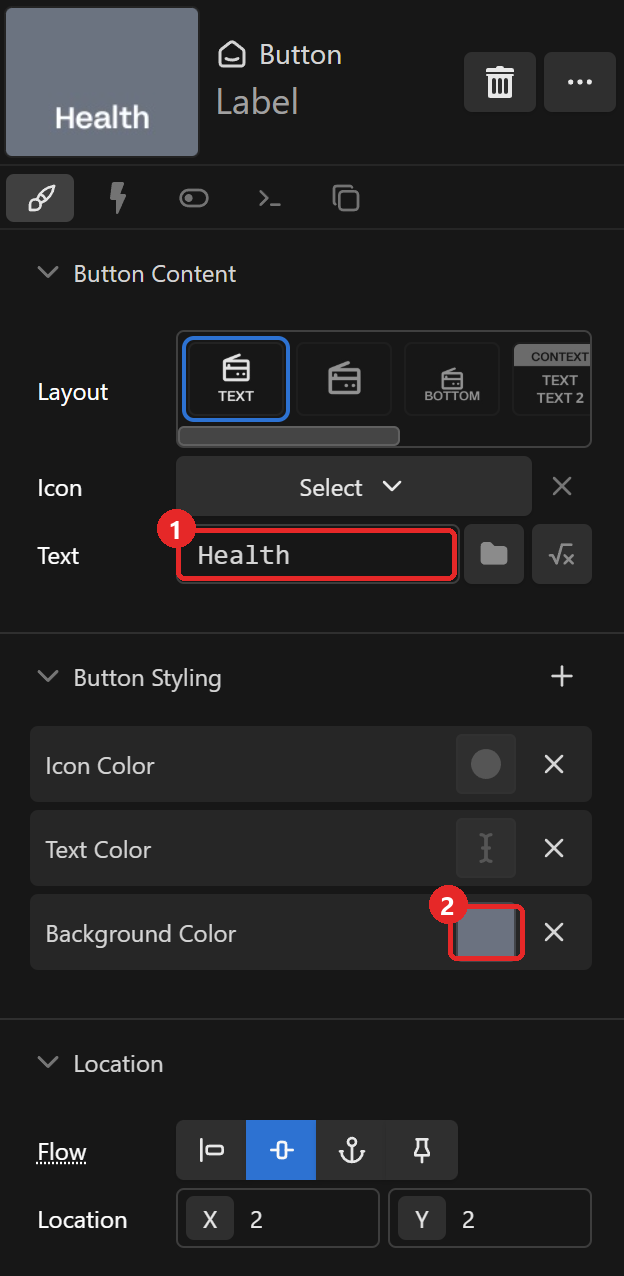
Open the Design tab (brush icon)
-
Remove the icon and enter the key Text (1)
-
Set a Background Color (2)
-
-
Click Apply at the top of the editor
-
The key appears on the Stream Deck
-
Duplicate keys
-
Select a finished key and press
Ctrl+C-
This replaces the clipboard, so paste any copied URL first
-
-
Select an empty key and press
Ctrl+V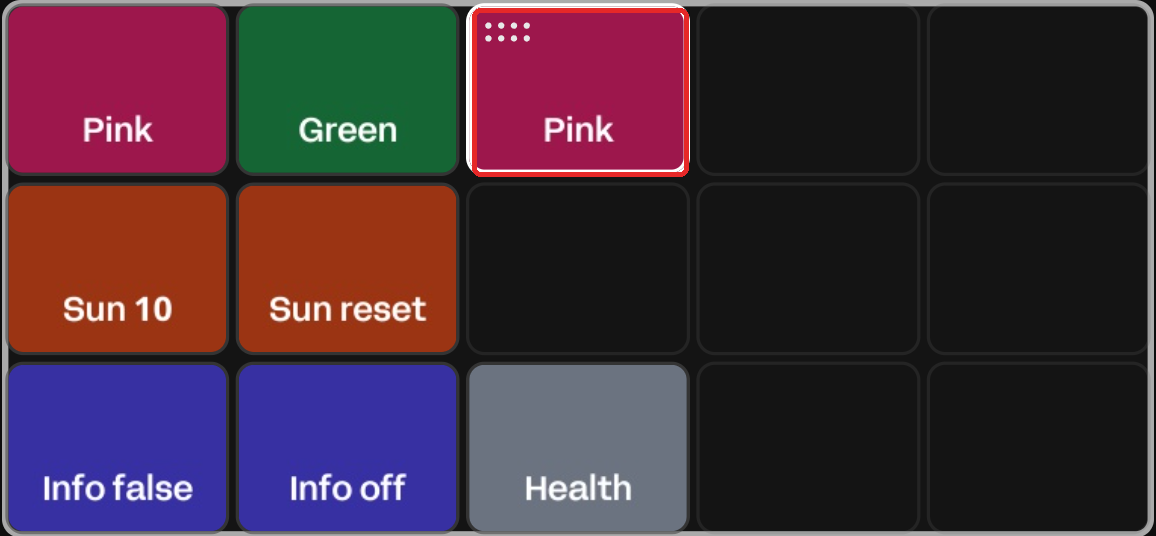
-
Change only what differs, for example the action target, Text and colour
-
Click Apply
Test a key
-
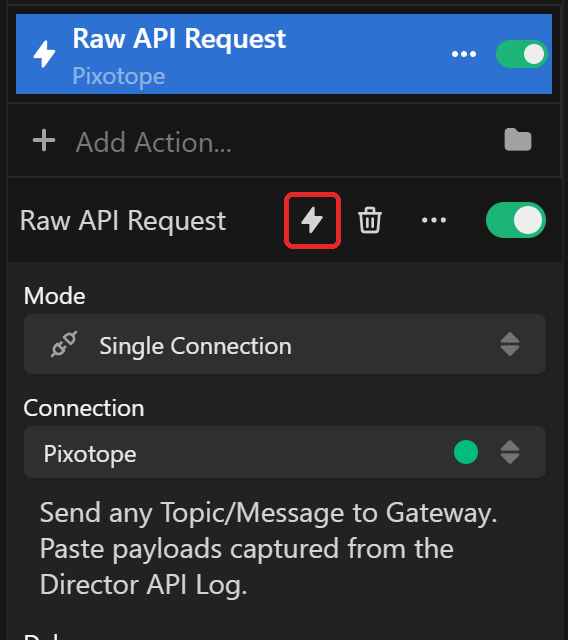
Click the lightning icon on the action header to run the action once, without the hardware
-
Variables are resolved the same way as on a key press
-
-
Go to Connect > Connection, select the Pixotope connection and check Connection Logs
-
Each request is logged as
Gateway request {…} -> 200together with its HTTP status -
The Debug filter is on by default but drawn grey. If no request lines show, click Debug to turn it on

-
Status 200 means Gateway accepted the request. It does not confirm that the target reacted. A misspelled function name or a control panel that is not open in LIVE mode also returns 200. Always check the result in Pixotope as well.
To see whether the target reacted: a Blueprint event that prints to the log shows up in the Engine Output Log, a property can be read back by opening its GetProperty URL in a browser, and a Store value by opening the Store URL with the full path, see the pages below. A Director Health call only returns a status, so nothing is visible in Pixotope.