
Introduction
Pixotope Gateway is a service to relay HTTP requests to Data Hub and to respond with meaningful data when it makes sense. The service is automatically launched by Pixotope Daemon. There’s an instance of it running on every Pixotope machine.
Network
-
Listening/Sending
-
Port 16208
-
Data hub PX_Datahub.exe as well as Pixotope Gateway PX_Gateway.exe, which are auto started by Pixotope, are expected to run on your machine.
Pixotope Gateway is not available when using Encryption
Quick start
For Engine API
The easiest way to make HTTP requests to get or set a specific property is via the context menu in the Editor:
-
Open the Editor
-
Right click the property you would like to get or control
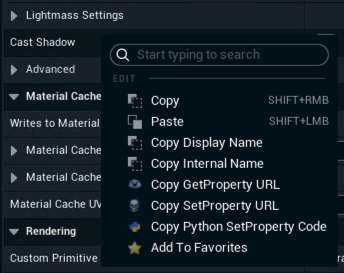
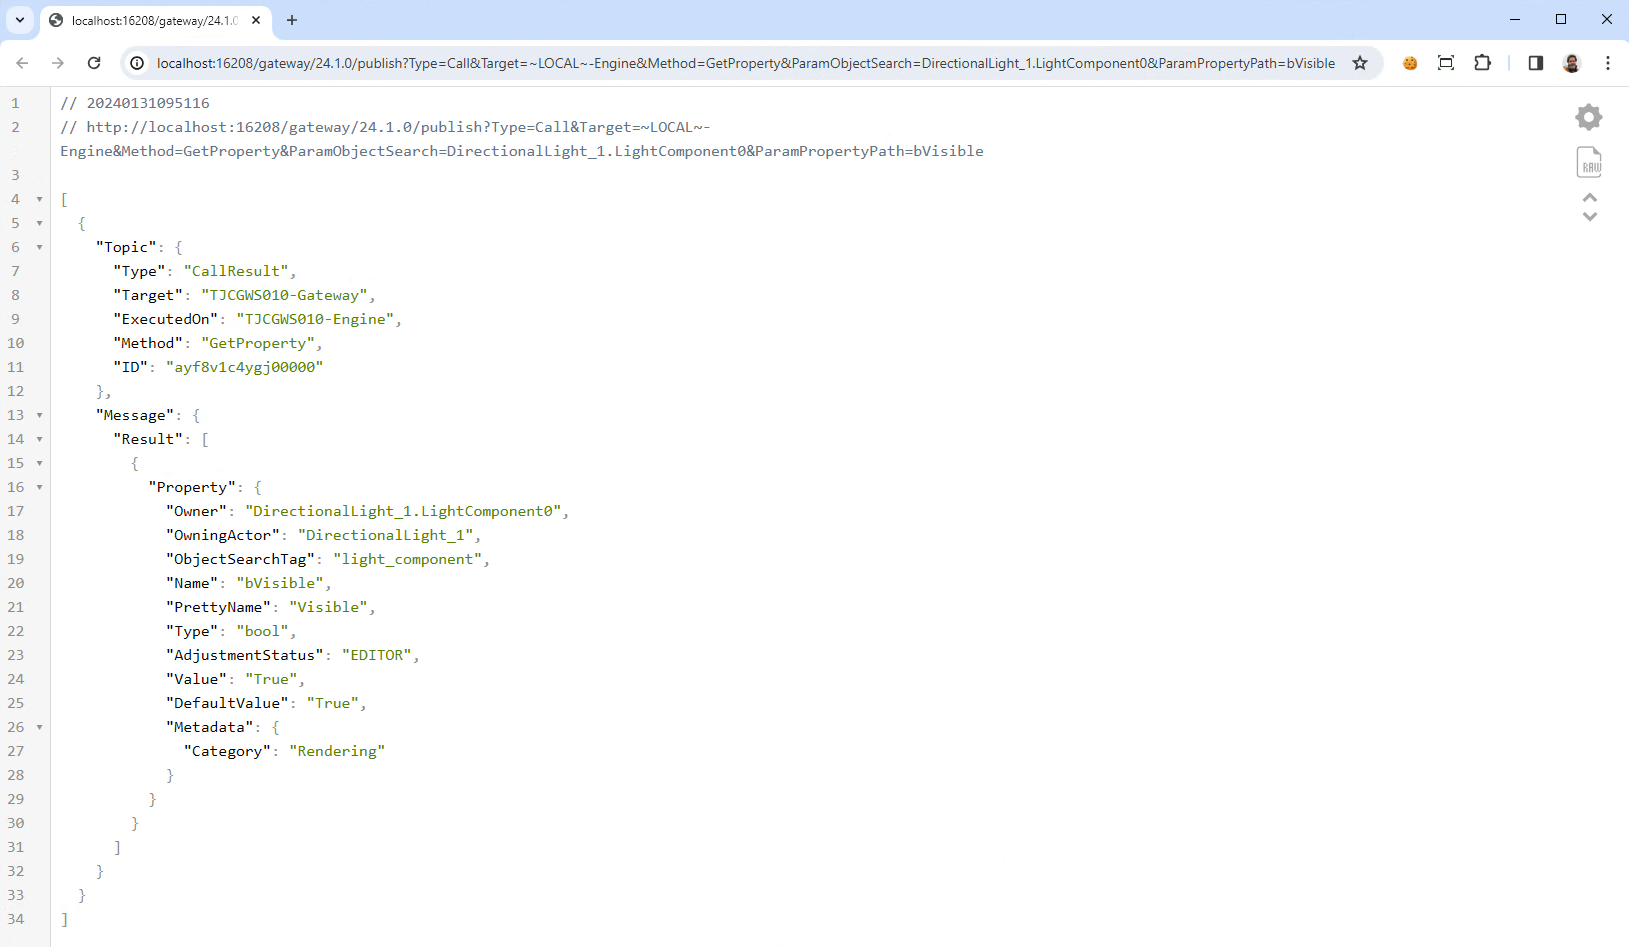
Copy GetProperty URL
Copies a URL that Gets this value to your clipboard. Paste it into your browser (or any HTTP client) to run it, depending on your browser, the response will be printed like this:
Copy SetProperty URL
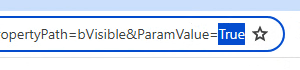
Copies a URL that Sets this value to your clipboard. To change the value, edit ParamValue in the URL before running it. Paste it into your browser to execute the change.
Copy Python SetProperty Code
Copies an example Python code to your clipboard how to Set this value. To change the value, edit paramValue.
import json, requests
url = "http://localhost:16208/gateway/publish"
paramObjectSearch = "DirectionalLight_1.LightComponent0"
paramPropertyPath = "bVisible"
paramValue = "True"
payload = json.dumps({"Topic":{"Type":"Call","Target":"~LOCAL~-Engine","Method":"SetProperty"},"Message":{"Params":{"ObjectSearch":paramObjectSearch,"PropertyPath":paramPropertyPath,"Value":paramValue}}})
response = requests.request("POST", url, data=payload)
print(response.content)
CallFunction
Besides getting and setting properties, you can call Blueprint functions and custom events. In the My Blueprint panel of the Editor, right-click a function or custom event and use the Pixotope API menu:
-
Copy Call URL — copies a URL-only HTTP GET request that calls the function (requires a running Pixotope Gateway).
-
Copy Python Call Code — copies example Python that calls the function.
Function arguments are pre-filled with their default values, so you only need to edit the values you care about before sending.
Multiple arguments are supported. In the URL they are passed as a bracketed list under ParamFunctionArguments, for example:
http://localhost:16208/gateway/publish?Target=MyMachine-Engine&Type=Call&Method=CallFunction&ParamObjectSearch=level_blueprint&ParamFunctionName=MyFunction&ParamFunctionArguments=[FirstValue,SecondValue]
ParamObjectSearch identifies the actor that owns the function (use level_blueprint for the Level Blueprint).
For any other API
-
Go to the documentation of the API call needed
-
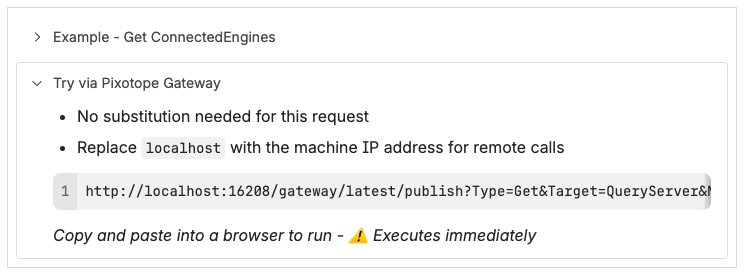
Open the "Try via Pixotope Gateway" section
-
Copy and paste the example URL into a browser
This executes the call immediately.
Test thoroughly before using in a production environment!
To protect Gateway requests from accidental calls, set a Passkey.
See Passkey Protection below.
Sending HTTP Requests
HTTP POST messages with a JSON data body are the main way of publishing messages via Pixotope Gateway. The whole functionality of a regular ZeroMQ Data Hub client should be available to anyone using HTTP POST.
Request specification
Target URL
The target URL is a Pixotope Gateway endpoint following this pattern:
http://[IPAddress]:[Port]/[Gateway]/publish
-
IPAddress - local network IP of the machine running Pixotope Gateway,
-
Port - port Pixotope Gateway listens on, 16208 by default (can be configured)
Older URLs might have a vesion specified like this:
http://[IPAddress]:[Port]/[Gateway]/[Version]/publish
This was deprecated, but versioned URLs still work.
For example, for a localhost URL, HTTP publishing would be:
http://localhost:16208/gateway/publish
Request body
Data body is a JSON containing Topic and Message objects, formatted in accordance with the general Data Hub guidelines.
Attachment objects are not supported by Pixotope Gateway
Learn more about Pixotope API - Message Scheme
Pixotope Gateway specifics
-
Any field signifying the identity of the sender (Source, RespondTo) don’t need to be sent. These fields will be filled in by Pixotope Gateway.
-
For Call messages, the ID field will always be set/overridden by Pixotope Gateway. It therefore doesn’t have to be included.
Request header
HTTP headers can be empty.
Example
Python example to Set CompositingColorSpace value on the Store:
import json, requests
url = "http://localhost:16208/gateway/publish"
payload = json.dumps({
                    "Topic": {
                        "Type": "Set",
                        "Target": "Store",
                        "Name": "State.General.CompositingColorSpace"
                    },
                    "Message": {
                        "Value": "Video"
                    }
})
response = requests.request("POST", url, data=payload)
Sending URL-only HTTP requests
Some messages can be formatted using a URL only HTTP GET method. This will make them easier to execute, but certain complexities will not be available (for example setting the whole struct with Set at once).
Use the Target URL (shown above) and add named URL parameters corresponding to Topic and Message fields of a regular Data Hub request.
http://localhost:16208/gateway/publish?Type=Set&Target=Store&Name=State.General.CompositingColorSpace&Value=Video
Example
Python example to Set camera Delay value on the Store:
import requests
requests.request("GET", "http://localhost:16208/gateway/publish?Type=Set&Target=Store&Name=State.General.CompositingColorSpace&&Value=Video")
You can also just execute the above URL from your web browser. Try it!
It can be useful for experimenting with your project.
Call type requests
Additionally, for Call Type requests, you can add named RPC arguments by adding URL parameters with a “Param“ prefix.
Example
Python example to Call a method CallFunction on TJCGWS040-Engine:
import requests
requests.request("GET", "http://localhost:16208/gateway/publish?Target=TJCGWS040-Engine&Type=Call&Method=CallFunction&ParamObjectSearch=level_blueprint&ParamFunctionName=Test")
Going against the standard practice we allow changing the state of our system with HTTP GET requests. This will be configurable in the future.
Passkey protection
By default, anyone who can reach a Pixotope machine on port 16208 can send Gateway requests to it. To reduce the risk of accidental requests, a saved test link opened in the wrong context, or a script run against the wrong machine, you can set a passkey that all Gateway requests must include.
The passkey is not a security feature!
It does not encrypt anything and does not authenticate the sender. It only reduces the risk of making accidental mistakes.
Setting the passkey
-
Go to the Launch panel in Director
-
Click the "Open control panel" button on the top right
-
Select PX - Set Gateway Passkey
-
Click "Launch LIVE"
-
Enter a Passkey in the Set Passkey input field
-
Press
Enter
Learn more about the Control panel library
Remove passkey again
-
Leave the Set Passkey input field empty and press
Enter
The passkey applies to every Gateway instance on the network and is stored on Store as State.General.GatewayPasskey.
Using the passkey
Add the passkey to every request. In URLs the parameter is named Passkey
-
In the PX - Set Gateway Passkey control panel
-
Click the "Click to copy" button
-
This copies the Passkey parameter including the passkey:
&Passkey=MyPasskey
http://localhost:16208/gateway/publish?Type=Get&Target=Store&Name=State.General&Passkey=MyPasskey
Requests without a matching passkey are rejected.
URLs generated by the Editor context menu and by the Try via Pixotope Gateway sections of this help center do not include a passkey. Append &Passkey=... manually when protection is active.
HTTP response
Any HTTP request sent to Pixotope Gateway will result in a response. In many cases the response is going to be quite minimal (for calls that only trigger changes without querying any data).
Responses to the different Type of the request
|
Type of request |
Response |
|---|---|
|
Set, Reset, Update, Log, Startup |
Resolves instantaneously with a confirmation of successfully publishing to Data Hub |
|
Get |
Resolves with first matching Update that Gateway receives from Data Hub |
|
Identify |
Resolves with first matching Self that Gateway receives from Data Hub |
|
Call |
Resolves with first matching CallResult that Gateway receives from Data Hub |
|
Self, CallResult |
Resolve instantaneously, pointless to send |
Custom timeout
If it so happens that a service targeted by your call doesn’t respond, Gateway will timeout after 1000 ms by default.
This value can be changed if you expect the targeted service to need more leeway.
URL-only example:
http://localhost:16208/gateway/publish?Type=Set&...&Timeout=2000
Python example:
import json, requests
url = "http://localhost:16208/gateway/publish"
payload = json.dumps({
                    "Topic": {...},
                    "Message": {...},
                    "Timeout": 2000
})
response = requests.request("POST", url, data=payload)