All settings global to a Pixotope level are available in the "Pixotope World Settings" Window in the Pixotope Editor.
Unreal’s World Settings ≠ Pixotope World Settings
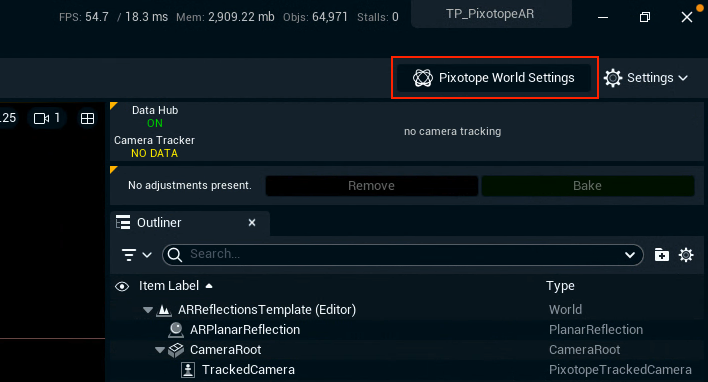
Pixotope related World Settings have been moved into its separate window named Pixotope World Settings. To open
-
Click on the Pixotope World Settings button on the top right
-
OR go to Window > Pixotope > Pixotope World Settings
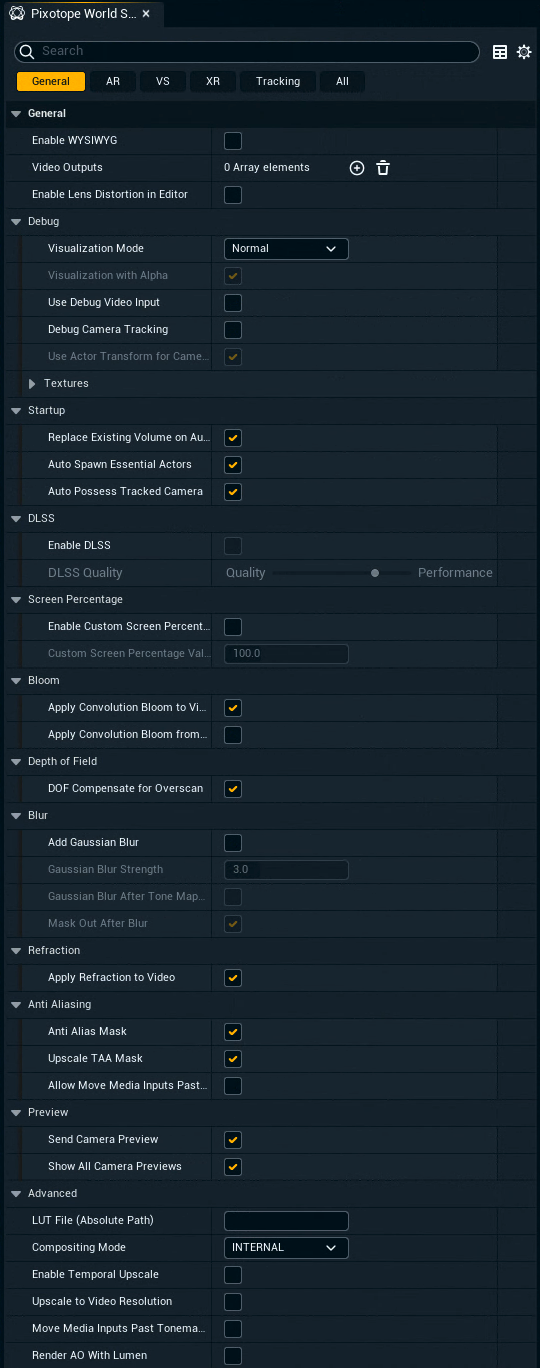
Sections
The settings are separated into sections which can be filtered on clicking the section buttons on the top of the window.
Most of the settings are accessible through the Adjustment panels in the Pixotope Director.
Learn more about Making adjustments - PRODUCTION
All properties can be controlled via the control panel.
Learn more about How to create a custom control panel
General
|
General |
|
|---|---|
|
Enable WYSIWYG |
Enable a preview output while working in the Editor. Learn more about the WYSIWYG broadcast workflow |
|
Video Outputs |
Define multiple outputs from a single engine. Learn more about how to Route more than one output per machine |
|
Debug |
|
|
Visualization Mode |
Optionally output intermediate buffers from before the output image is completed |
|
Visualization with Alpha |
Include alpha channel in intermediate buffers |
|
Use Debug Video Input |
Use a debug image instead of the external video input. Optionally set your own Custom Debug Textures (see below). |
|
Debug Camera Tracking |
Use debug tracking instead of the external tracking input Debug tracking can be found on:
|
|
Use Actor Transform for Camera Tracking Debug |
Allows to manually move the TrackedCamera using its transforms |
|
Enable Lens Distortion in Editor |
|
|
Textures |
|
|
Custom Debug Textures |
|
|
Startup |
|
|
Replace Existing Volume on Auto Spawn |
Convert the first unbound Post Process Volume, if one exists, with a Post Process Handler Learn more about PostProcessHandler vs PostProcessVolume |
|
Auto Spawn Essential Actors |
Make sure these essential Pixotope actors exist, when this level is opened
|
|
Auto Possess Tracked Camera |
Start with viewing the level through the main tracked camera, when playing this level |
|
DLSS |
|
|
Enable DLSS |
Use DLSS Learn more about Using NVIDIA DLSS |
|
DLSS Quality |
|
|
Screen Percentage |
|
|
Enable Custom Screen Percentage |
Learn more about Screen percentage Note: When using Custom Screen Percentage Unreal’s screen percentage is disregarded |
|
Custom Screen Percentage Value |
|
|
Bloom |
|
|
Apply Convolution Bloom to Video |
|
|
Apply Convolution Bloom from Video |
|
|
Depth of Field |
|
|
DOF Compensate for Overscan |
Modifies the depth of field calculations to make them as accurate as possible to incoming lens data |
|
Before DOF Translucency Compositing |
For materials which have Before DOF enabled.
Note: Adds a small performance cost |
|
Blur |
|
|
Add Gaussian Blur |
|
|
Gaussian Blur Strength |
|
|
Gaussian Blur After Tone Mapping |
|
|
Mask Out After Blur |
|
|
Refraction |
|
|
Apply Refraction to Video |
If you don't use refraction in front of the video, turn it off to save performance. Note: Materials with refraction also distort the video |
|
Anti Aliasing |
|
|
Anti Alias Mask |
Smoothes to the edges of the Compositing plane |
|
Upscale TAA Mask |
Upscale Anti Alias Mask using temporal antialiasing |
|
Allow Move Media Inputs Past AA |
When enabled together with "Use unjittered projection" on the Media input component, the media input (including 3D living photo) will not be affected by antialiasing. When enabling "Use unjittered projection", this setting will be enabled by default. 
|
|
Preview |
|
|
Send camera Preview |
Send this engines camera position to other machines. Learn more about Showing cameras of other engines |
|
Show All Camera Previews |
Show all camera positions in this Editor viewport |
|
Advanced |
|
|
LUT File (Absolute Path) |
Set a custom LUT file. Note: |
|
Compositing Mode |
Switch between Internal and External compositing mode. Learn more about Compositing modes |
|
Enable Temporal Upscale |
Controls the console command |
|
Upscale to Video Resolution |
When rendering in Preview Live mode the render resolution will be upscaled to match the video output resolution |
|
Move Media Inputs Past Tonemapping |
When enabled together with "Use unjittered projection" on the Media input component, the media input will not be affected by tone mapping. When enabling "Use unjittered projection", this setting will be enabled by default. |
|
Render AO With Lumen |
Force Ambient Occlusion rendering when using Lumen for Global Illumination |
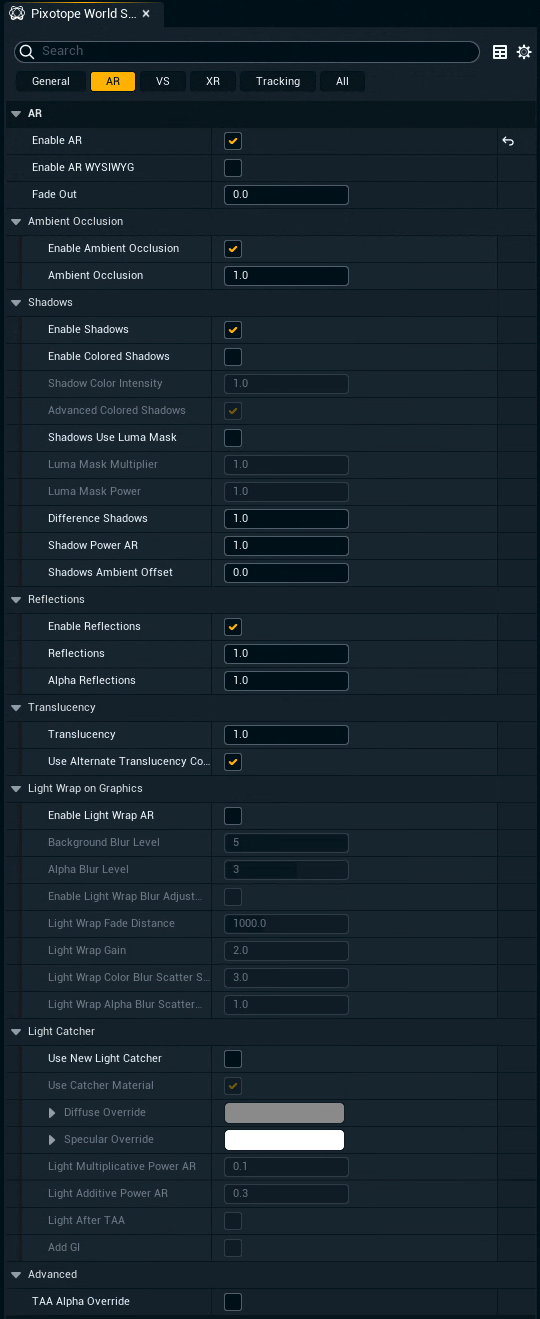
AR
|
AR |
|
|---|---|
|
Enable AR |
Render the input video behind the graphics |
|
Enable AR WYSIWYG |
Render the input video on the AR backplate in the Editor viewport |
|
Fade Out |
Fade out graphics |
|
Ambient Occlusion |
When using Lumen check the Render AO With Lumen setting above |
|
Enable Ambient Occlusion |
|
|
Ambient Occlusion |
Change the intensity |
|
Shadows |
|
|
Enable Shadows |
|
|
Enable Colored Shadows |
Switch between using black or colored shadows |
|
Shadow Color Intensity |
Multiplier for shadow colors |
|
Advanced Colored Shadows |
Samples the video texture for shadow color calculation, giving more realistic results |
|
Shadows Use Luma Mask |
Use the video luma mask to change the intensity of the shadows, for example in order to avoid awkward real-world/digital shadow overlaps |
|
Luma Mask Multiplier |
Enables the multiplication by the video luma mask. Used with new shadows |
|
Luma Mask Power |
Luma Mask Power factor |
|
Difference Shadows |
Global shadow strength control |
|
Shadow Power AR |
Global shadow power factor |
|
Shadows Ambient Offset |
Sets a maximum intensity for shadows which can be useful to simulate ambient light |
|
Reflections |
|
|
Enable Reflections |
|
|
Reflections |
Change the color intensity of the reflections |
|
Alpha Reflections |
Change how visible the reflections are |
|
Translucency |
|
|
Translucency |
|
|
Use Alternate Translucency Compositing |
Try disabling, if translucency compositing is not giving the expected results |
|
Light Wrap on Graphics |
|
|
Enable Light Wrap AR |
|
|
Background Blur Level |
|
|
Alpha Blur Level |
|
|
Enable Light Wrap Blur Adjustments |
|
|
Light Wrap Fade Distance |
|
|
Light Wrap Gain |
|
|
Light Wrap Color Blur Scatter Size |
|
|
Light Wrap Alpha Blur Scatter Size |
|
|
Light Catcher |
|
|
Enable Light Catcher |
Learn more AR Shadow, Reflection & Light Catcher |
|
Use Catcher Material |
|
|
Diffuse Override |
|
|
Specular Override |
|
|
Light Multiplicative Power AR |
|
|
Light Additive Power AR |
|
|
Light After TAA |
|
|
Add GI |
Add Global Illumination to light catcher. Note: When using Ray Tracing Global Illumination (Post Process Handler) the Shadow/Reflection/Light catcher material must be non black! |
|
Advanced |
|
|
TAA Alpha Override |
Use with DLSS |
Learn more about how to Set up an AR level
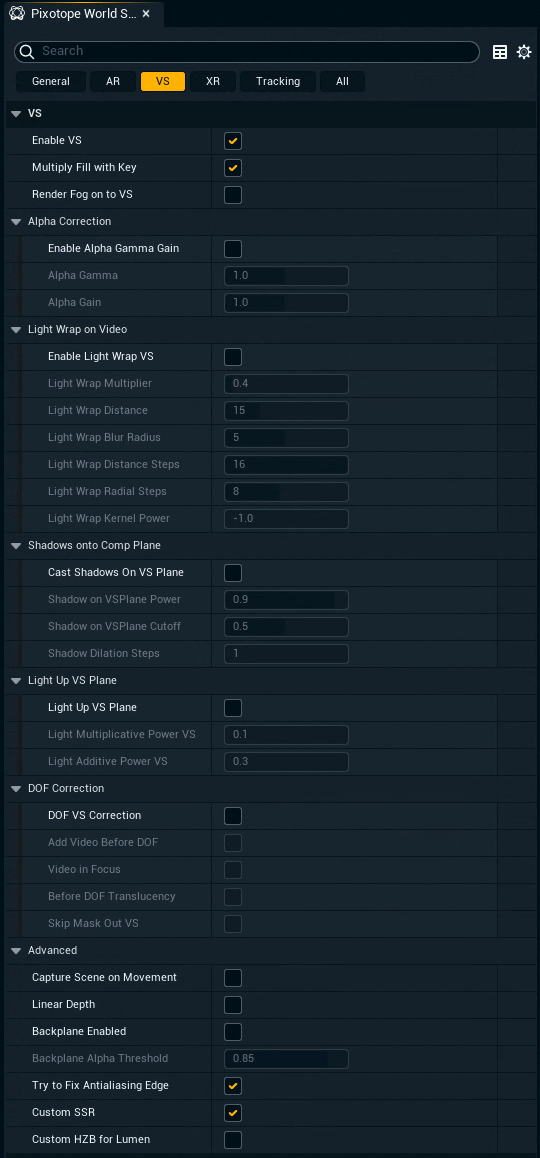
VS
|
VS |
|
|---|---|
|
Enable VS |
|
|
Multiply Fill with Key |
Multiply the input fill with the input key inside the engine |
|
Render Fog on to VS |
Enable, if volumetric fog should be visible on top of the compositing plane |
|
Alpha Correction |
|
|
Enable Alpha Gamma Gain |
|
|
Alpha Gamma |
|
|
Alpha Gain |
|
|
Light Wrap on Video |
|
|
Enable Light Wrap VS |
Adds a lightwrap around the edges of the image using the environment |
|
Light Wrap Multiplier |
|
|
Light Wrap Distance |
|
|
Light Wrap Blur Radius |
|
|
Light Wrap Distance Steps |
|
|
Light Wrap Radial Steps |
|
|
Light Wrap Kernel Power |
|
|
Shadows onto Comp Plane |
|
|
Cast Shadows On VS Plane |
Allows scene objects to cast shadows on to Compositing planes. Learn more about Compositing Planes |
|
Shadow on VSPlane Power |
|
|
Shadow on VSPlane Cutoff |
|
|
Shadow Dilation Steps |
|
|
Light Up VS Plane |
|
|
Light Up VS Plane |
|
|
Light Multiplicative Power VS |
|
|
Light Additive Power VS |
|
|
DOF Correction |
|
|
DOF VS Correction |
|
|
Add Video Before DOF |
|
|
Video in Focus |
|
|
Before DOF Translucency |
|
|
Skip Mask Out VS |
|
|
Advanced |
|
|
Capture Scene on Movement |
When enabled, the Respill scene capture will automatically update on plane movement. Note: This decreases performance while plane is moving |
|
Linear Depth |
When using virtual cameras this will smoothen the video on the compositing plane |
|
Backplane Enabled |
"Backplane" is geometry placed just behind the video plane, which can cast shadows and might be necessary for certain effects. Try to avoid using it, as it can cause issues with DOF and AO |
|
Backplane Alpha Threshold |
|
|
Try to Fix Antialiasing Edge |
This smoothens the edge of the video on the compositing plane. Try disabling it when you are
|
|
Custom SSR |
Allows the compositing plane to cast Screen Space Reflections even with Backplane disabled |
|
Custom Lumen Reflections |
Similar to Custom SSR but for Lumen |
Learn more about how to Set up a VS level
XR
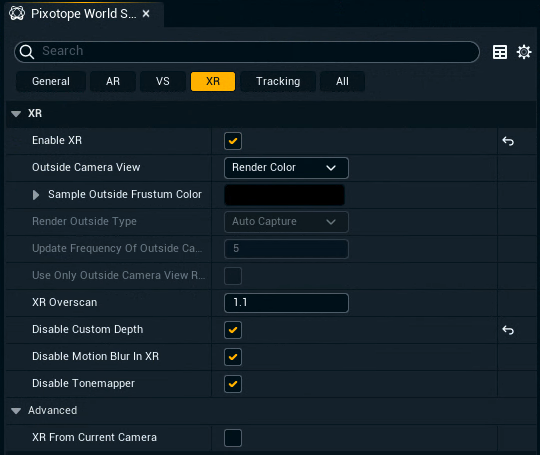
Learn more about Pixotope World Settings > XR
Learn more about how to Set up an XR level (virtual window)
Tracking
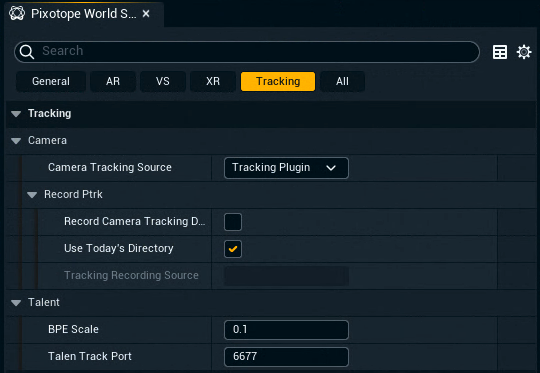
|
Tracking |
|
|---|---|
|
Camera |
|
|
Camera Tracking Source |
Switch between tracking sources |
|
Record Ptrk |
|
|
Record Camera Tracking Data |
Start to record tracking data. Learn more about Recording and playback of tracking data |
|
Use Today's Directory |
|
|
Tracking Recording Source |
|
|
Talent |
|
|
BPE Scale |
Learn more about how to Set up Body Pose Estimation (BPE) |
|
TalenTrack Port |
Learn more about how to Set up TalenTrack |
Learn more about how to Configure camera tracking