An XR license is needed for
-
Rendering XR Walls
-
Showing Pixotope World settings > XR
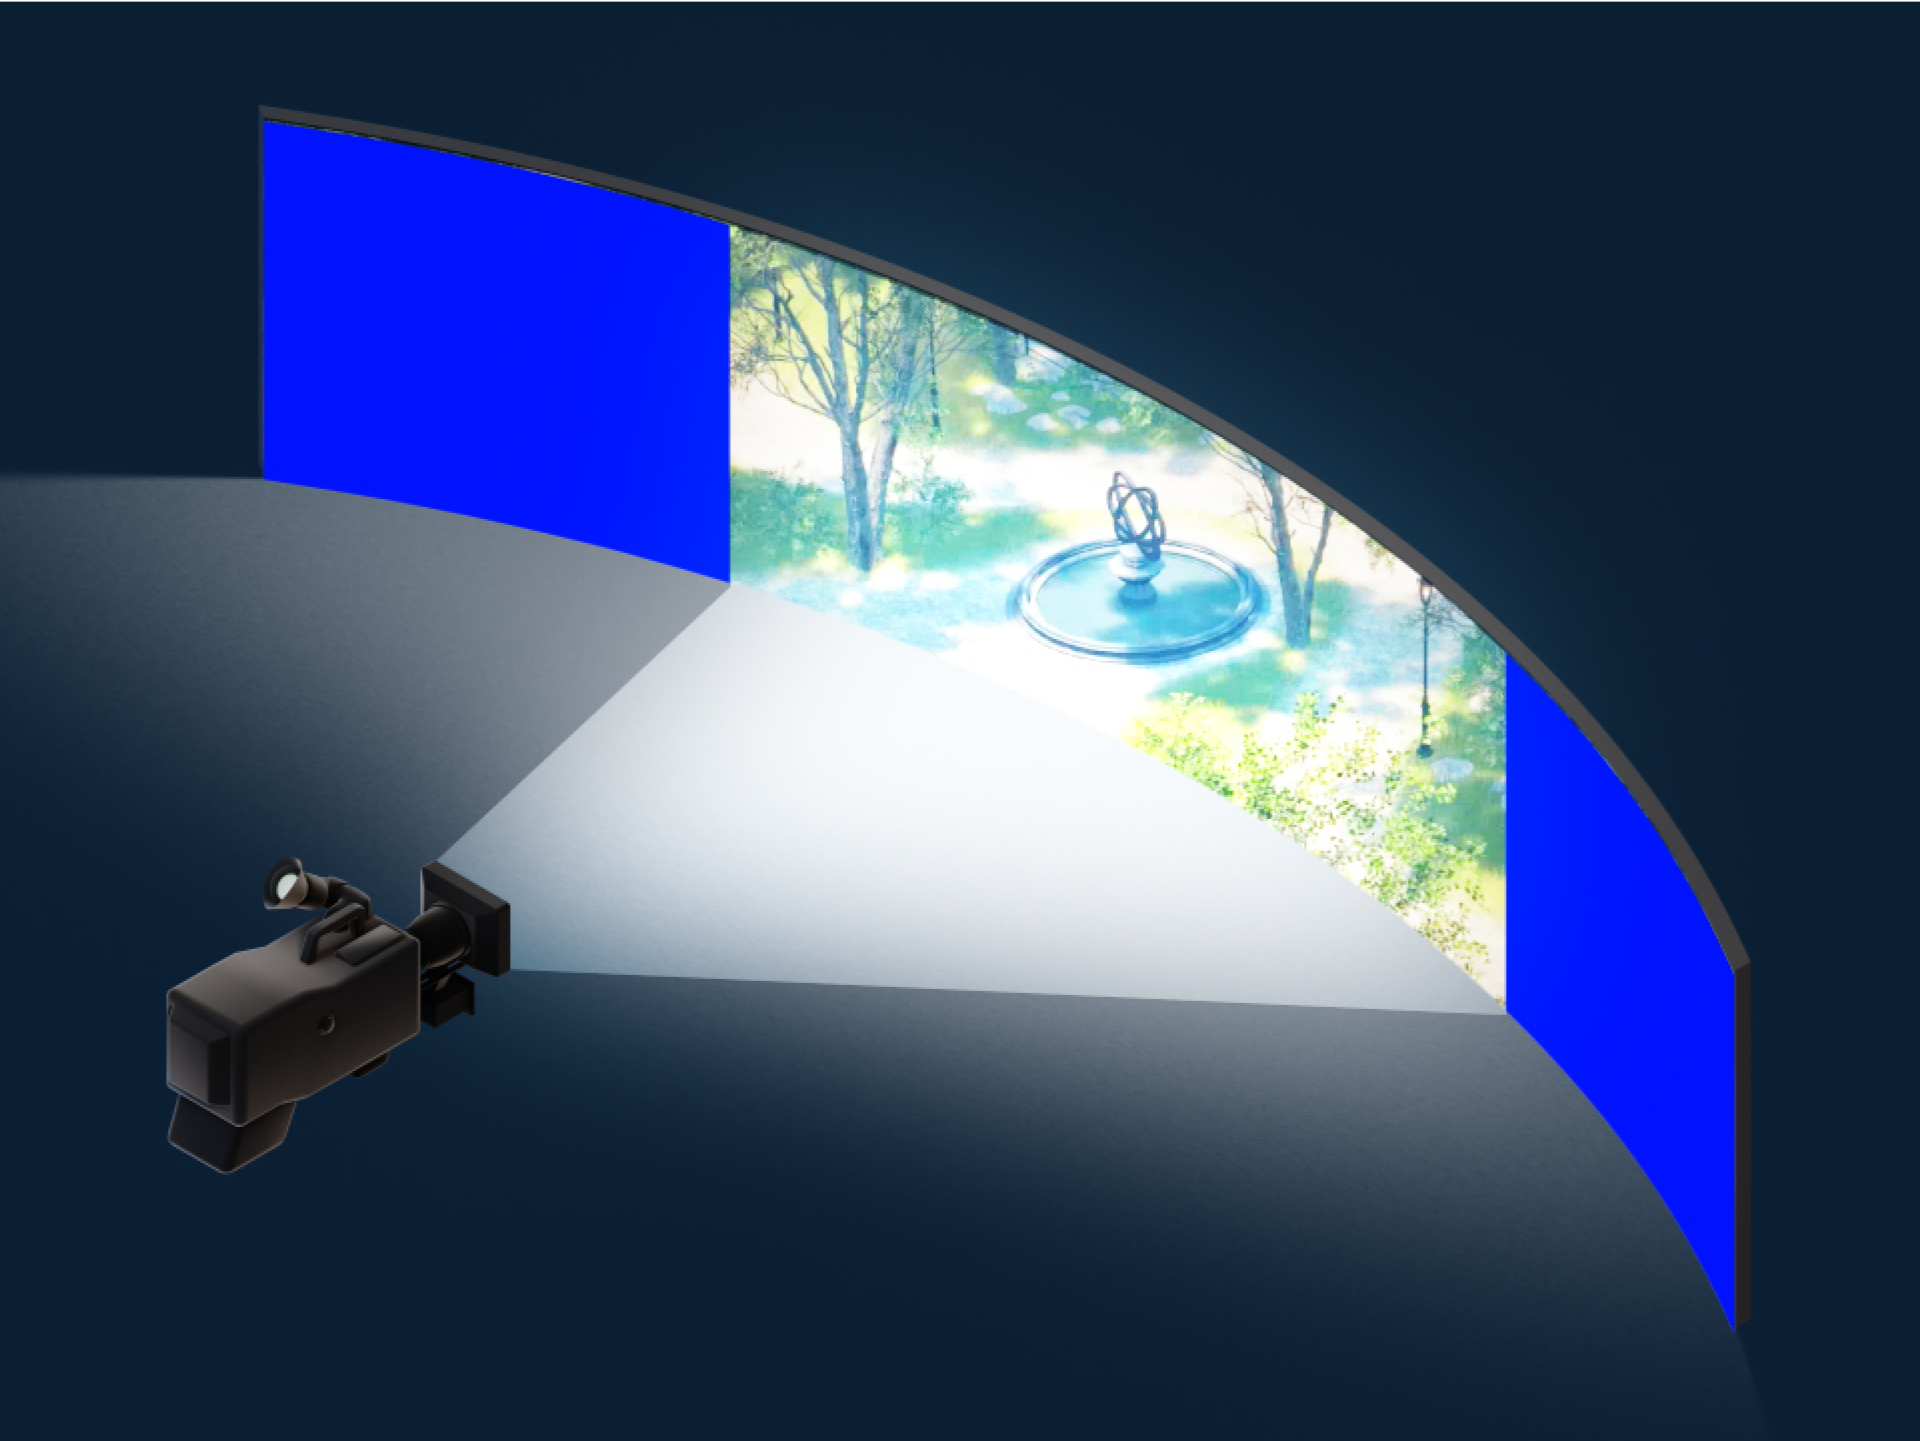
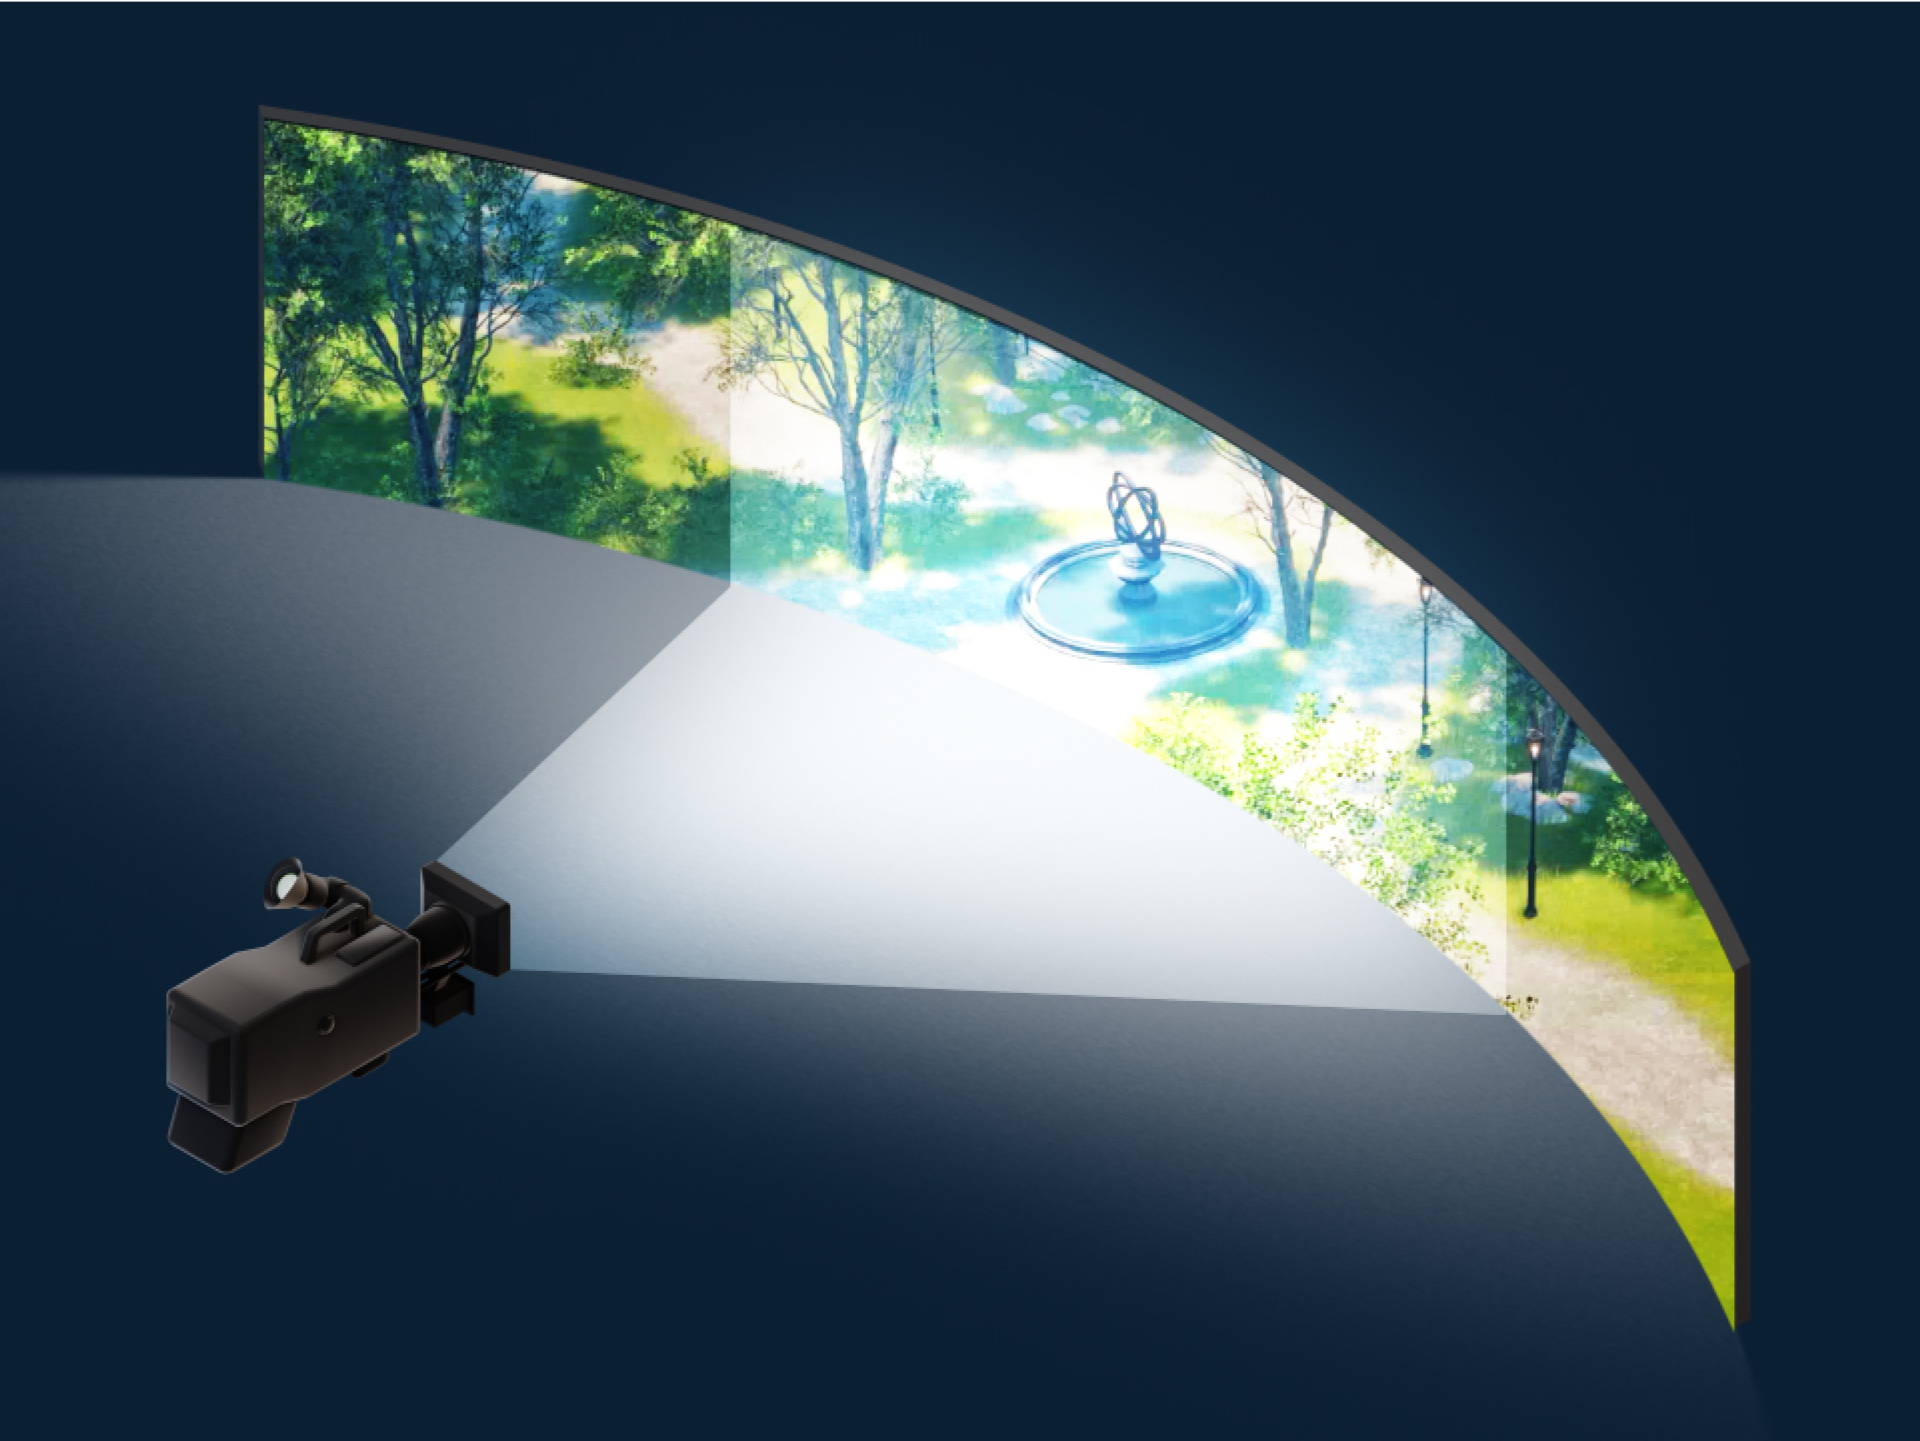
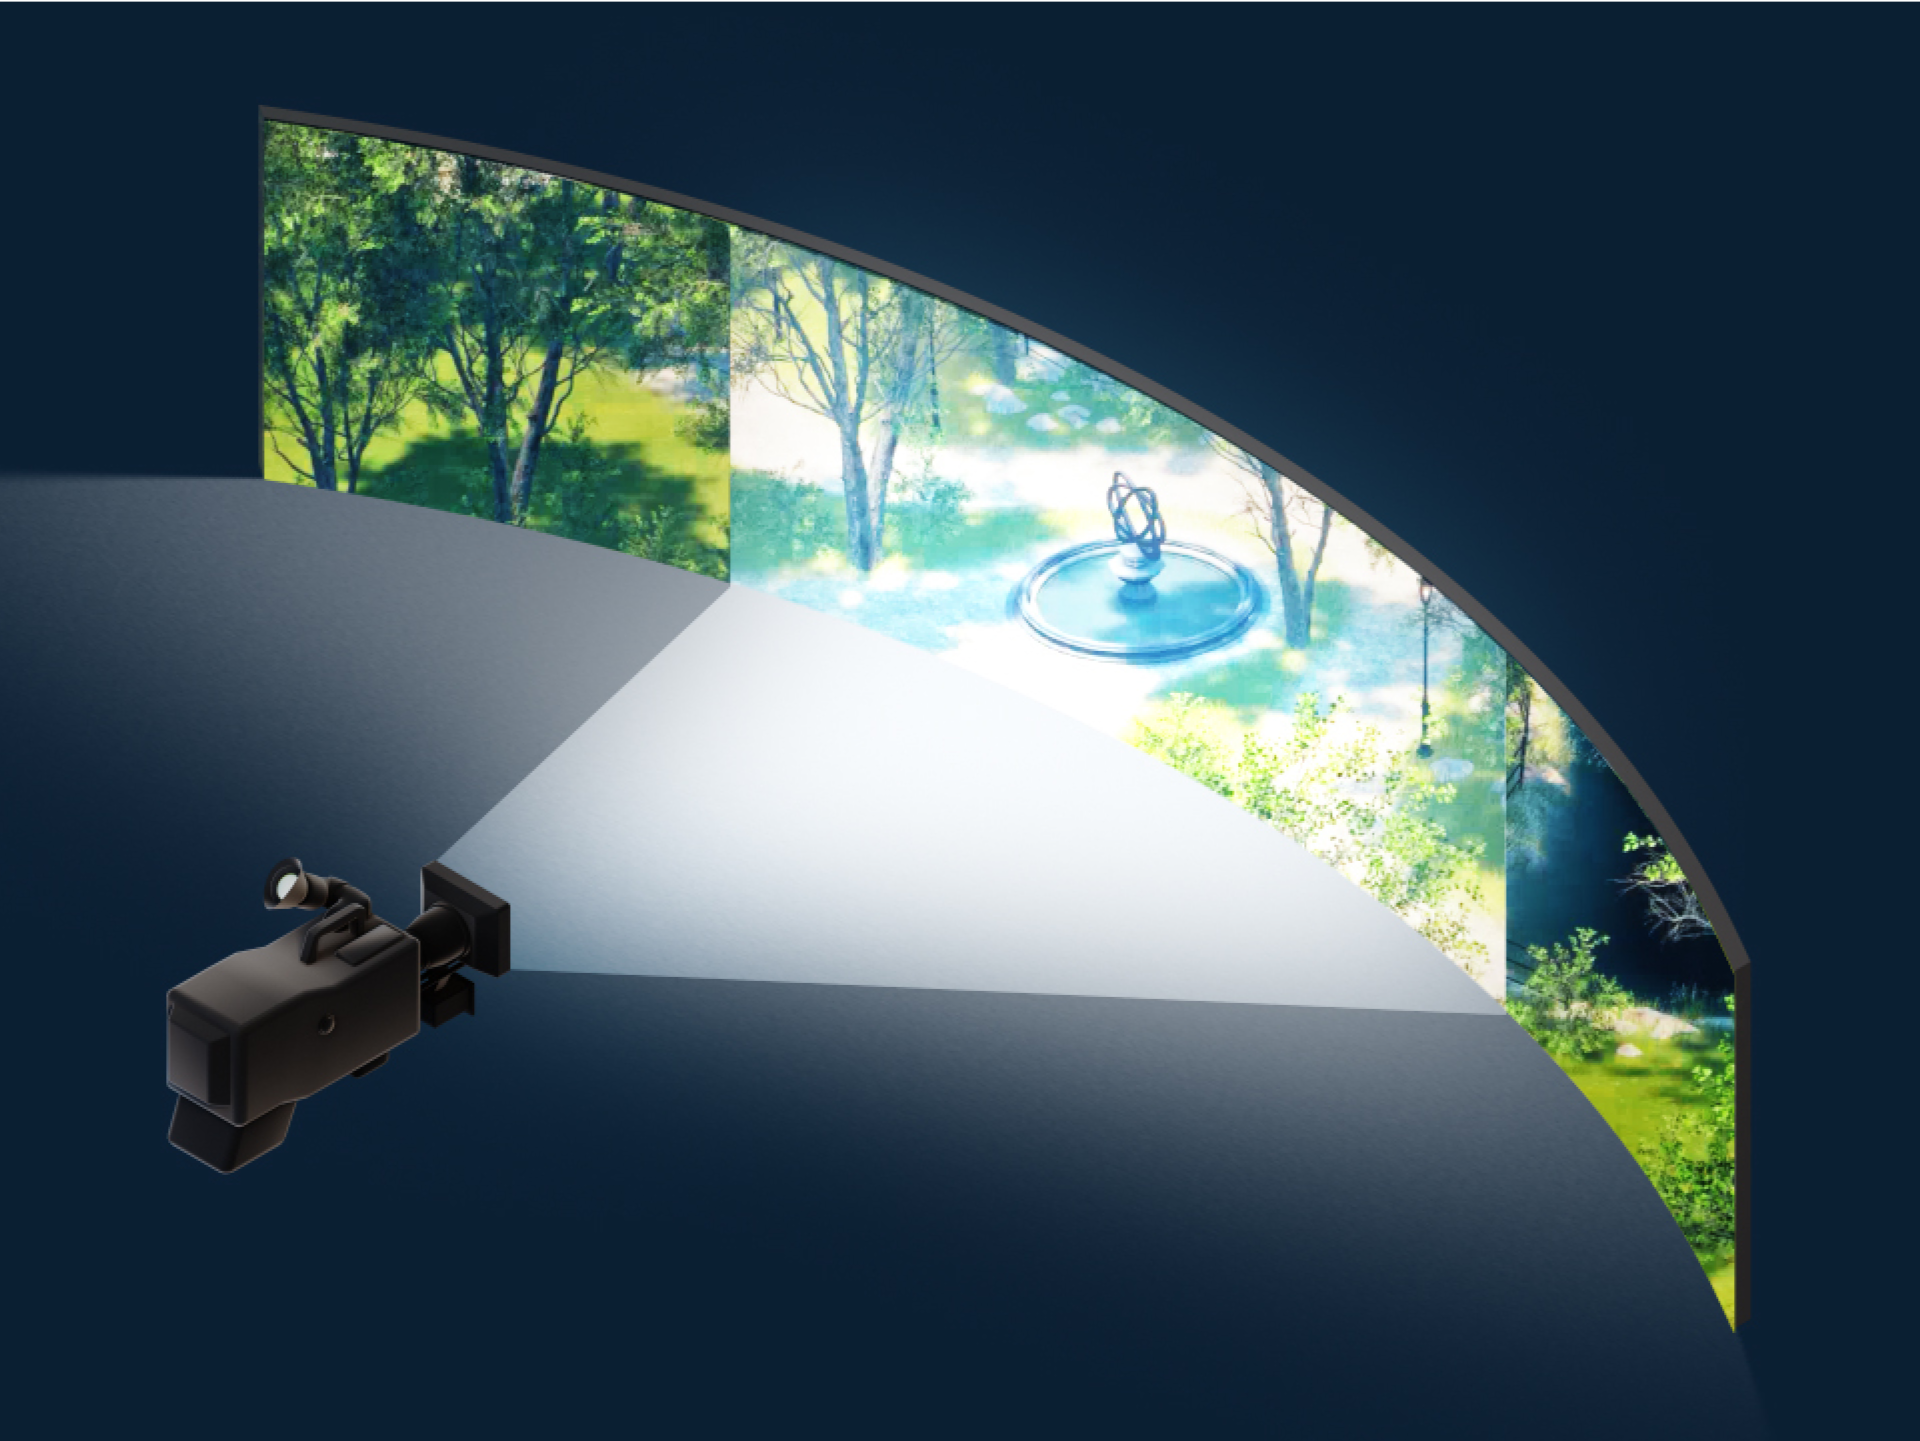
With XR you can extend your physical set beyond its borders or create a virtual window into another world. This is done by rendering the virtual scene onto for example LED screens using the perspective of the camera.
The XR Wall is a special Pixotope actor which is used as the representation of the physical display screen within the virtual environment.
Learn more about how to Set up an XR level (virtual window)
Learn more about how to Adjust XR
XR Wall settings
|
Render to Output |
Enable XR rendering for this wall |
|---|---|
|
Output position |
Choose how to place this XR Wall on the render output. Options are
|
|
Output |
The name of the Output routed to this machine, onto which the XR Wall should be rendered to. Internal Buffers can be used for visualizing while there are no outputs routed yet. |
|
Visualize |
Preview the output directly on the XR wall (WYSIWYG) |
|
Add Border |
Renders a border around the XR wall in the viewport |
|
Custom Output Position Min/Max |
When the Output position is set to "Custom", use these parameters to specify the exact position of the XR Wall on the render output. |
|
Flip XAxis/YAxis |
Flips the X/Y axis of the output |
|
Machines |
Entering one or more windows machine names, enables selective rendering for an XR wall, so it only renders on the specified machines. |
|
Color grading |
Compensate for color discrepancies of the physical planes. |
Global settings
Pixotope World Settings > XR
|
Enable XR |
Output off axis textures instead of regular fill |
|---|---|
|
Outside Camera View |
Choose the outside camera frustum rendering depending on your needs Render a custom color
Render extended view (optimized)
Render separate view
Choose this option, if you need a static outside frustum for lighting and reflections. The XROutsideFrustumPoint actor can be found next to the TrackedCamera under the CameraRoot. |
|
Sample Outside Frustum Color |
Used when Outside Camera View is set to Render Color Color to use when trying to sample outside of frustum view |
|
Render Outside Type |
Used when Outside Camera View is set to Render Separate View
|
|
Auto Capture Optimize Aspect Ratio Auto Capture Size X Auto Capture Size Y |
Used when Outside Camera View is set to Render Separate View Set a specific render resolution
|
|
Update Frequency Of Outside Camera View |
Used when Render Outside Type is set to Cube Lower values mean better FPS in outside frustum capture but higher performance demands. 1 = update every frame, 5 = update disabled |
|
Use Only Outside Camera View Rendering |
Use the Outside Camera View rendering even inside the camera view (frustum). Reduces the quality but removes any seams. Mostly useful for testing |
|
XR Overscan |
Blends between inside and outside camera view. 1 = no blend |
|
Disable Custom Depth |
Gain performance by disabling Custom Depth rendering (disables AR and VS) |
|
Disable Motion Blur In XR |
Disable Motion Blur when outputting |
|
Disable Tonemapper |
Checked by default as one usually does not want tone mapping on XR Walls.
|
|
Advanced |
|
|
XR From Current Camera |
Uses the current camera position to project XR. Enable this when using virtual camera moves |
Pixotope World Settings > General
|
DLSS > DLSS Quality |
Uses NVIDIA's DLSS to increase the quality of the XR rendering. For supported graphics cards and more details see Using NVIDIA DLSS |
|---|---|
|
Debug > Textures > Custom Debug Texture XROutside Frustum |
Set a custom texture for the outside camera view |
Tracked camera > Pixotope Tracked Camera
|
Outside Frustum Camera Position |
Manually set the position from which the outside frustum is rendered from |
|---|
Tracked camera > Camera Tracker Component > XR Frustum Optimization
|
Auto Algorithm |
Algorithm used to find the best viewing angle when using Automatically Optimize Camera Rotation and FOV |
|---|---|
|
Use Center |
If enabled, only the XR wall centers are used instead of the corners to find the best viewing angle |
|
Use Roll |
If enabled, the camera is also rotated around its X axis. By default Automatically Optimize Camera Rotation and FOV only rotates the camera around Y and Z. |
|
Optimize Aspect Ratio |
Also optimizes the aspect ratio when using Automatically Optimize Camera Rotation and FOV |
|
Instant Adjustment |
If enabled, the camera is moved instantly to the position.
|
|
Roll Step |
Defines the accuracy of the roll, if Use Roll is enabled |
|
Use Zoom Momentum |
To avoid rapid zoom changes, a momentum to the zoom is added.
|
|
Zoom Momentum |
Speed of zoom changes, if Use Zoom Momentum is enabled |