Skip table of contents

Supported input and output types

AJA

See System Requirements for supported AJA video cards

Input/Output options

Input

Input source

Spigot number 1-8

Channel

  • Fill - default setting, allows for using the internal Video Keyer (default)

  • Key - External Key - the video is keyed externally and is provided as a separate fill and key signal

  • Fill/Key - External Key - the video is keyed externally and is provided as a combined fill and key signal

Use a media input for Key - External Key. The camera system needs to be Fill.

Output

Output destination

Spigot number 1-8

Output type

  • Fill - for internal compositing mode (default)

  • Key - for external compositing mode

Learn more about Compositing modes

Audio

Enable

Learn more about how to Configure audio output

BMD

See System Requirements for supported BlackMagic Design DeckLink video cards

Blackmagic Desktop Video Setup

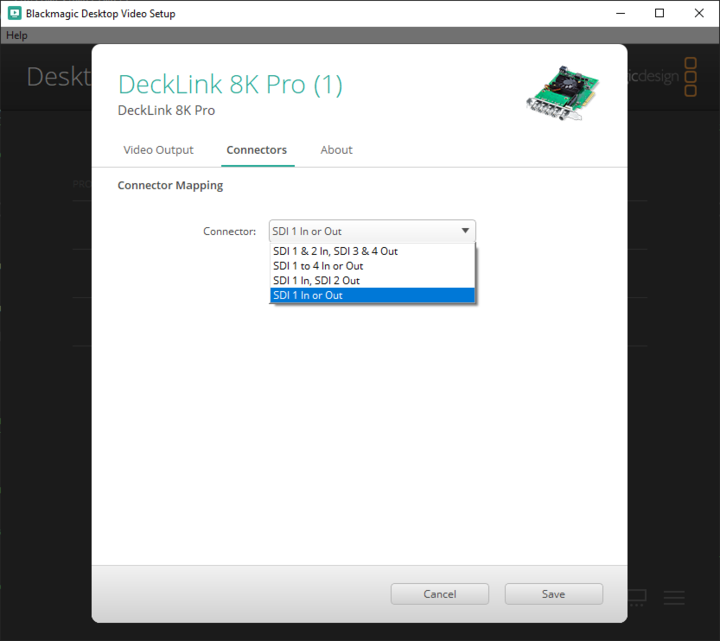
  1. Set the Connector Mapping to SDI 1 In or Out in the Blackmagic Desktop Video Setup application

Blackmagic Desktop Video Setup application - Connector Mapping options

SDI 1 & 2 In, SDI 3 & 4 Out

This option requires two cables for a single input.

Not something that you would often use.

SDI 1 to 4 In or Out

This option is for 8k or UHD2, it requires all four cables to be used for a single input or output.

Not something that you would often use.

SDI 1 In, SDI 2 Out

This option is a full duplex mode, if you use this you must use the same spigots within Director (e.g. Camera SDI 1, and Output SDI 1).

This can help if you have no reference -- but not having a Genlock reference is STRONGLY not advised.

SDI 1 In or Out

This option treats all spigots as either a single input or single output (e.g. Camera SDI 1, and Output SDI 2).

This is the suggested mode for Pixotope.

Input/Output options

Input

Input source

Spigot number 1-8

Channel

  • Fill - default setting, allows for using the internal Video Keyer (default)

  • Key - External Key - the video is keyed externally and is provided as a separate fill and key signal

  • Fill/Key - External Key - the video is keyed externally and is provided as a combined fill and key signal

Use a media input for Key - External Key. The camera system needs to be Fill.

Output

Output destination

Spigot number 1-8

Output type

  • Fill - for internal compositing mode (default)

  • Key - for external compositing mode

Learn more about Compositing modes

Audio

Enable

Learn more about how to Configure audio output

NDI

Video streaming protocol - What is NDI?

Input

Input source

Any NDI stream on this network

Output

Output destination

Name of your output stream

Output type

  • Fill

  • Key

Learn more about Compositing modes

SRT

SRT is an established open source video streaming protocol

Input and Output

Mode

  • Caller

    • The Caller machine uses the IP address to establish the connection

  • Listener - default

    • The Listener machine is waiting for a Caller machine to establish the connection

Send to

Applicable for Caller mode

  • IP addresses of all connected machines

  • Custom IP address

Port

Port number - default: 16213

Codec

  • MPEG4 - default

  • H264

Latency buffer

Latency in ms - default: 120

Password

If a password is set, the stream is encrypted - default: no password set

The frame rate of the incoming stream (caller) and the input (listener) must be the same!

If the Editor drops its frame rate will below the one chosen, it will lead to an SRT input buffer overflow. This then causes a rebuild of the videoIO pipeline which will, during rebuild, display “Misconfigured Input Signal”.

The frame rate of the output (caller) and the listener of the stream must be the same!

If the receiver of the output is not able to consume the incoming packets fast enough its SRT receiver buffer will overflow and most likely break the connection.

Ways to send an SRT stream

Ways to send an SRT stream

Pixotope

You can use another Pixotope machine to output an SRT stream.

Learn more about how to Configure routing

FFMPEG

Run ffmpeg as source via command line

CODE
ffmpeg.exe -fflags nobuffer -re -protocol_whitelist file,srt -i <here_input_file> -r 30 -g 30 -b:v 25M -vcodec mpeg4 -f mpegts srt://10.11.36.22:16210

Options used:

-fflags nobuffer- lower latency

-re - realtime playback with frame pacing here defined by -r 30

-i <here_input_file> - input source, may be a file (with path) or a url

-protocol_whitelist file,srt - on some (older or not full build) ffmpeg versions, a manual whitelisting of protocols may be required

-g 30 - GroupOfPictures size, here every the 30th frame is a key frame. Lower value means lower latency but very low values may impact quality whilst using temporal codecs (mpeg4, h264)

-b:v 25M- maximum bitrate used - here 25 MBps - quality versus required bandwidth. If user see frame drops (in the logs) it will cause broken image after decoding (broken macroblocks or whole areas of frame) should try to lower that value

-vcodec mpeg4- recommended codec

-f mpegts- transport format (only mpegts is supported)

srt://10.11.36.22:16210 - target IP and port

Ways to read an SRT stream

Ways to read an SRT stream

Pixotope

You can use the stream as an input to another Pixotope machine.

Learn more about how to Configure routing

VLC (only as Caller)

  1. Open Network

  2. Enter the IP address in the following format: srt://192.168.1.1:16213

FFPLAY

Run ffplay as sink via command line

CODE
ffplay.exe srt://0.0.0.0:16210?mode=listener -framerate 30

Options used:

srt://0.0.0.0:16210 - target port

-framerate 30 - for older versions of ffplay one has to specify the frame rate to secure against buffer overflow

Experimental

File

File (experimental)

Experimental feature. Use with caution!

Plays any video and image files supported by FFmpeg

File input

This allows you to use an image or video file as input.

  1. Go to SETUP > Configure > Routing

  2. Set the Input to File (experimental)

  3. Select the image or video file you want to input

  4. Playing of the file starts immediately and is played in a loop

Limitations

  • No play/pause controls available

  • The frame rate can not be changed

  • There is no guarantee of fluent playback. The speed depends on the read rate of your hard drive.

File output

This allows you to output to a video file.

  1. Go to SETUP > Configure > Routing

  2. Set the Output to "File (experimental)”

  3. In the Output destination field type or paste a path in case no file exists yet
    OR Click on "Select file" and choose a video file you want to overwrite

  4. Writing to the file starts automatically (when videoIO pipeline was rebuilt)

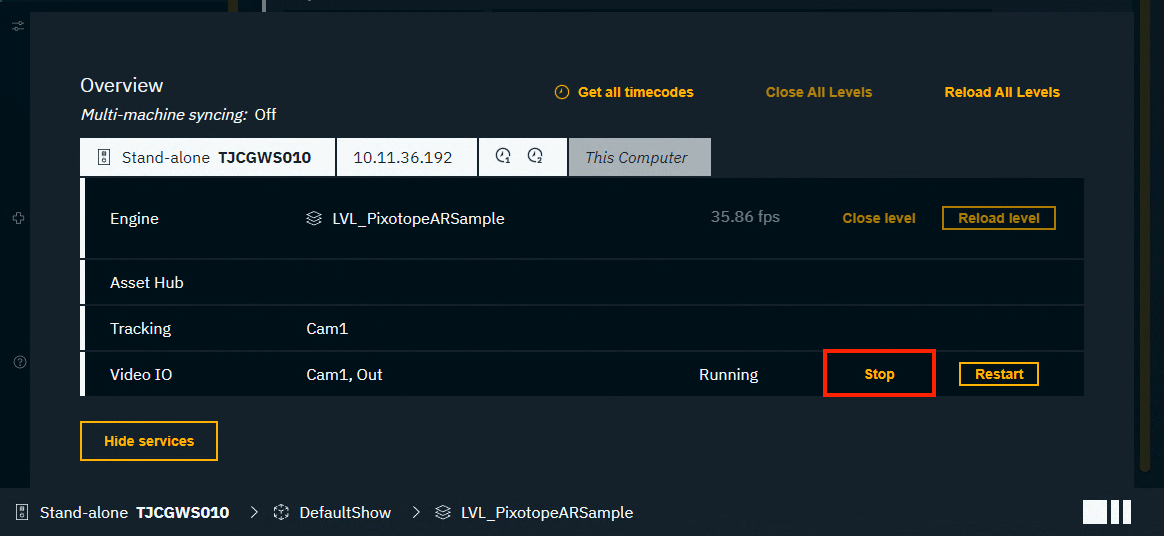
  5. Stop the writing to the file, by stopping the videoIO service through the Status panel

Restarting the service will start the write process again and overwrite the same file!

To avoid overwriting the file, before you restart the service, do one of the following:

  • Change Output to something else then File (experimental)

  • Clear the Output destination field

  • Change the filename so it writes to a different file

Limitations

  • Currently supported codecs: mpeg4

  • Currently supported container formats: mp4, avi, mov, mpegts, mpeg

GPU

GPU output (experimental)

Experimental features can be enabled in SETUP > Show > Show settings
Use with caution!

GPU output

This allows you to output to an HDMI output of your graphics card directly. The output is stretched to the whole monitor’s resolution and put in the "background". It can be used seamlessly in a dual monitor setup.

  1. Set the Output to GPU (experimental) in SETUP > Configure > Video IO > Output

  2. Use the "Output destination" to select which output on your graphics card to use

GPU output does not support Genlock

Pass-through mode

Pass-through mode (experimental)

Experimental features can be enabled in SETUP > Show > Show settings
Use with caution!

Pass-through mode

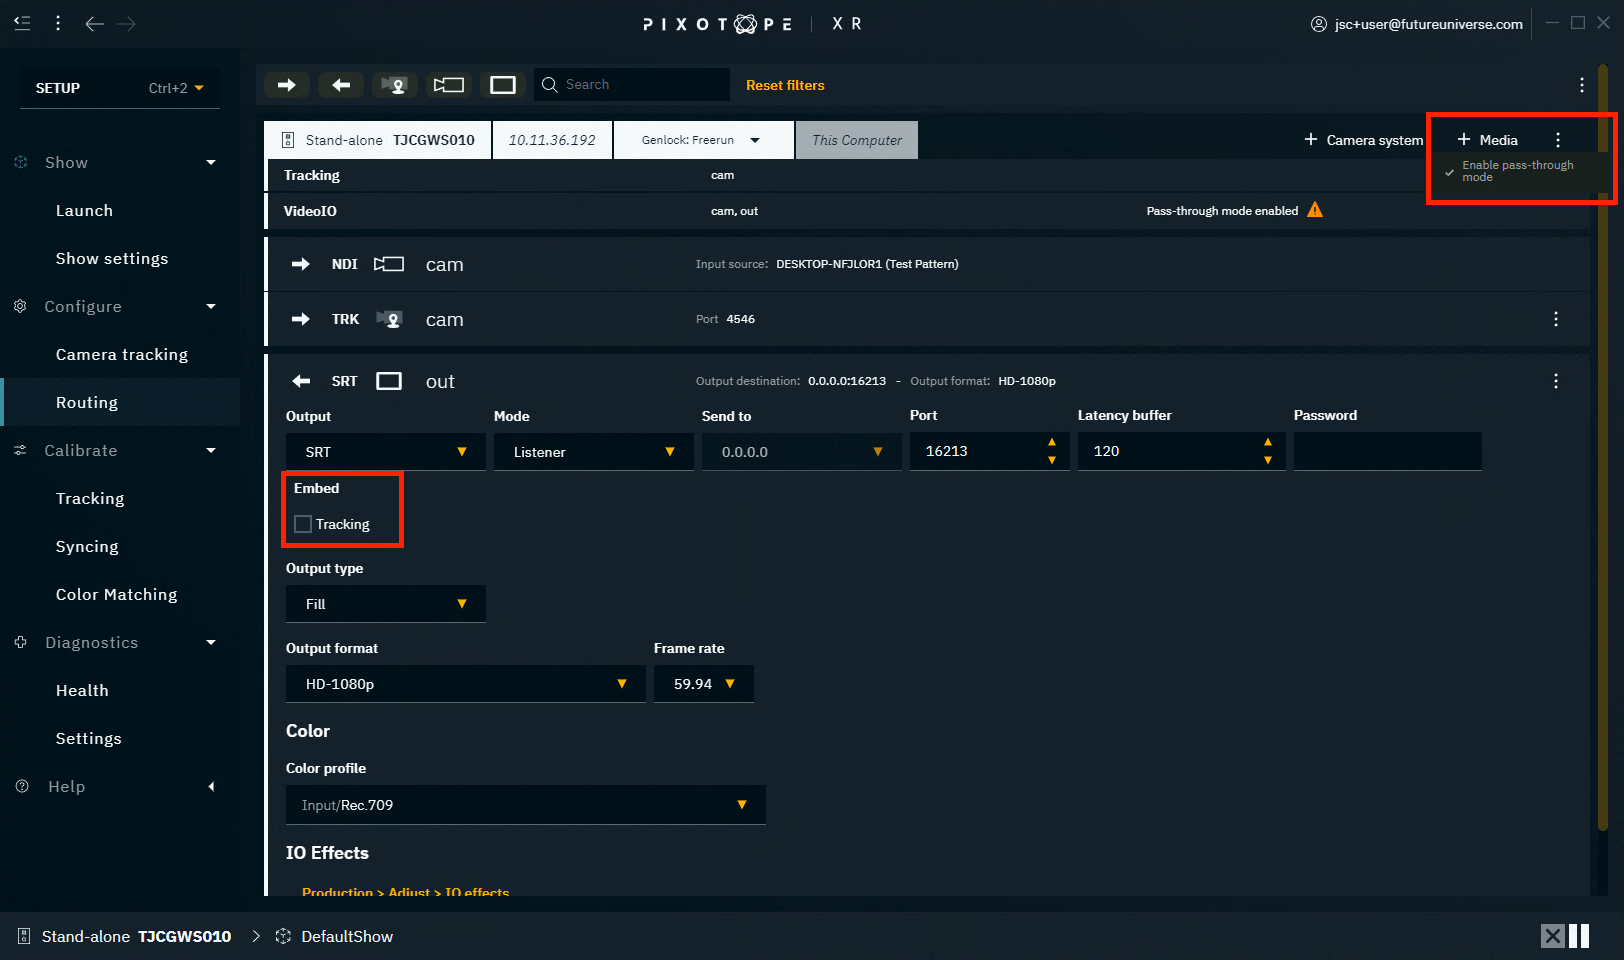
This mode allows a machine to embed the incoming tracking data in the video signal and output it via SRT.

  1. Enable pass-through mode via the overflow menu in SETUP > Configure > Routing > Machine header

  2. Enable Embed Tracking

Keep the Editor/Engine closed on that machine

JavaScript errors detected

Please note, these errors can depend on your browser setup.

If this problem persists, please contact our support.