With presets you can save and apply fixed sets of values.
-
-
Quickly save and apply different settings for fast experimentation while still editing
-
-
-
Give presets a name to easily remember them and recall them through the Control panel or the API
-
You can find the presets drawer in all adjustment panels except for IO Effects and XR.
.gif?cb=2c9aad70a589ab35c241a050b49d4b12)
General
Presets are
-
stored in the show file
-
shared between machines
Presets store values based on the shown scope in the header of the drawer.
|
Panel |
Save |
Apply |
|---|---|---|
|
Video Keyer |
Stores all values which can be set on this panel. This includes settings on all sub pages. |
Applies the values on the selected camera system/media input. |
|
Composite |
Stores all Live changes* of this panel and its sub pages. |
Applies the stored values to All machines*. |
|
Camera Effects |
||
|
Color Grading |
||
|
Object |
Stores all Live changes* of the selected object(s) and the object selection itself. |
Applies the stored values to the saved object selection. When applied in Director, it also switches to the saved object selection. |
For presets in Composite, Camera Effects, Color Grading and Object panel
-
the level needs to be running in LIVE or Preview Live mode on all machines
-
the send to group needs to be set to All machines. Group overrides are not supported!
Test complex presets before using them on-air to ensure smooth performance.
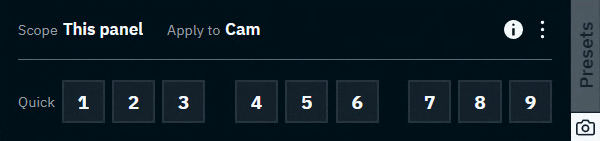
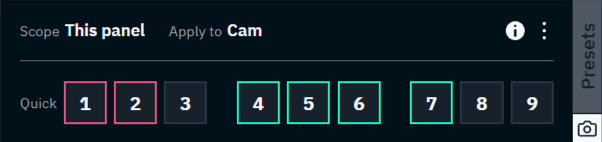
Use quick presets
Quick presets allow you to easily store settings in predefined slots and recall them with a single click.
Open quick presets
-
Click on the camera snapshot icon on the bottom right of the presets drawer to open/close it
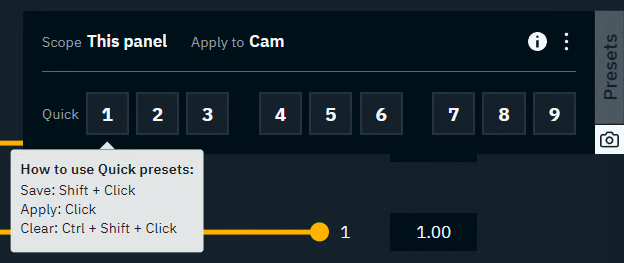
Save a quick preset
-
Shift + Clickone of the numbered slots to store the current settings-
NOTE: Saving in a slot which already has a preset stored, will overwrite the stored preset
-
-
The slot in which the settings are stored, is shown with a white outline
-
Video Keyer panel: In a multi-machine setup, the outline color is the machine color from which this preset was saved
-
The number of stored presets are also shown next to the snapshot icon on the bottom right of the presets drawer
-

Apply a quick preset
-
Clickon a numbered slot to apply the preset stored in it-
NOTE: Clicking on an empty slot does nothing
-
Clear a quick preset
-
Ctrl + Shift + Clickon a numbered slot to clear the preset stored in it-
NOTE: Numbered slots do not have to be cleared, they can just be overwritten (See "Save a quick preset")
-
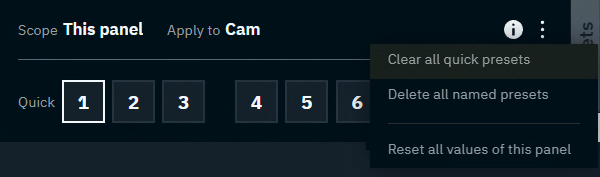
Clear all quick presets
-
Open the overflow menu on the top right of the drawer and choose "Clear all quick presets"
-
Click "Clear" to confirm
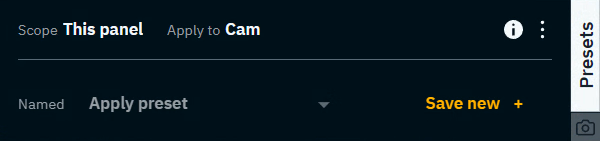
Use named presets
Named presets allow you to save settings using custom names so they are recognizable and can be recalled later through the presets drawer, the control panel or the API.

Open named presets
-
Click on the "Presets" button on the right to open/close the drawer
Save a named preset
-
Click "Save new +"
-
Choose a name for your preset
-
When using the default name it will automatically count up. Preset 1, Preset 2, …
-
The number of stored presets are also shown on the top right of the presets drawer
-
Apply a named preset
-
Open the Preset dropdown
-
Select a named preset
Last applied indicates which preset was last applied. However, we are not keeping track of the changes you make afterwards. This means that last applied and the values you see might be different.
Overwrite a named preset
-
Open the Preset dropdown
-
Hover over the preset you want to overwrite with the current data
-
Click on the Disc icon

-
Click on "Overwrite" to confirm

Rename a named preset
-
Open the Preset dropdown
-
Hover over the preset you want to rename
-
Click on the Edit icon

-
Edit the name and press
Enteron your keyboard or clickEnterto confirm
Delete a named preset
-
Open the Preset dropdown
-
Hover over the preset you want to delete
-
Click on the Trash can icon

-
Click on "Delete" to confirm

Delete all named presets
-
Open the overflow menu on the top right of the drawer and choose "Delete all named presets"
-
Click "Delete" to confirm
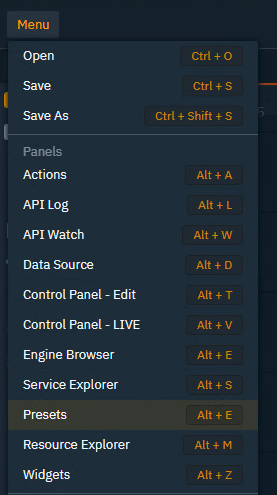
Trigger named presets from the Control panel
For presets in Composite, Camera Effects, Color Grading and Object panel
-
the level needs to be running in LIVE or Preview Live mode on all machines
Test complex presets before using them on-air to ensure smooth performance.
-
In the Control panel open the Presets panel via the Menu on the top left
-
The panel gets docked next to the last active panel
-
Link multiple presets
-
Drag a preset category onto the canvas and select a Tab or Dropdown widget to link them to
-
Optionally remove presets, change their displayed names or their order
Link a single preset
-
Drag a specific preset onto the canvas and select a Button (trigger) widget to link them to
Target a specific group
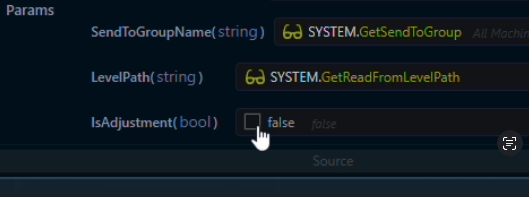
To target a group of machines which is different from what is specified in the Read from - Send to header.
-
Double click the SendToGroupName parameter
-
Enter the name of the target group and click "Confirm"

Target default send to group
To get back the default behaviour and use the send to group in the Read from - Send to header
-
Click the System actions icon on the bottom of the widget icons on the left side
-
Drag the GetSendToGroup onto the SendToGroupName field
* Advanced
When storying a preset in the Composite, Camera Effects, Color Grading and Object panel
-
we do NOT store all the values of the panel in the preset
-
we only store the values that changed compared to the saved level
That means when applying a preset
-
we apply the stored/changed values
-
we reset all the other values of the panel
Therefore are presets triggered from the Control panel by default sent as "Live Changes" (isAdjustment=true). This is contrary to any other action sent from the control panel.
To change this, uncheck isAdjustment in the Params list of the trigger action.
Note: This might lead to unexpected results.
Learn more about Adjusting levels - Live changes and Group overrides