Record video
Recording to a video file can be done via the
-
the PX - Record and playback control panel
-
Creates a temporary File output routing while recording
-
-
OR the Routing panel
-
Needs a dedicated File output routing
-
What is being recorded?
Video
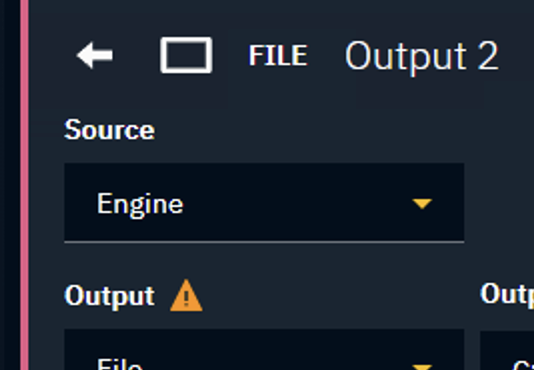
We record the output source of the routed output (by default set to Engine).
If there is no level launched, an empty file is being recorded.
To record the input, pass it through the LVL_VideoPassThrough level.
Tracking (optional)
If enabled, we record the tracking data of the active camera.
For compatibility reasons is the tracking information embedded inside the audio channel. This data sounds like loud noise when listened to in a video player.
Only want to record tracking? Check out Recording and playback of tracking data
Recording format
Files are recorded as .mkv using the h264 codec.
Learn more about the file output format
Recording options
|
Record |
|
|---|---|
|
Pause |
|
|
Stop |
|
Via the control panel

Open control panel
-
Click the "Open Control panel" button in the Launch panel
-
Select the "PX - Record and playback" control panel
-
Click "Launch LIVE"
Start recording
On the left side
-
Use the "Select machine" dropdown to select the one you want to record from
-
Use the "Select output" dropdown to select which output to record
-
A file name suggestion is created based on machine and output name
-
-
Optional: Change the file name base
-
Optional: Select "Embed tracking"
-
Embeds the tracking data of the active camera into the audio channel
-
-
Click "Record" to start recording
-
Creates a temporary File output routing using the same settings as the selected output
-
Adds a timestamp to the file path
-
Starts writing into that file
-
-
Click "Stop" to stop recording
-
Finalizes the recorded file
-
Clicking "Pause" allows you to temporarily pause the recording and continue writing to the same file when clicking "Record" again.
Via the routing panel

Create output routing
In the Routing panel
-
Add a Media output to the machine you want to record
-
Select File as Output
-
Choose the output path for the recorded file
-
If the routed machine is the local one, you can pick a folder using the folder icon
-
-
Optional: Change the file name base
-
Optional: Select "Embed tracking"
-
Embeds the tracking data of the active camera into the selected audio channel
-
-
Optional: Change output format or color profile
Start recording
-
Click "Record" to start recording
-
Click "Stop" to stop recording
-
A notification is shown allowing you to
-
Open the recorded file in your default video player
-
Open the folder in the file explorer

-
Playback video
Playing back files or image sequences can be done via
-
the PX - Record and playback control panel
-
OR the Routing panel
Playback format
A variety of file and image sequence formats are supported.
Learn more about the file input formats
Playback options
|
Loop |
Enables looping of the video (enabled by default) |
|---|---|
|
Play |
Plays the video |
|
Pause |
Pauses the video |
|
Back to start |
Moves the playhead back to the beginning of the video |
Via the control panel
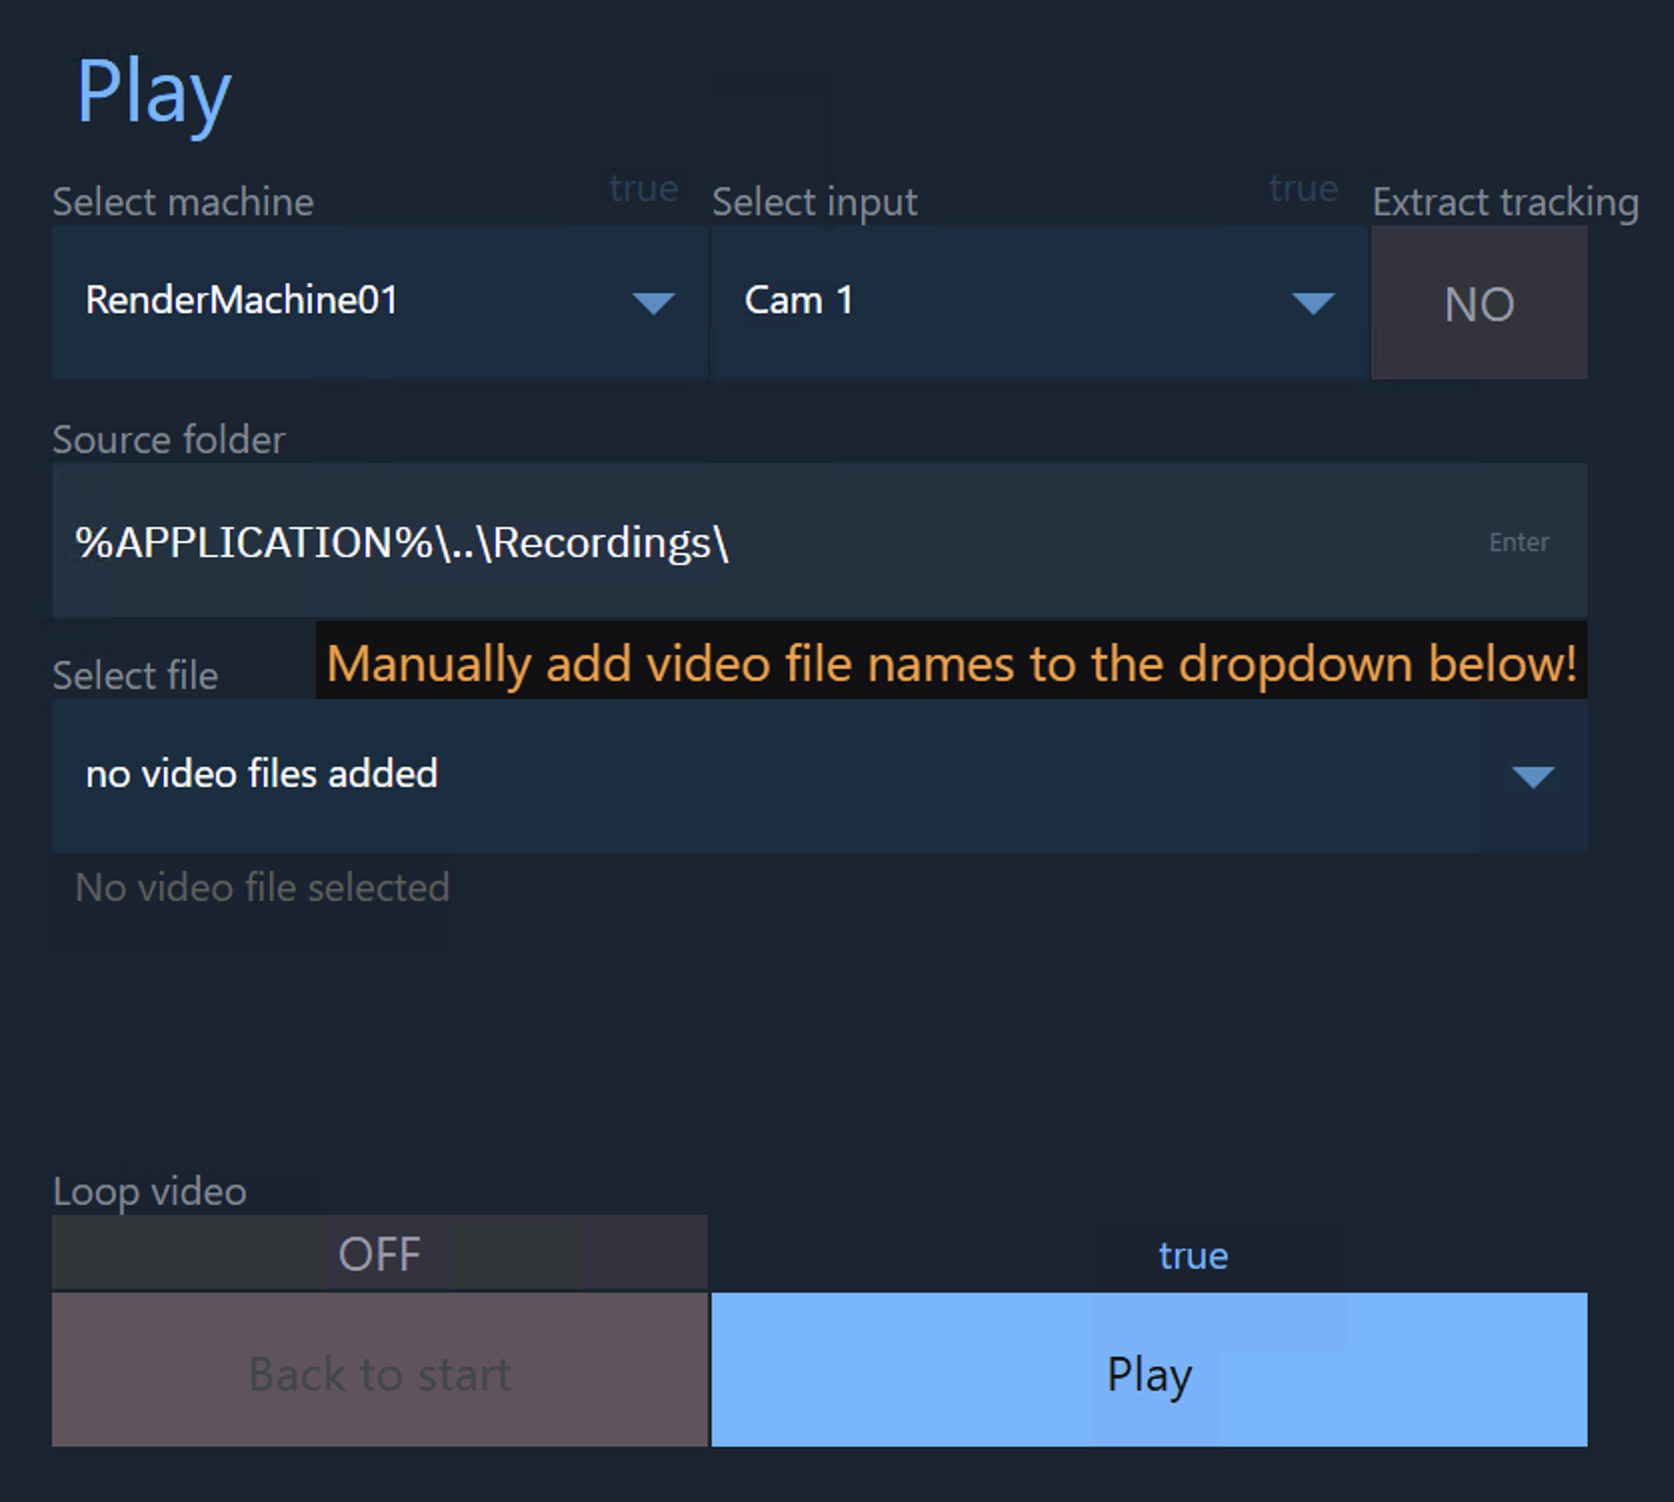
Open control panel
-
Click the "Open Control panel" button in the Launch panel
-
Select the "PX - Record and playback" control panel
-
Click "Edit"
-
OR "Launch LIVE" if file names have already been specified
-
Specify file names
-
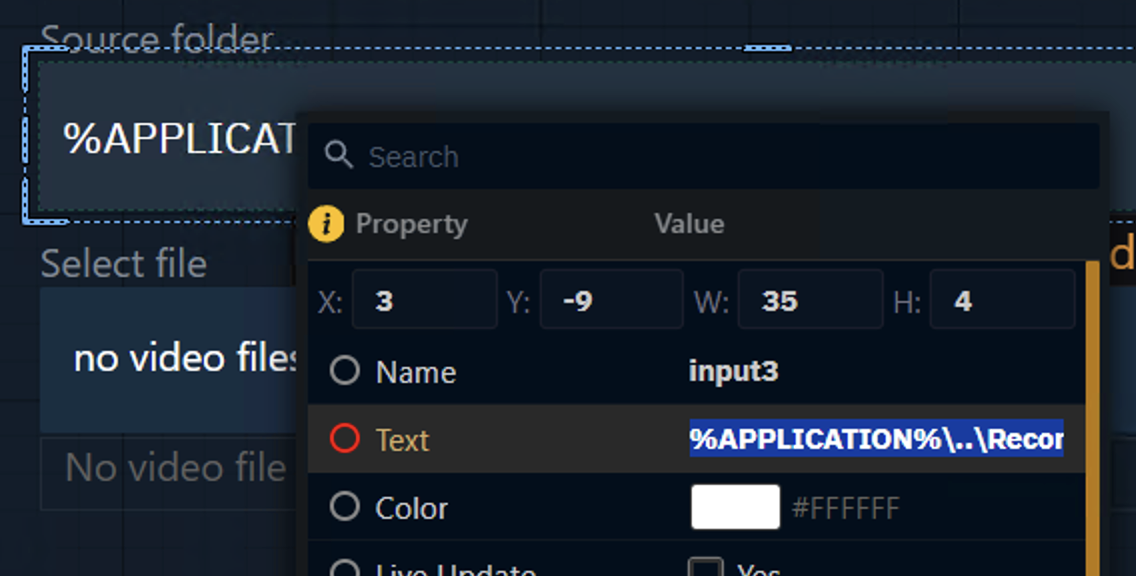
Optional: Right click "Source folder" and update the Text to change its default value
-
Right click the "Select file" dropdown
-
Click on "OPTIONS"

-
Add the file names (including extensions) and display names as options
-
The folder path is set in the

-
-
Press
Ctrl+Sto save the Control panel
Start configuring
On the right side
-
Use the "Select machine" dropdown to select the one to configure
-
Use the "Select input" dropdown to select which input to change
-
Optional: Select "Extract tracking"
-
Extracts the tracking data from the audio channel
-
-
Optional: Change the Source folder
-
Select a file from the "Select file" dropdown
-
Sets that input route to file
-
Sets the input path using the above selection
-
-
Click "Play" if not already playing
Via the routing panel

Add input routing
In the Routing panel
-
Add a Camera system or Media input on the dedicated machine
-
Select File as Input
-
Choose the input path for the file to be played
-
If the routed machine is the local one, you can pick a file using the file icon
-
The "Input file" dropdown lists all supported file formats
-
-
Optional: Change the Input file using the "Input file" dropdown
-
Optional: Select "Extract tracking"
-
Extracts the tracking data from the selected audio channel
-
-
Optional: Change output format or color profile
-
Click "Play" if not already playing