The Machines panel allows you to view and configure your machines from a single panel.
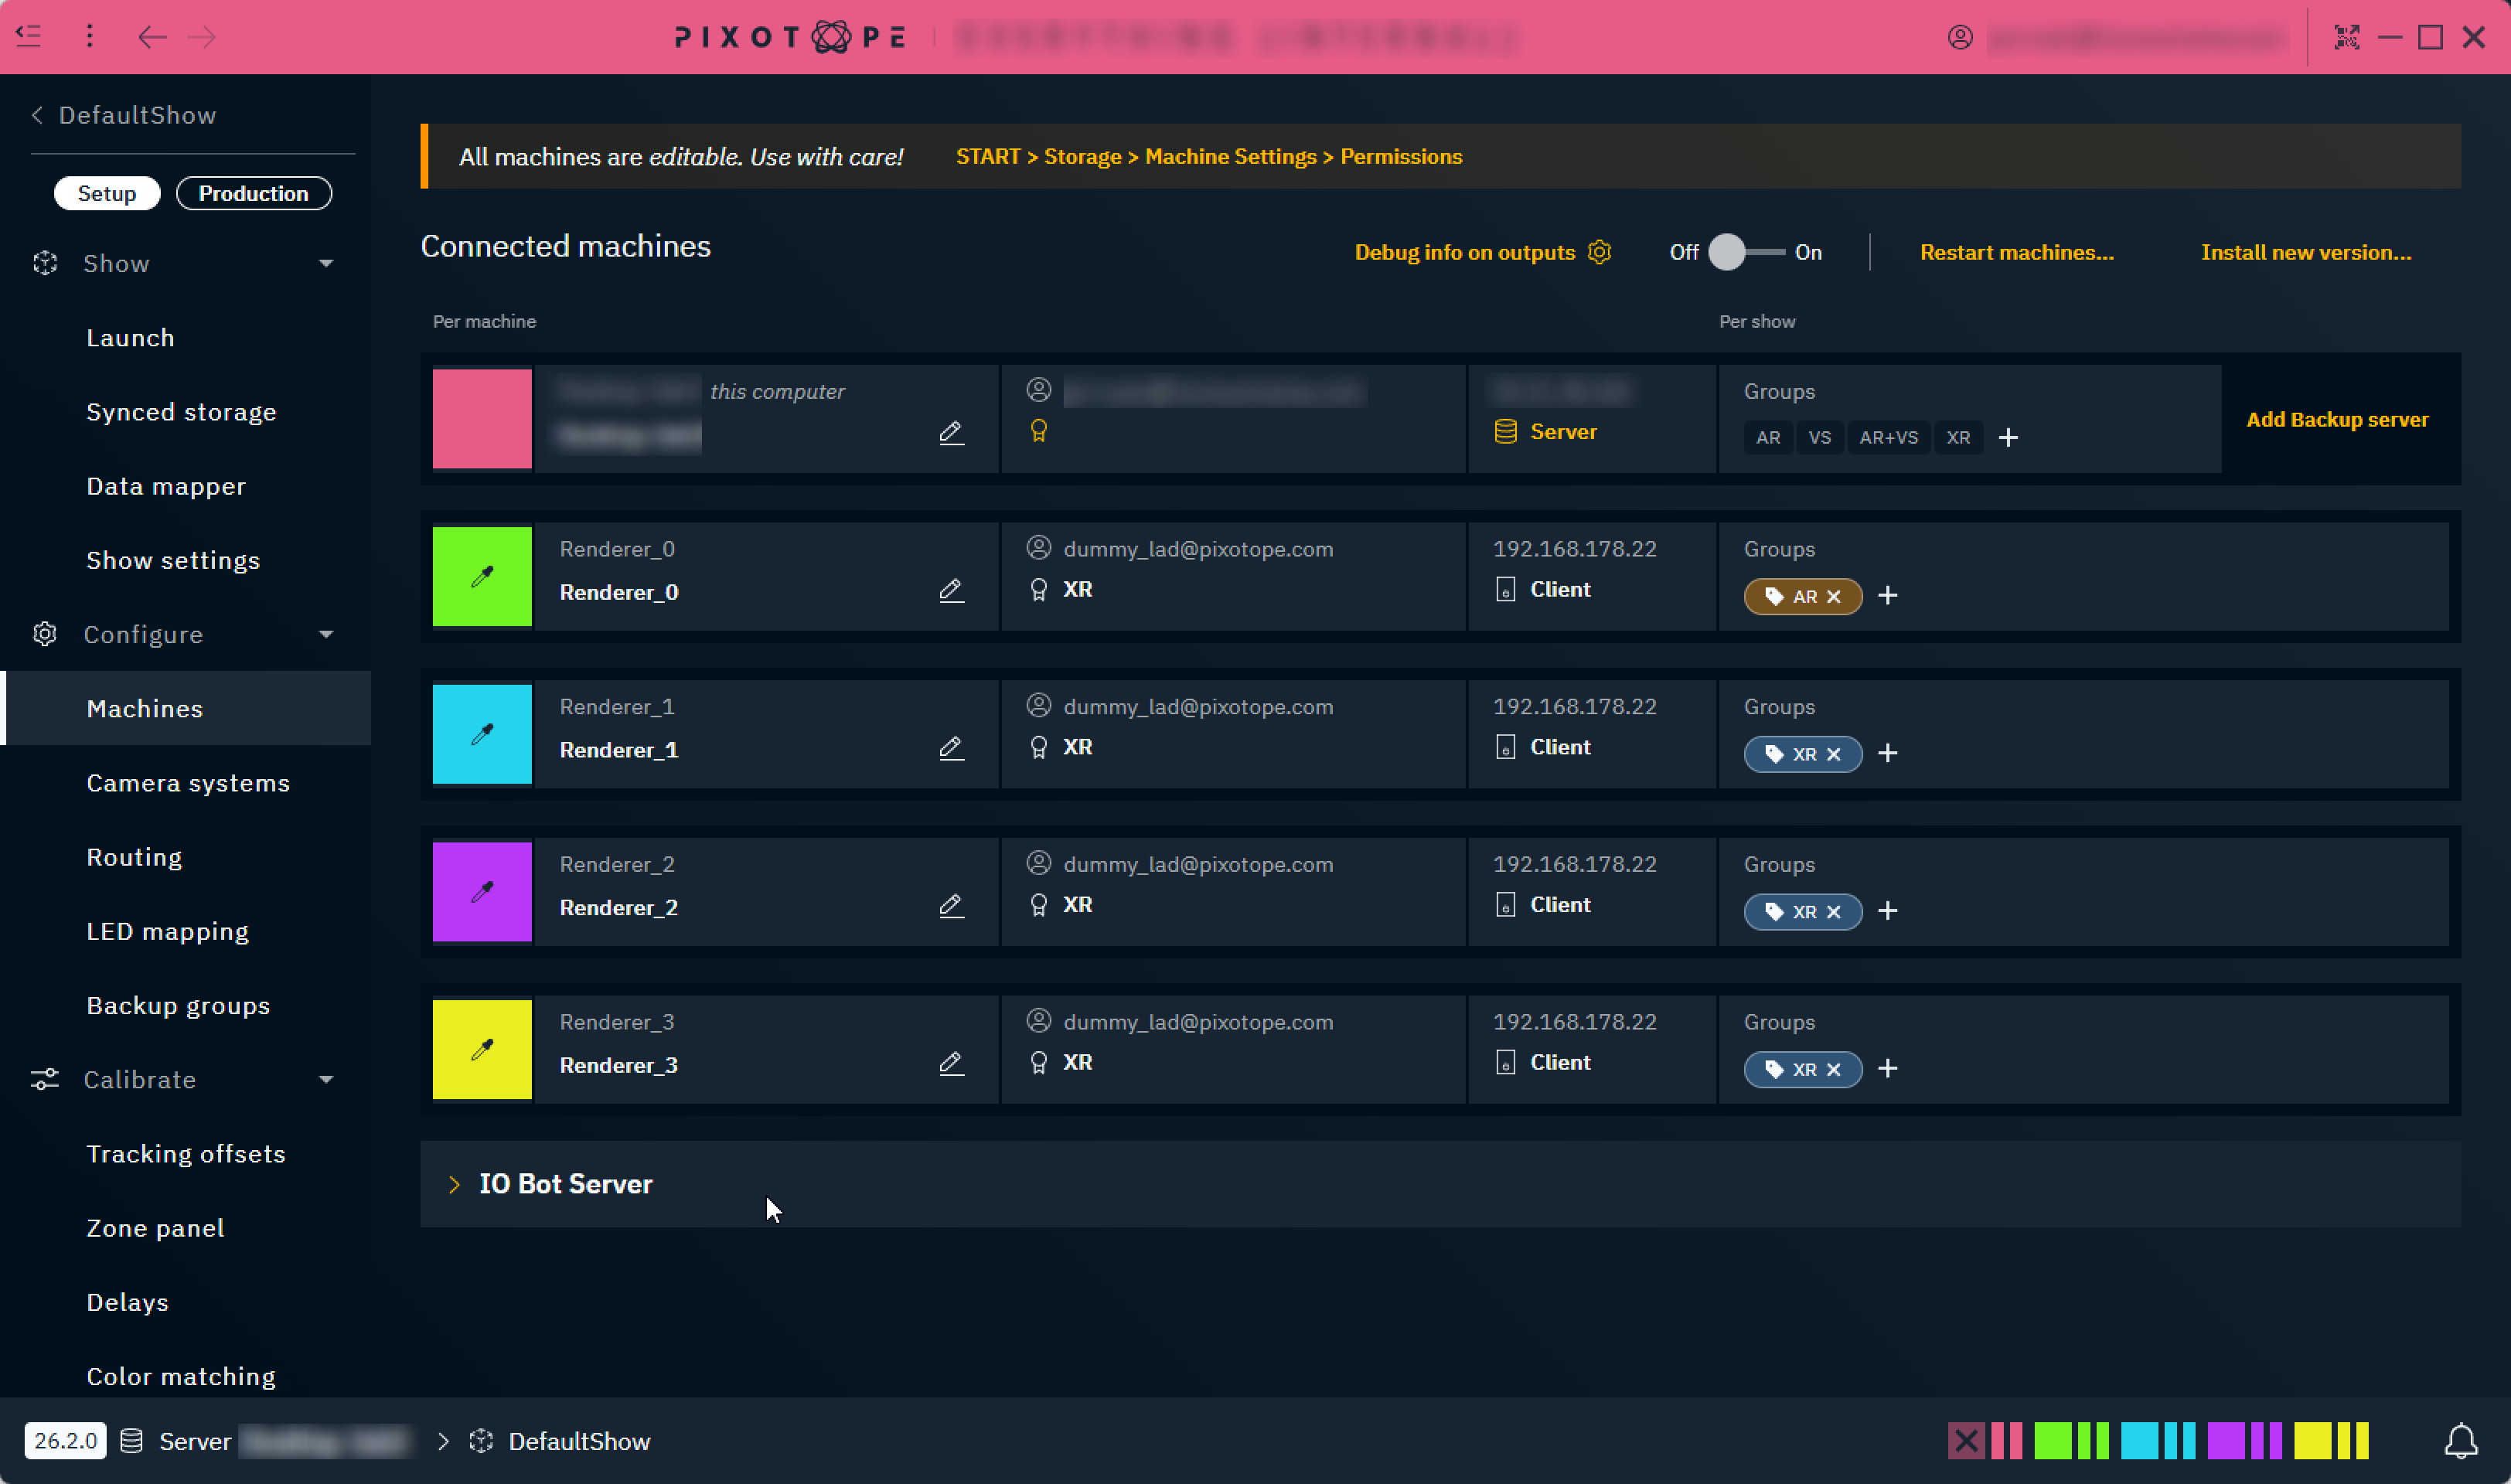
It shows all connected machines and their following settings:
|
|
Editable across machines |
Scope |
|---|---|---|
|
Machine name |
Local only |
Per machine |
|
Display name |
Yes |
Per machine |
|
Display color |
Yes |
Per machine |
|
Logged in user |
Local only |
Per machine |
|
License |
Local only |
Per machine |
|
IP address |
Local only |
Per machine |
|
Network role |
Local only |
Per machine |
|
Groups/Render groups |
Yes |
Per show |
Change name and color
-
Click on the colored box to change the display color
-
Note: The Server’s color can not be changed
-
-
Click on the Edit icon of the machine name to set a display name
If editing is not possible, check the permissions level of your machine. Learn more about Permissions - affecting SETUP
These settings are the same as the one set in machine settings
Change groups
Add machines to groups to
-
force specific render or feature behaviour
-
OR to be able to address them collectively
Every render machine needs to have a Render group set!
It sets the Compositing Type in the Editor > Pixotope World Settings > General for every launched level.
Learn more about Render, feature and custom groups - AR, VS, AR+VS, XR
Add machine to existing group
-
On the machine row select a Render group and or click the
+icon for Feature and Custom groups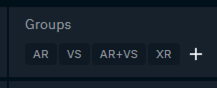
Remove machine from group
-
Click the
xicon on the group tag
Add custom group
-
Click on the
+icon inside the Groups dropdown to add a Custom group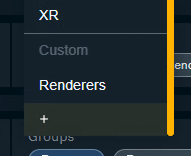
Remove custom group
-
Click the delete icon inside the Groups dropdown
The custom group will be removed from all machines including the dropdown.
Show debug info on output
Allows to show one or more of the following information in the top left corner of the output:
-
Machine color, display name (and machine name)
-
Render group
-
Genlock
-
Performance (FPS) and status
-
Timecode and status
Do not use while you are ON-AIR!
Configure what to show
-
Click the "Debug info on outputs" button
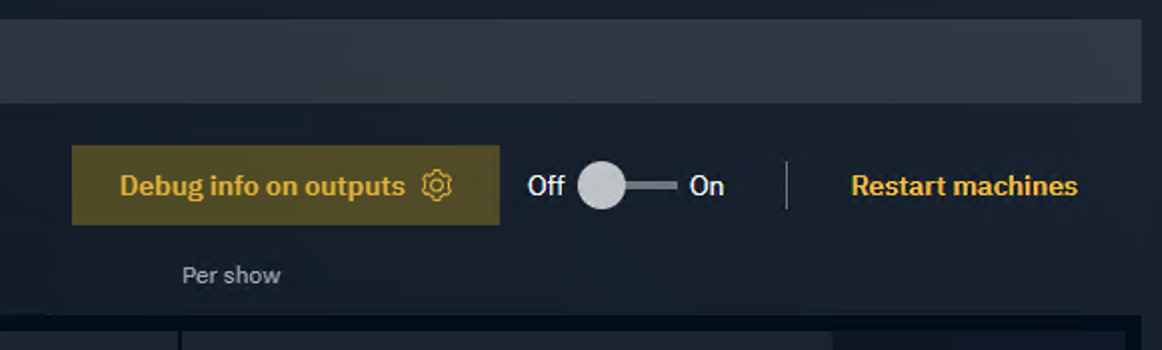
-
Select what info to show
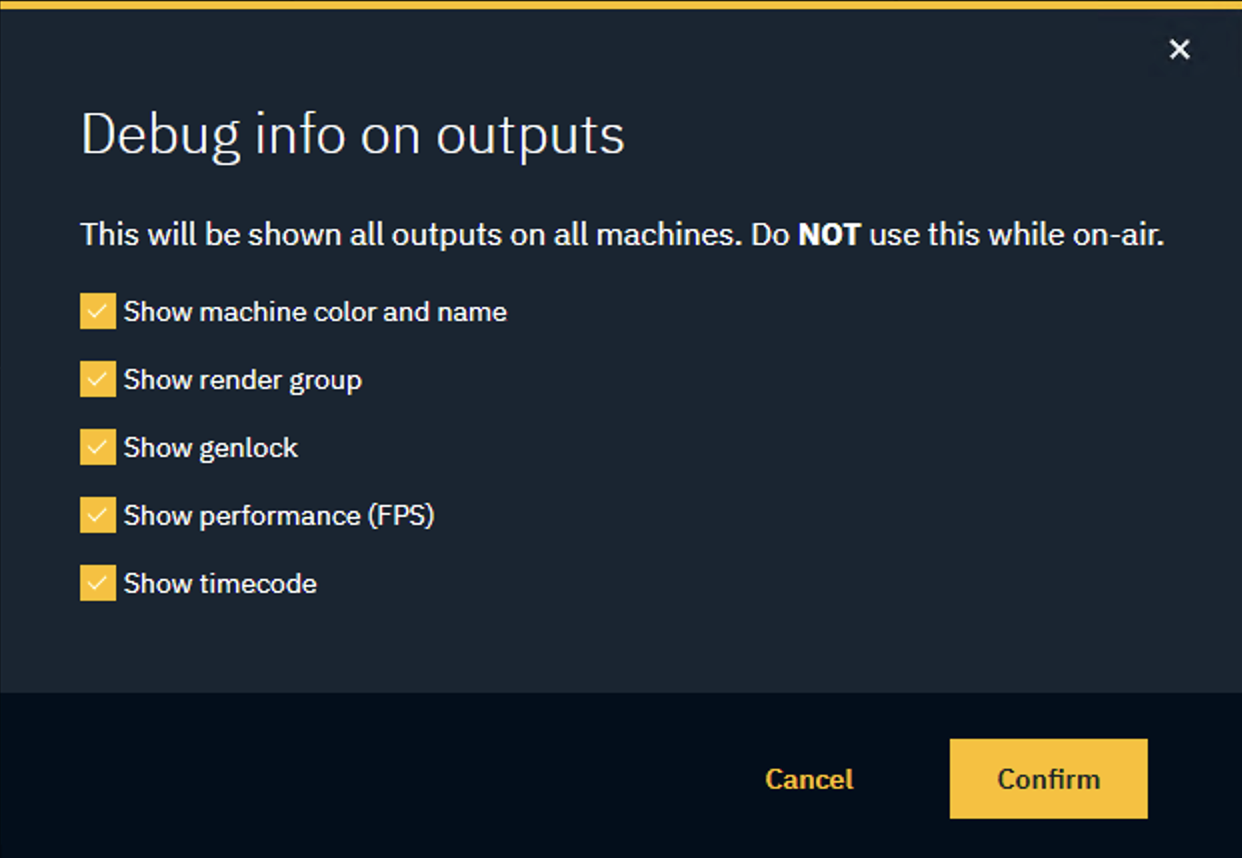
-
Click "Confirm"
Show debug info
-
Toggle On the switch next to the right of the "Debug info on outputs" button
-
Click "Confirm"

Hide debug info
-
Toggle Off the switch next to the right of the "Debug info on outputs" button
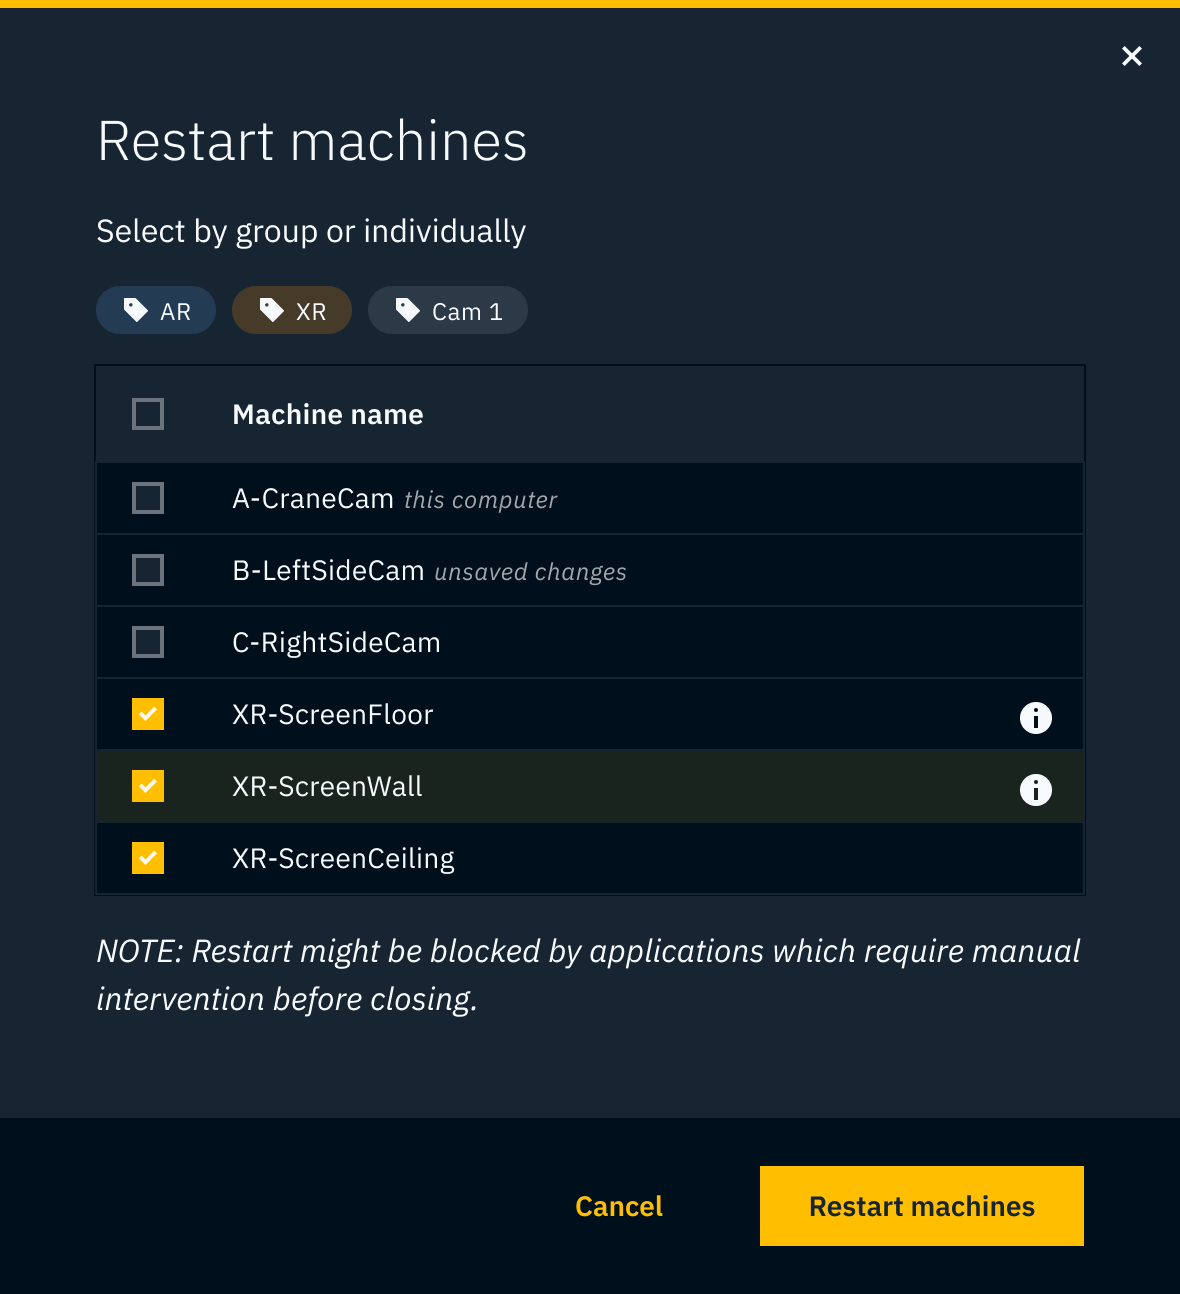
Restart machines remotely
This allows to restart any machine within the Pixotope network.
-
Click on "Restart machines…"
For any machine which is selected Launch Pixotope on startup will be enabled, so Pixotope Graphics will relaunch after restart. This can be changed in START > Machine settings.
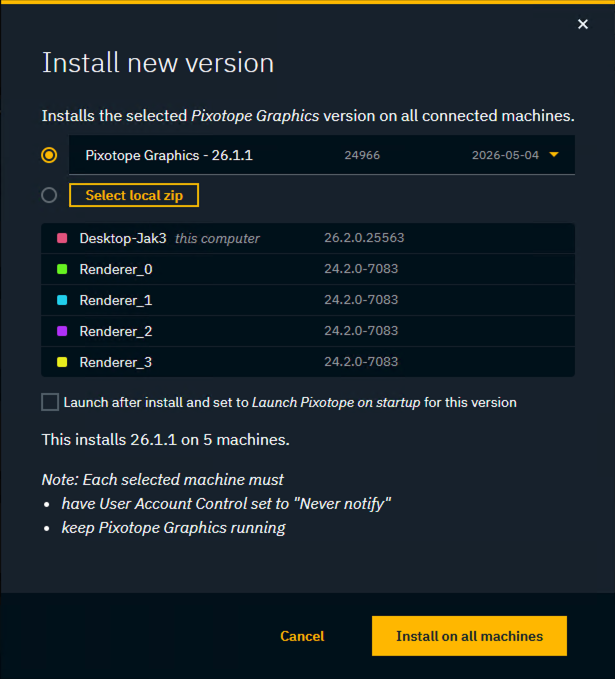
Install new version
This allows to install a new Pixotope Graphics version on all connected machines.
-
Click on "Install new version…"
-
Select from available Pixotope Graphics versions > Requires an internet connection
OR select a local zip file -
Optionally, select to launch the new version after the installation has finished
-
Click "Install on all machines"
-
The new version will now be
-
downloaded and unzipped to Synced config
-
distributed to all machines via the Asset Hub
-
installed
-
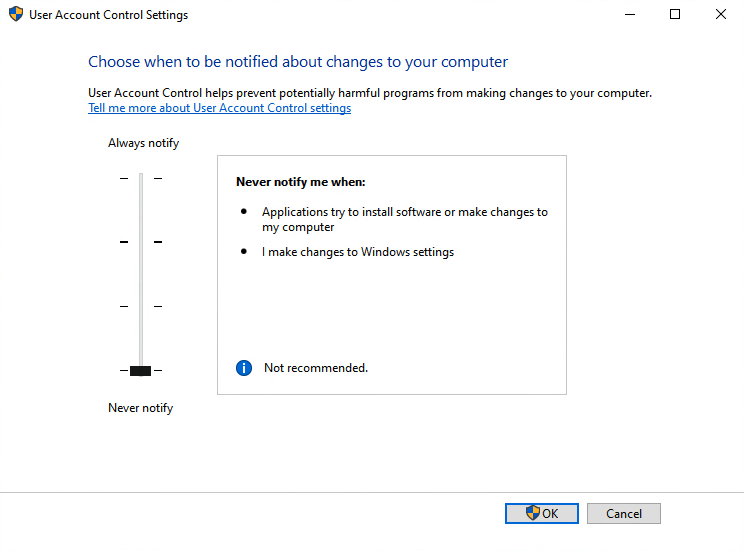
Each connected machine must
-
keep Pixotope Graphics running for the whole installation process
-
have User Account Control set to "Never notify"
Add Backup Server
Learn more about how to Use Backup Server (failover)