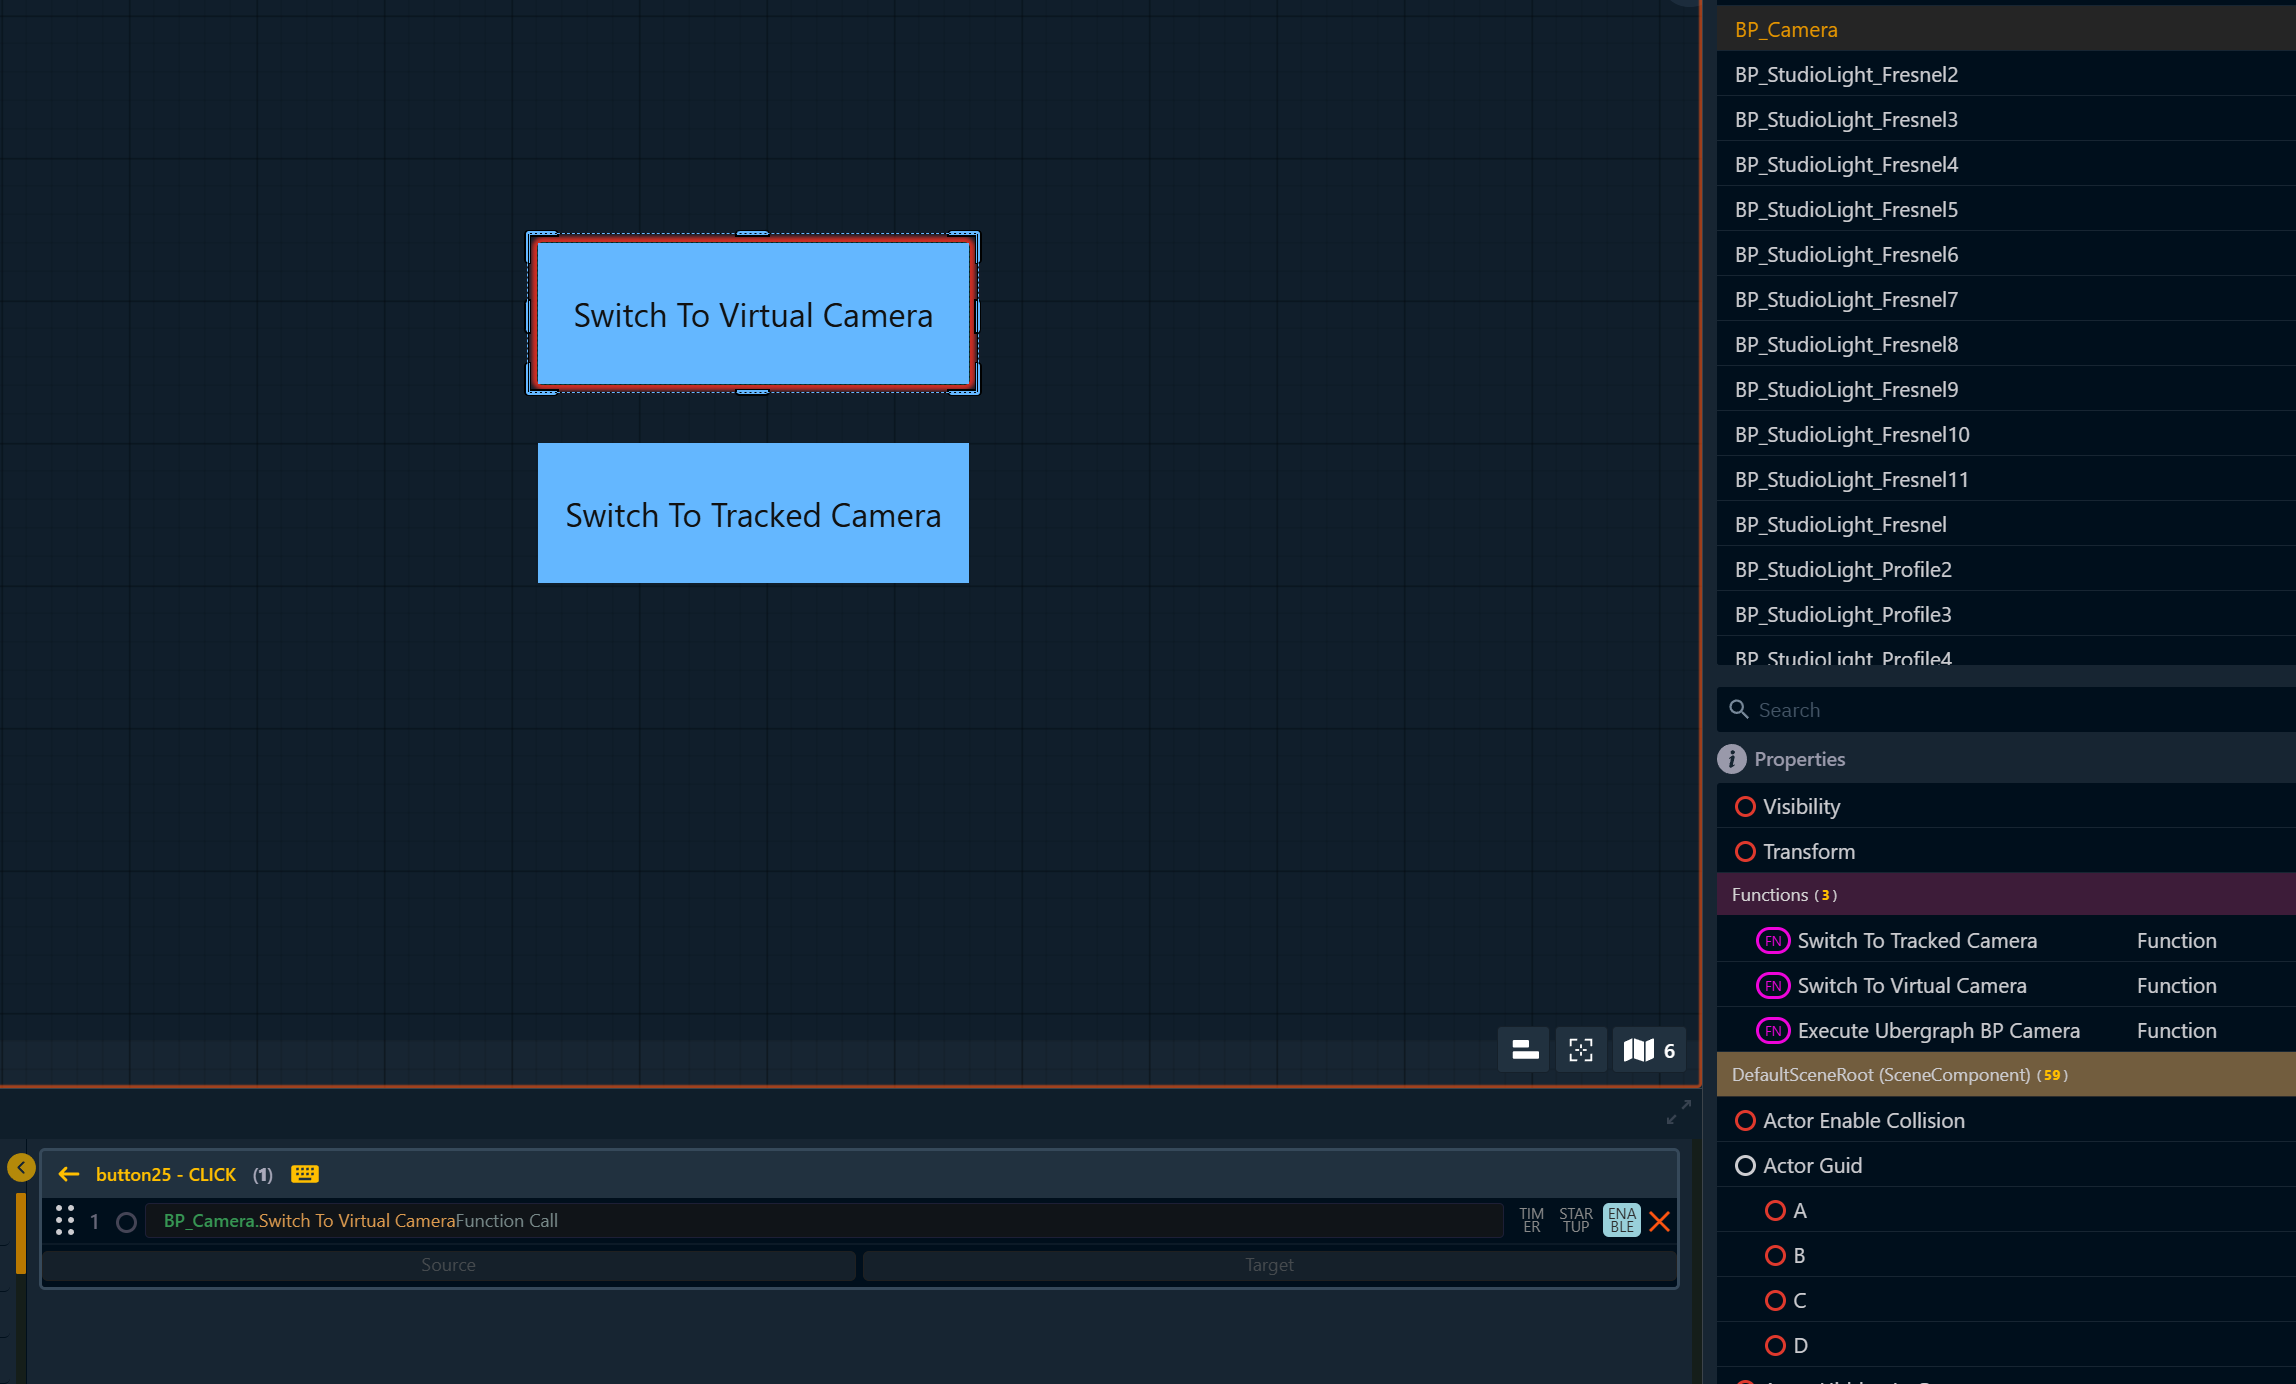
Check out the following examples:
-
LVL_PixotopeVSSample level in the PixotopeCalibration project included in the installer
-
Pixotope example projects, which can be downloaded from the Pixotope cloud → login.pixotope.com
For functionality specific to the Unreal Editor and some in-depth knowledge, check out https://docs.unrealengine.com/en-us/Engine/Editor.
-
Learn how to set up and control Pixotope's virtual cameras using Blueprints. This tutorial walks through the entire process, including configuring virtual cameras, creating Blueprints, setting up controls, and implementing logic for smooth camera movements.
Create a Virtual Camera
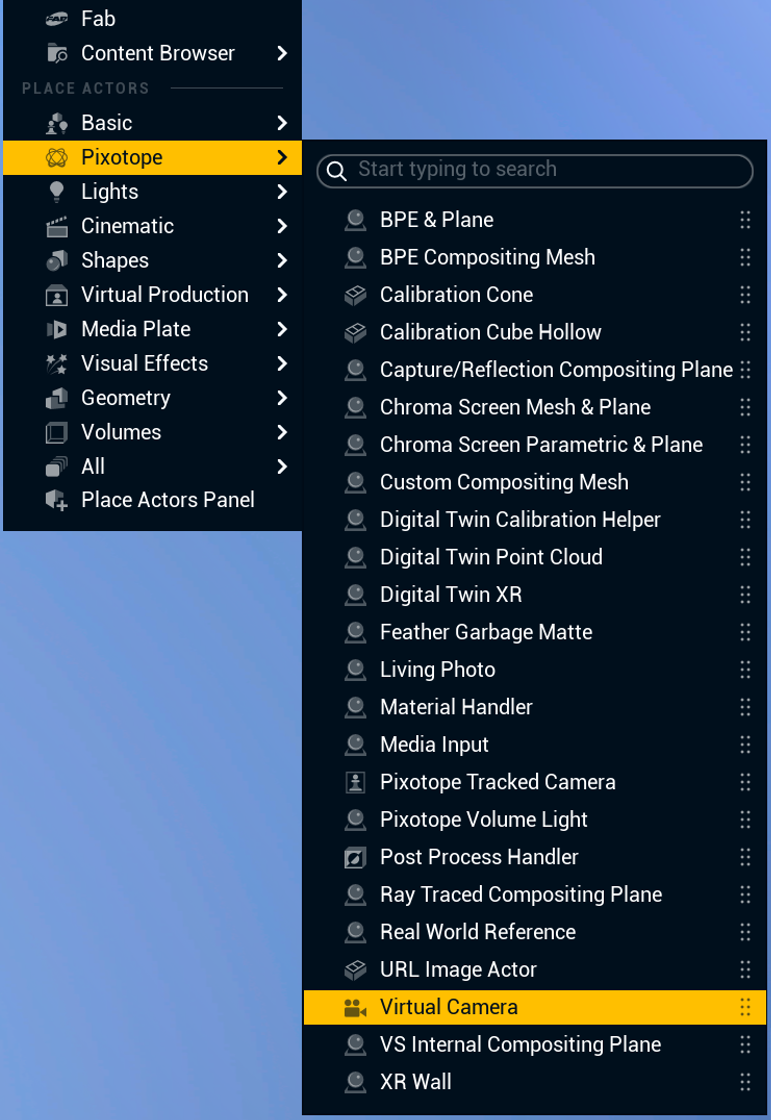
Go to Add > Pixotope > Virtual Camera to add a virtual camera to your level and move it into position:
Create Blueprint logic
-
Create the Blueprint logic for switching between the Virtual and Tracked cameras:

-
Create 2 custom events and connect them to “Switch to Tracked Camera“ and “Switch to Camera“:
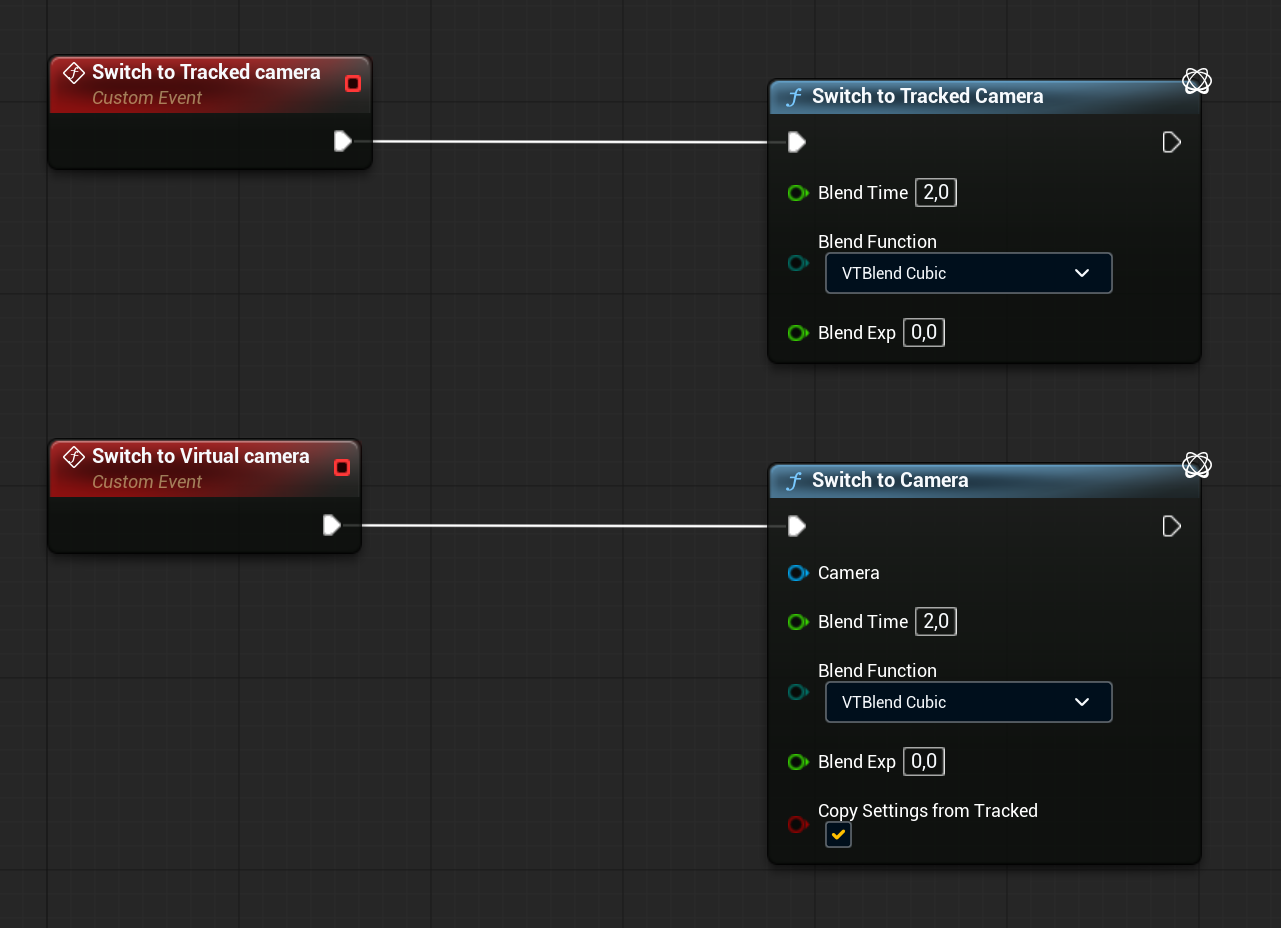
Blend Time controls the time it takes to move between cameras. A value of 0.0 is a cut.
-
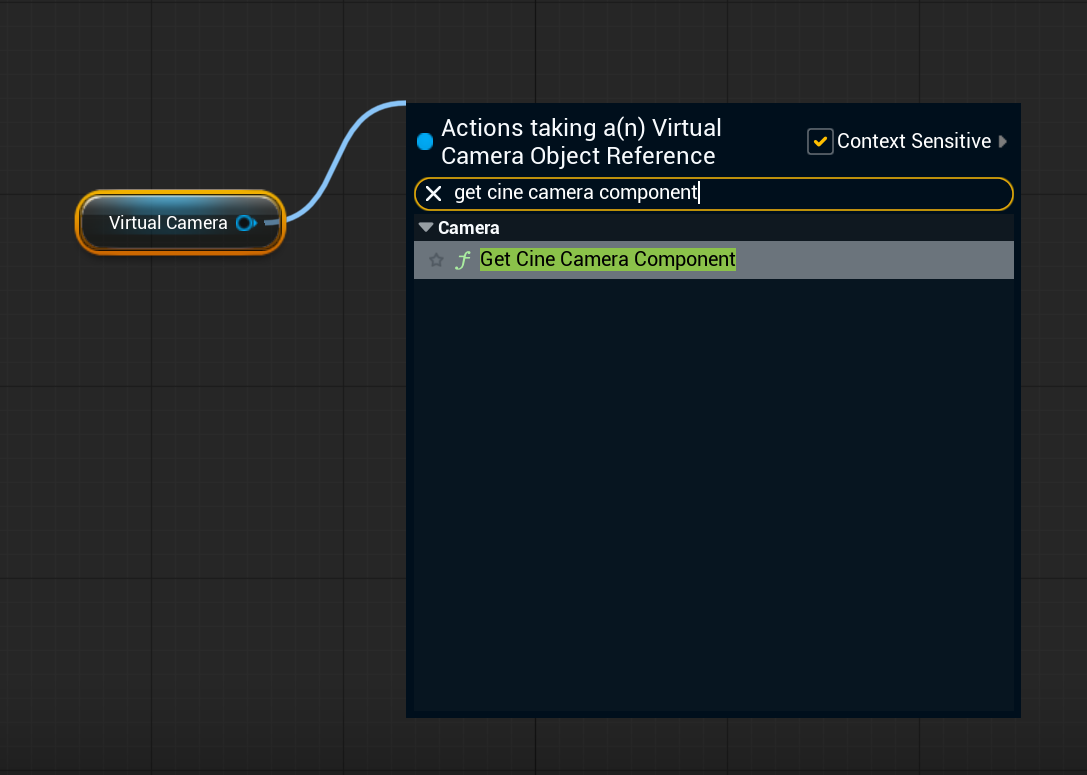
Add the Get Virtual camera variable to the event graph. Drag from the output pin of the variable and search for “Get Cine Camera Component”:
-
Connect the return pin of the “Get Cine Camera Component“ to the Camera pin of “Switch to Camera”:
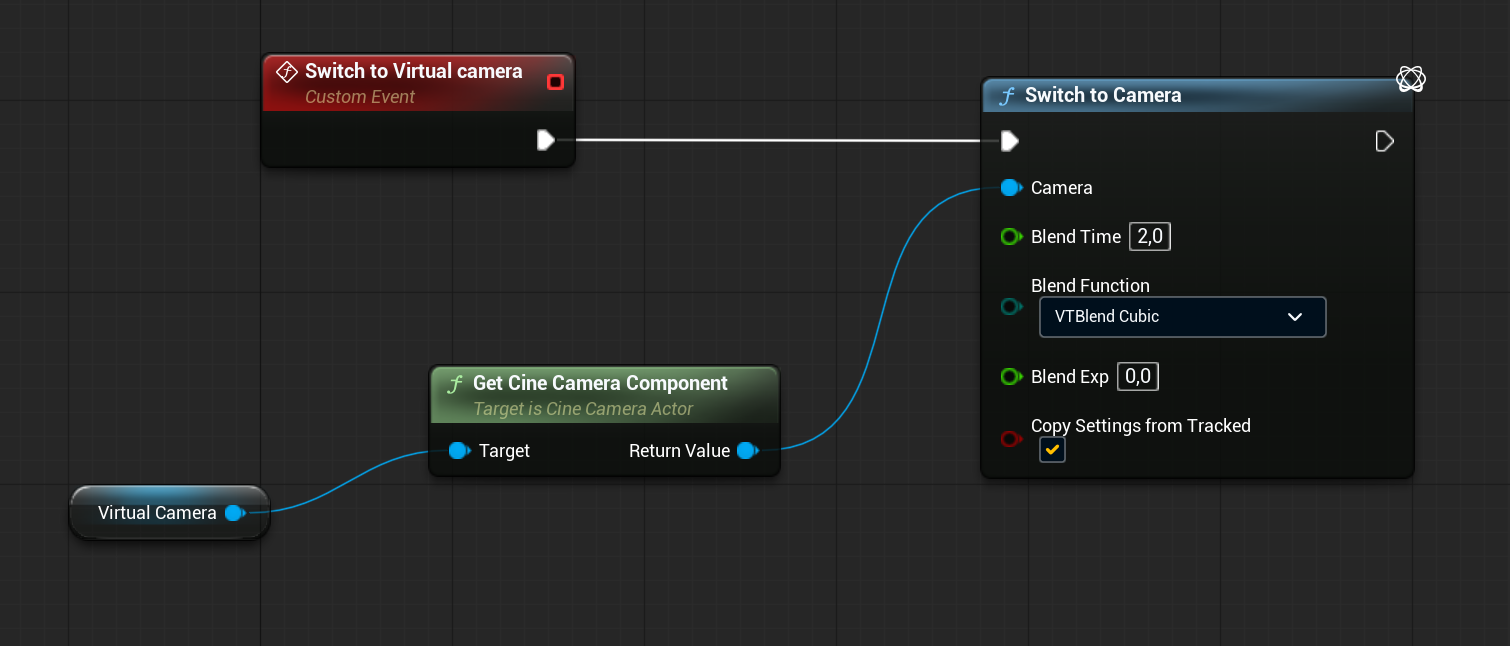
-
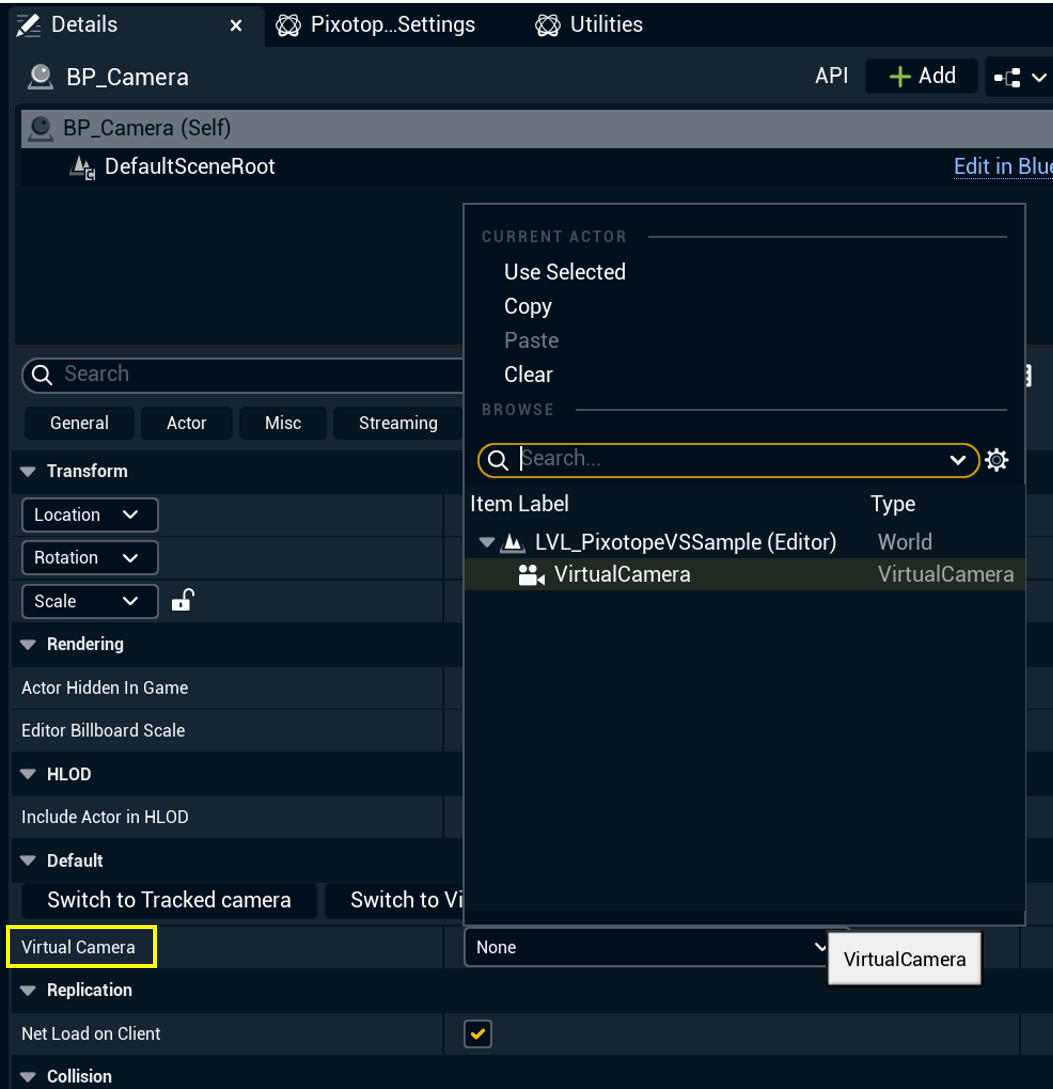
Compile, Save, and add the blueprint to the level. In the Bleuprint’s details, assign the Virtual Camera to the Blueprint variable:
Create triggers in Control Panel
Create a Control Panel, locate the blueprint in the Engine Browser and drag the custom events onto the canvas to create buttons.