
This page only covers what is different when using the Live controller with Pixotope Motion. Learn more about Using Pixotope Motion
The standard Live controller workflow is described in Using Pixotope Live controller
Prerequisites
Level preparation
-
In Editor: Enable the Pixotope Motion plugin
-
For projects created from the Pixotope MOTION template, the plugin is already enabled
-
Using Internal compositing
-
Enable the Enable Motion Design Overlay setting in Pixotope World Settings
-
-
Prepare machines
-
Go to the Machines panel in Director: Setup > Configure
-
Set the MOTION tag on all Preview and Render/Playout machines
-
Using Internal compositing
-
Set the AR tag on all render machines
-
Set up routing
For Preview
-
Go to the Routing panel in Director: Setup > Configure
-
Add a media output in the dedicated Preview machine
-
Change Source to Engine Motion
-
Set Engine source to Channel 1
-
Set Output to Stream (WebRTC) and choose the Stream endpoint
For Render/Playout
Internal compositing
-
Add a media output in the Routing panel in the Render/Playout machine
-
Change Source to Engine
External compositing
-
Add two media outputs in the Routing panel in the Render/Playout machine
-
Change Source to Engine Motion on both
-
Set Engine source to the desired Channel (Channel 1, 2 or 3) on both
-
Set Output Type to Fill on one of the outputs
-
Set Output Type to Key on the other output
If using multi-channel, repeat steps 1-5 for the remaining channels
Launch levels
-
Go to the Launch panel
-
Launch the levels in LIVE mode on all output target machines
-
For Motion, launch an empty non-Motion Design level where the Motion Design levels are loaded into
-
For Engine, launch the level which needs to be controlled
-
Set up output target
Add output target
In addition to the standard steps for adding an output target:
-
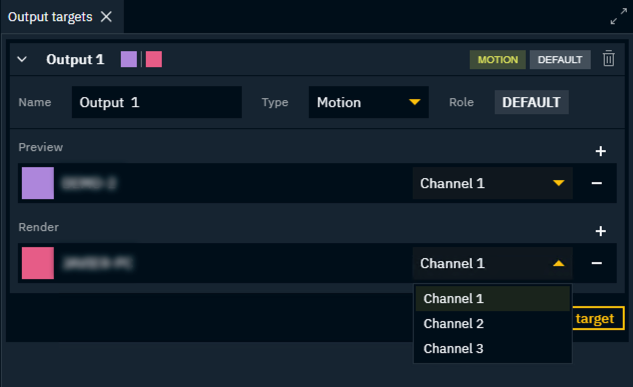
Change output target Type to Motion
-
Add the Preview machine and select Channel 1 in the Preview section
-
Add the Render/Playout machine and select the desired channel(s) in the Render section
Create template
Bulk create motion design templates
-
Click the arrow next to the Create engine template button and select Import Motion levels
-
Select the Motion levels to create templates for
-
Click Import
Learn more about how to create Motion levels Using Pixotope Motion
Not seeing all levels? In Editor, click the "Rebuild Asset Cache" button on the bottom right. This scans all Motion Design levels of this project and should make all their data available.
Operate
Take preview to air
For Motion instances the logic of how other instances react to Take in and out commands is handled in the Transition Logic tree.
Learn more about how to Create complex transition logic with inter-template dependencies using the Transition Logic tree
Change layer order
For Motion instances, Layer order is defined in the Motion Design level by their z-depth.