A mapping defines which XR walls/which parts of your LED wall are being outputted together. If your LED wall resolution is larger than your output resolution, you will need either
-
Multiple render machines
-
OR Multiple outputs
NOTE: This option needs an "Additional output" license -
OR Select “Scale to Fit” under Graphics Scale while creating the Mapping
NOTE: This will not use the full resolution potential of your wall
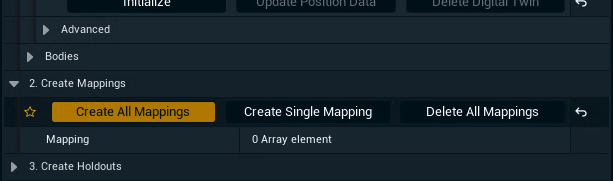
Create all mappings
You can create all mappings at once or one at a time.
-
Open the Details panel of the Digital Twin XR Actor
-
Click "Create All Mappings" in 2. Create Mappings
-
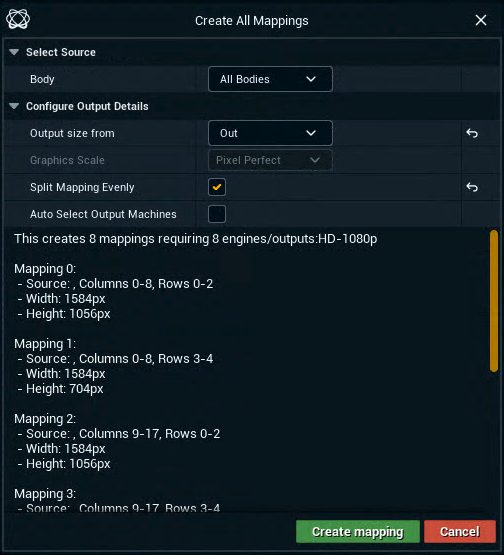
Select the LED Body you want to creating a mapping for
-
All Bodies is selected by default
-
-
Select a routed output to specify the mapping size
-
The graphics scale is fixed to Pixel Perfect
-
-
Enable Split Mapping Evenly to balance the distribution of rows and columns between mappings
-
By default a single mapping would cover as many rows as possible
-
-
Enable Auto Select Output Machines to automatically assign outputs of machines to the output channel of the created XR walls/mappings
-
To change this later see Select output machines below
-
-
Click "Create mapping"
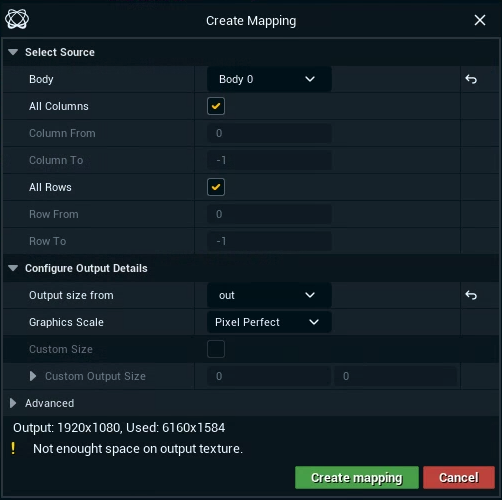
Create single mappings
Create single mappings
-
Click "Create Mapping"
-
Select the LED Body you are creating a mapping for
-
Specify how many columns and rows it should cover
-
To only select a specific range, uncheck "All Columns" and enter From and To values
-
Columns and Rows start with
0. You can use-1to indicate the maximum value.
-
-
NOTE: The pixel size available vs needed for the selected range can be seen on the bottom of the dialog after you have selected “Output size from”
-
-
Select a routed output to specify the mapping size
-
Select the graphics scale
-
Use the Scaled option only for testing as it reduces the picture quality
-
-
Click "Create mapping"
Repeat this step to create more mappings, if your LED wall resolution is larger than your output resolution.
Specify mapping/output position manually
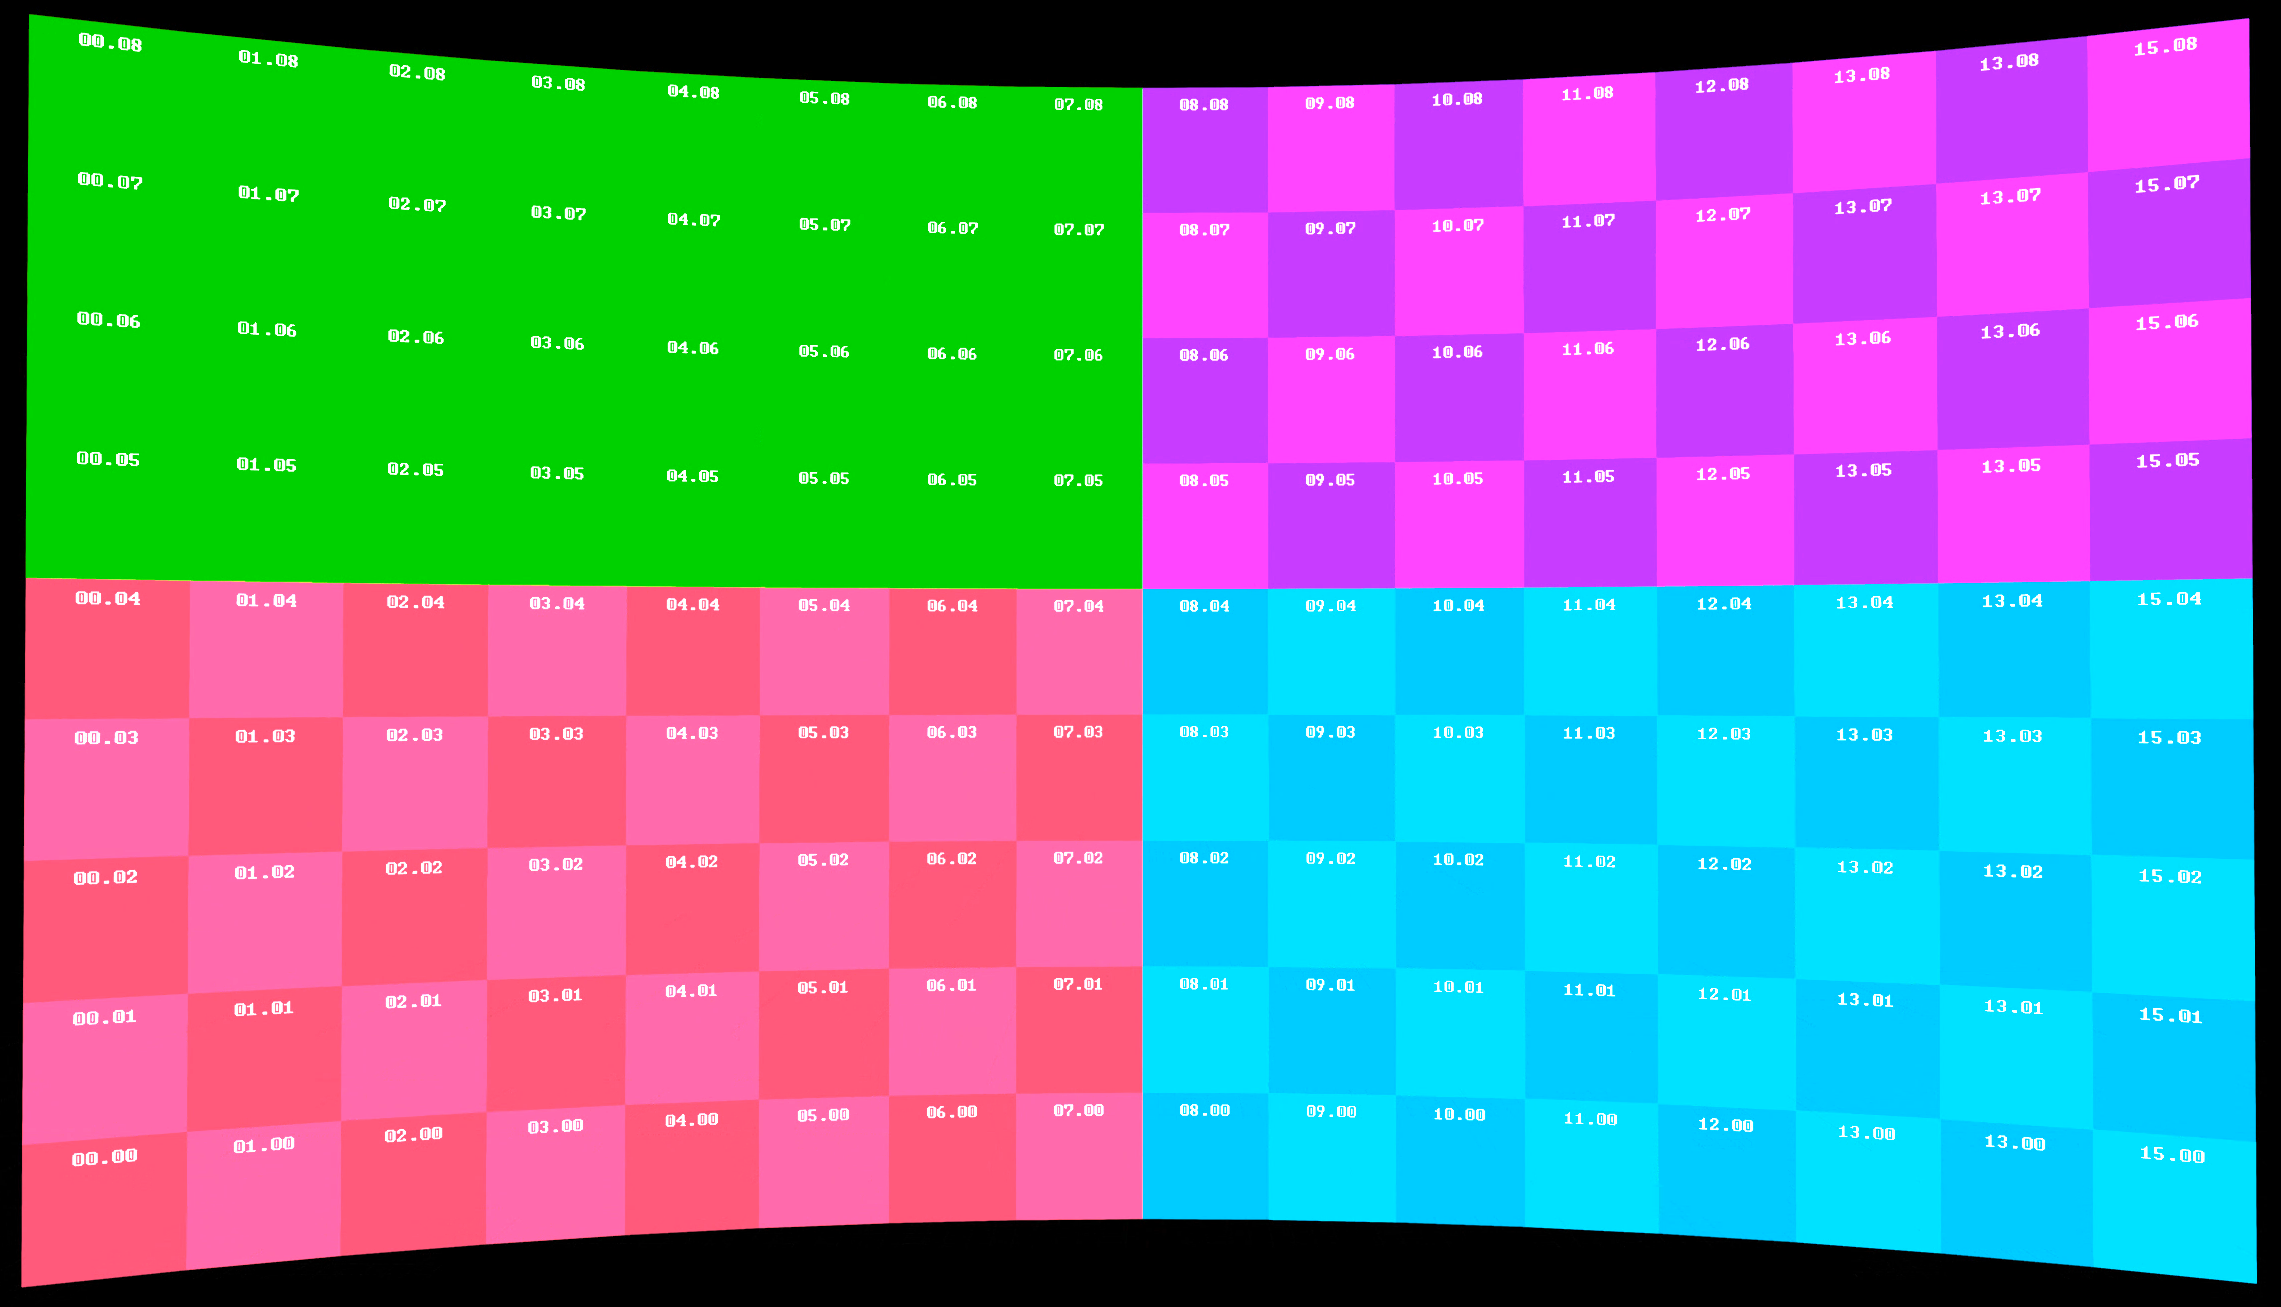
Identify your mappings
To check that your mappings have been setup and output correctly.
-
Expand Display Mode
-
Choose "Identify" for the XR Wall Texture

Select output machines
In a multi-machine setup you can specify which mapping should be rendered by which machine.
-
All outputs need to have different names. They can not be the same
-
Selective rendering needs to be disabled
From Director
-
Go to the "XR wall settings" tab in PRODUCTION > Adjust > XR
-
Select the mapping/XR walls to specify the machine and output for
-
Enable Selective rendering
-
Select the machine this mapping should be output on
-
Choose the correct output from Output destination > Outputs
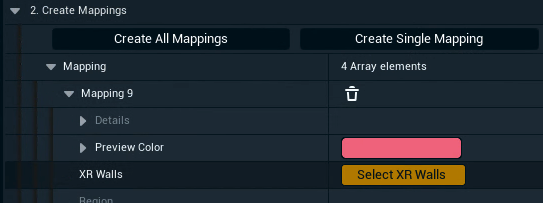
From Editor
-
Expand the details of a specific mapping and click on "Select XR walls"
-
The detail view switches to the XR walls related to this mapping
-
-
Click on the
+icon to add an element to the Selective Rendering array
-
Type in the windows name of the machine this mapping/these XR walls should be output on
-
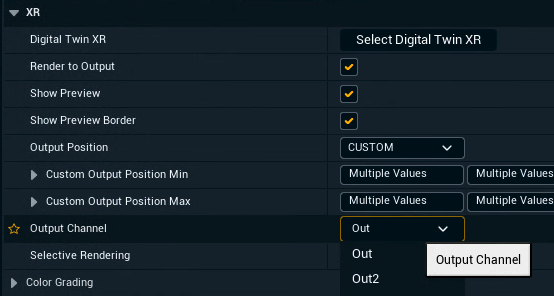
Select the correct output from Output channel