Pixotope Cloud → login.pixotope.com is our web portal to
-
download new releases, add-ons and example projects
-
manage organizations, user accounts and permissions
-
manage licenses
-
access customer support and documentation
Looking for Cloud roles and permissions
Pixotope Cloud Introduction
Learn how to set up users, administer licenses, and utilize our air-gapped license workflow for secure, offline environments.
Complete signup
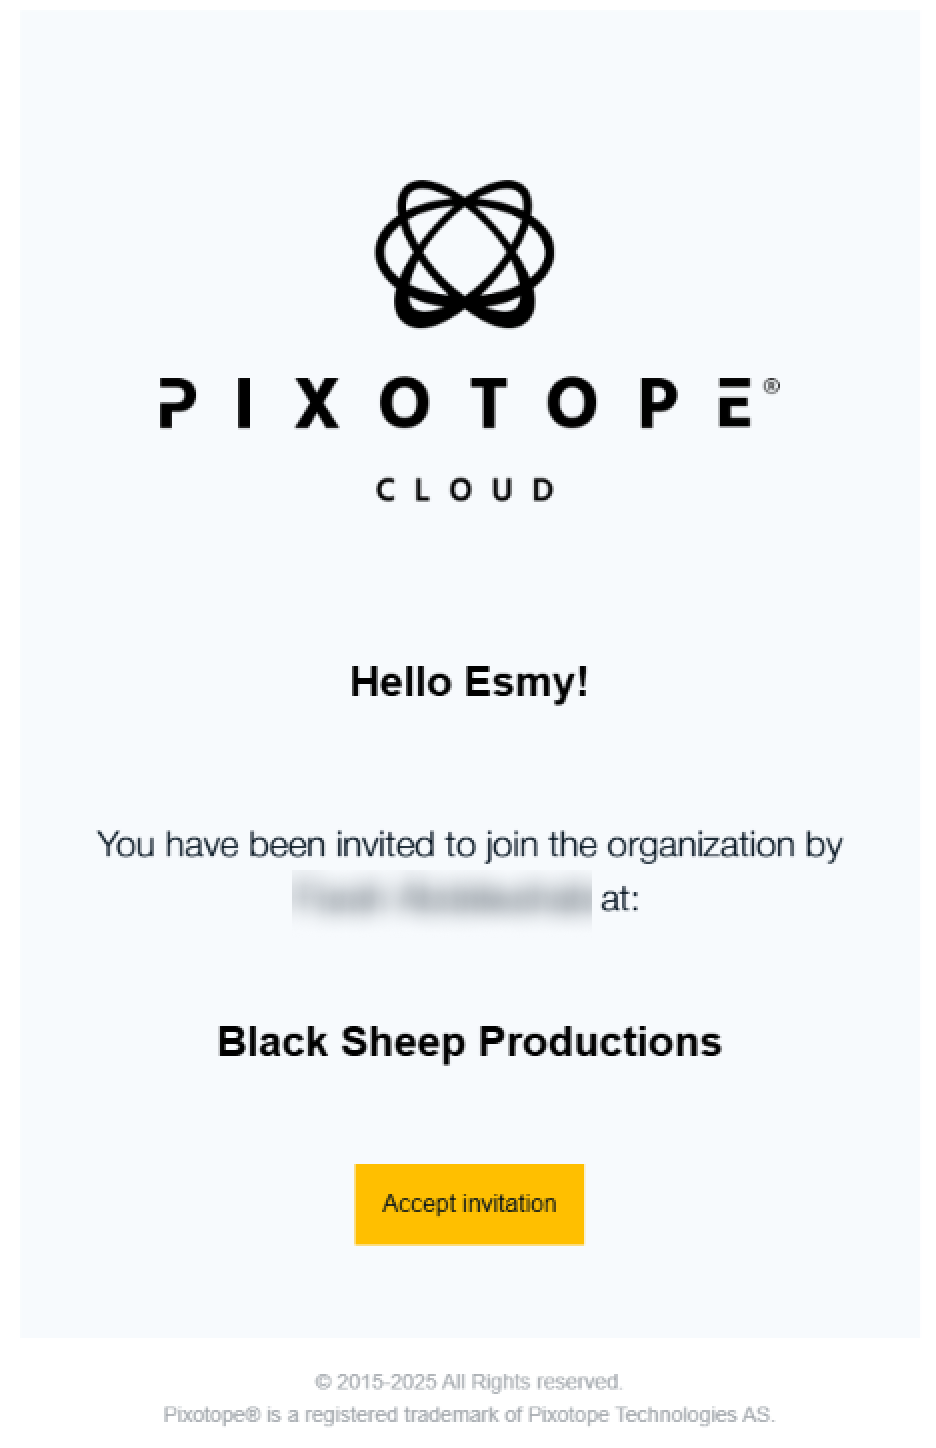
When you are added by an admin, you will receive an email invite.
-
Click on "Accept invitation" in the email
-
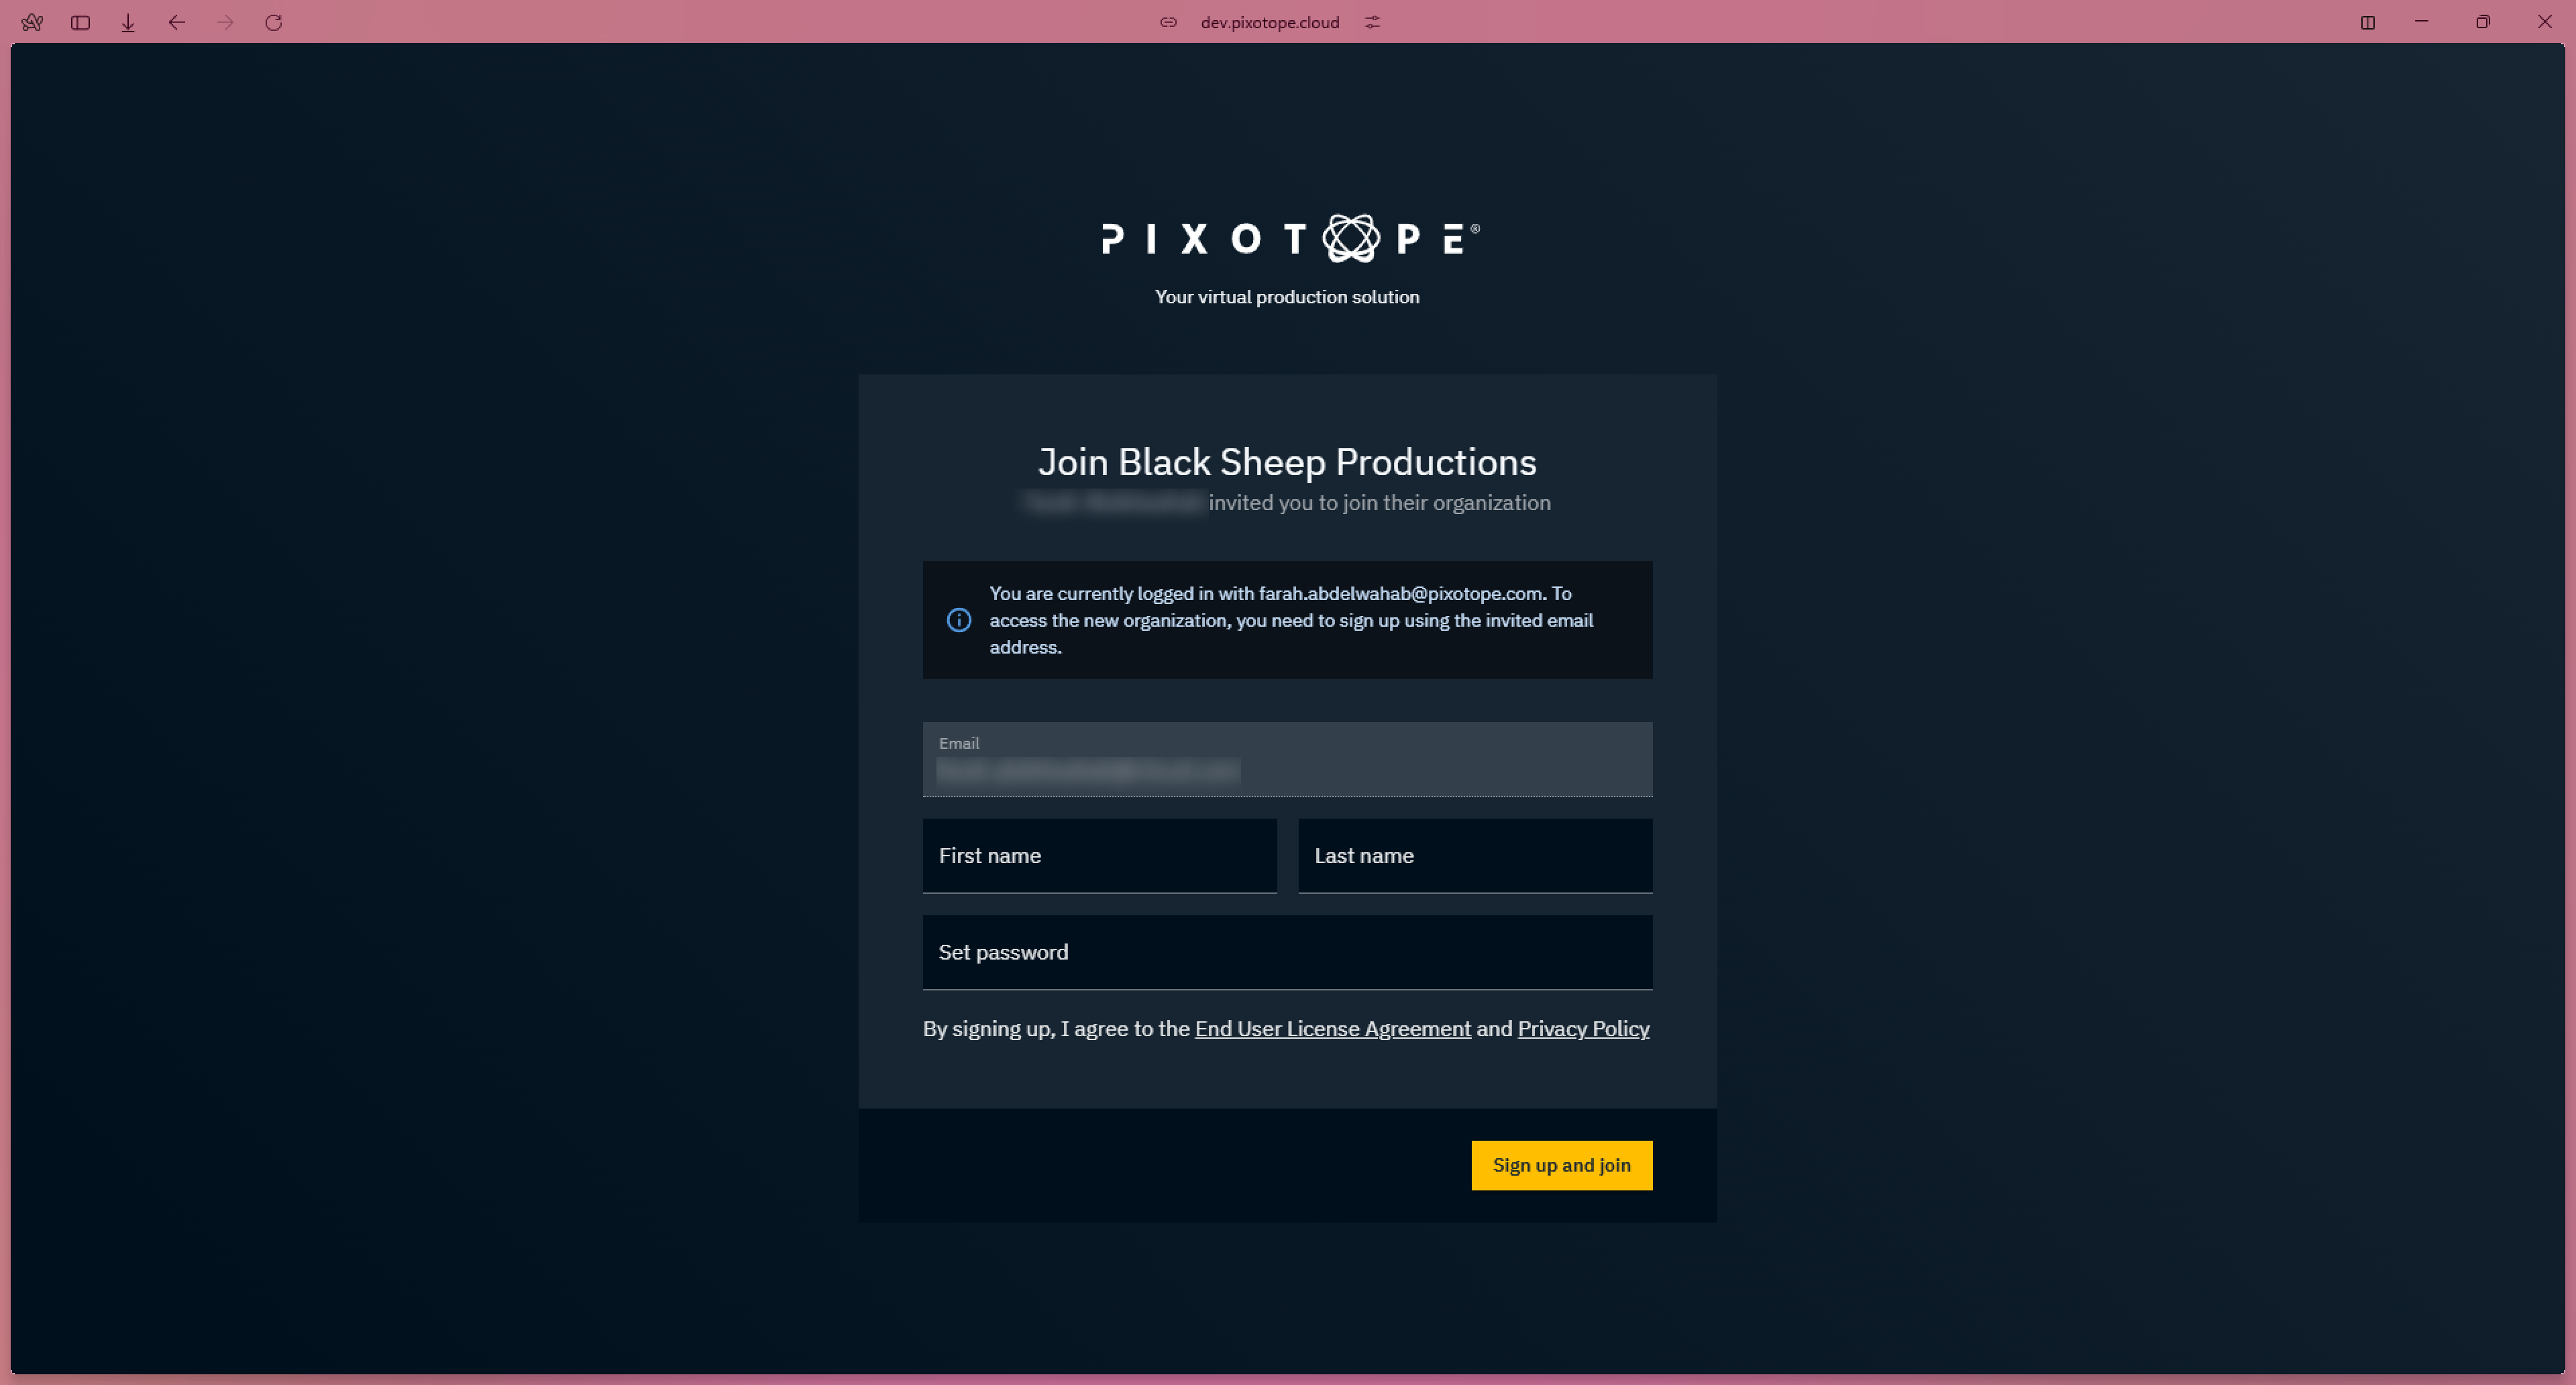
Fill in your first and last name and set a password
-
Confirm that you accept the End User License Agreement and the Privacy Policy
-
Click "Sign up and join" to finish the registration and join the organization
You are now a Pixotope Cloud user and depending on your role, a Member or Admin of the organization you were invited to.
Learn more about Cloud roles and permissions
Your admin might also have assigned one or more Pixotope licenses to you, which you use to log in to the Pixotope Software.
Learn more about License types - AR/VS, XR, Control, Artist and more
Login
-
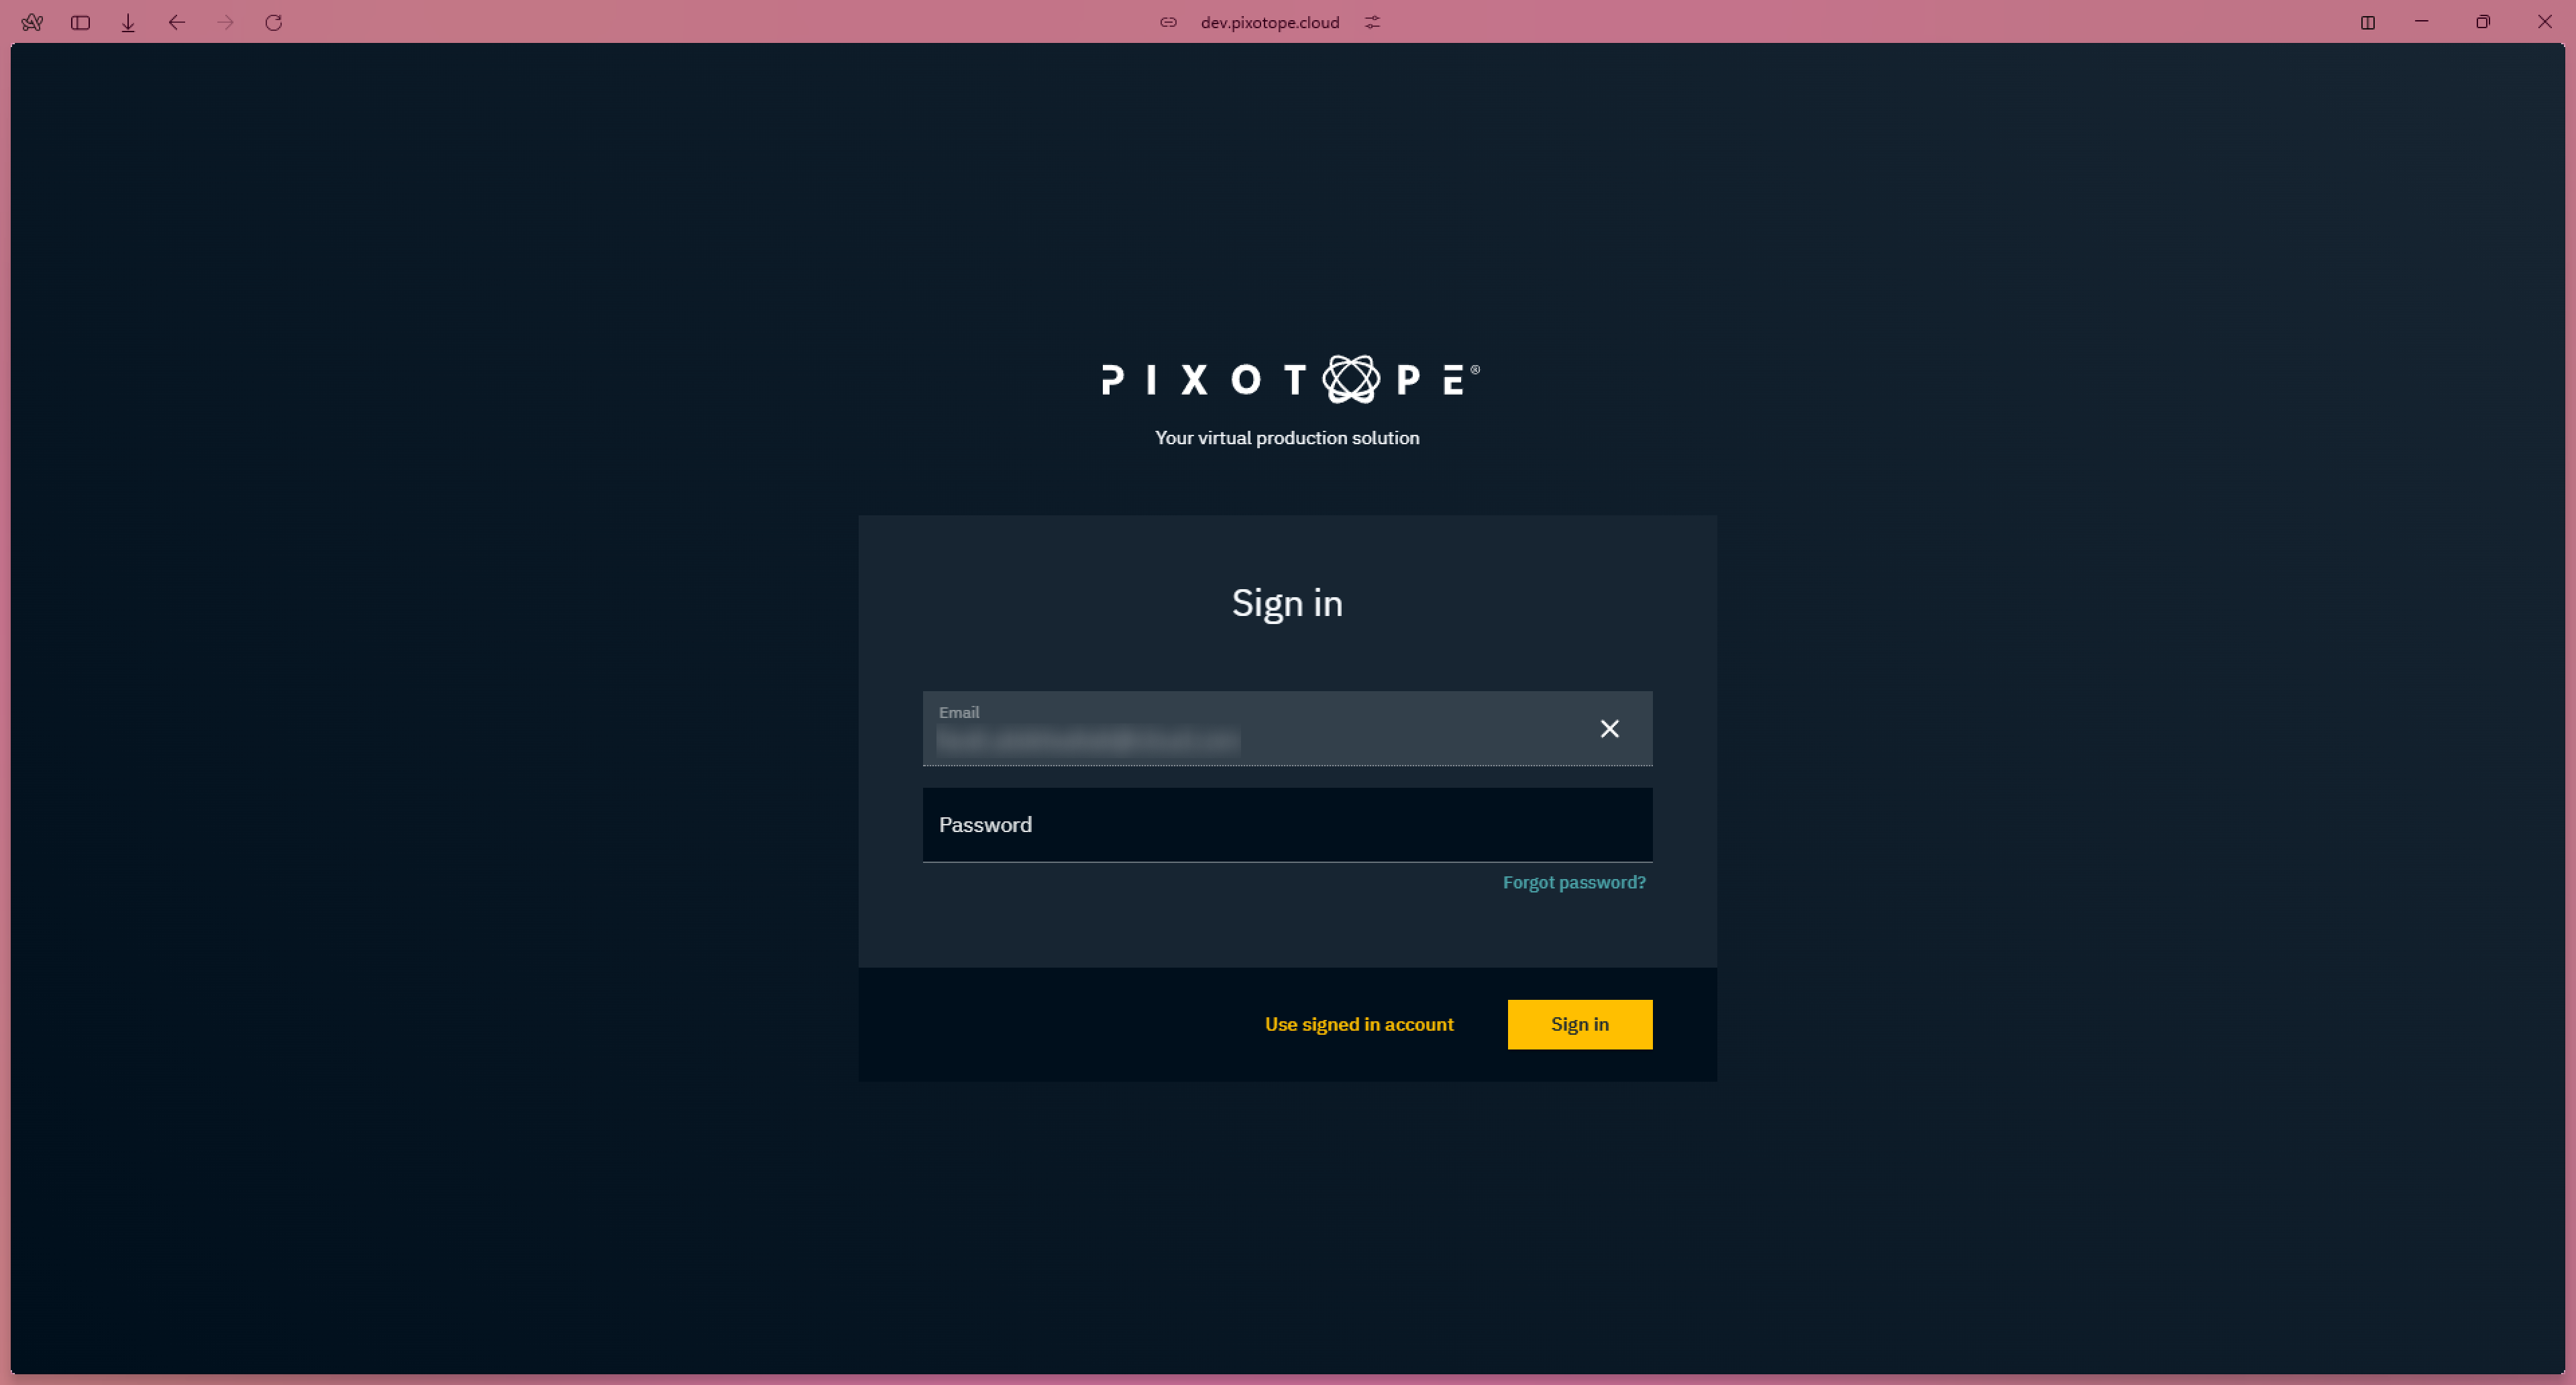
Go to Pixotope cloud → login.pixotope.com
-
Enter your email address and password
-
Click "Sign in"
-
You are redirected to the Overview page of your default organization
Are you part of multiple organizations? See how to change the default organization below
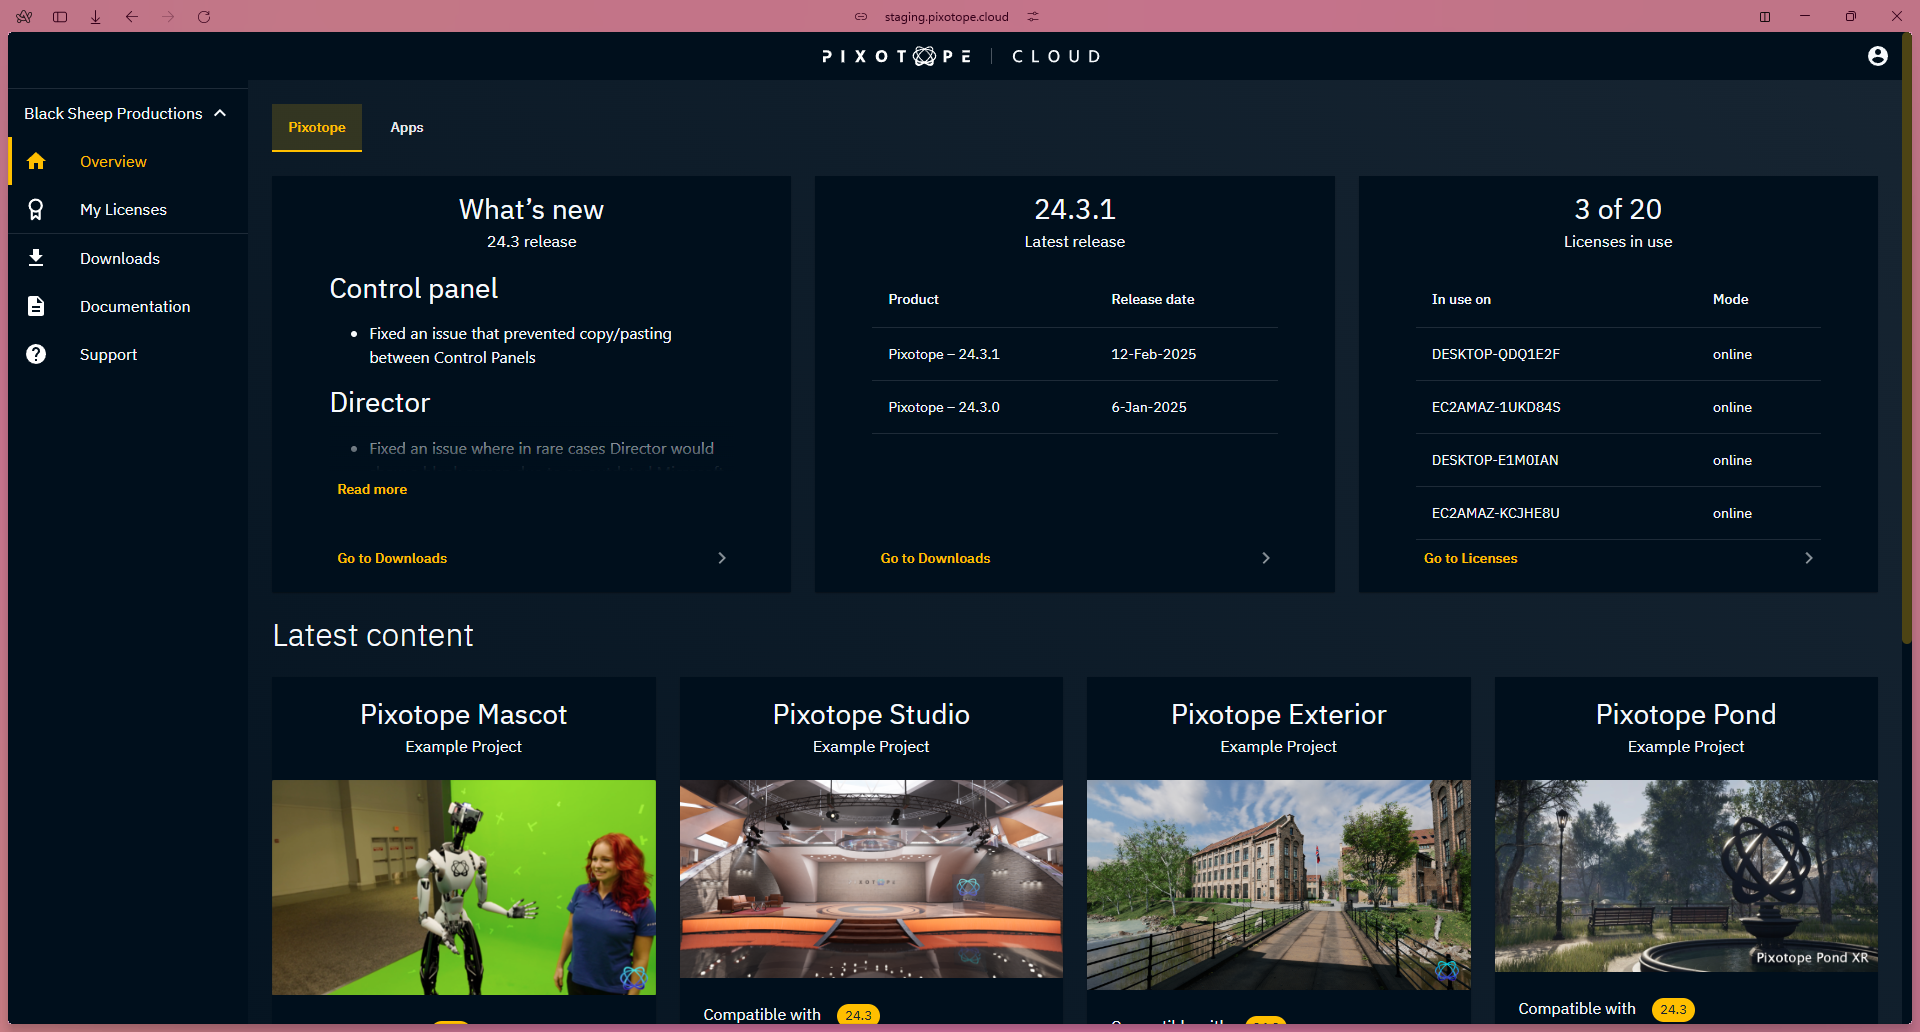
Get an overview
-
Go to Overview
-
View the latests updates for the products the organization you are part of has subscribed to
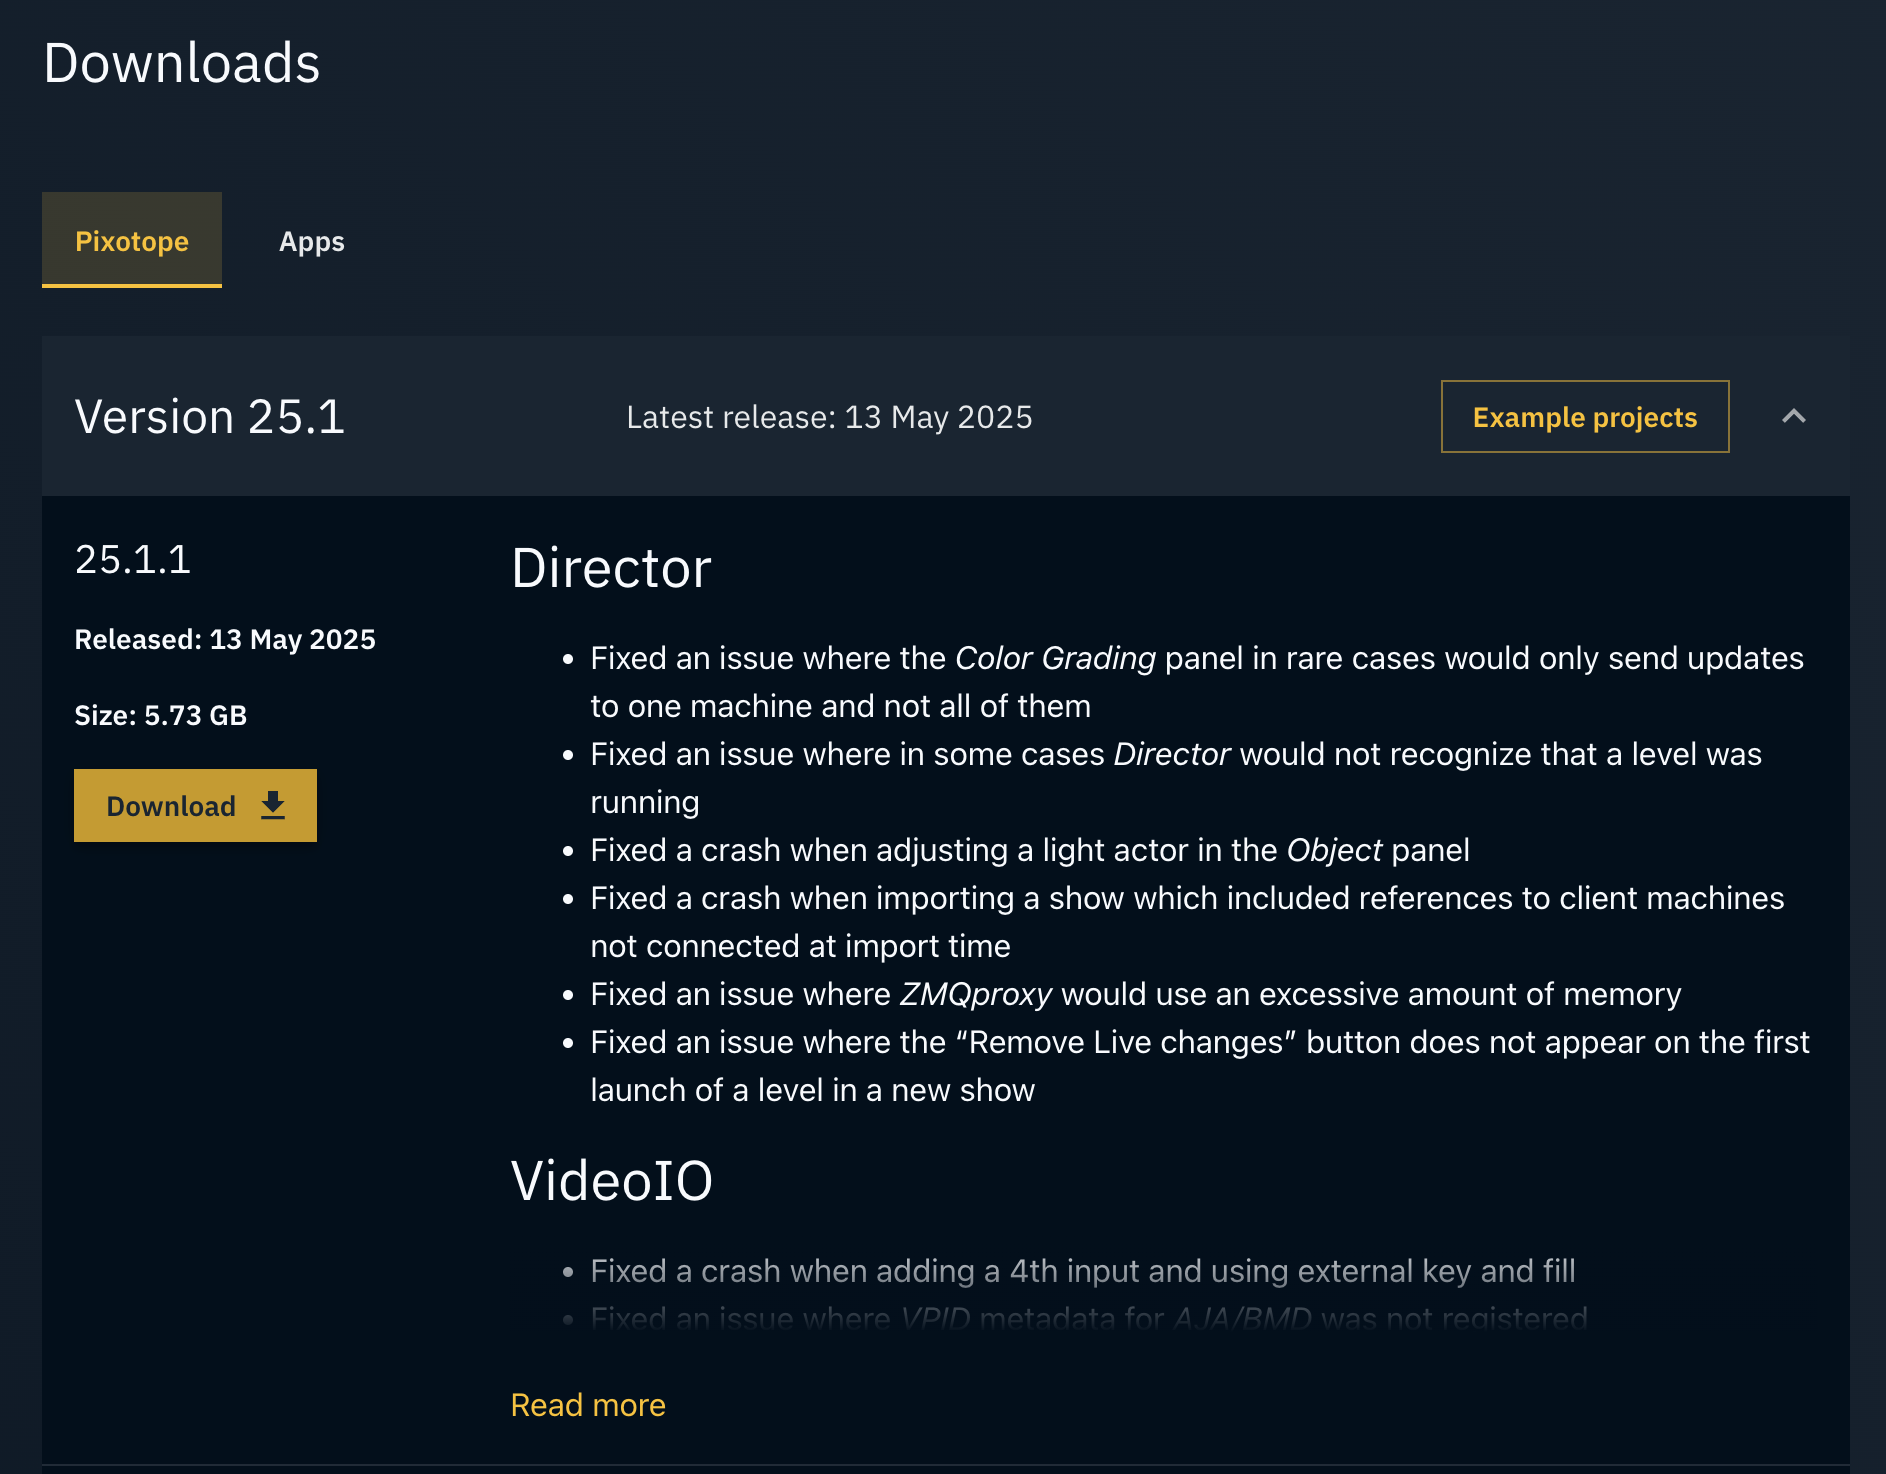
Download releases, add-ons and examples
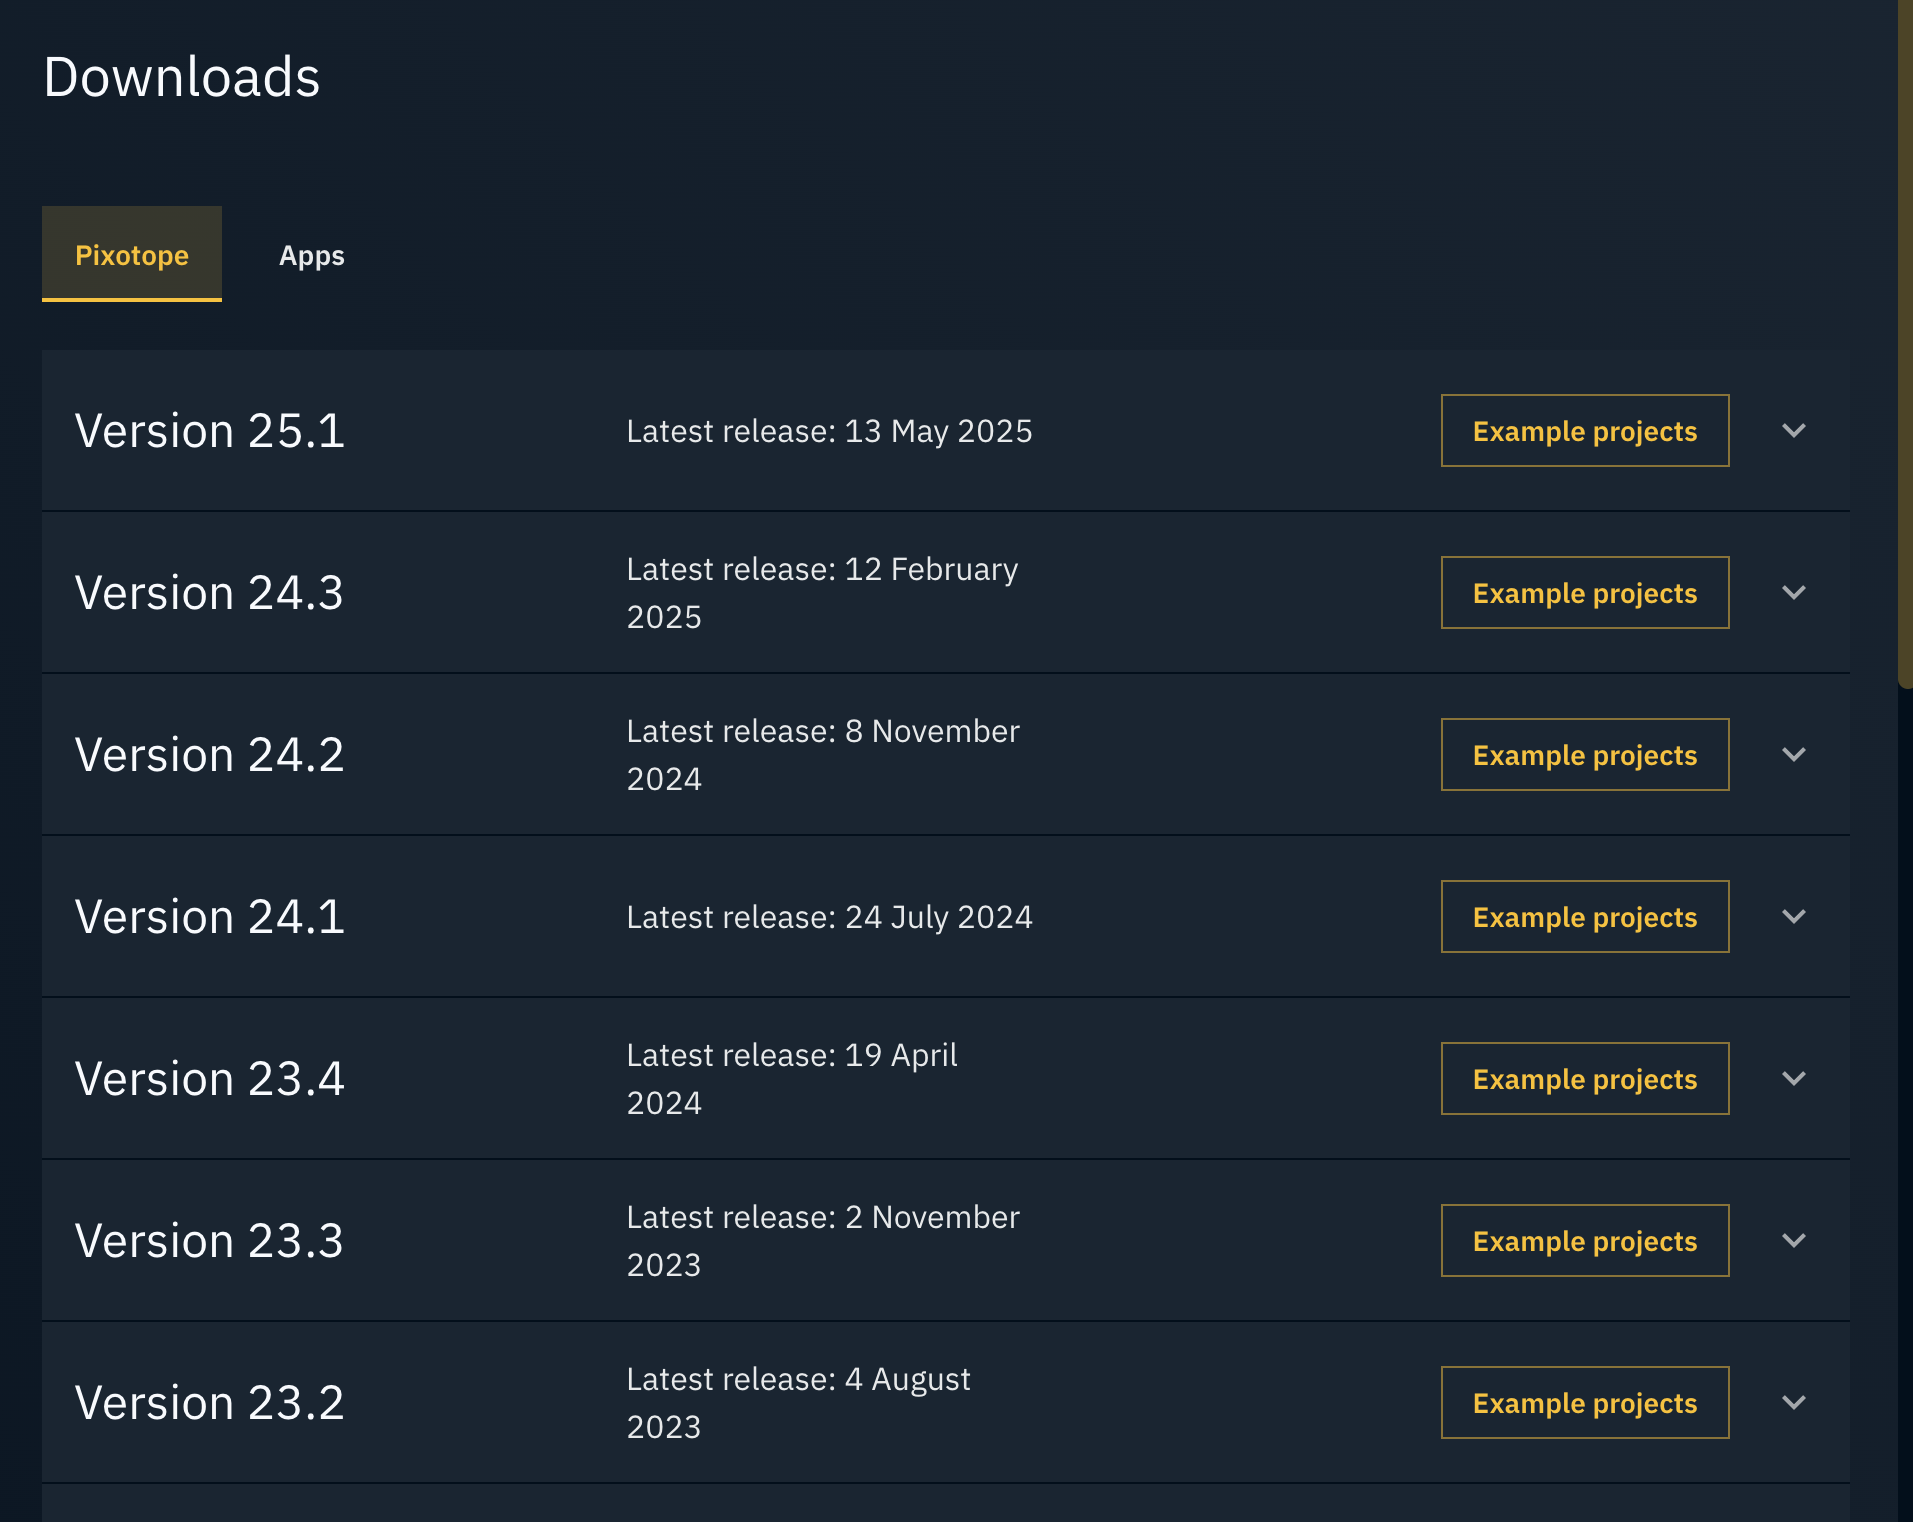
-
Go to Downloads
-
Switch to the product you want to download from using the tabs on the top
-
Product options depend on what licenses your organization owns
-
-
Scroll to the version you are interested in
-
For software, click on the "Download" button on the left
-
For other downloads, check out the available options on the right
-
Handle licenses
Licenses belong to an organization.
Are you part of multiple organizations? See how to change organization below
Check license status
-
Go to My Licenses
-
View the list of licenses assigned to you showing:
-
when they expire
-
which machine they are used on
-
their mode (online or offline)
-
Learn more about License modes - online and offline licensing

Get license for a machine without internet access
Learn more about how to Get a license for an offline machine (air-gapped)
Release a license
If you have license issues with a specific machine, you can force it to release the license.
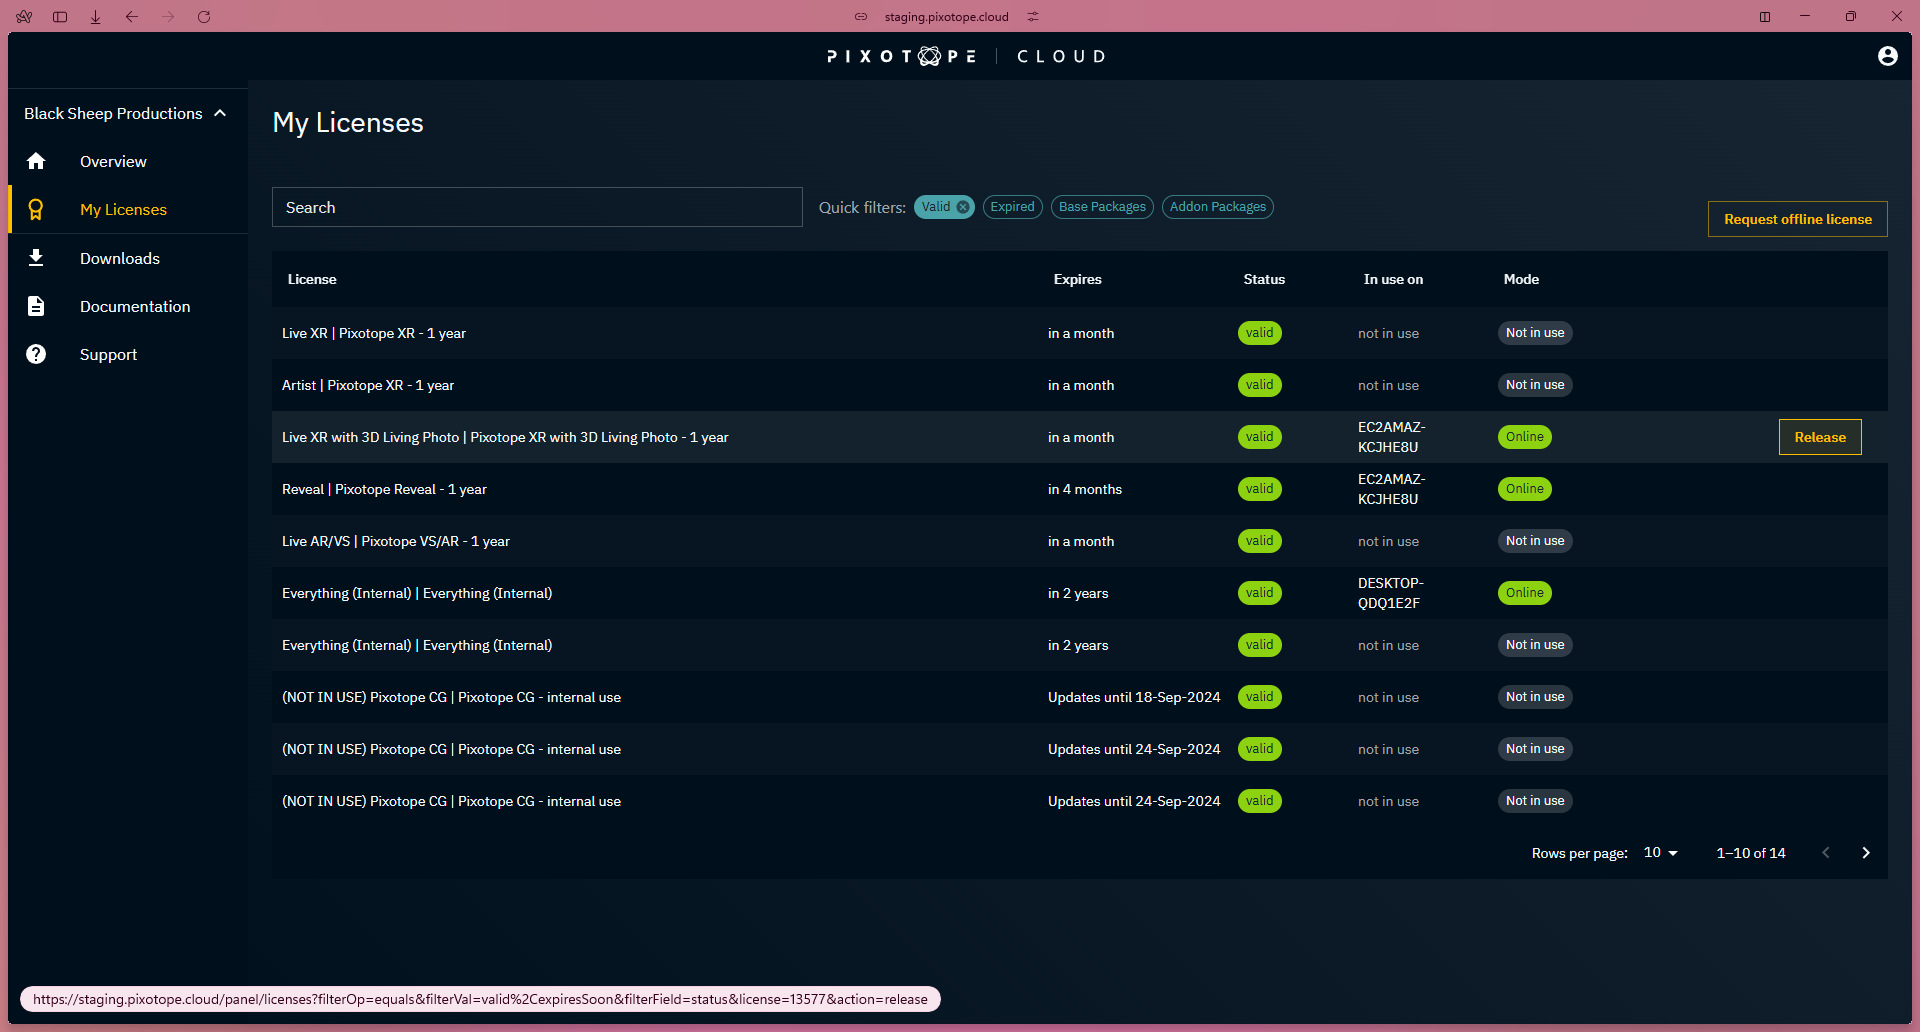
For licenses in online mode
-
Click the "Release" button of the license you would like to release
-
Confirm by clicking "Release license"
-
The license will be removed from this machine
-
It can now be used on another machine
-
-
The user on this machine is redirected to the license picker
-
For licenses in offline mode with internet access
Learn more about how to Release a license on machine with temporary internet access
For licenses in offline mode without internet access
Learn more about how to Release a license on machine with no internet access
Access documentation

-
Go to Documentation
-
For online documentation
-
Click the Pixotope Help Center button on the top right which leads to → help.pixotope.com
-
-
For offline documentation (PDF)
-
Look for the version you are interested in and click the Download icon on the right
-
Check support status
-
Go to Support
-
View a list of all your support tickets
-
their status
-
when they were last updated
-
-
Clicking on a ticket will redirect you to → support.pixotope.com
-
Use your Pixotope Cloud password if needed
-
Create support ticket
-
Go to Support
-
Click on Create new ticket in the top right corner
-
This will redirect you to → support.pixotope.com
-
Use your Pixotope Cloud password if needed
-
Learn more about How to contact customer support
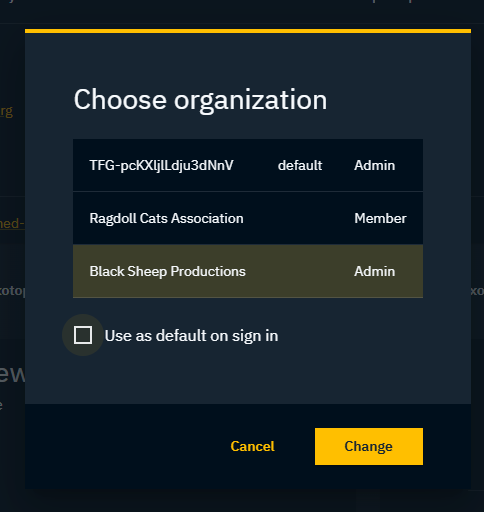
Change organization
In case you have been invited to multiple organizations, you can switch between them
-
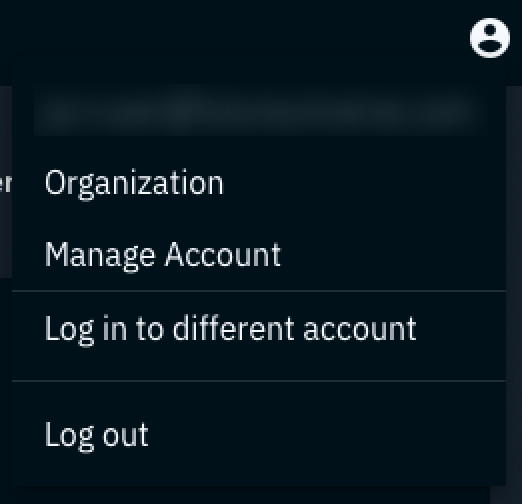
Click on the User icon on the top right
-
Click on Organization
-
Select the organization you want to switch to
-
Confirm by clicking the "Change" button

Change default organization
The organization which is set as default is used when logging into
-
Pixotope Cloud
-
Pixotope Graphics/Tracking
There is currently no way of changing the organization in Pixotope Graphics/Tracking
This is only applicable when you are invited to more than one organization.
-
Click on the User icon on the top right
-
Click on Organization
-
Select the organization you want to set as default and switch to
-
Confirm by clicking "Change"
Change your account details
-
Click on the User icon on the top right
-
Click on Manage Account
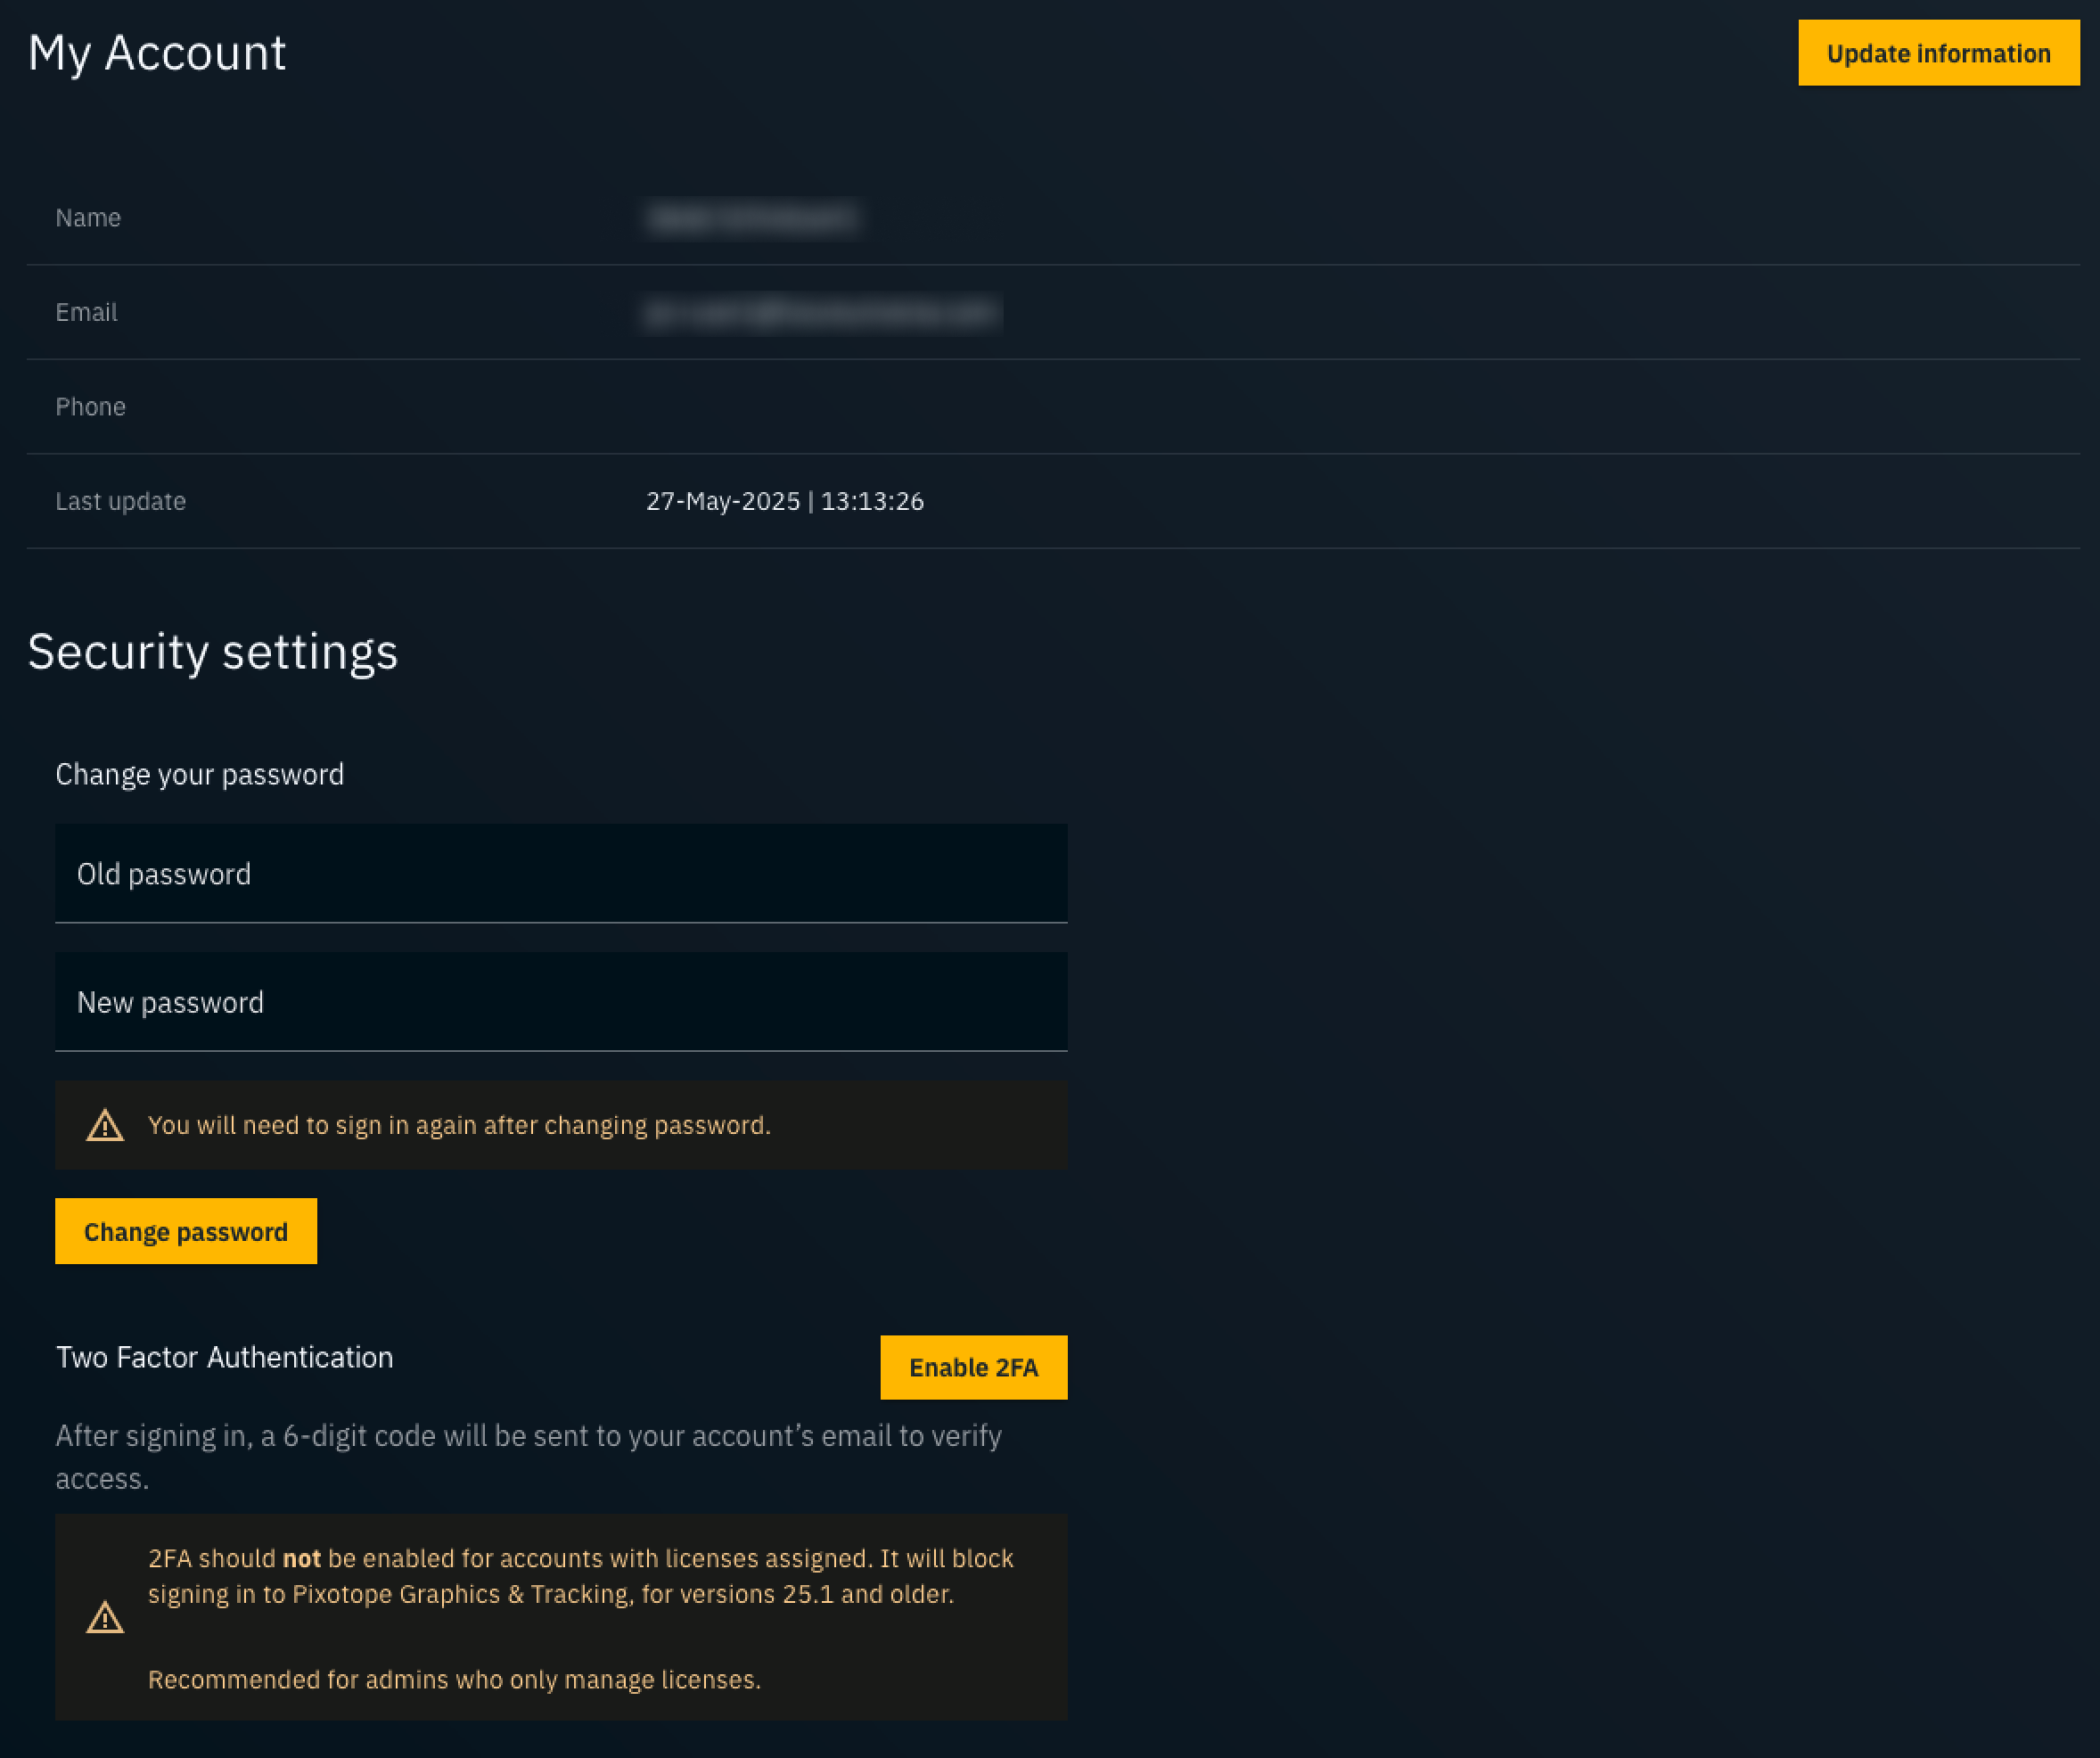
Update email address or name
-
Click the "Updated information" button on the top right
-
Update your account details
-
Confirm by clicking "OK"
When updating email, a verification link is sent to your new email address. Only after having clicked the link in the email, the process is completed and the email address is changed.
Change password
-
Enter the old password and a new password
-
Confirm by clicking "Change password"
You will need to sign in again.
Manage two-factor authentication
Enable two-factor
-
Click "Enable 2FA" which opens a new dialog
-
Click "Send the code"
-
A 2FA code is sent to your email address
-
Enter the Verification code in the dialog
-
2FA is now enabled and an Account security update email has been sent
On every log in from now on, aside of the password, an additional one-time verification code sent via email has to be entered.
2FA should NOT be enabled for accounts with licenses assigned. It will block signing in to Pixotope Graphics & Tracking, for versions 25.1 and older.
2FA is recommended for admins who only manage licenses.
Disable two-factor
-
Click "Disable 2FA"
-
Confirm by clicking "OK"
-
2FA is now disabled and an Account security update email has been sent
Manage your team
You need to have an Admin role.
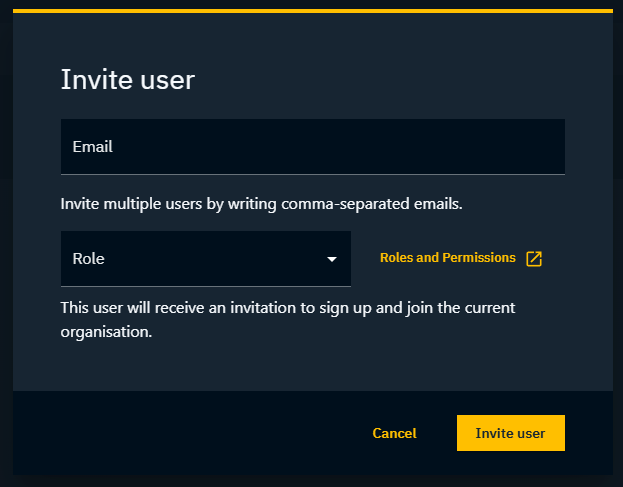
Invite new user(s)
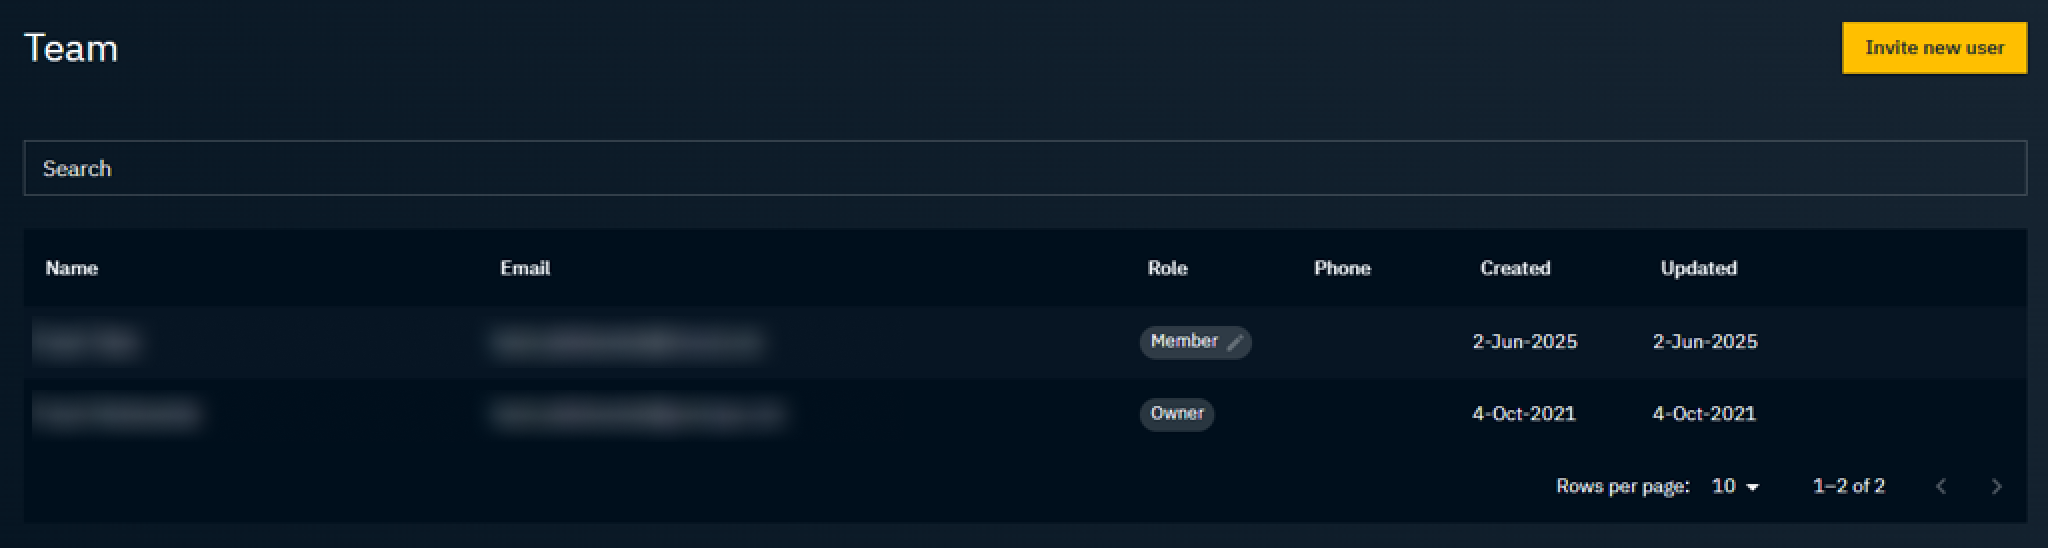
-
Go to Team or Invites
-
Click the "Invite new user" button
-
Enter one or multiple email addresses (comma separated)
-
Choose a role
-
Confirm by clicking “Invite user"
-
The user(s) will receive an email invite to your organization
-
The invites are now added on the Invites page as pending
-
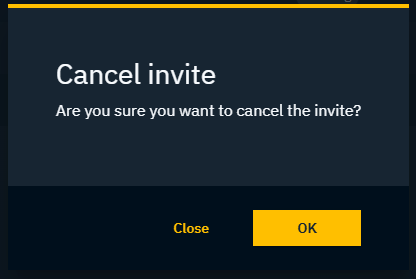
Cancel pending invite
-
Go to Invites
-
Hover over the specific email address and click on "Cancel invite" on the right and confirm

Learn more about Cloud roles and permissions
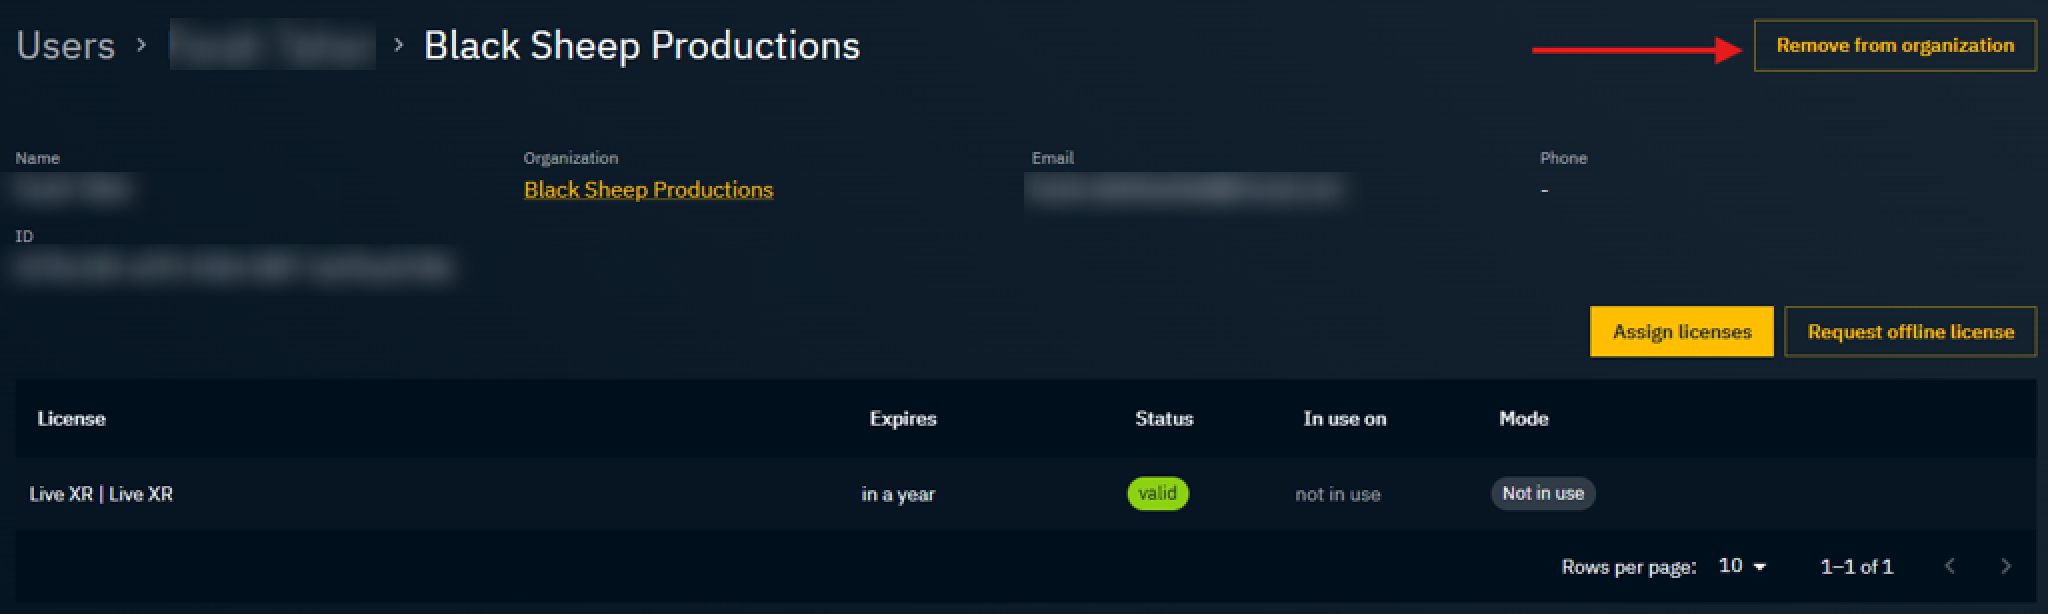
Remove user from organization
-
Go to Team
-
Click on the user to be removed
-
Click the "Remove from organization" button on the top right
-
An email is sent to the user that they have been removed from your organization
-
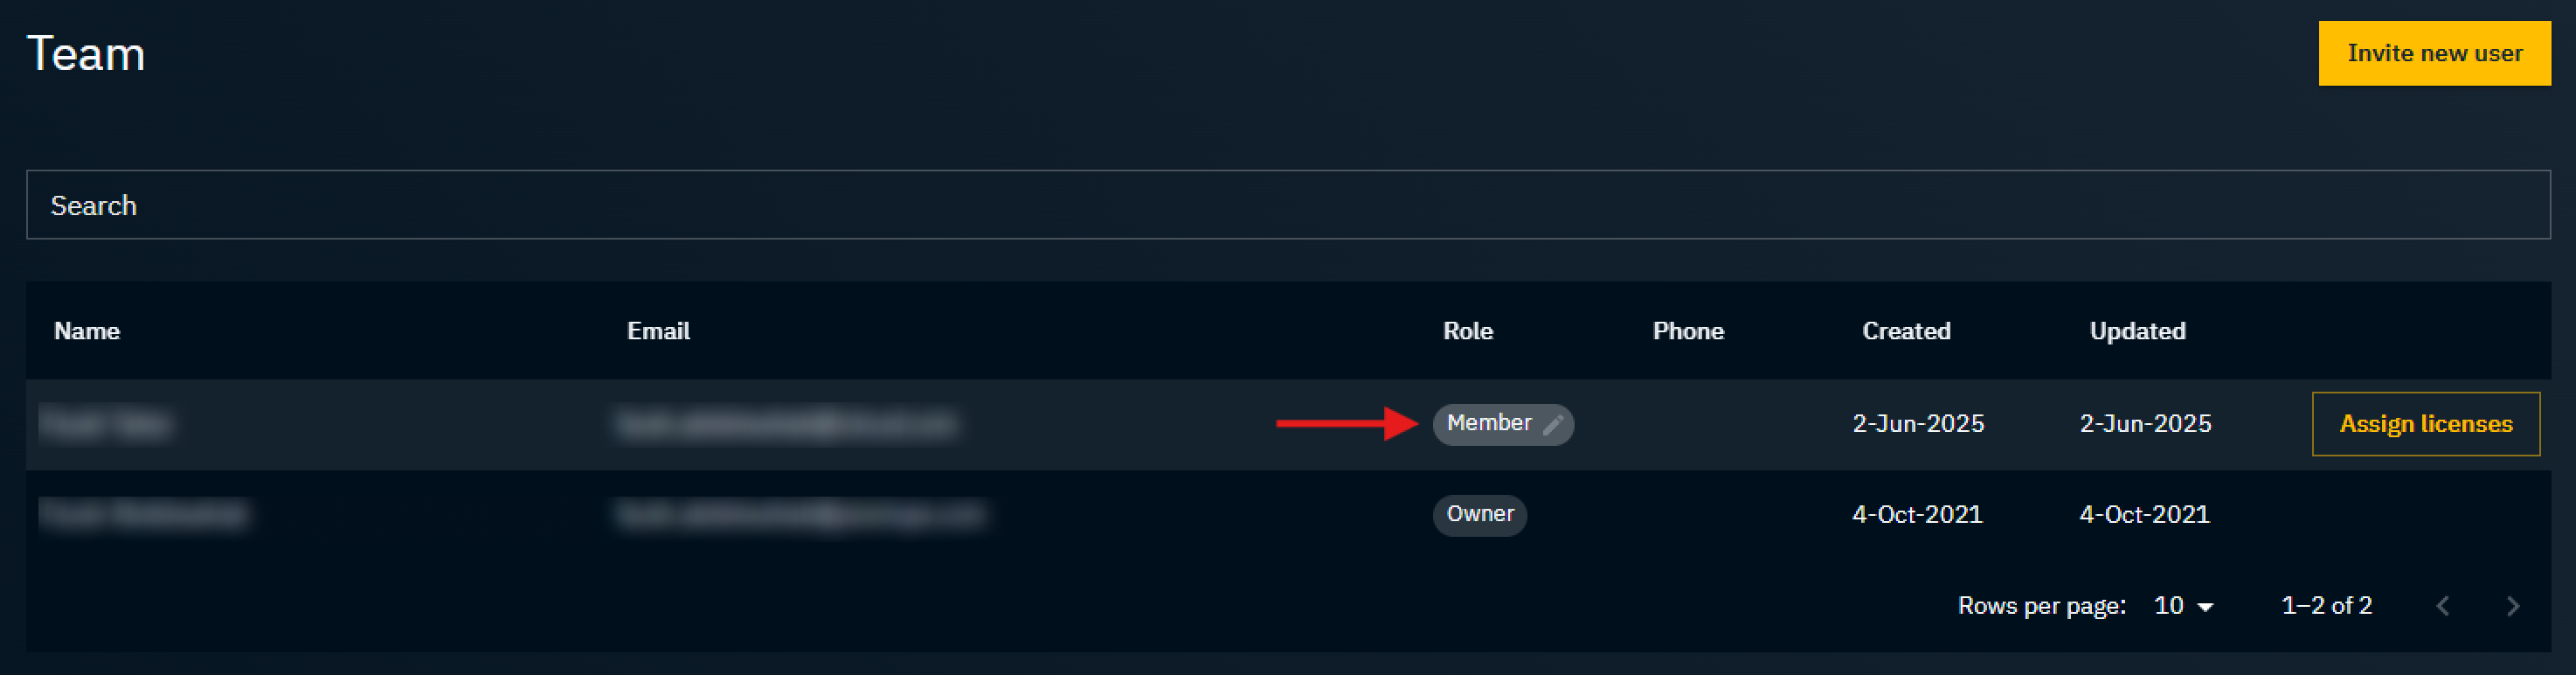
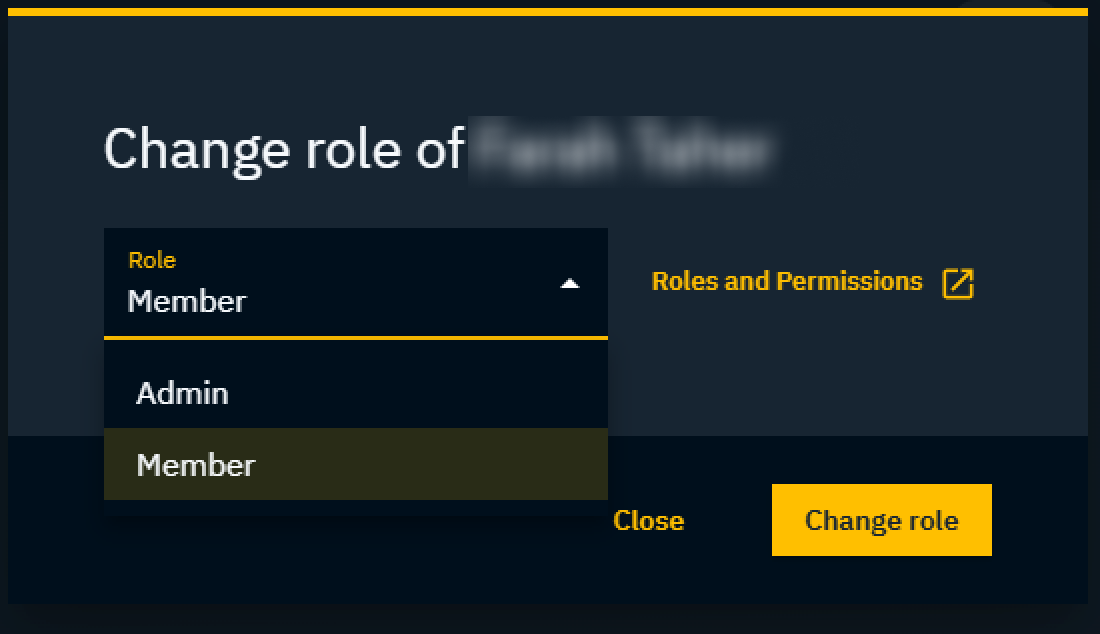
Change role
-
Go to Team
-
Click on the "Role" tag of the user
-
Choose another role for the user
Change owner
-
Please contact customer support at → support.pixotope.com
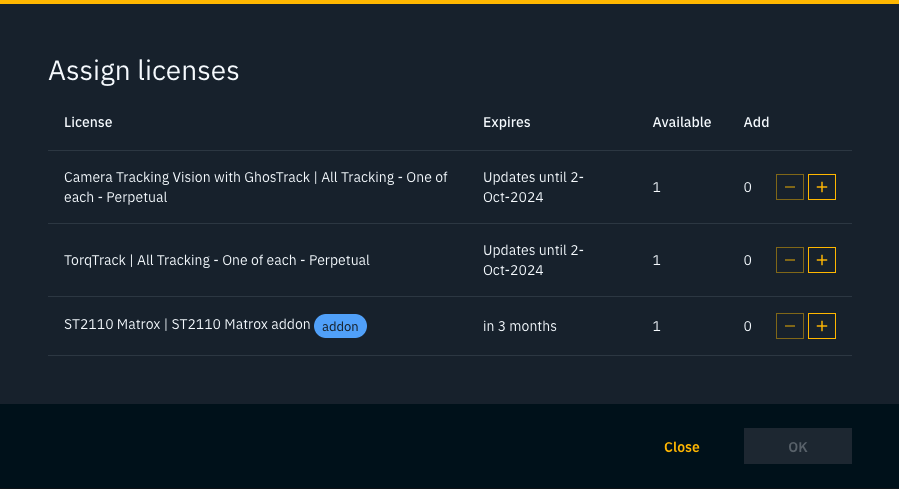
Assign licenses
-
Go to Team
-
Hover over the specific user and click on "Assign licenses" on the right
-
Select the licenses you want to assign to the user
Unassign licenses
-
Go to Team
-
Click on the specific user
-
Hover over the specific license and click "Unassign" on the right
Only licenses in online mode can be unassigned.
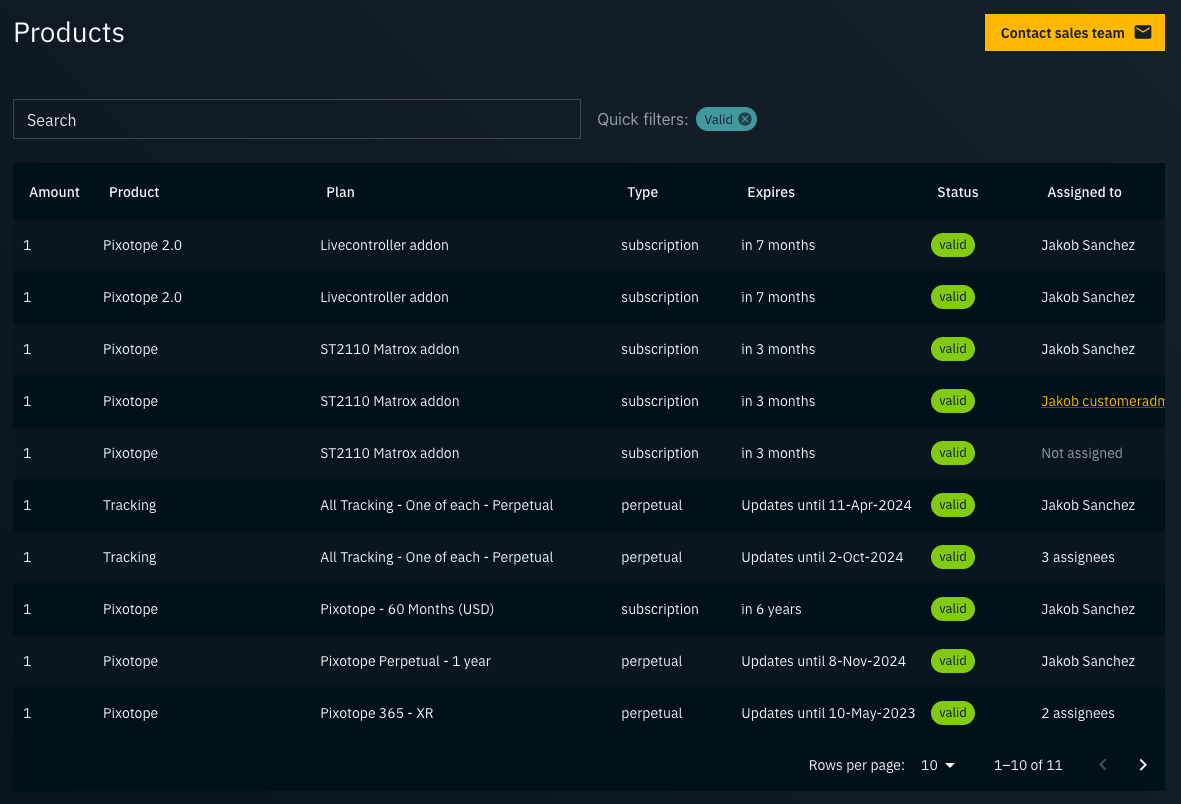
Check product/license status
-
Go to Products
-
Click on the product/plan you want to see the status of
-
The license details including who they are assigned to are listed