Using Pixotope Reveal
A Reveal license is needed
Pixotope Reveal enables media creators to seamlessly integrate real-time 2D and 3D graphics behind on-screen talent during any live media stream, eliminating the need for green screens, chroma keyers, or LED walls.
Current restrictions for Pixotope Reveal
Supported format: HD-1080p with all frame rates up to 60fps
Edge Correction: This feature currently only works for the combined Reveal+Graphics in one engine configuration
For supported GPUs check out the System requirements
Masking quality:
Small foreground elements might be occasionally removed, or background elements might remain visible
Wearing clothes that match the background color (like black clothing on a black background) will reduce masking quality
This article focuses on Keyer mode: Reveal
Looking for Keyer mode: Chroma? Go to Use the video keyer
Supported configurations
Pixotope Reveal supports 3 different configurations, based on what graphics engine is going to be combined with, and how it interacts with it:
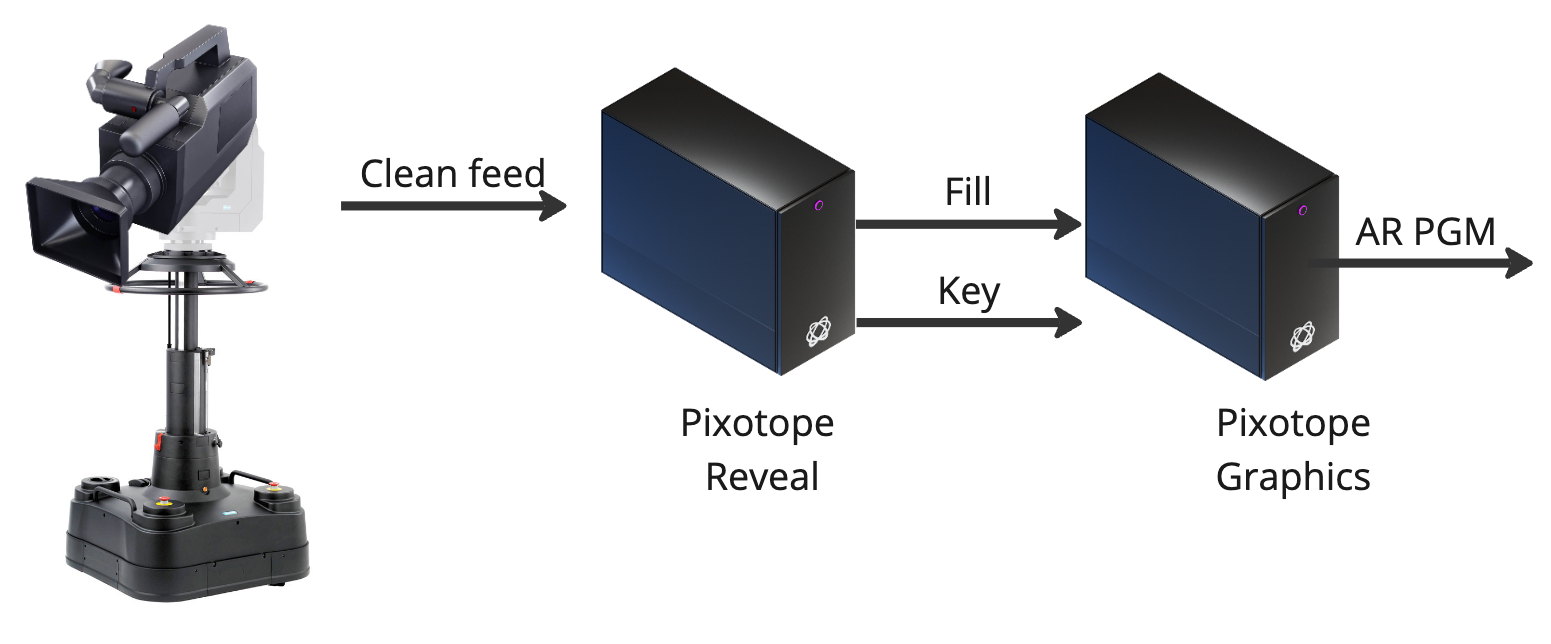
Reveal stand-alone + Pixotope Graphics in a separate engine

We recommend to set up the Pixotope Reveal machine in Stand-alone role and avoid connecting it to the Server-Client multi-machine setup that you might have for your graphics engines.
Learn more about Network roles - Stand-alone, Client or Server
For setup, continue to Set up video keyer stand-alone routing
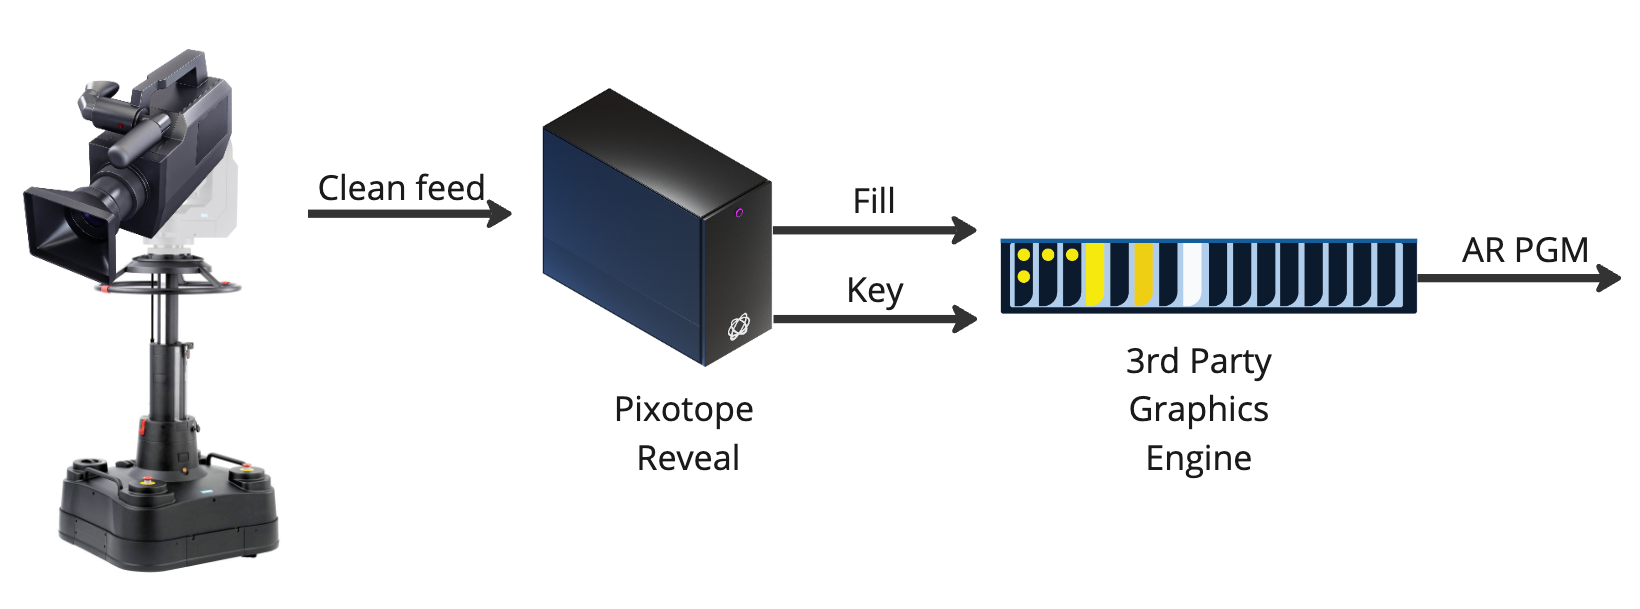
Reveal stand-alone + 3rd-party Graphics in a separate engine

For setup, continue to Set up video keyer stand-alone routing
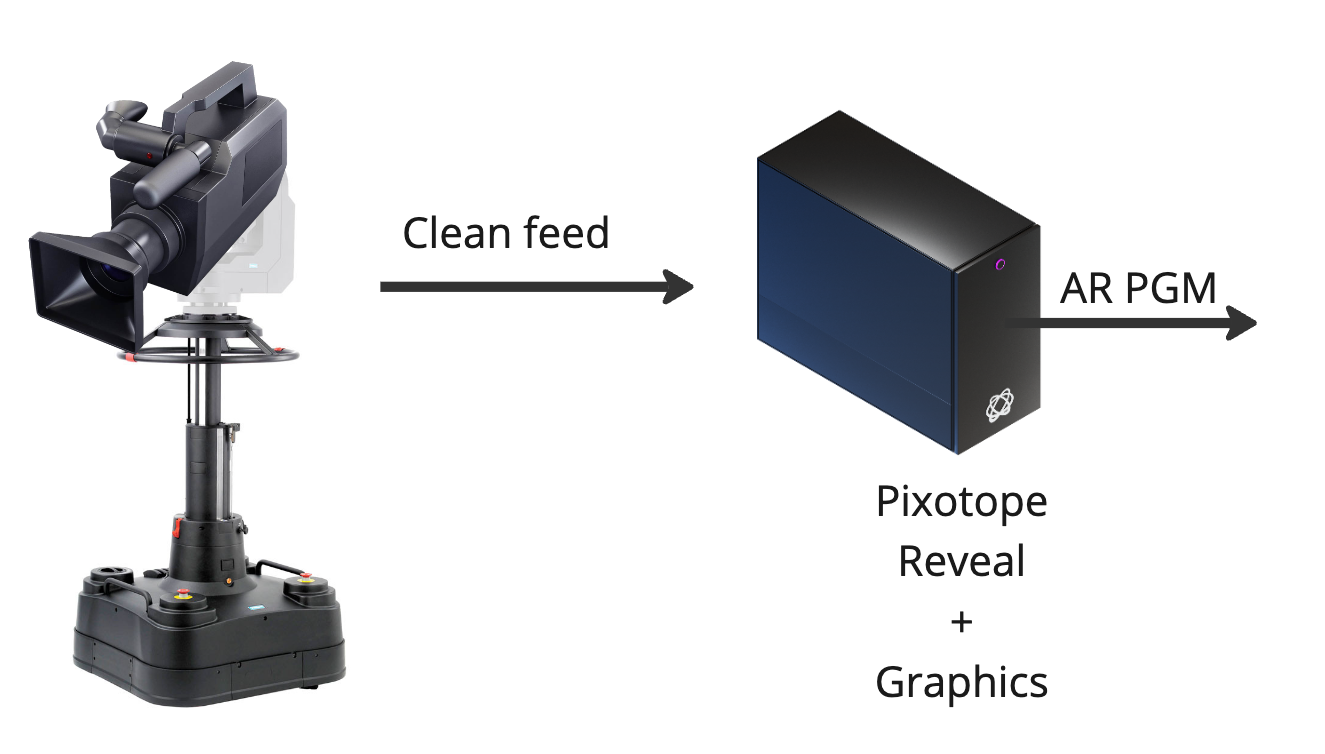
Combined Reveal + Pixotope Graphics in one engine

Pixotope Reveal adds additional load to the GPU. It is highly important to follow the System requirements - Recommended configuration for this option
For setup, continue to Set up combined Pixotope Reveal + Graphics routing
Set up video keyer stand-alone routing
Reveal machine
Go to the dedicated machine in the Routing panel
Add a Media Input and configure it
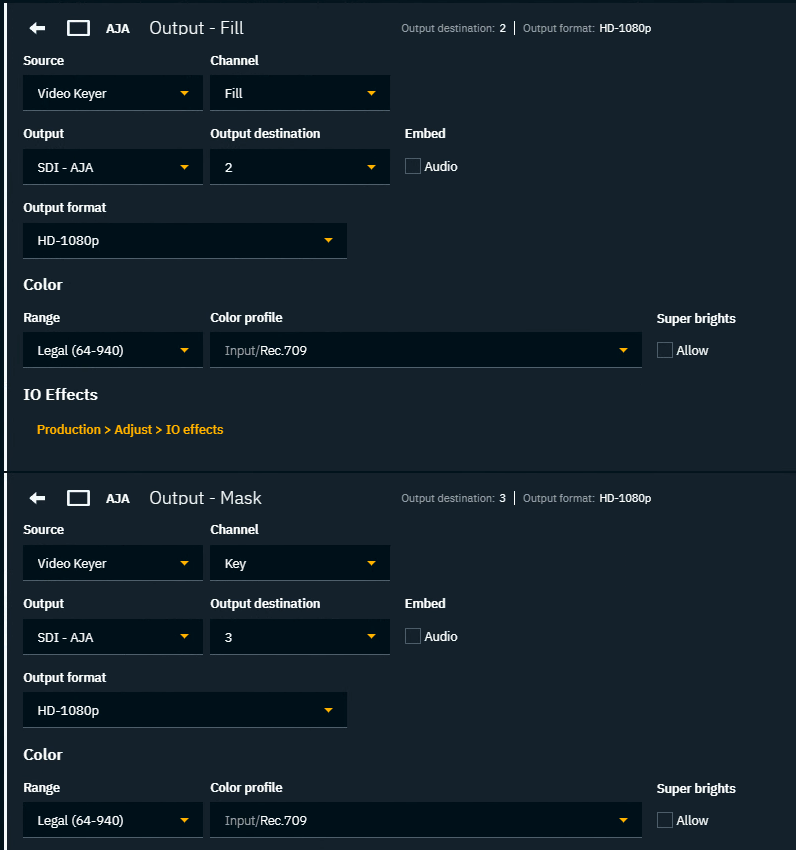
Add 2 Media Outputs
For both: Change the Source to Video Keyer
For the 2nd: Change the Channel to Key

Render machine
When using the key inside Pixotope Graphics configure continue routing the render machine.
Learn more about how to Configure using an external keyer
Set up combined Pixotope Reveal + Graphics routing
Follow the usual setup procedure for Pixotope Graphics - Configure routing.
Use the Camera system input in the Routings panel instead of a Media Input.
Enable Reveal keyer
Go to the Video Keyer panel
Click on "Enable Reveal keyer"
OR when switching from Chroma keyer, select "Reveal" as the Keyer modeOptionally change Preview to
Alpha > showing the mask
Layered > showing fill with the mask applied
Adjust the Edge Correction value to refine the mask and optimise results
Edge Correction is applied in the Engine. To evaluate its impact, look at the final output. Its effect will not be visible in the embedded Preview in Director.
