Linked projects
Displays the projects linked to this show file. It also shows its availability (Status) on this machine.
Projects handled by the Asset Hub have additional options.
Learn more about how to Sync projects and other files in Synced storage

Add a linked project
-
Click on "Add project link"
-
Choose the Project location
-
From synced storage
-
Choose from a list of synced projects (
Synced Storage/Projects)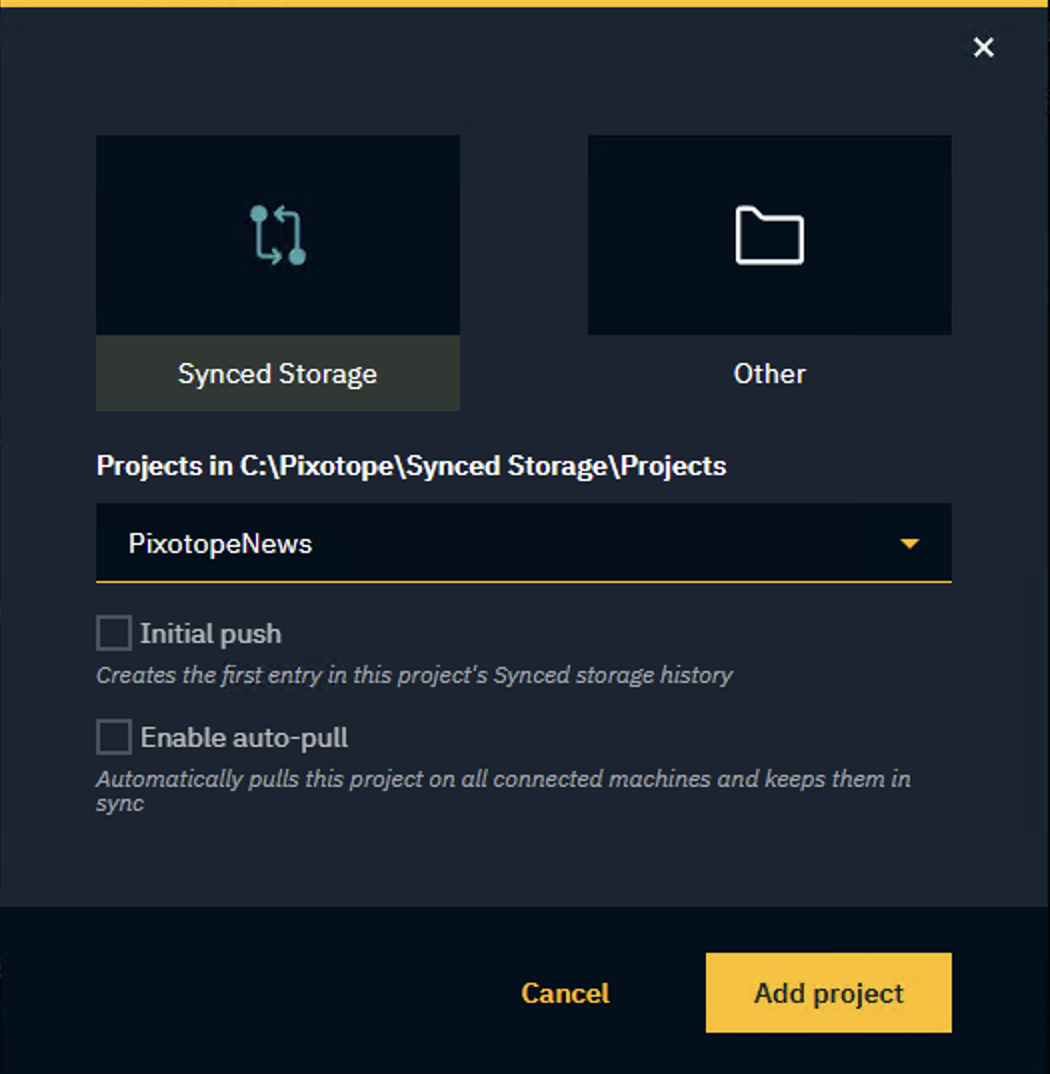
-
-
OR from another location
-
Click "Select" and browse to the
.uprojectfile of the project which should be linked -
Choose to
-
Keep it local only to not use Asset Hub for syncing
-
Move or Copy into Synced Storage whether to move or copy the project into
Synced Storage/Projects
-
Optionally, select "Initial push" and/or "Enable auto-pull"
-
-
-
Learn more about Initial syncing of a project
Remove project link
-
Click on the Trash can icon in the linked project row
If only one linked project exists, it can not be removed.
Edit project path (Stand-alone and Server role)
-
Click on "Edit project path"
-
Browse to the new location of the
.uprojectand click "Select"
Server machine: Editing the path of the linked project will affect all Client machines.
Edit local project path (Client role)
Client machines can override the project path locally in case their project path is different
-
Click on "Edit local project path"
-
Browse to the location of the
.uprojectand click "Select"
The project with a local override is indicated with - local override
Remove local override
To remove the local override and go back to using the server machine’s project path:
-
Click on "Remove local override"
Learn more about Show file and linked project
Import from other show
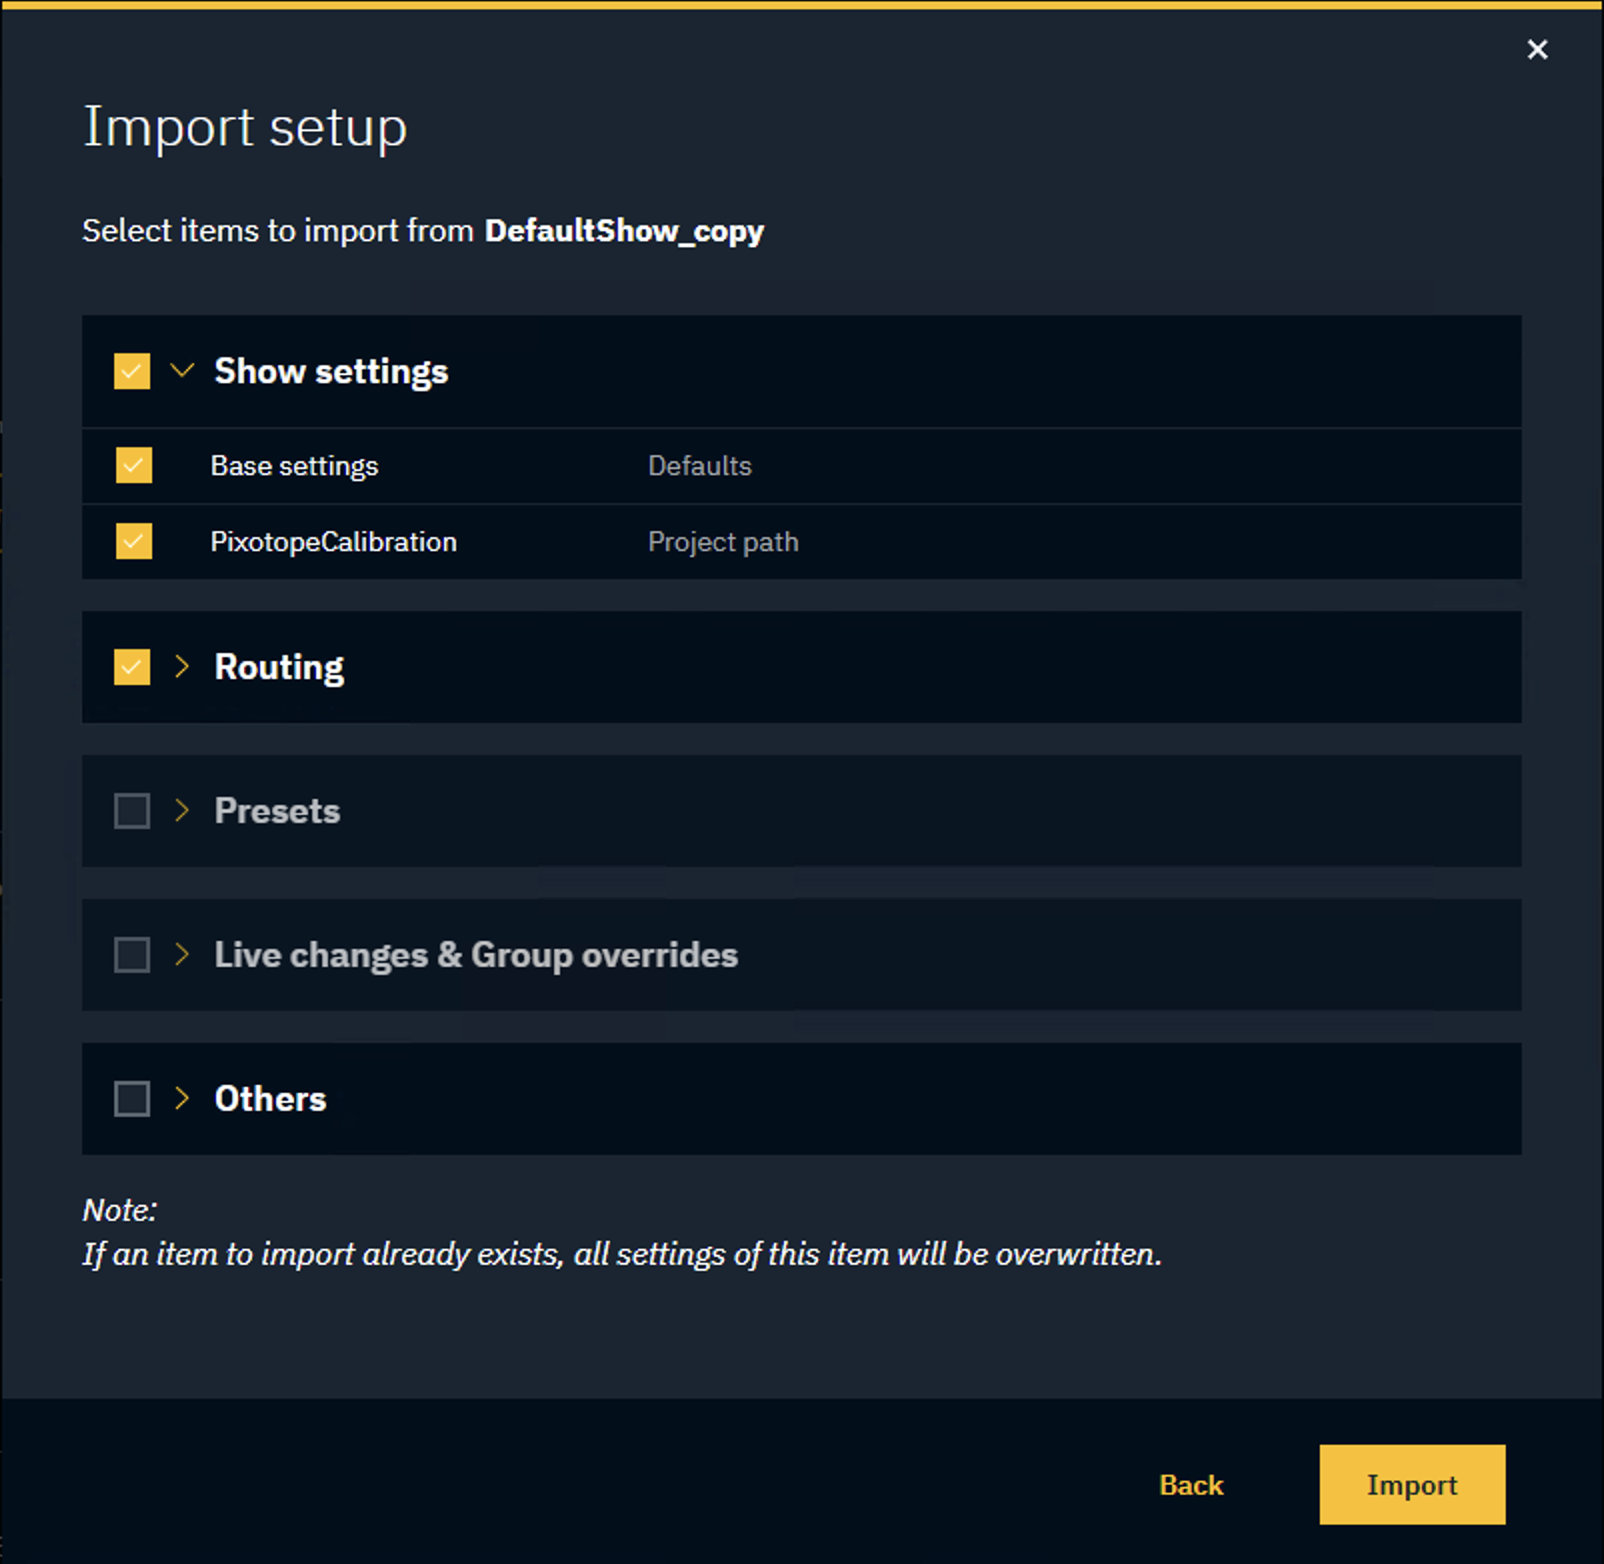
Allows you to import configuration and calibration settings from another show.
To import a setup into the open show:
-
Click "Import from other Show" in SETUP > Show > Show settings
-
Select the machine you want to import the setup from
-
Optionally, you can click "Browse" to select a show from anywhere on the local machine
-
-
Select the Show
-
Select the items to copy over
If an item to import already exists in the target show, all settings of this item will be overwritten.
Options
-
Show settings (Base settings, Linked project paths)
-
Routing per machine
-
To include the machines "Group tags", also select Others > Machine groups
-
-
Presets per panel
-
Live changes & Group overrides
-
Others (Machine groups, Data mapper, Pixotope Tracking data, Digital Twin data, Camera groups)
Base settings
Frame rate
Choose the project’s frame rate.
Learn more about Supported video formats and frame rates
Multi-machine syncing and timecode
Enable multi-machine syncing based on the primary timecode. The status of this setting is also shown in the Status panel.
Learn more about how to Configure timecode (LTC)
Learn more about the Status panel in Pixotope Director - Interface
Filmic tone mapping (global)
Enables Unreal’s filmic tone mapper globally.
Learn more about how to Configure the color pipeline
If enabled, the values can be changed in the Color grading panel.
Learn more about how to Adjust color grading
Camera input switching
Enable the ability to switch between multiple camera systems (video and tracking source) in the routing panel.
If disabled, the first camera system routed to a machine is used.
No engine - fallback option
Choose what to output in case the engine is not running.
-
Default image

-
Black
-
Outputs full black
-
-
Passthrough
-
Outputs the camera input directly
-
Customize default textures
Defaults
Choose the default values for
-
Input/Output
-
Video format
-
Color profile
used in Configure > Routing.
Engine startup arguments (EDITOR/LIVE)
Requires restarting levels.
Render the Engine headless (-RenderOffScreen)
This starts the Engine without any visible rendering at all on the local machine.
Custom arguments
Here you can add custom commands to control how the engine behaves when launched.
-
Click “Add custom argument”
-
Write out as many commands as you like into the Argument(s) field
-
Give your argument(s) a Label for easier recognition. This label will also be displayed in a notification bar in the Launch panels, each time an argument is toggled on
-
Choose to apply the custom argument when launching In Editor and/or LIVE

A notification is shown in the Launch panel, when custom arguments are applied.

Make sure you use proper syntax when typing your commands, otherwise launching levels could fail. A helpful guide, and list of available arguments can be found here
→ https://docs.unrealengine.com/en-US/command-line-arguments-in-unreal-engine/
Experimental features
-
VideoIO service debug tools
These features are experimental. We do not recommend using them in production.
Continue to Configure camera systems
Info
-
Show state
-
Opens the show state JSON in the browser
-
-
Show Pixotope Tracking data
-
Opens the Pixotope Tracking data JSON in the browser
-
-
Open show file in Pixotope Explorer
-
Opens the show file in the Pixotope Explorer application
-
This is an advanced feature. Use with caution!