Widgets can be useful when you want to show some stats for debugging or make an animated picture/text on the viewport/output. In this guide we will show you how to use Pixotope Widget renderer.
Create widget
-
Right click in the Content Drawer
-
Add a "Widget Blueprint" under User Interface
-
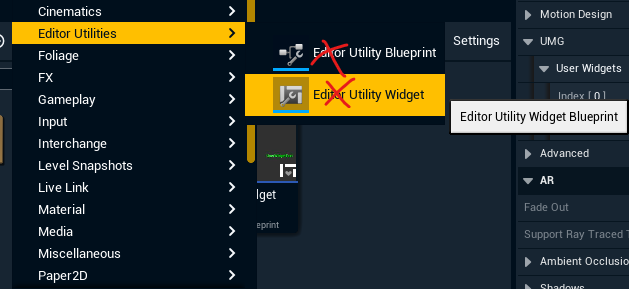
Note: the "Editor widget blueprint" under Editor Utilities does not work in Live mode, if there are animations involved

-
-
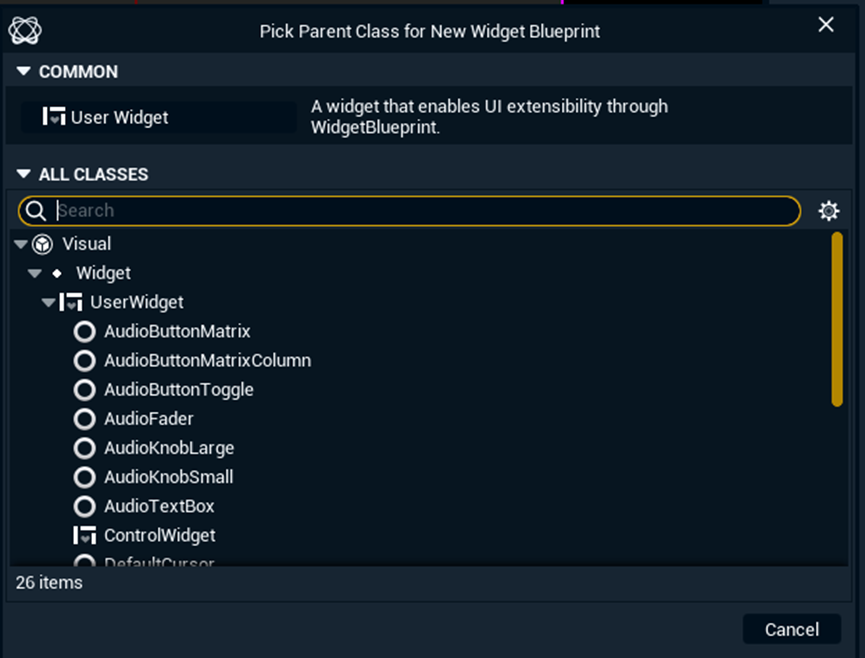
Select "User Widget" in the upcoming dialog
Editor Utility Widget and Editor Utility Blueprint are for debugging purposes only. They do not render in Preview Live/LIVE mode!
-
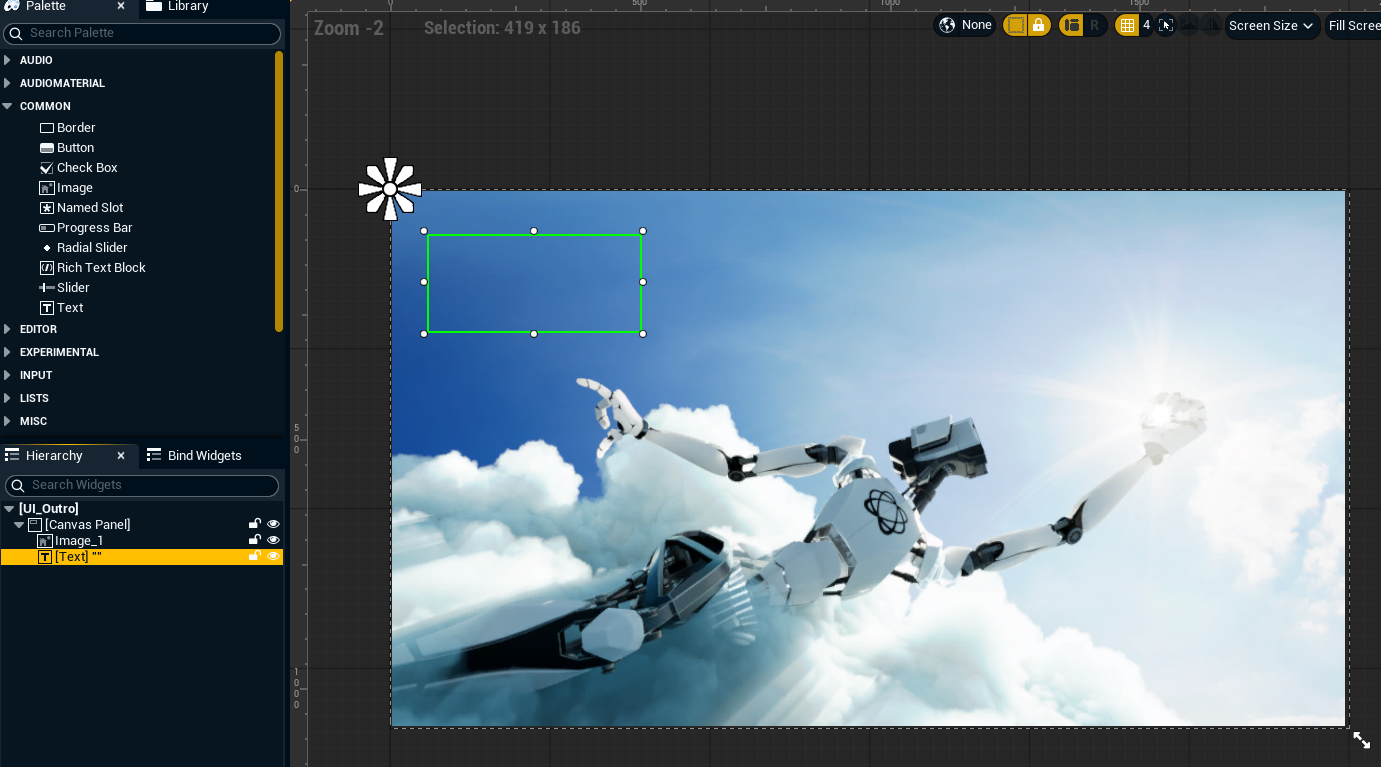
Rename it, in our case UI_Outro
-
Create the widget you like
-
Learn more about how to create user interfaces → https://dev.epicgames.com/documentation/en-us/unreal-engine/creating-user-interfaces-with-umg-and-slate-in-unreal-engine
-
-
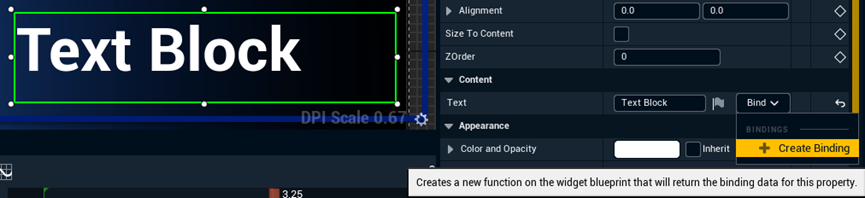
Click "Create Binding" on a widget so that we can tweak it in another Blueprint
-
This creates a function and switches to the Graph page
-
-
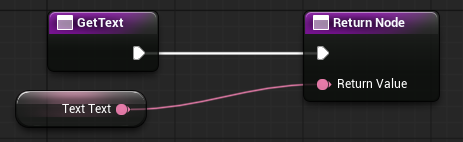
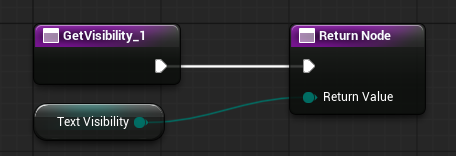
In the graph view, click the Return Value and select Promote to variable

-
Compile and save the widget blueprint
Repeat this process with other widgets that you want to control from another Blueprint.
Control variable
-
Fine tune the widgets in the widget blueprint
-
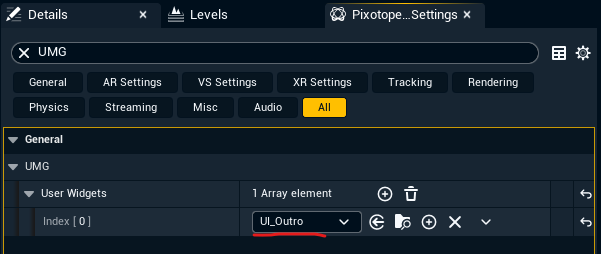
Go to Pixotope World Settings > UMG > User Widgets and add our widget blueprint
-
Create an actor Blueprint and rename it (in this case BP_WidgetControl)
-
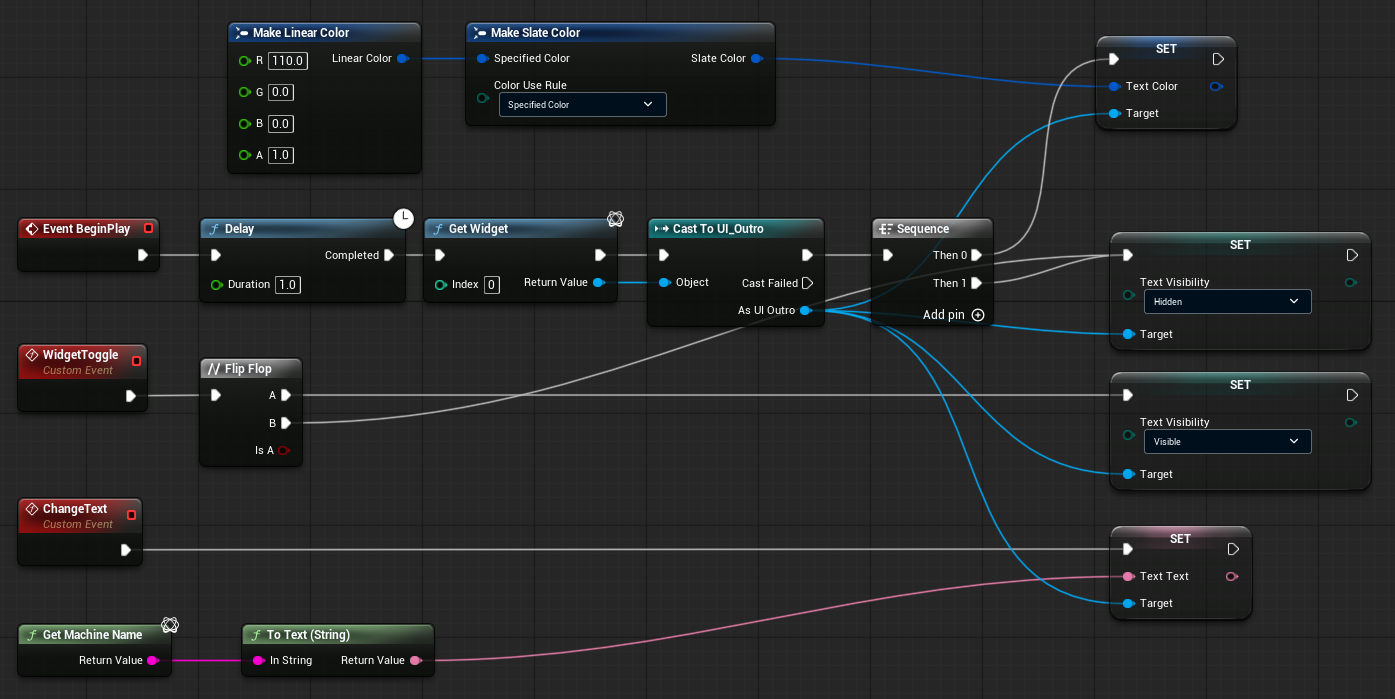
Create logic for widget control
-
Be sure to add a delay node before getting widgets, as the UMG system takes more time to start
-
If you want to show a widget in the final output, please use the "Get Widget" node to get the Pixotope UMG widgets.
-
Don’t use "Get all widgets of class" or "create widget+add to viewport” as they are debug widgets only. They won’t be rendered to the output.
-
-
You can build complex logic to drive this text widget. For example, use a custom event to send text from an Array one by one to Text widget.