Creating a template consists of the following steps:
Set up workspace
-
Make sure you have the following windows enabled (from Window title bar menu):
-
Remote Control – dock it at the bottom next to the Content Browser tab
-
Sequencer – dock it at the bottom next to the Content Browser tab
-
Motion Design Outliner – dock it on the top right next to the Outliner tab
-
Operator Stack – dock it on the top right next to the Outliner tab
-
When using Cloners, make sure that Generate Mesh Distance Fields in Project Settings > Engine - Rendering is enabled. Note that this has a performance cost.
Add motion design assets
Add your motion design assets and structure them.
-
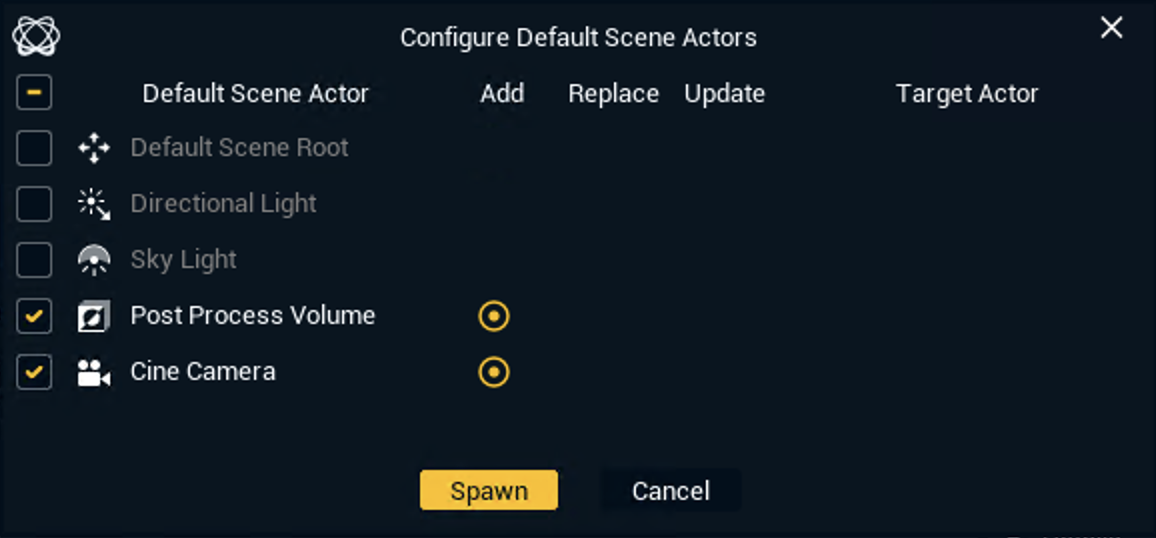
If you don’t have a Camera Actor and a Post Process Volume in your scene yet, create one of each
-
Click the "Create Defaults" button on the bar above the viewport
-
Check the Cine Camera and the Post Process Volume options
-
Click "Spawn"
-
-
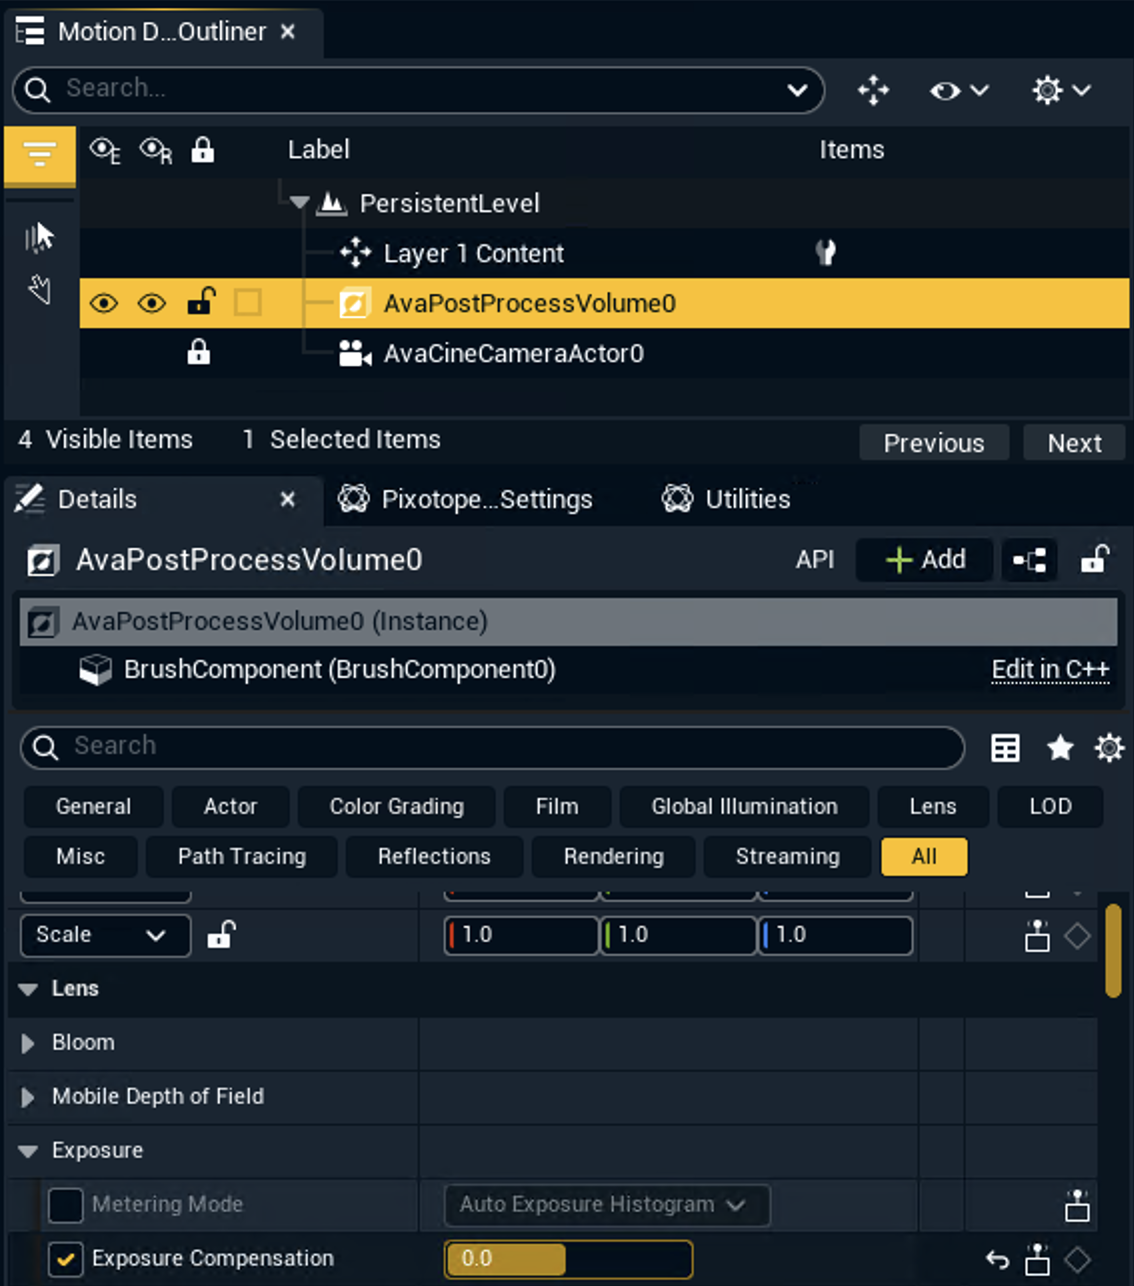
Set the Exposure Compensation of the newly created AvaPostProcessVolume
to0.0and make sure it is enabled-
Do this for all Motion Design levels!
-
-
When Motion Design is enabled for a level
-
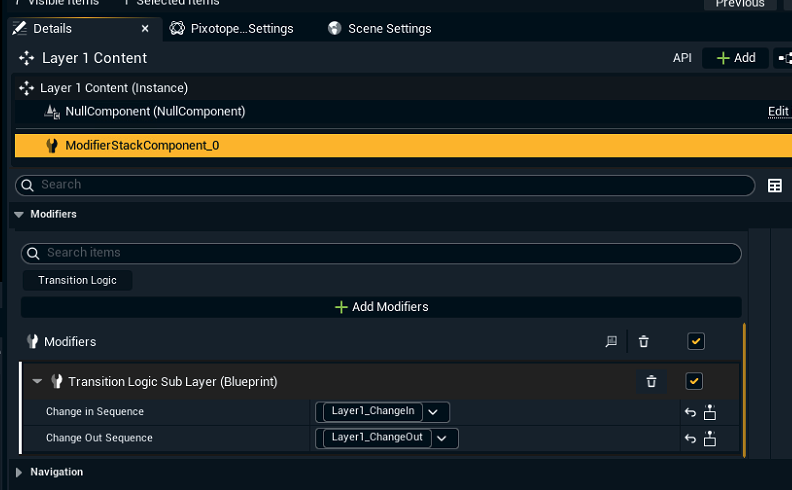
a new Null Actor called Layer 1 Content is created

-
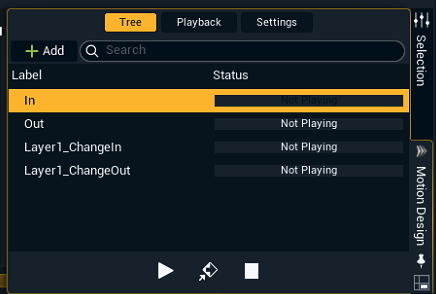
four new blank sequences are added to the Sequencer:
-
In - Sequence Settings > Tag: In
-
Out - Sequence Settings > Tag: Out
-
Layer1_ChangeIn - Sequence Settings > Tag: None
-
Layer1_ChangeOut - Sequence Settings > Tag: None
-
-
Layer 1 Content actor has a Modifier called Transition Logic Sub Layer (Blueprint) applied
-
In Details, the sequences Layer1_ChangeIn and Layer1_ChangeOut are pre-selected as Change in Sequence and Change Out Sequence
-
-
-
Place all the actors and structure of your Motion Design asset under Layer 1 Content
Layer 1 Content is meant to be the parent at the top of the hierarchy of the Motion Design Outliner
-
It owns the logic for the Change animations via the pre-defined modifier
-
It can be renamed
Set up transparency/layer sorting
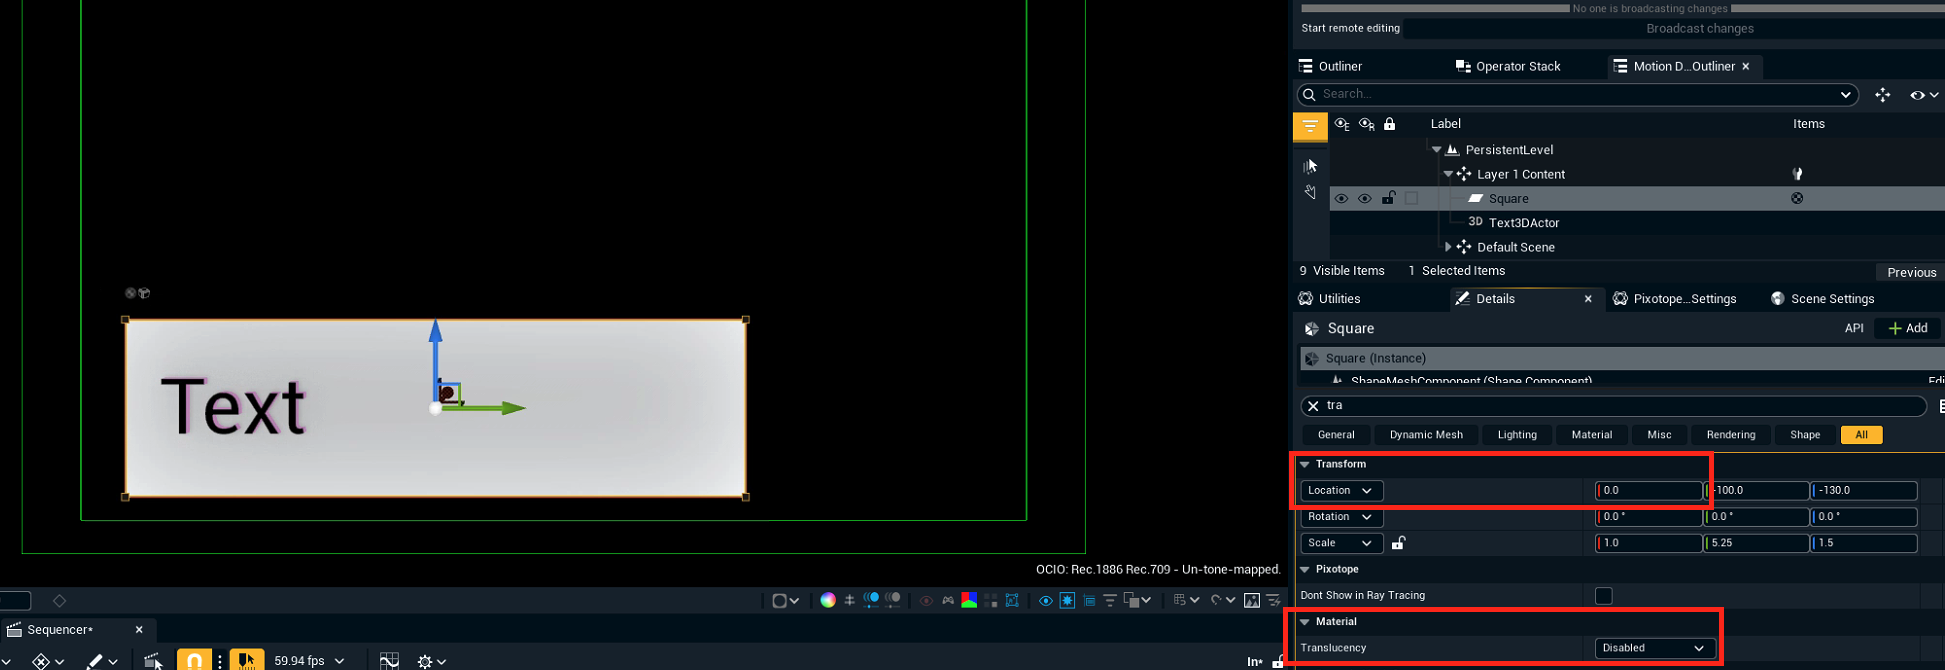
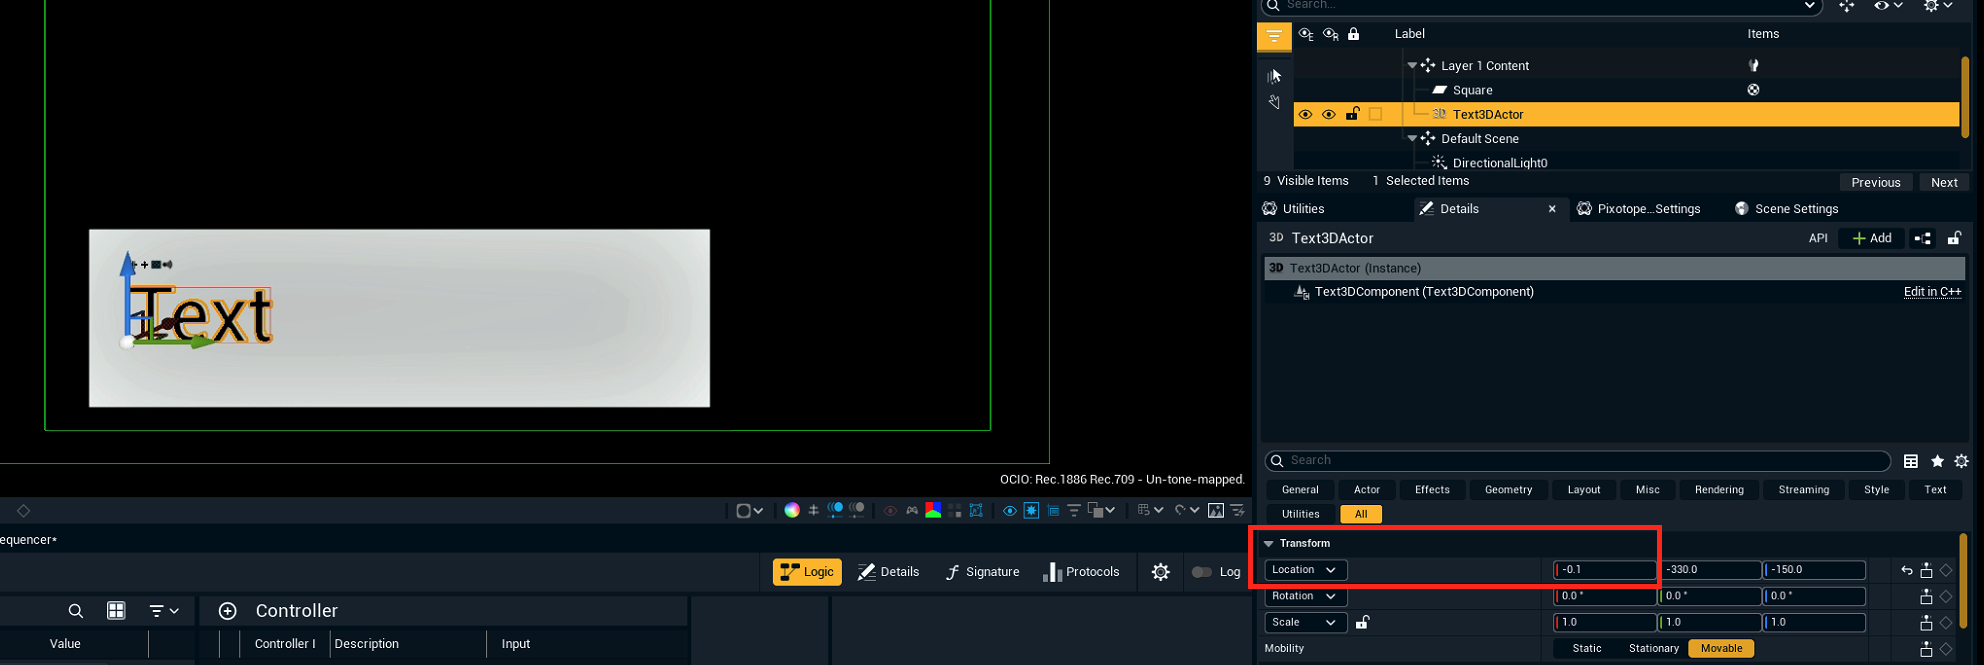
Motion Design presents a 2D-like editing view in a 3D editor. That means that all assets have a value in the depth-axis (x-axis, represented in red).
To define the layer sorting (what is rendered on top of what), there are two methods:
-
Translucency sorting
-
Opaque/Depth-based sorting
Do not mix these two methods. The moment there is one translucent material, follow the Translucency sorting methodology.
Translucency sorting
This is the most common use case, since it is likely that there will be some level of translucency in some (or all) of the elements in the graphic asset.
Make sure that all elements are placed
-
at the same depth (typically at x = 0)
-
under the parent null actor (in the example above, Layer 1 Content)
-
In the Motion Design Outliner, right-click the parent null actor
-
Then Add Modifiers > Translucency Sort Priority
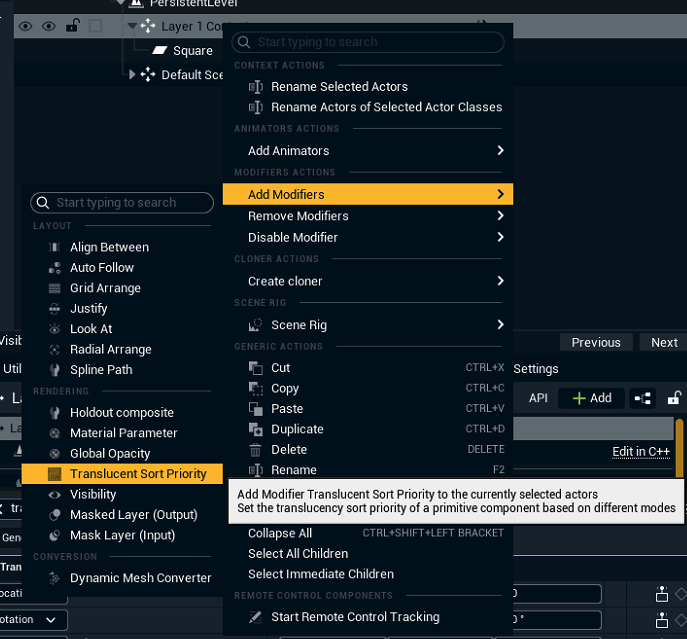
The default modifier settings configure the scene to sort the translucency layers based on the order in the Motion Design Outliner. Now modify what is on top of what by moving actors up and down in the Motion Design Outliner.
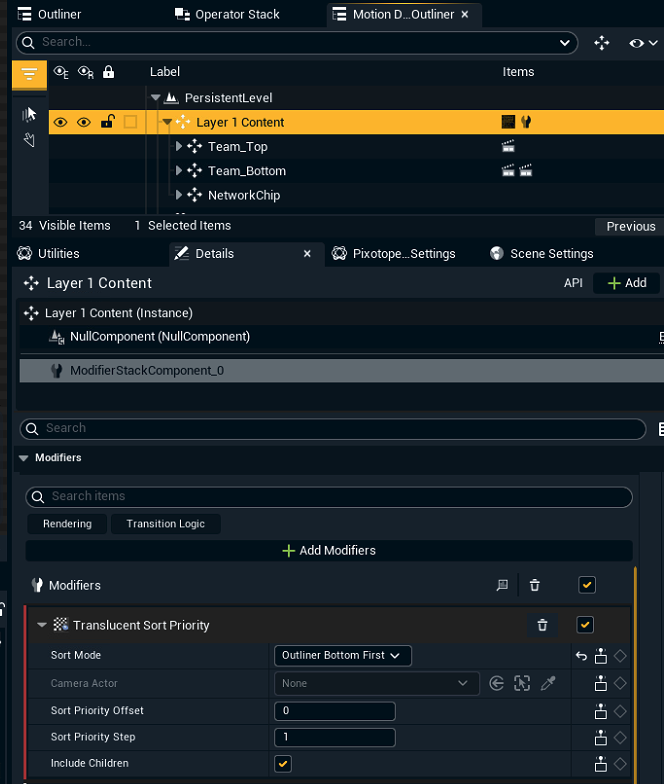
Sort Priority Offset
When multiple Motion Design assets overlap on screen, set the Sort Priority Offset to control which one renders on top (higher values appear in front).
The modifier assigns sort priorities starting at the offset value (default = 0), incrementing by 1 through the Outliner based on the Sort Mode (default: Outliner Bottom First).
If overlapping assets both use the default offset of 0, their priorities may conflict, causing incorrect layering. To fix this, set a high offset (e.g., 1000) on the asset that should render on top.
Opaque/depth-based sorting
If all the elements in your scene are opaque, you can easily use the x-axis (depth) to order actors in front or behind each other.
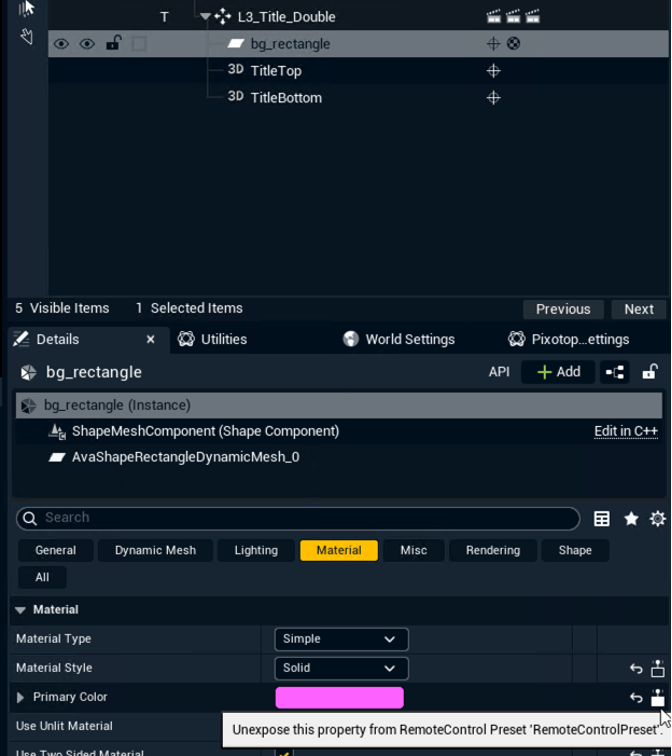
Expose properties
-
Select the properties you would like to control from the template form
-
For example: bg_rectangle actor > Details > Material > Primary color
-
-
Click on the "Expose" icon
-
Repeat this process for other properties you want exposed
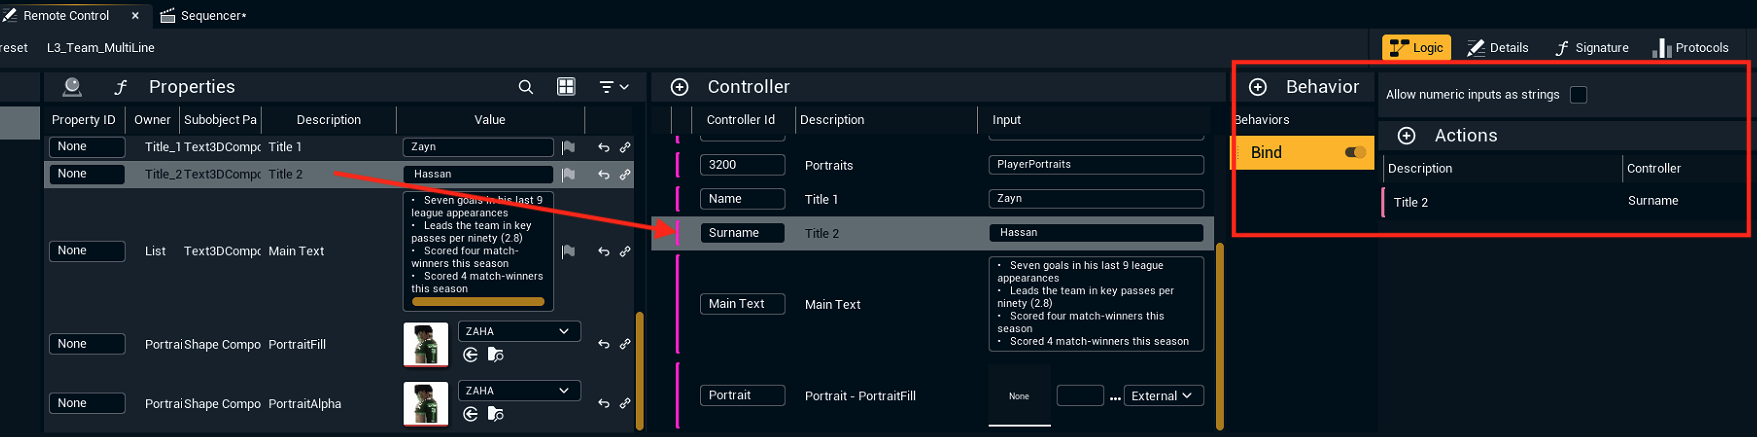
Create and bind controllers
Create a Controller for each property.
-
Open the Remote Control tab
-
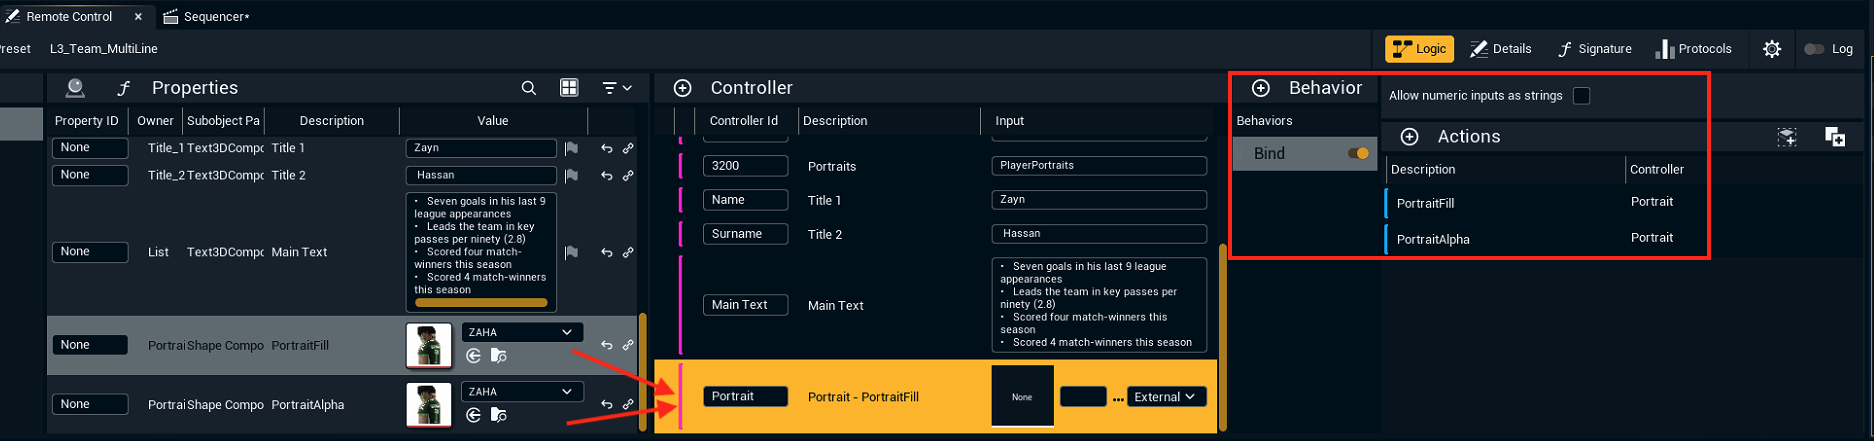
For the most basic Controller (Bind) drag & drop the property from the Properties to the Controller section
-
Choose a Controller ID
-
This is used as the name presented when importing the template in Erizos Studio
-
Controller are a powerful tool allowing to create more complex logic. For example can you create a Controller that sets the value of multiple properties of the same type.
Set up In/Out/Change sequences
For any new scene created from Pixotope 25.3 (UE 5.7) and onwards, the basic Transition Logic (In/Out/Change) is pre-configured for the user right after enabling Motion Design in the Editor.
We recommend to watch the following Youtube tutorial
-> Understanding Transition Logic Fundamentals in Unreal Engine 5.7
In/Out
It is recommended to use the pre-created sequences:
-
In - Sequence Settings > Tag:
In -
Out - Sequence Settings > Tag:
Out
These animations are already connected with the default Transition Logic tree via the Sequence Settings > Tag.

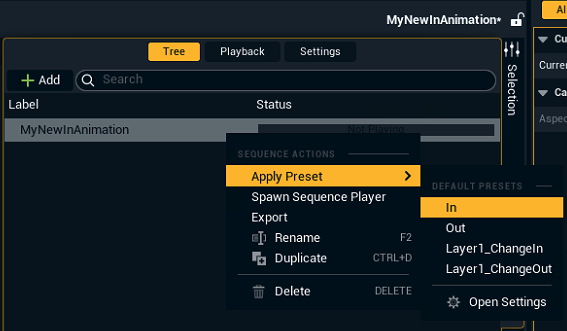
Applying the sequence settings tag on a new sequence
In case you choose to create new sequences or you delete these default ones, make sure you apply the corresponding Sequence Preset to re-enable the connection with the Transition Logic tree
-
Right-click the new sequence
-
Select Apply Preset and choose the tag needed
Change
If all the elements are placed under the pre-created Layer 1 Content null actor, the Change animation works as follows:
-
When a template is IN and another one with different data in the controllers is taken IN
-
The pre-created Layer1_ChangeOut sequence will be played before the data is changed
-
The pre-created Layer1_ChangeIn sequence will be played immediately after with the new data
-
-
If above is done with the same data, no animation will be played
All this logic is handled by the existing Transition Logic Sub Layer (Blueprint) Modifier in the Layer 1 Content parent actor.
The user can re-create this structure manually at any point.
Per-child change animations
The change logic described above provides a single change animation for the entire asset. Any data change on any exposed property triggers the same Change Out/Change In sequence.
If you need more granular change animation triggering, define separate Change Out/Change In pairs for any child actor that should trigger independently on data changes.
Example
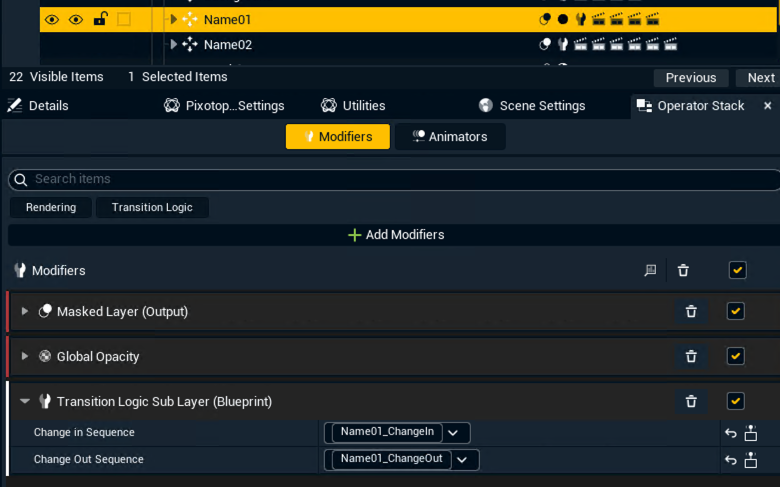
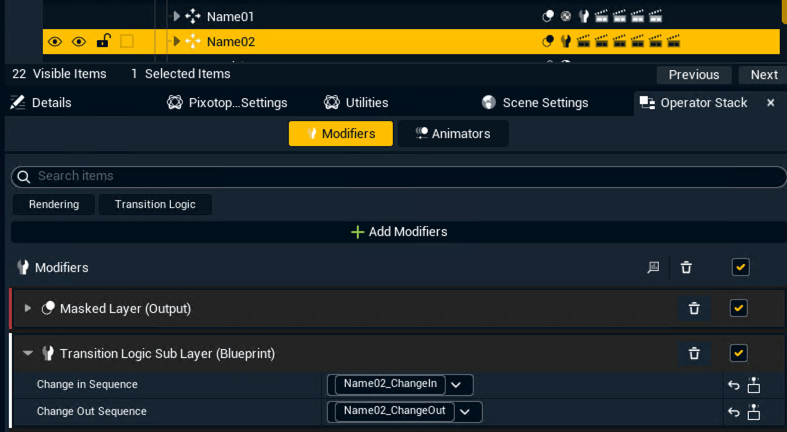
The Lower Third has two data blocks: Name01 (blue) and Name02 (pink). Each child actor has its own Transition Logic Sub Layer (Blueprint) modifier linked to its own change animations.
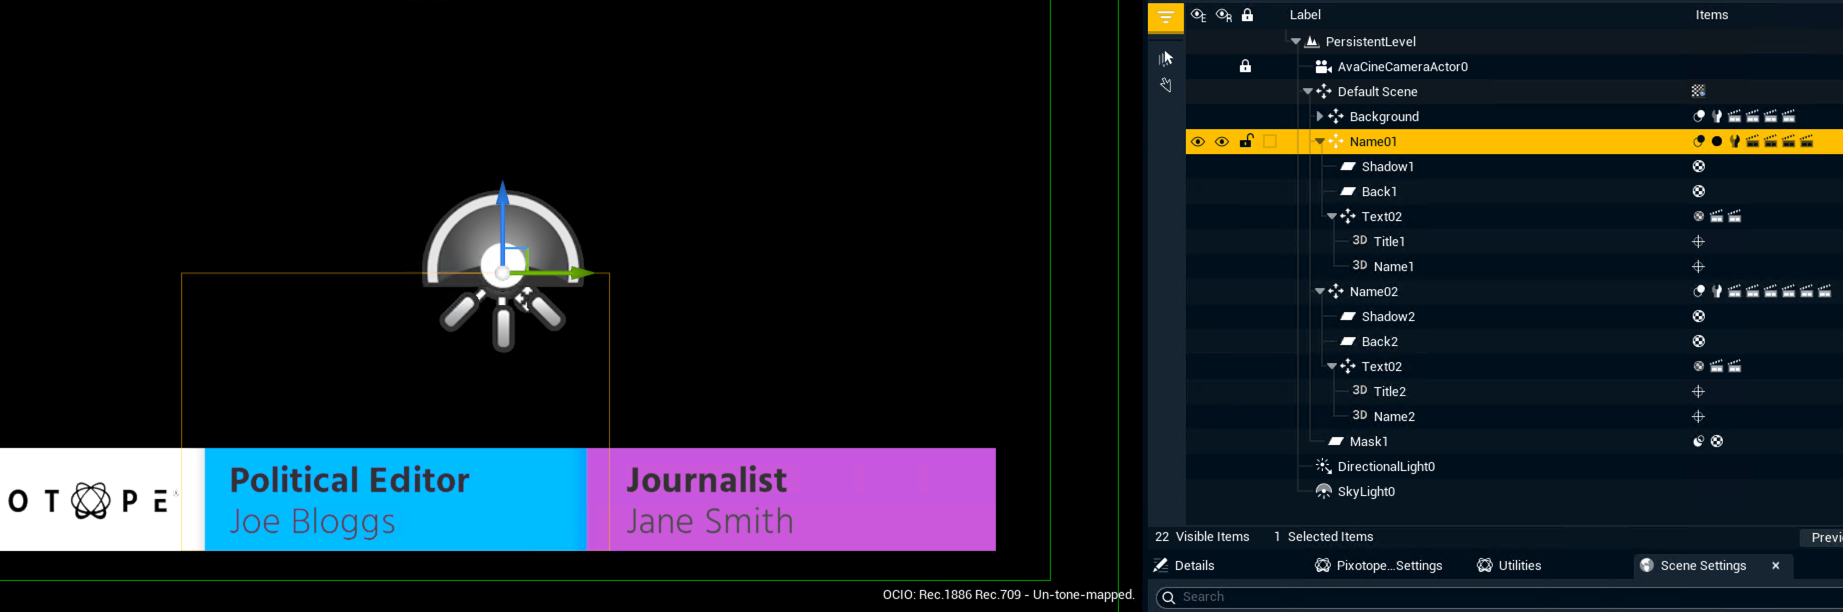
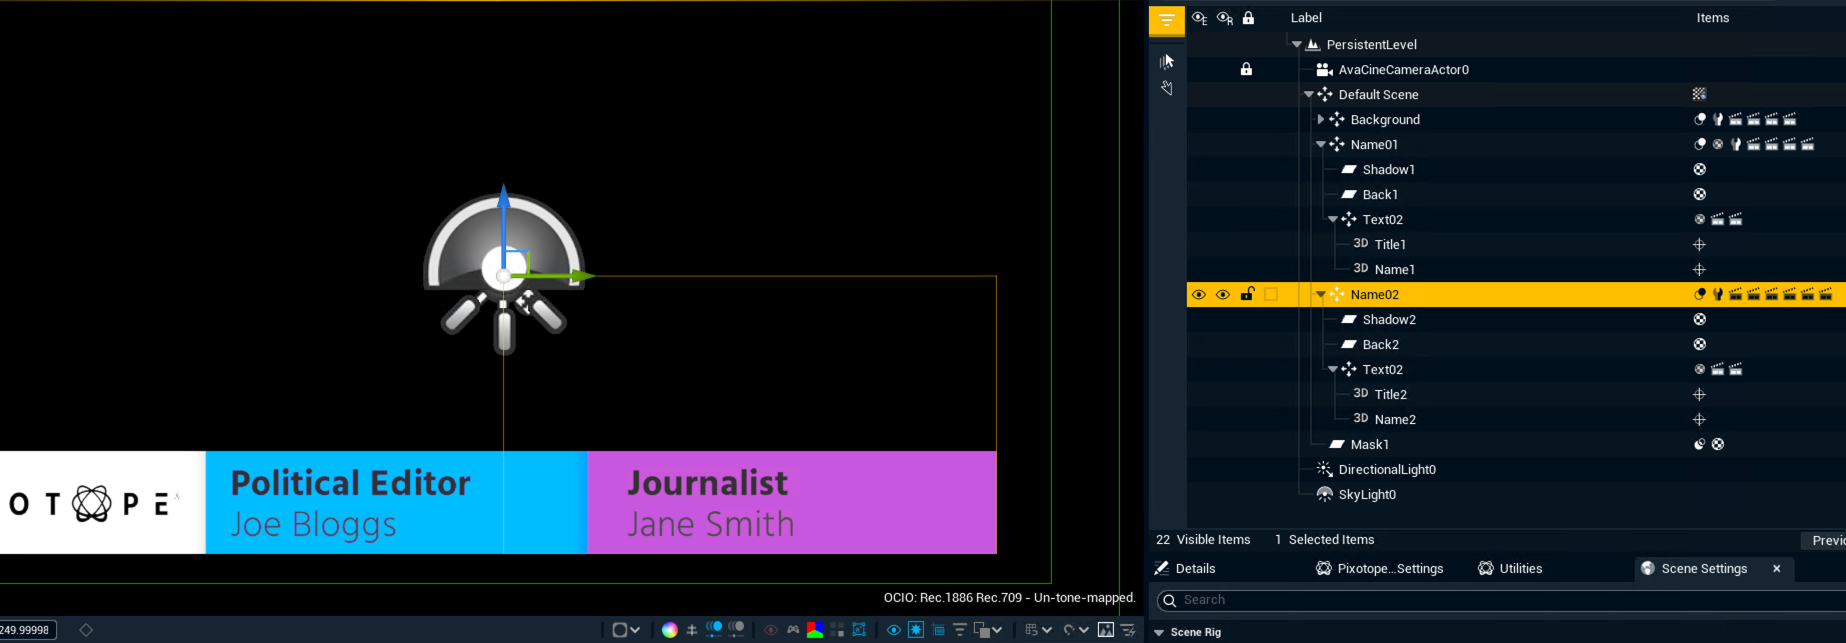
-
If only Name01 data changes → play Name01_ChangeOut and Name01_ChangeIn
-
If only Name02 data changes → play Name02_ChangeOut and Name02_ChangeIn
-
If both change → all Change animations play
If data changes outside these child actors, the system traverses up the Motion Design Outliner tree to find the nearest Transition Logic Sub Layer (Blueprint) modifier.
General sequence requirements
Off-camera positioning
Frame 0 of the IN animation and the last frame of the OUT animation must place the asset off-camera. This is to prevent visibility issues when launching the level.
Assign a layer
Templates can be grouped into layers which are used in the transition logic.
When a new template is taken IN while another template in the same layer is already IN, the first template's OUT animation triggers before the new template's IN animation begins.
-
Click on the 3-dotted menu next to Transition Logic on the top bar
-
Click on the LAYER drop-down menu and choose CREATE NEW ASSET > Motion Design Tag Collection
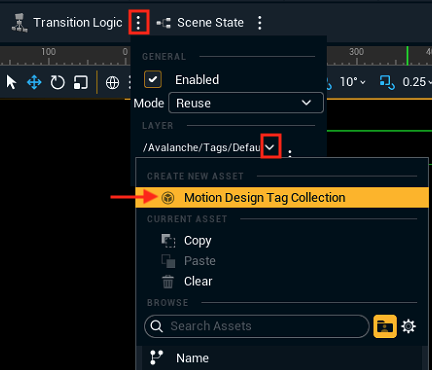
-
Choose a name and a location in your Content Browser and open it from that window
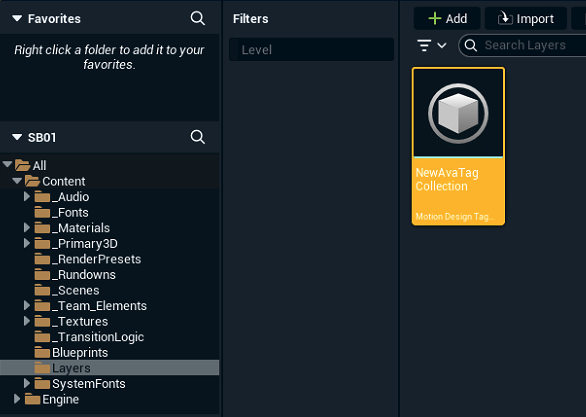
-
Create all the layers that you will use in your graphics package and save the collection

-
Go back to the 3-dotted menu next to the Transition Logic button. Now the layer drop-down presents all the layers defined in the new tag collection

-
Select the one for this graphic asset
Test your templates in the Editor Rundown
The Editor allows testing the transition logic and external control via controllers before importing the templates into Erizos Studio and having the full production setup in place.
-
Create a new rundown:
-
Go to Content Browser
-
Right-click the desired folder
-
Select Motion Design > Motion Design Rundown

-
-
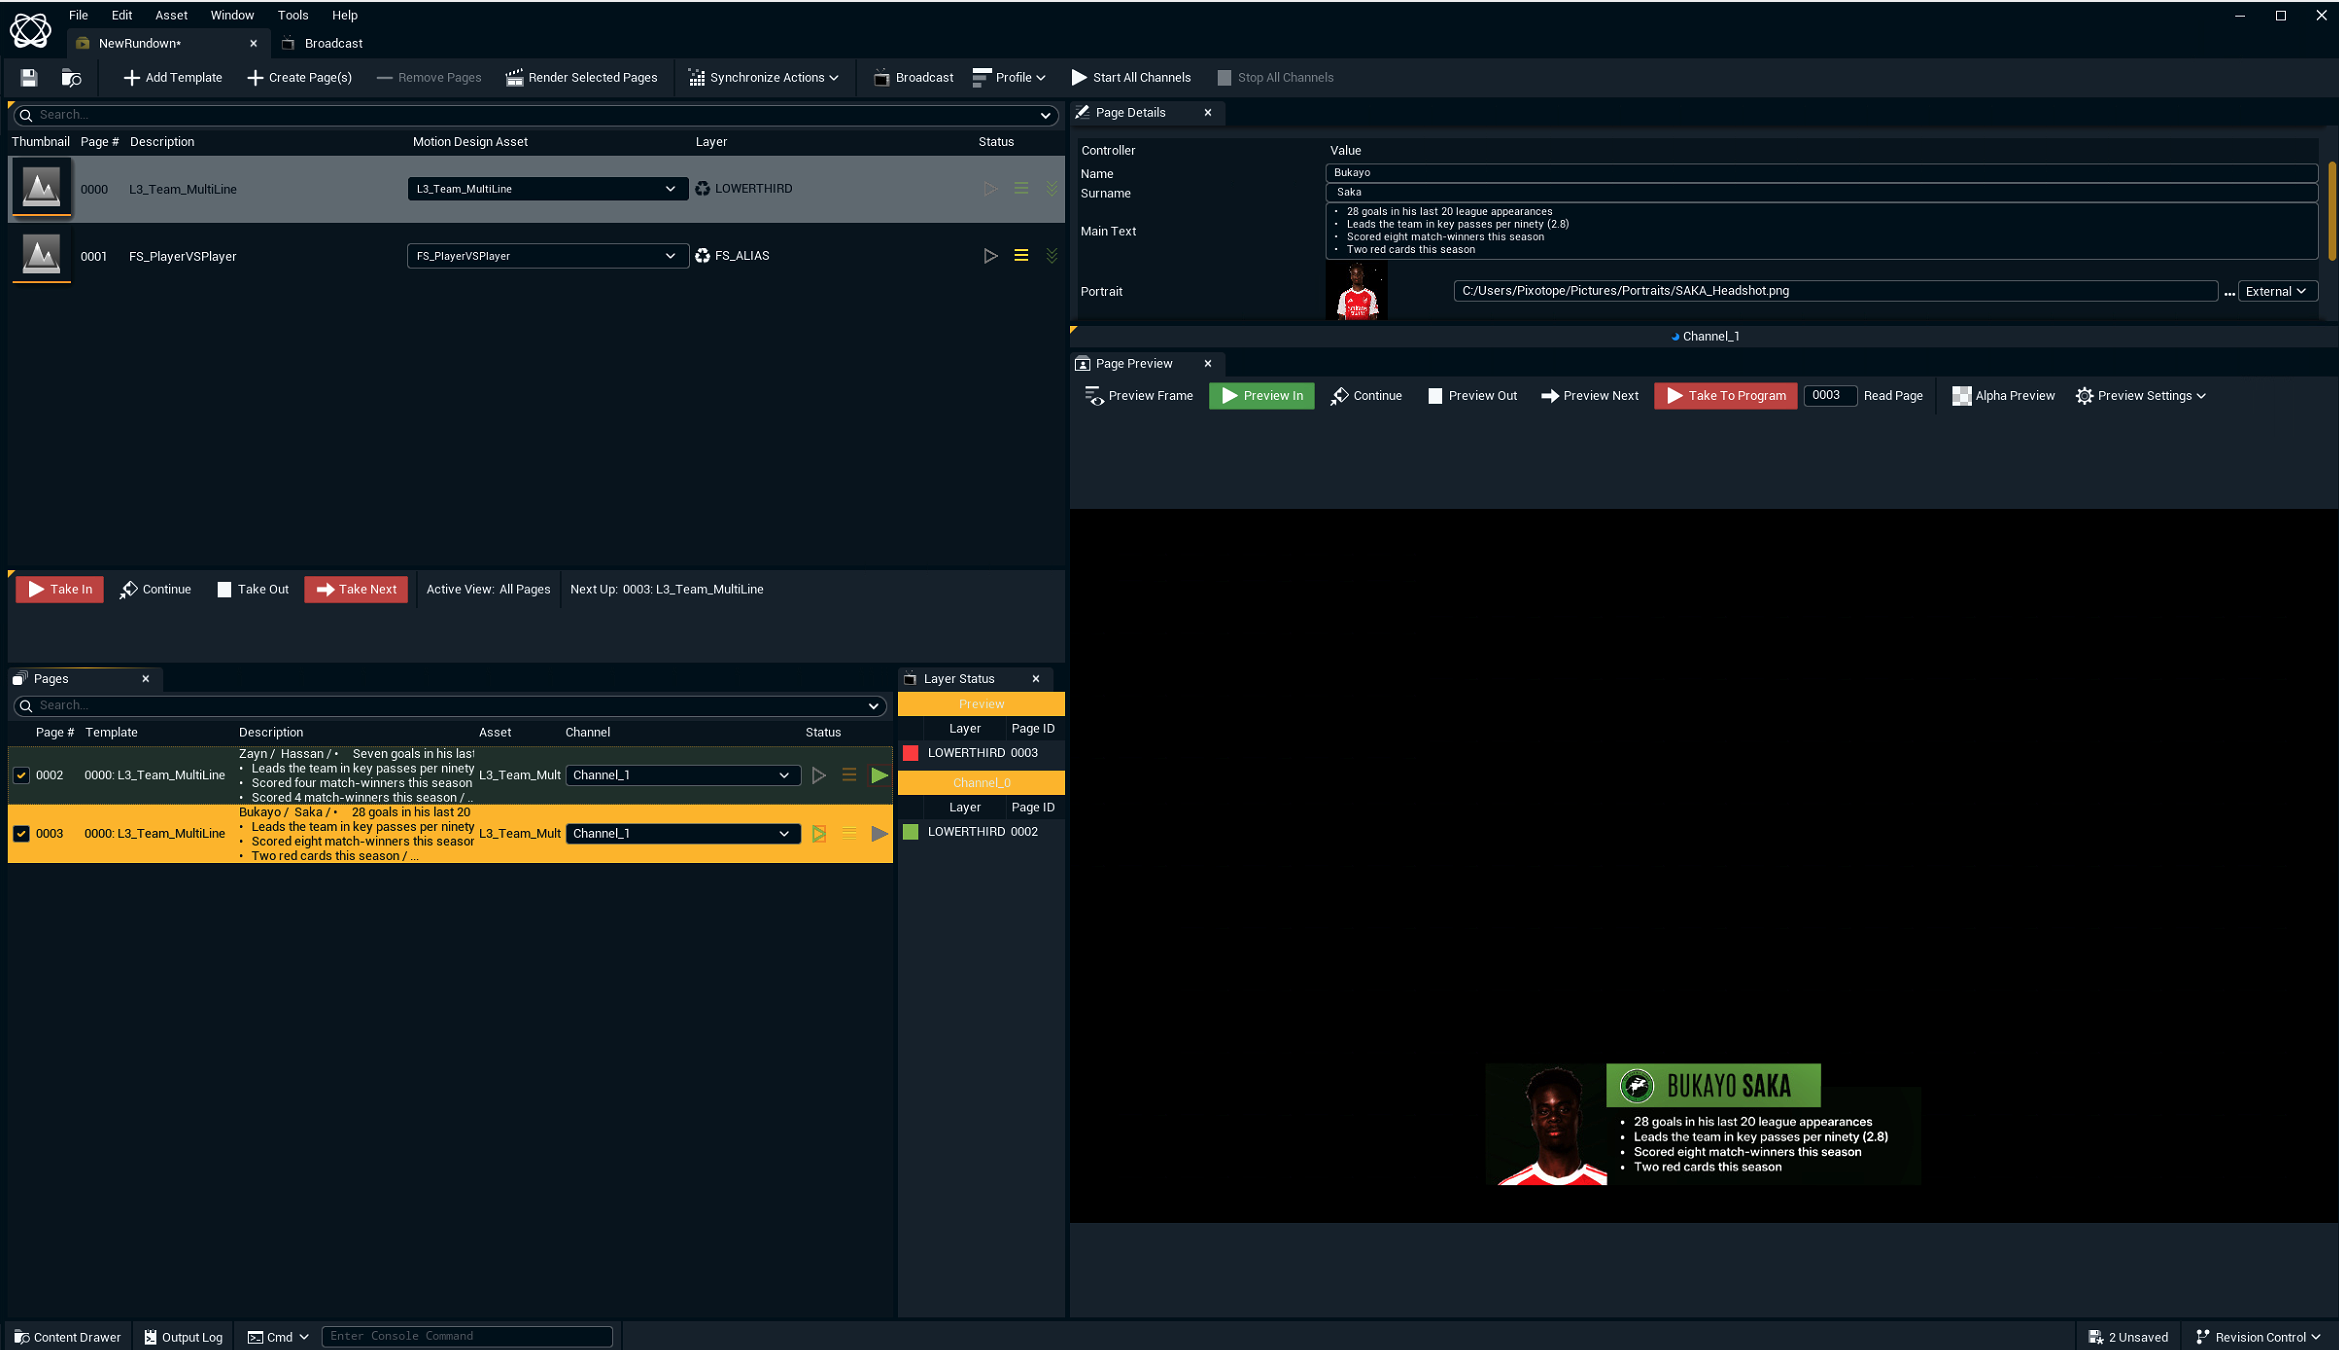
Double-click the newly created rundown to open the Rundown window
-
Click on "Add Template"
-
On the added template placeholder, select the level that contains the desired template for testing
-
Repeat this with as many templates as desired
-
Every template is loaded showing what layer they belong to
-
-
Select a template and check that all the created Controllers are presented on the Page Details section on the top-right

-
Drag and drop any template onto the Pages section as many times as you want and edit the pages content
-
A page is an instance of a template with optionally adjusted content
-
-
Use the controls in the Page Preview window to test In/Out/Change and verify that the Controllers are changing the exposed properties in the desired way
Need to edit the pages again? Make sure that all pages are taken out from Preview or Broadcast channel in the Rundown window before you modify them.
Saving a level of a template that is being played in the rundown will throw an error. In that case, close the Rundown or stop/take out all pages, then try saving again.
Create complex transition logic (optional)
If the simple In/Out/Change transition logic doesn’t cover all cases needed, there are two options for more complex transition logic:
|
Customized Transition Logic tree |
Useful when the transition logic requires inter-template dependencies. Learn more about how to Create complex transition logic with inter-template dependencies using the Transition Logic tree |
|
State machine transition logic |
Useful for assets that have multiple states and animations based on the state of the asset itself. Learn more about how to Create complex transition logic using Scene States (State Machines) |
Sync the changes to all machines
Make sure both engines are in sync.
From Editor
-
All newly created files or previously existing files that have been modified are marked with a yellow arrow on the top-left corner
-
Right-click on one of them and go to the Pixotope Asset Hub menu
-
Click "Push all changes"
Learn more about how to Use source control in Engine - Pixotope Asset Hub plugin
From Director
-
Go to Director > SETUP > Show > Synced Storage
-
Click the "Push Changes" button
-
On the other machine, on the same panel, double-check that the machines are in sync and the latest changes have been pulled
Learn more about how to Sync projects and other files in Synced storage
Next step
Continue to Import templates into Erizos Studio