For any Transition Logic that goes beyond the basic In/Out/Change, Motion Design offers a powerful tool called Scene States.
Scene States offer a streamlined workflow to create transition state machines directly in the
Pixotope Editor. These are authored on a per-level basis, and each motion design template may have multiple concurrently running state machines
What are Scene States?
State trees are widely used across many platforms, including Unreal Engine's animation systems. Scene State is a separate plugin designed specifically for broadcast graphics. It lets you build state trees that encapsulate behaviors into states, making logic easier to build and maintain.
-
A state tree can only be in one state at a time
-
States are connected by transitions, each with conditions that must be met before triggering
-
When multiple transitions are valid, the first valid one is taken
-
-
You control the state tree by changing variables that the transition conditions check against
Setup
Enabling Scene State plugins
-
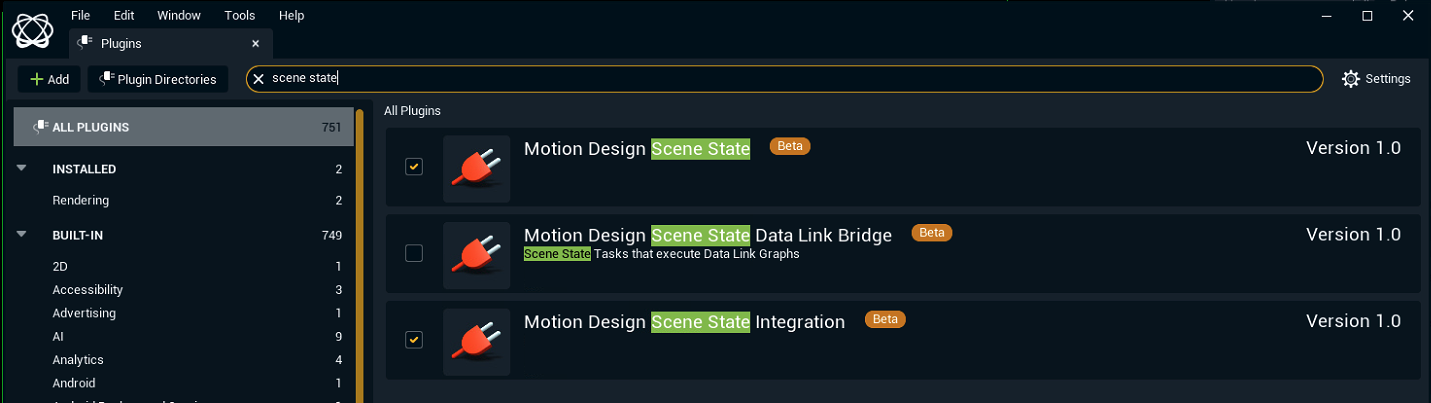
In the Pixotope Editor, go to Edit > Plugins and search for "Scene State"
-
Enable the Motion Design Scene State and Motion Design Scene State Integration plugins
-
Restart the editor when prompted
After restart, a Scene State button appears above the viewport for Motion Design levels.

Add Scene State to your Motion Design level
-
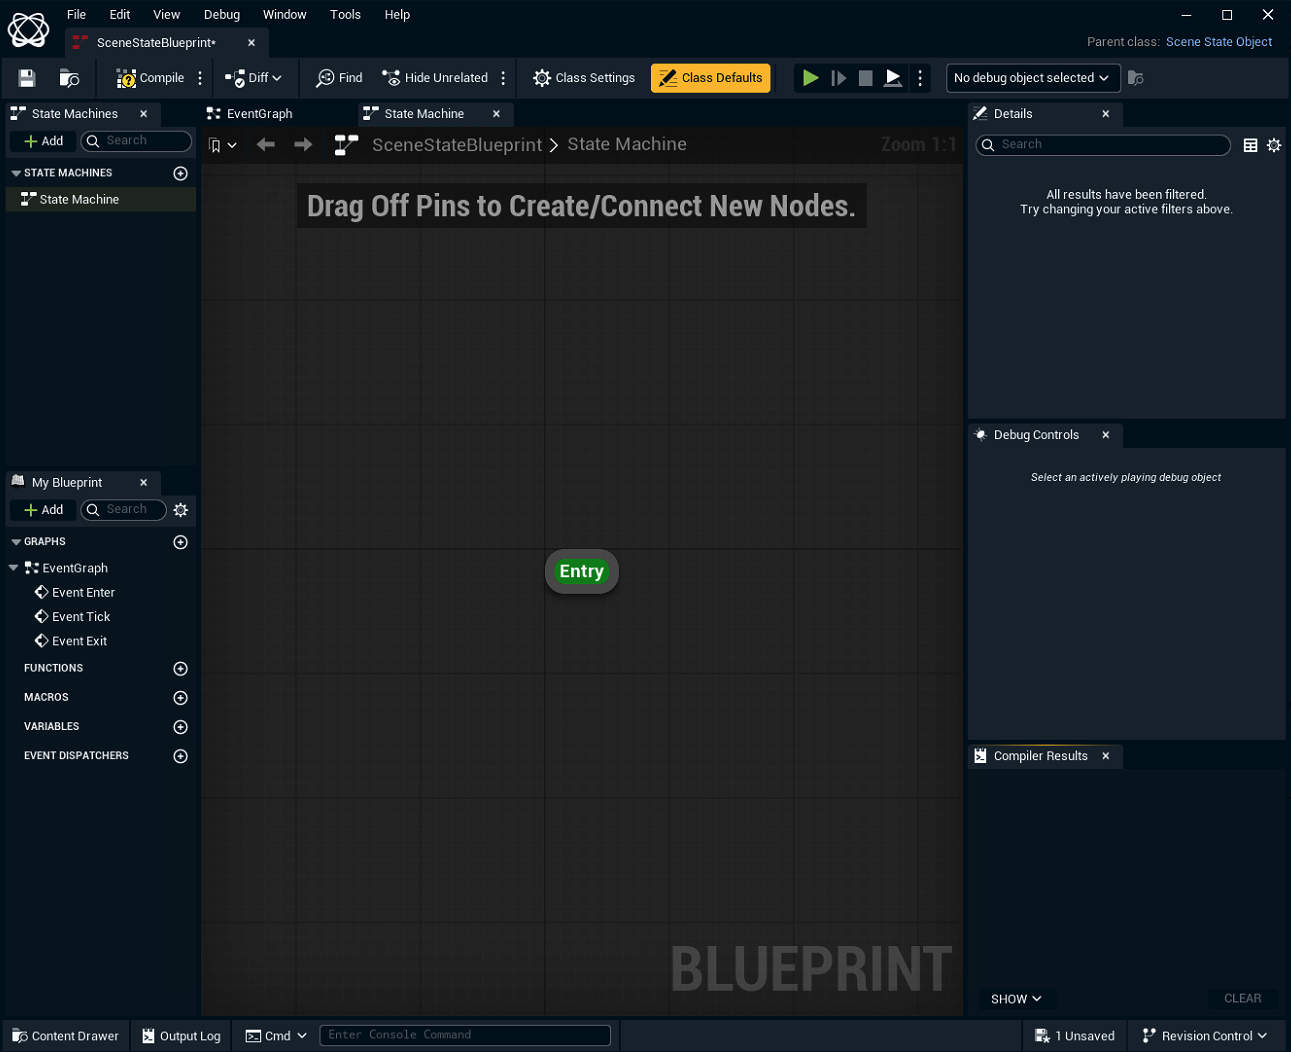
Click the "Scene State" button to open the editor
-
This opens a new EventGraph window with an empty Scene State. This is the main user interface to create state machine trees
-
This also adds a Motion Design Scene State actor to your Outliner
-
This is where public variables for your state trees will appear

-
-
Creating your first Scene State Tree
Before you start creating the Transition Logic that fits your graphic asset, we recommend watching the following video tutorials about Scene State.
https://youtu.be/h38NfqRzFVo?si=jFiL0cNto_5G8gG9
https://youtu.be/Bk3nQSG6MSE?si=lOKnnAzTb06E7NE5
The following demonstrates how to create a simple lower third with a conditionally revealed subtext.
Prepare the content
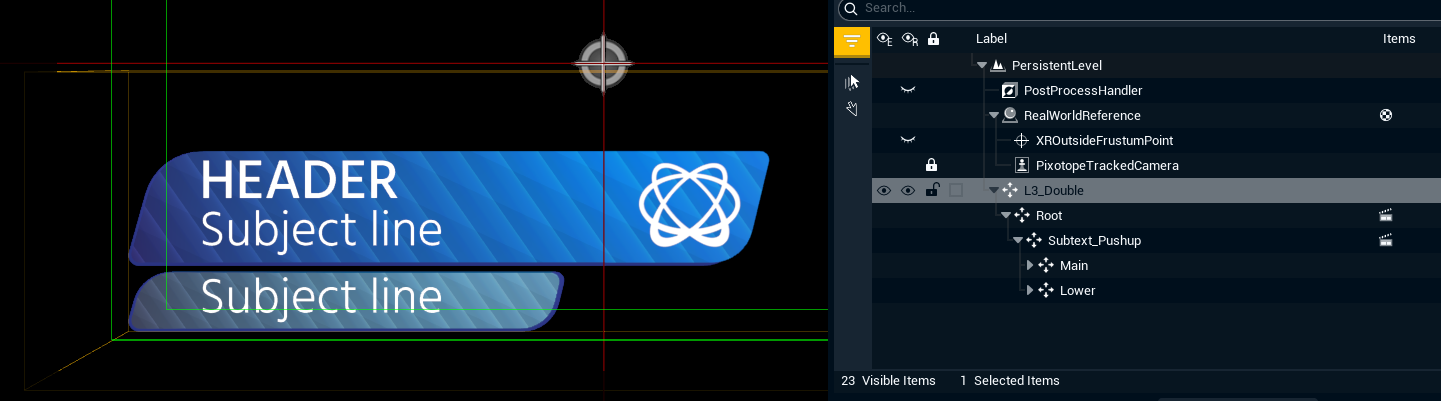
Starting with a fresh Motion Design Template project, we alter the MD_L3_Double graphic to now also have a subtext field.
Create animations
We also create two animations, L3_In and Subtext_In. The first simply animates the “Root” Null in order to slide the graphic in from left to right, while the latter pushes the graphic up and reveals the subtext, by means of animating the “Subtext_Pushup” null.
Build your content in an "Out" state, hidden offscreen before any animation plays. We won't create separate Out animations; we'll play the In animations in reverse.
Expose text properties to Remote Control
We also expose the “Text” property of our text fields and bind them to individual controllers in the Remote Control window. We will be needing these controllers later.

Create the State Trees
We will be using two state trees to drive our lower third. The first state tree will drive the L3 in/out, while the second state tree will only drive the subtext field.
Note that it would be just as easy to fit all the logic into a single state tree - but breaking up the logic means we avoid quickly growing complexity as we add more and more elements to our graphic, which would mean more and more branching permutations if using a single tree. In other words, a single state tree can be harder to scale.
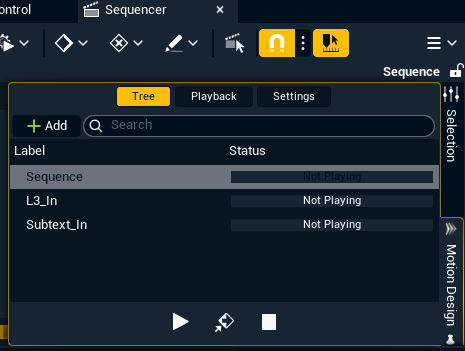
Open the Scene State window, add an extra Scene State tree, and name them as follows:
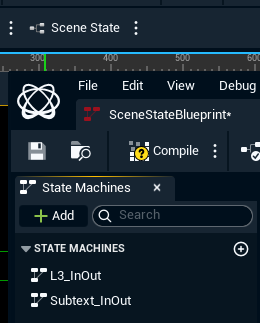
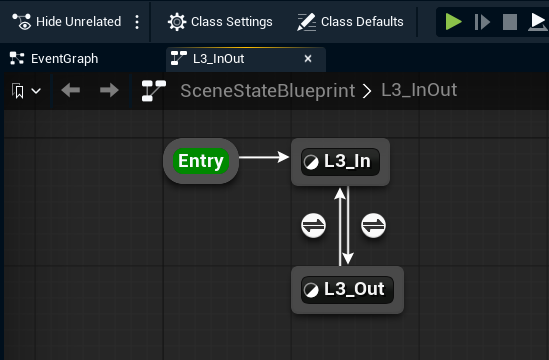
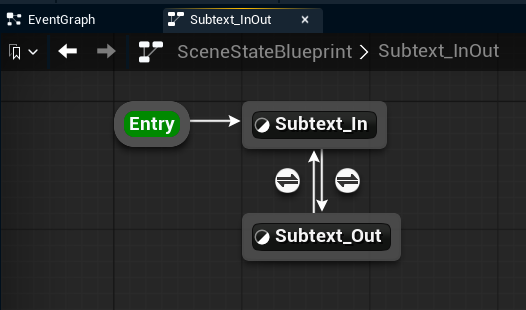
Then, in BOTH state trees, add two states and connect them as seen here. To add a state, right click in the canvas and select “State”, and then connect them by drag + dropping between the borders.
We default go to the “In” state, because we assume that we want to animate in the moment the template is triggered in from a rundown.
Ensure that the in and out states are connected bidirectionally, otherwise we cannot loop between them.
Add variables
The next thing we need to do, is add some variables that we can check to see if we are able to transition between states.
There are countless ways to do this - we could, for instance, check if the subtext controller has a valid text input and bring the subtext field in automatically, or drive animation whenever a string parameter changes.
For now, we will simply create the following Boolean variables to define our state behavior:
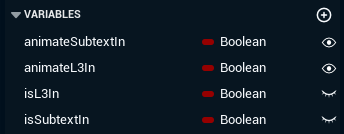
The two first booleans must be set to public (The eye symbol) and will be the controllers that the operator drives from the rundown via the Remote Controller system.
The latter two booleans are for internal StateTree use and will ensure we play out elements in the correct order.
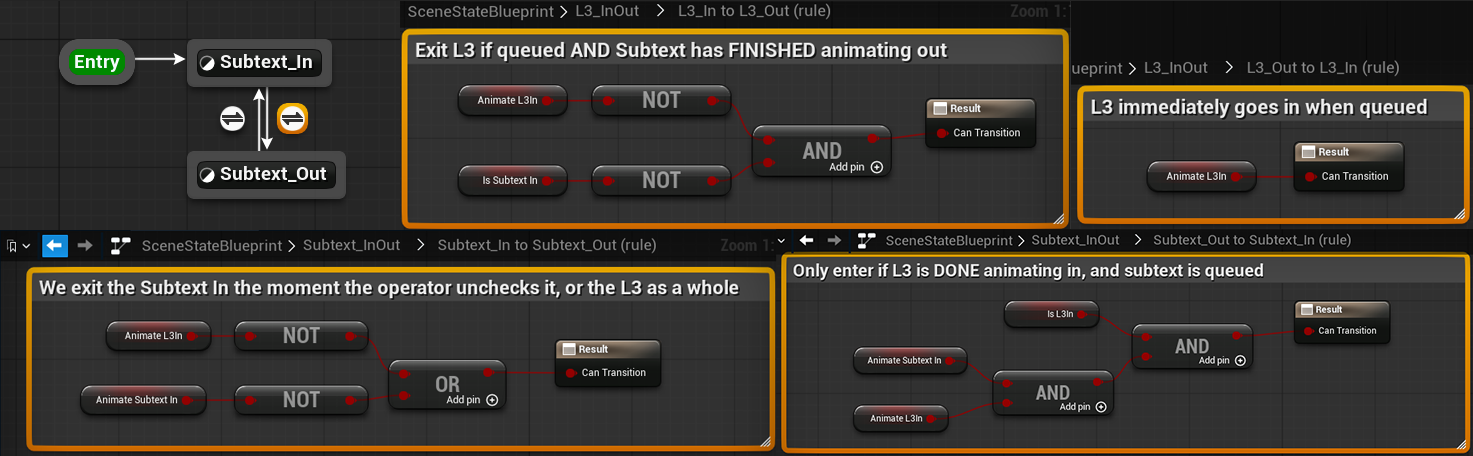
Set transition rules
Next, we set up the rules that dictate how we can flow between our states. Double-click on the arrow icon next to each connective line, and add the rules as follows;
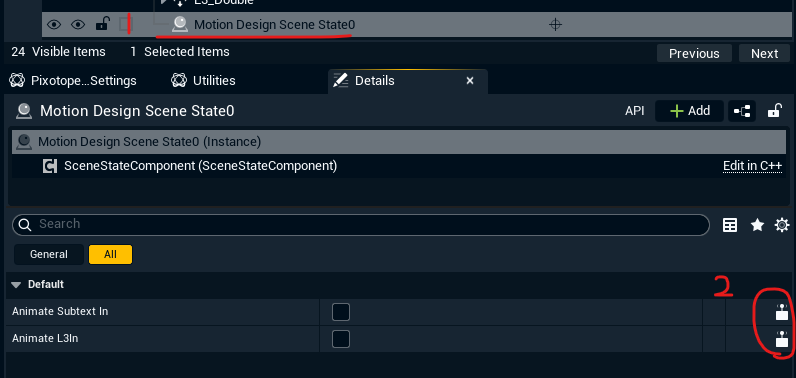
Next, find the “Motion Design Scene State” actor in the outliner, and expose the two “Animate” properties so we may add controllers to them;
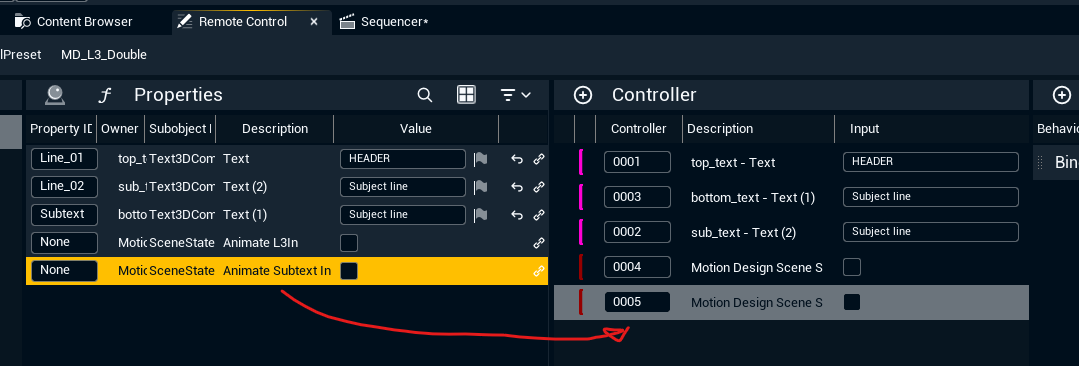
Connect to Remote Control
Then, drag + drop these properties into the “Controller” field of the Remote Control window, to create new controllers for them.
Test the logic
Now is a good time to test our logic. By entering PIE (Play in Editor) mode, and selecting RootState as our debug target, we can see how toggling the Animate L3 controller makes the L3 state jump back and forth! We have not yet finished our conditional setup for the Subtext, and therefore the Subtext state tree currently will not change states.

Set the AnimState checkers
In order for our logic to work as intended, we need to know WHEN the prerequisite state transitions have concluded. We can achieve this with the “Setter” action to set our isL3In and isSubtextIn states when we enter the relevant states, as seen here:
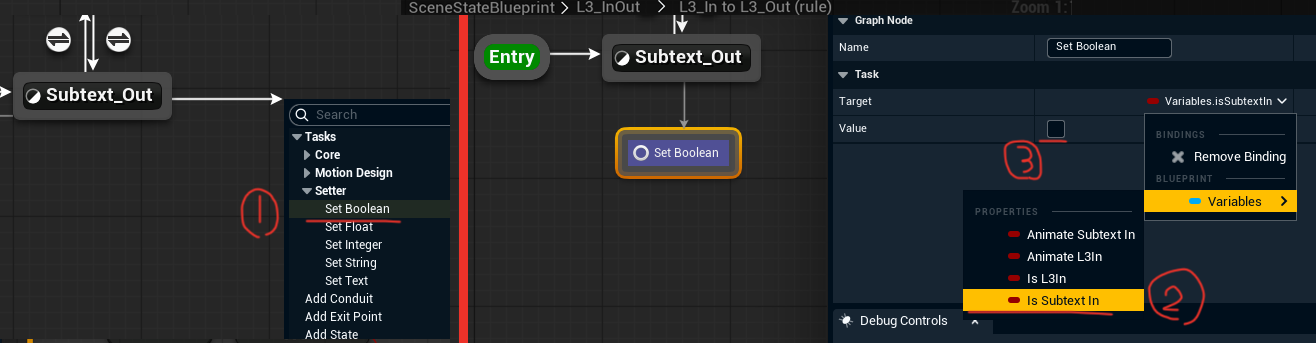
Set the “isL3In” and “isSubtextIn” booleans to the approapriate values, whenever the state changes, in both state trees.
Finalize by adding the animations
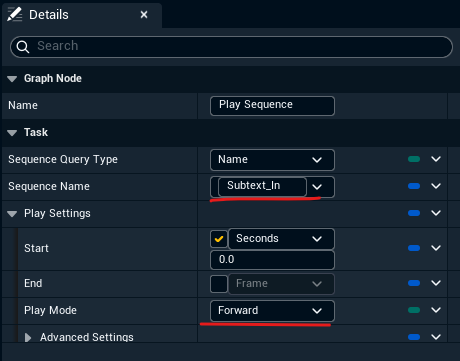
We will need to add a sequence player to each state, in both state trees;

Simply assign the relevant animation, and choose the correct playback mode. For our content, we can change the playback direction from “Forward” to “Reverse” for our out animations - but in a more complex graphic, you might of course want to have a completely unique out animation.
As a last step, we need to connect our “Set Boolean” states AFTER the “Play Sequence” node for the Subtext_Out and L3_In and L3_Out states, to ensure that the graphic waits for the animation to finish playing before updating the relevant “is…” booleans - which, in turn, ensures we play out our animations in the correct order. Your finished state trees should look like this;
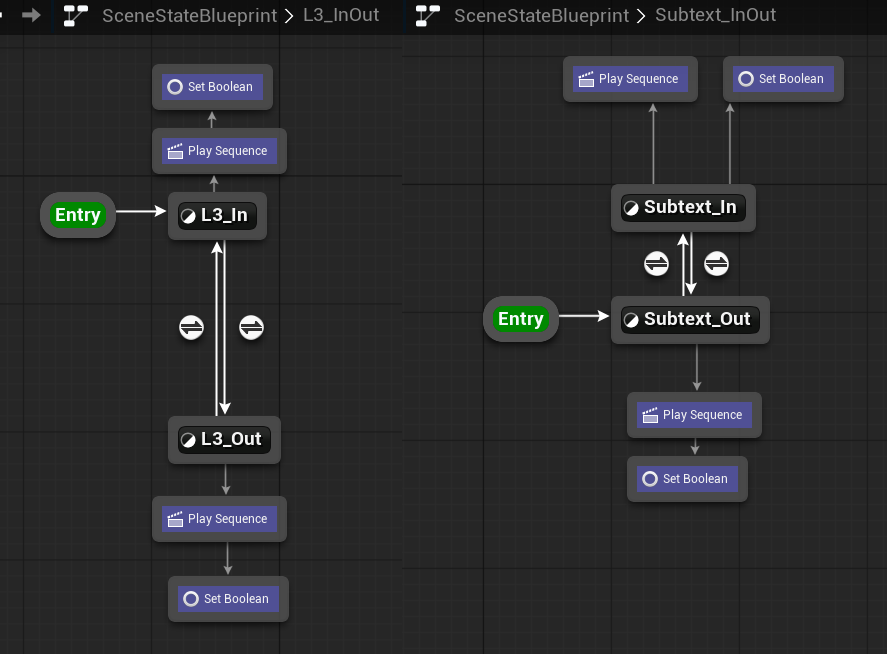
At this point, you should be able to play out the scene, and see the state trees change correctly as we toggle the animate controllers on and off. There are other ways to achieve this same setup with faster setup in a single state tree, but this setup has walked you through all of the essentials for far more complex motion design templates.
Once you are done creating your Scene State logic, remember to Sync the changes to all machines.
Next step
Continue to Import templates into Erizos Studio