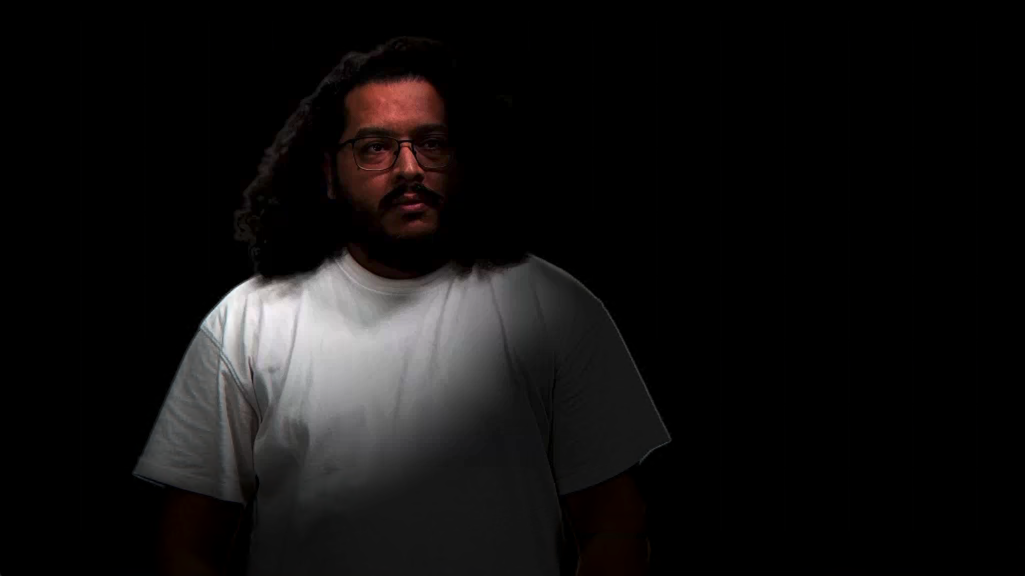
Traditional virtual lighting on video treats the input as a flat plane, which works for broad lighting but quickly breaks the illusion when lights need to interact with three-dimensional subjects.
Advanced video relighting allows you to use virtual lights to dynamically illuminate video input in real-time, creating natural interactions between your virtual environment and real-world subjects. This feature uses AI-powered normal map generation to understand surface orientations, enabling virtual lights to respond realistically to the shape and contours of people and objects in your video.

|
|
This is particularly valuable for Virtual Studio (VS) scenarios where the virtual environment has strong or dynamic lighting - such as moving spotlights, dramatic sunlight shifts, or complex lighting cues that would be difficult or impossible to replicate with physical studio lights.
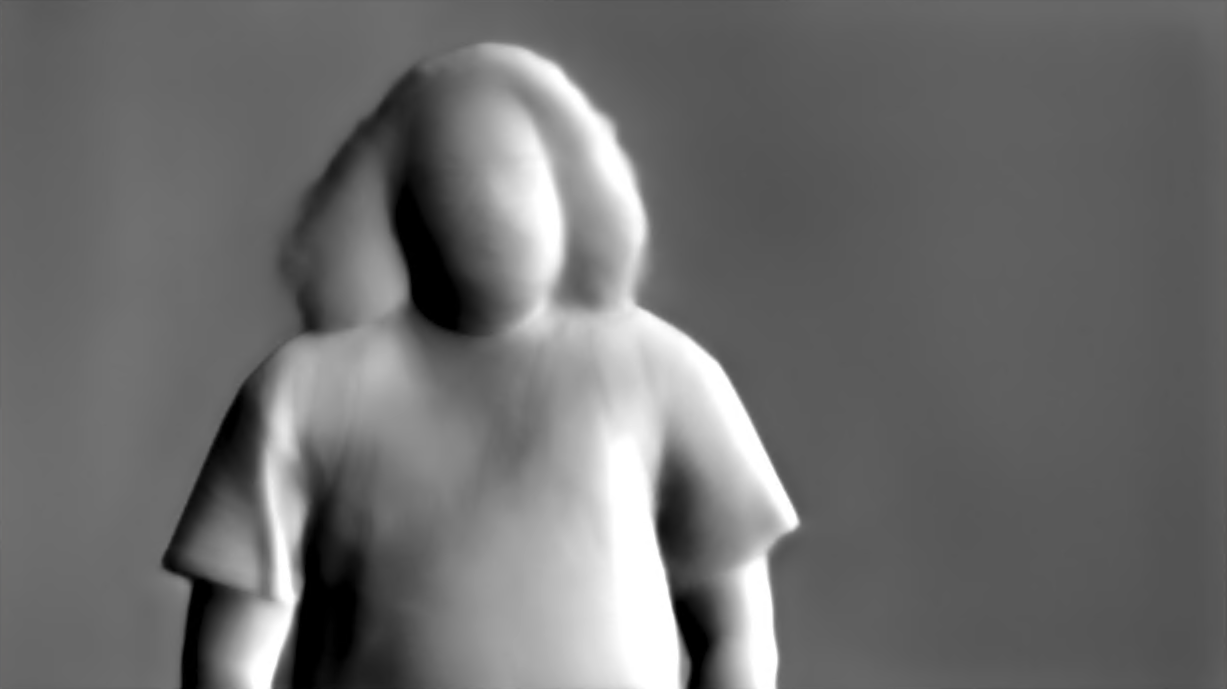
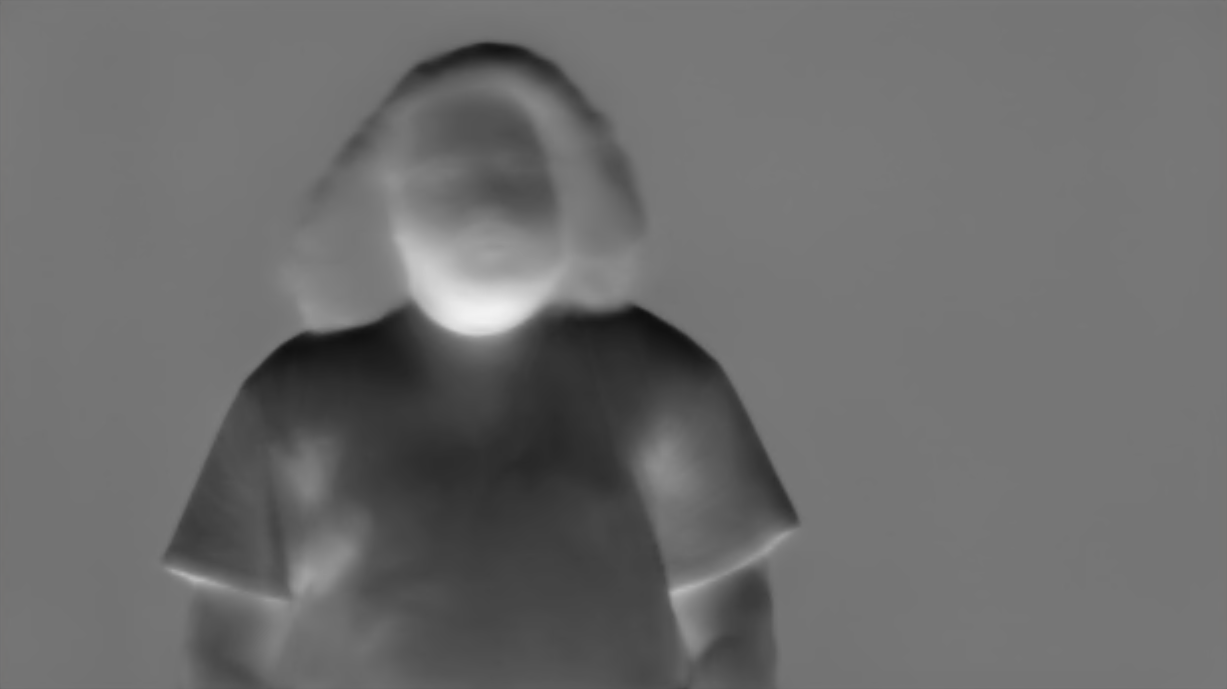
Understanding the normal map
Expand to learn more
The normal map is generated by a neural network trained to estimate surface orientations.
The normal map is based on the current viewing perspective and therefore updates when the position of the camera changes.

|

|
|---|
The colors in the normal map represent different directional axes
|
|
|
The current resolution captures the overall shape and major features, which provides significant improvement in lighting realism even without capturing every fine detail.
Requirements
-
Video input stream (camera)
-
Virtual Studio project setup
-
Learn more about how to Set up a VS level
-
-
Optional: Green screen for clearer demonstration of effects
Enable normal map generation in Director
-
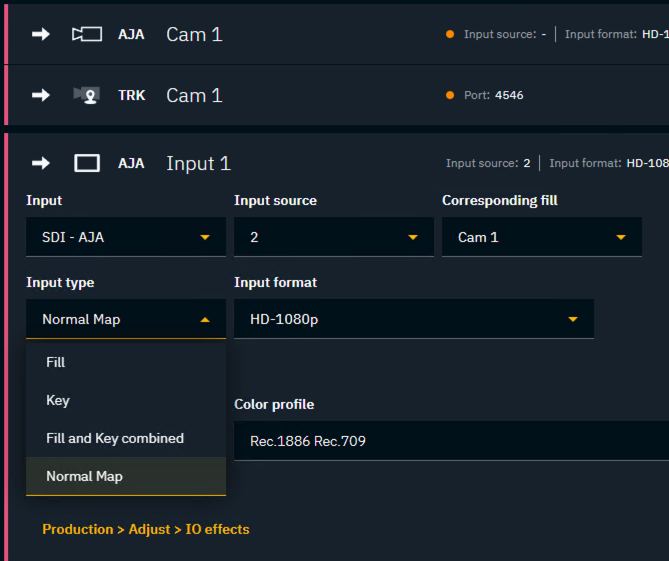
In Director, go to PRODUCTION > Adjust > IO Effects
-
Select the input video
-
Enable "Normal Map"
The system now generates a normal map for your selected video stream in real-time.

Performance considerations
Normal map generation adds GPU memory usage and computational overhead. While not substantial on most setups, it's not free.
Test thoroughly with normal map generation enabled before going into production, especially on complex scenes.
Run normal map generation on a separate machine
Optionally, you can run the normal map generation on a separate machine.
-
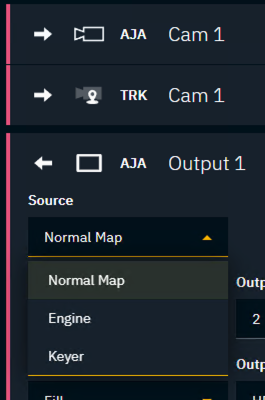
Go to SETUP > Configure > Routing
-
On the normal generation machine
-
Change the Source of the output to "Normal Map"
-
-
On the render machine
-
Add an additional Media input and route the rendered Normal Map to it
-
Change the Input type of the input to "Normal Map"
-
Set the Corresponding fill to the camera input
-
-
Adjust the video delays in SETUP > Calibrate > Delays accordingly
Setup relighting in Editor
Enable relighting for the VS plane
-
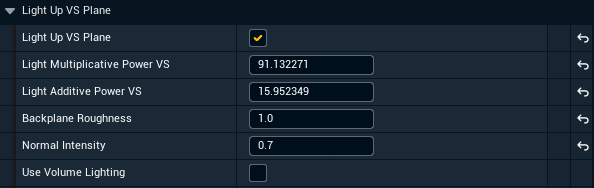
Go to the Pixotope World Settings
-
Enable "Light Up VS Plane"
Turn off Use Volume Lighting, as it currently is not compatible with normal maps.
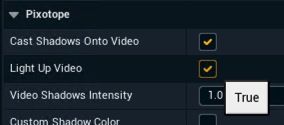
Enable lights for relighting
-
Select the lights that should interact with the normal maps
-
Enable "Light Up Video"
Sky Light is currently not supported with normal map based relighting.
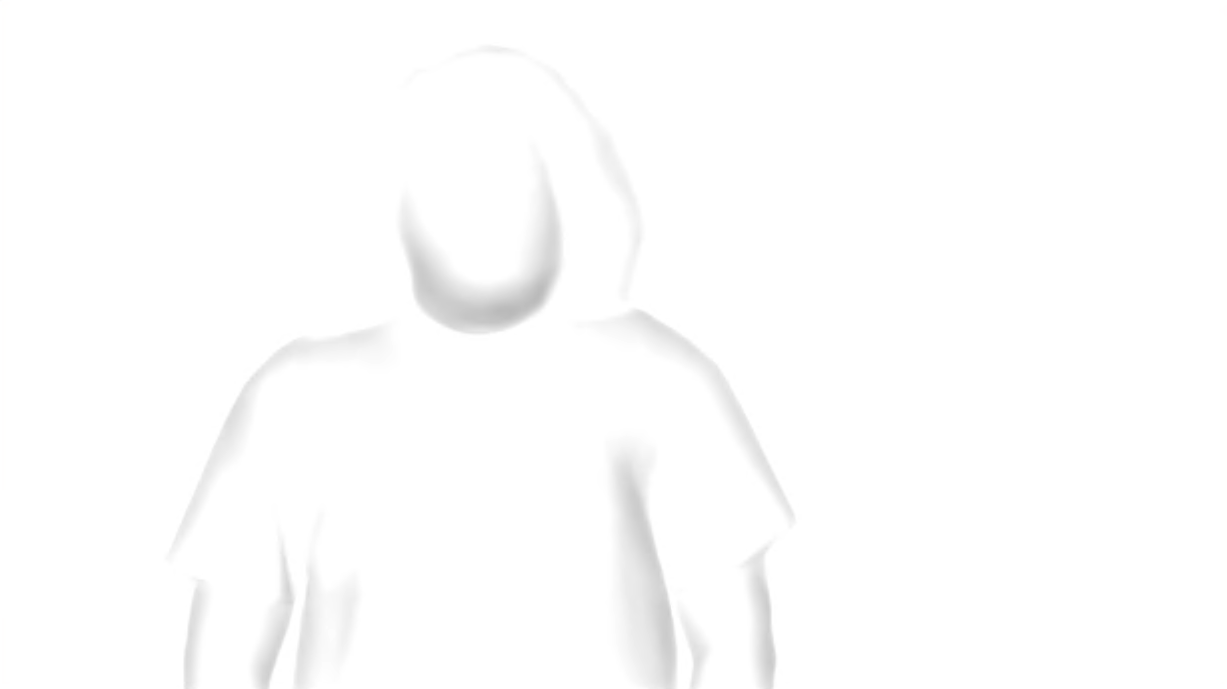
Reduce video exposure
The virtual lights are applied additively. Together with the input video which is already lit, this can cause the video to appear overblown.
As Pixotope processes video as 32-bit floating point linear data you can reduce the video’s exposure before relighting:
-
In Director: Go to PRODUCTION > Adjust > Color Grading
-
Select the "Video" tab to only color correct the input video
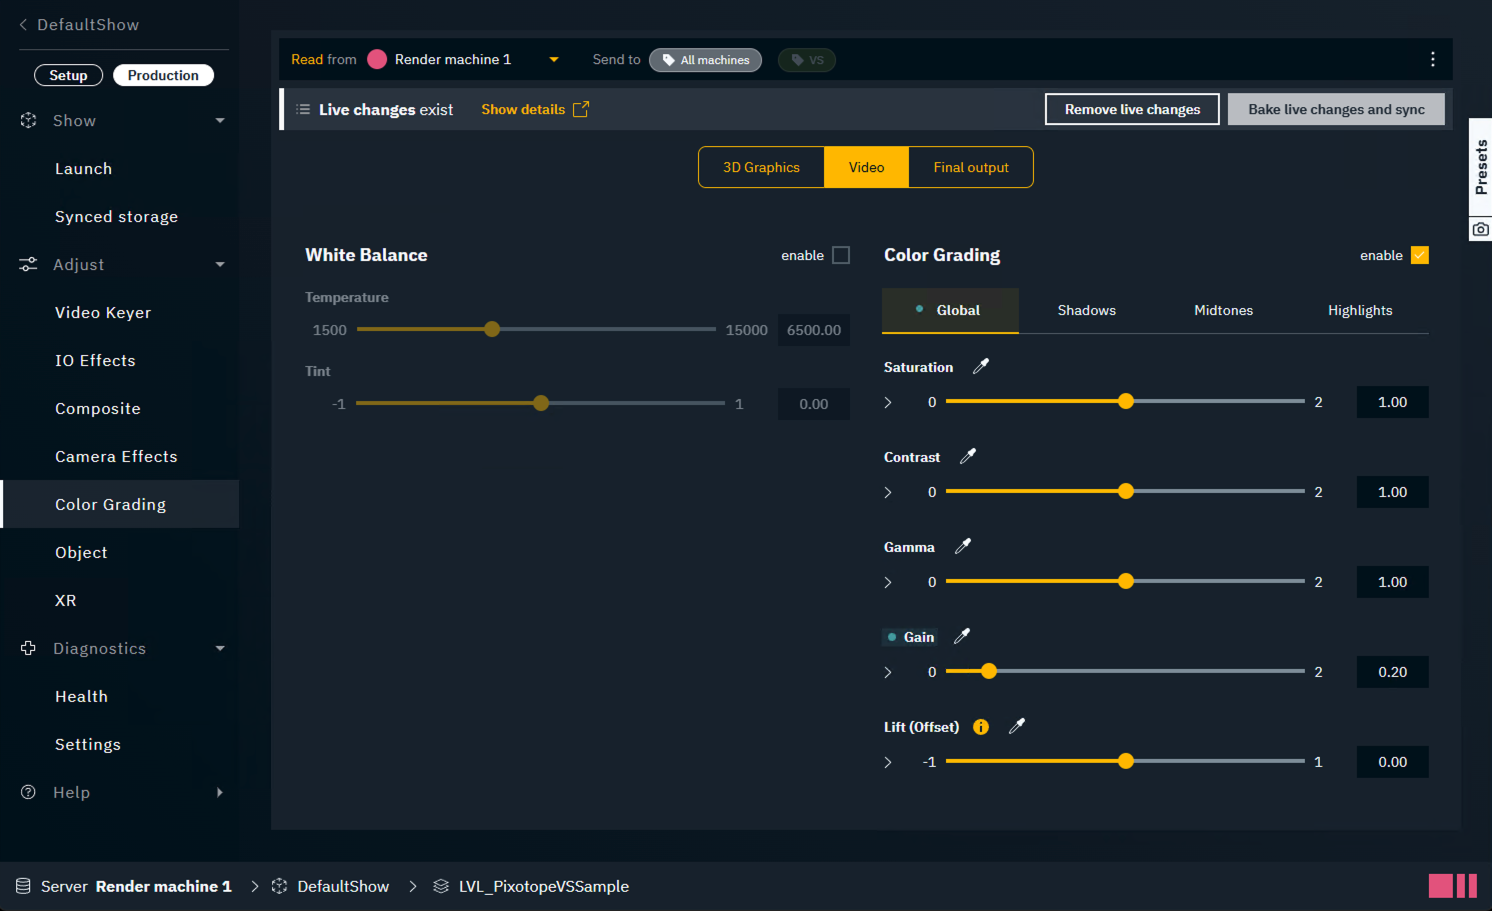
-
Reduce the Gain of the video
This technique can also be used to learn about the effect of normal map-based relighting.

Here's a single spotlight coming from screen right demonstrating proper normal map interaction. Notice how light is correctly added only where it would naturally hit, respecting the three-dimensional form of the subject.
Adjust the virtual lights
Now you can bring back details with the virtual lights exactly where needed using the lights intensity as well as the following global parameters in Pixotope World Settings:
Light Multiplicative Power VS
Multiplies the effect of lights on video affecting the intensity of all lights on all composite planes simultaneously. This is equivalent to increasing individual light intensities but applied globally.
Light Additive Power VS
Adds brightness on top of light intensity where lights are hitting. Use this to offset the overall brightness and flatten out lighting when needed.
Backplane Roughness
Adjusts the specular properties of the material used for lighting calculation. Currently has limited practical use.
Recommended setting: 1 for fully diffuse shading.
Normal Intensity
Controls how much the normal map affects lighting.
Recommended range: 0.7-0.8 for most scenarios. However, experimentation is encouraged to find the right balance for your specific setup.
|
0 |
No effect (flat lighting, same as traditional approach) |
|---|---|
|
1 |
Full normal map effect |
|
> 1 |
Exaggerated effect with higher contrast between lit areas and shadows Might exaggerate noise. |
Best practices
Lighting tips
-
Start with a single light to understand the effect before adding complexity
-
Use multiple lights to create depth and dimension
-
Balance virtual lights with the existing lighting in your video to avoid over-illumination
Remember that virtual lights add on top of existing video lighting
The neural network estimates normals depending on the current viewing perspective, thus the surface orientation changes with the camera’s pose.
Camera tracking can be used to transform normals from dependent camera space into independent world space.
Workflow tips
-
Reduce input video exposure first, then add virtual lights for a clearer demonstration of effects
-
Test performance with all features enabled before production
-
Start with Normal Intensity around 0.7-0.8 and adjust to taste
-
Currently, normals are view-dependent and change with pose of the camera. Use tracking to transform normals into independent world space.
Troubleshooting
-
If the video appears too bright, reduce input exposure using Color correction
-
If lighting looks flat, increase the Normal Intensity parameter
-
If lighting appears noisy or artificial, reduce the Normal Intensity parameter
-
If performance issues occur, check the overall scene complexity and ensure adequate GPU resources